> ## Documentation Index
> Fetch the complete documentation index at: https://docs.superjoin.ai/llms.txt
> Use this file to discover all available pages before exploring further.
# Scheduled Data Imports
> Scheduled Imports in Superjoin automates the process of keeping your data up-to-date by creating new static sheets on a regular basis—hourly, daily, weekly, or monthly. This feature helps ensure that your data remains current without manual intervention, allowing you to focus on analysis rather than data management.
Only available on Google Sheets
## Follow the quickstart guide to get started with Superjoin 🚀
Install Superjoin in under a minute and start pulling your data instantly.
We've listed down common issues that you might face & how to fix it.
## Steps to create a scheduled Imports ✨
Ensure Superjoin is installed and working before following the rest of the guide.
### **Scheduled refreshes can be created in 2 ways:**
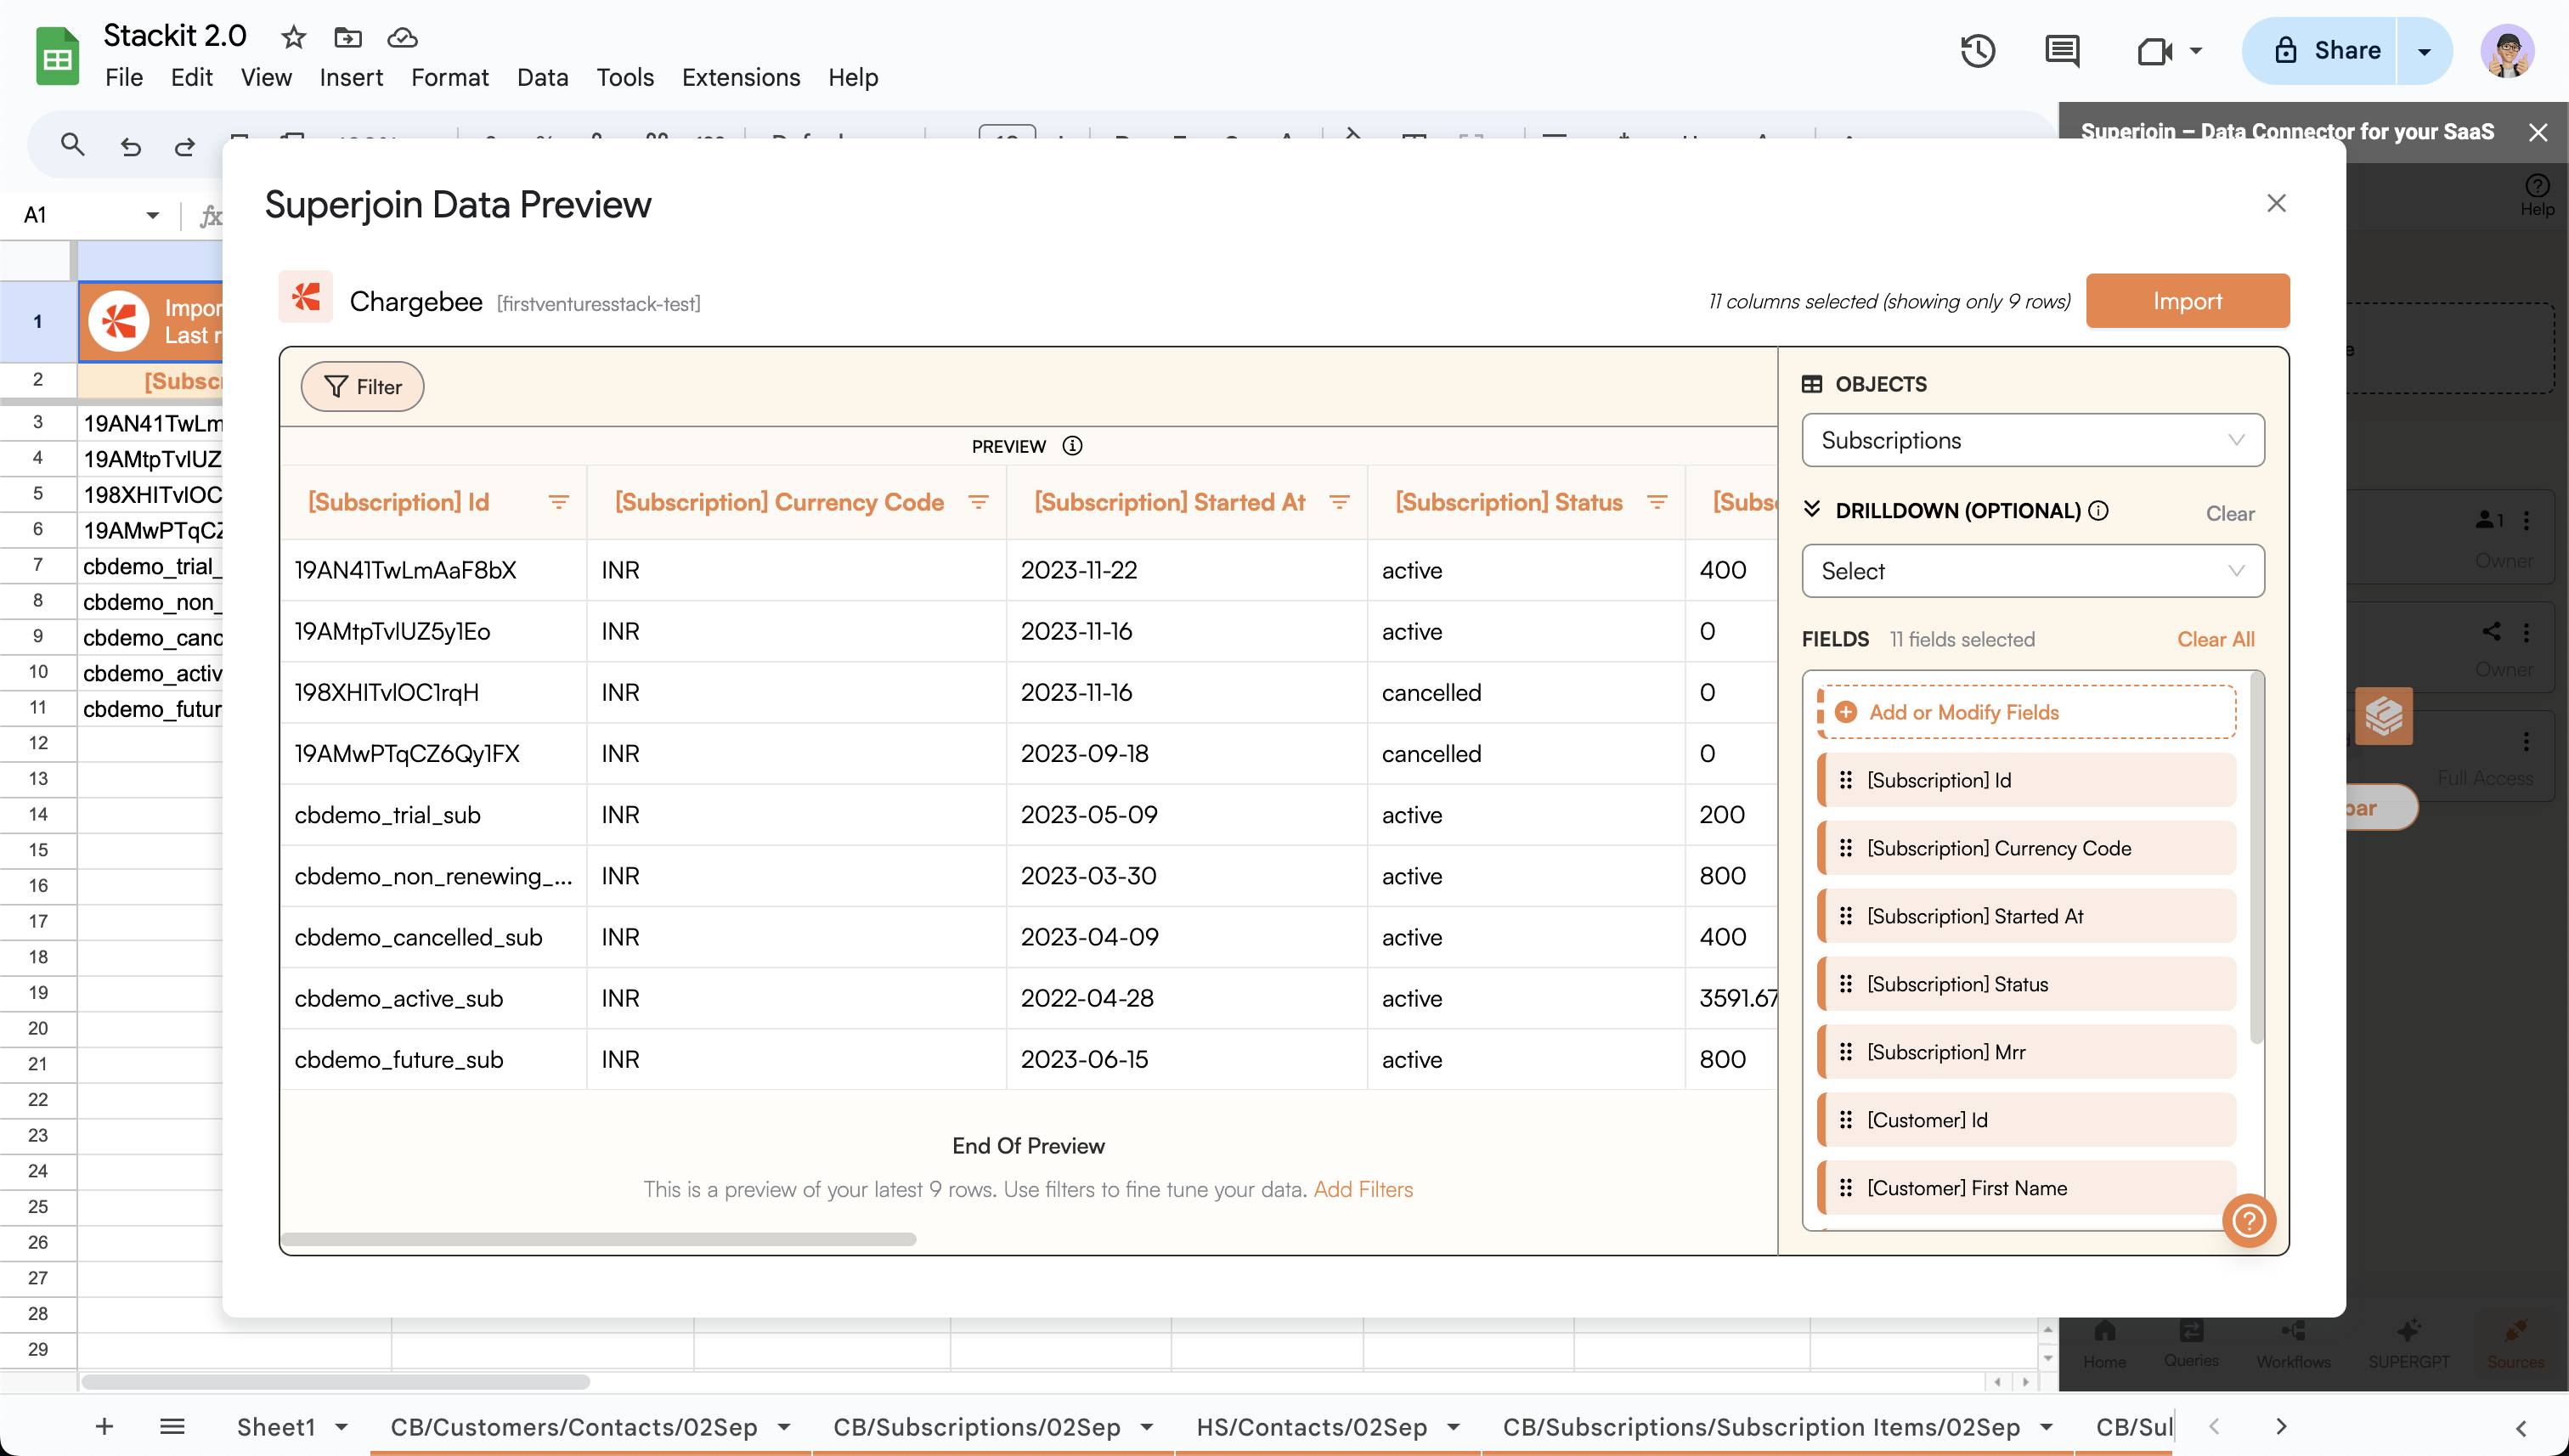
Import the data after configuring the query.
Click on the `Import` button to import the data.
A scheduled Imports can be created in the last step of creating a custom SQL query. Follow the guide to create a custom SQL query [here](/features/queries/create-queries).
 After a successful import, a drawer will open up with the option to create a scheduled refresh.
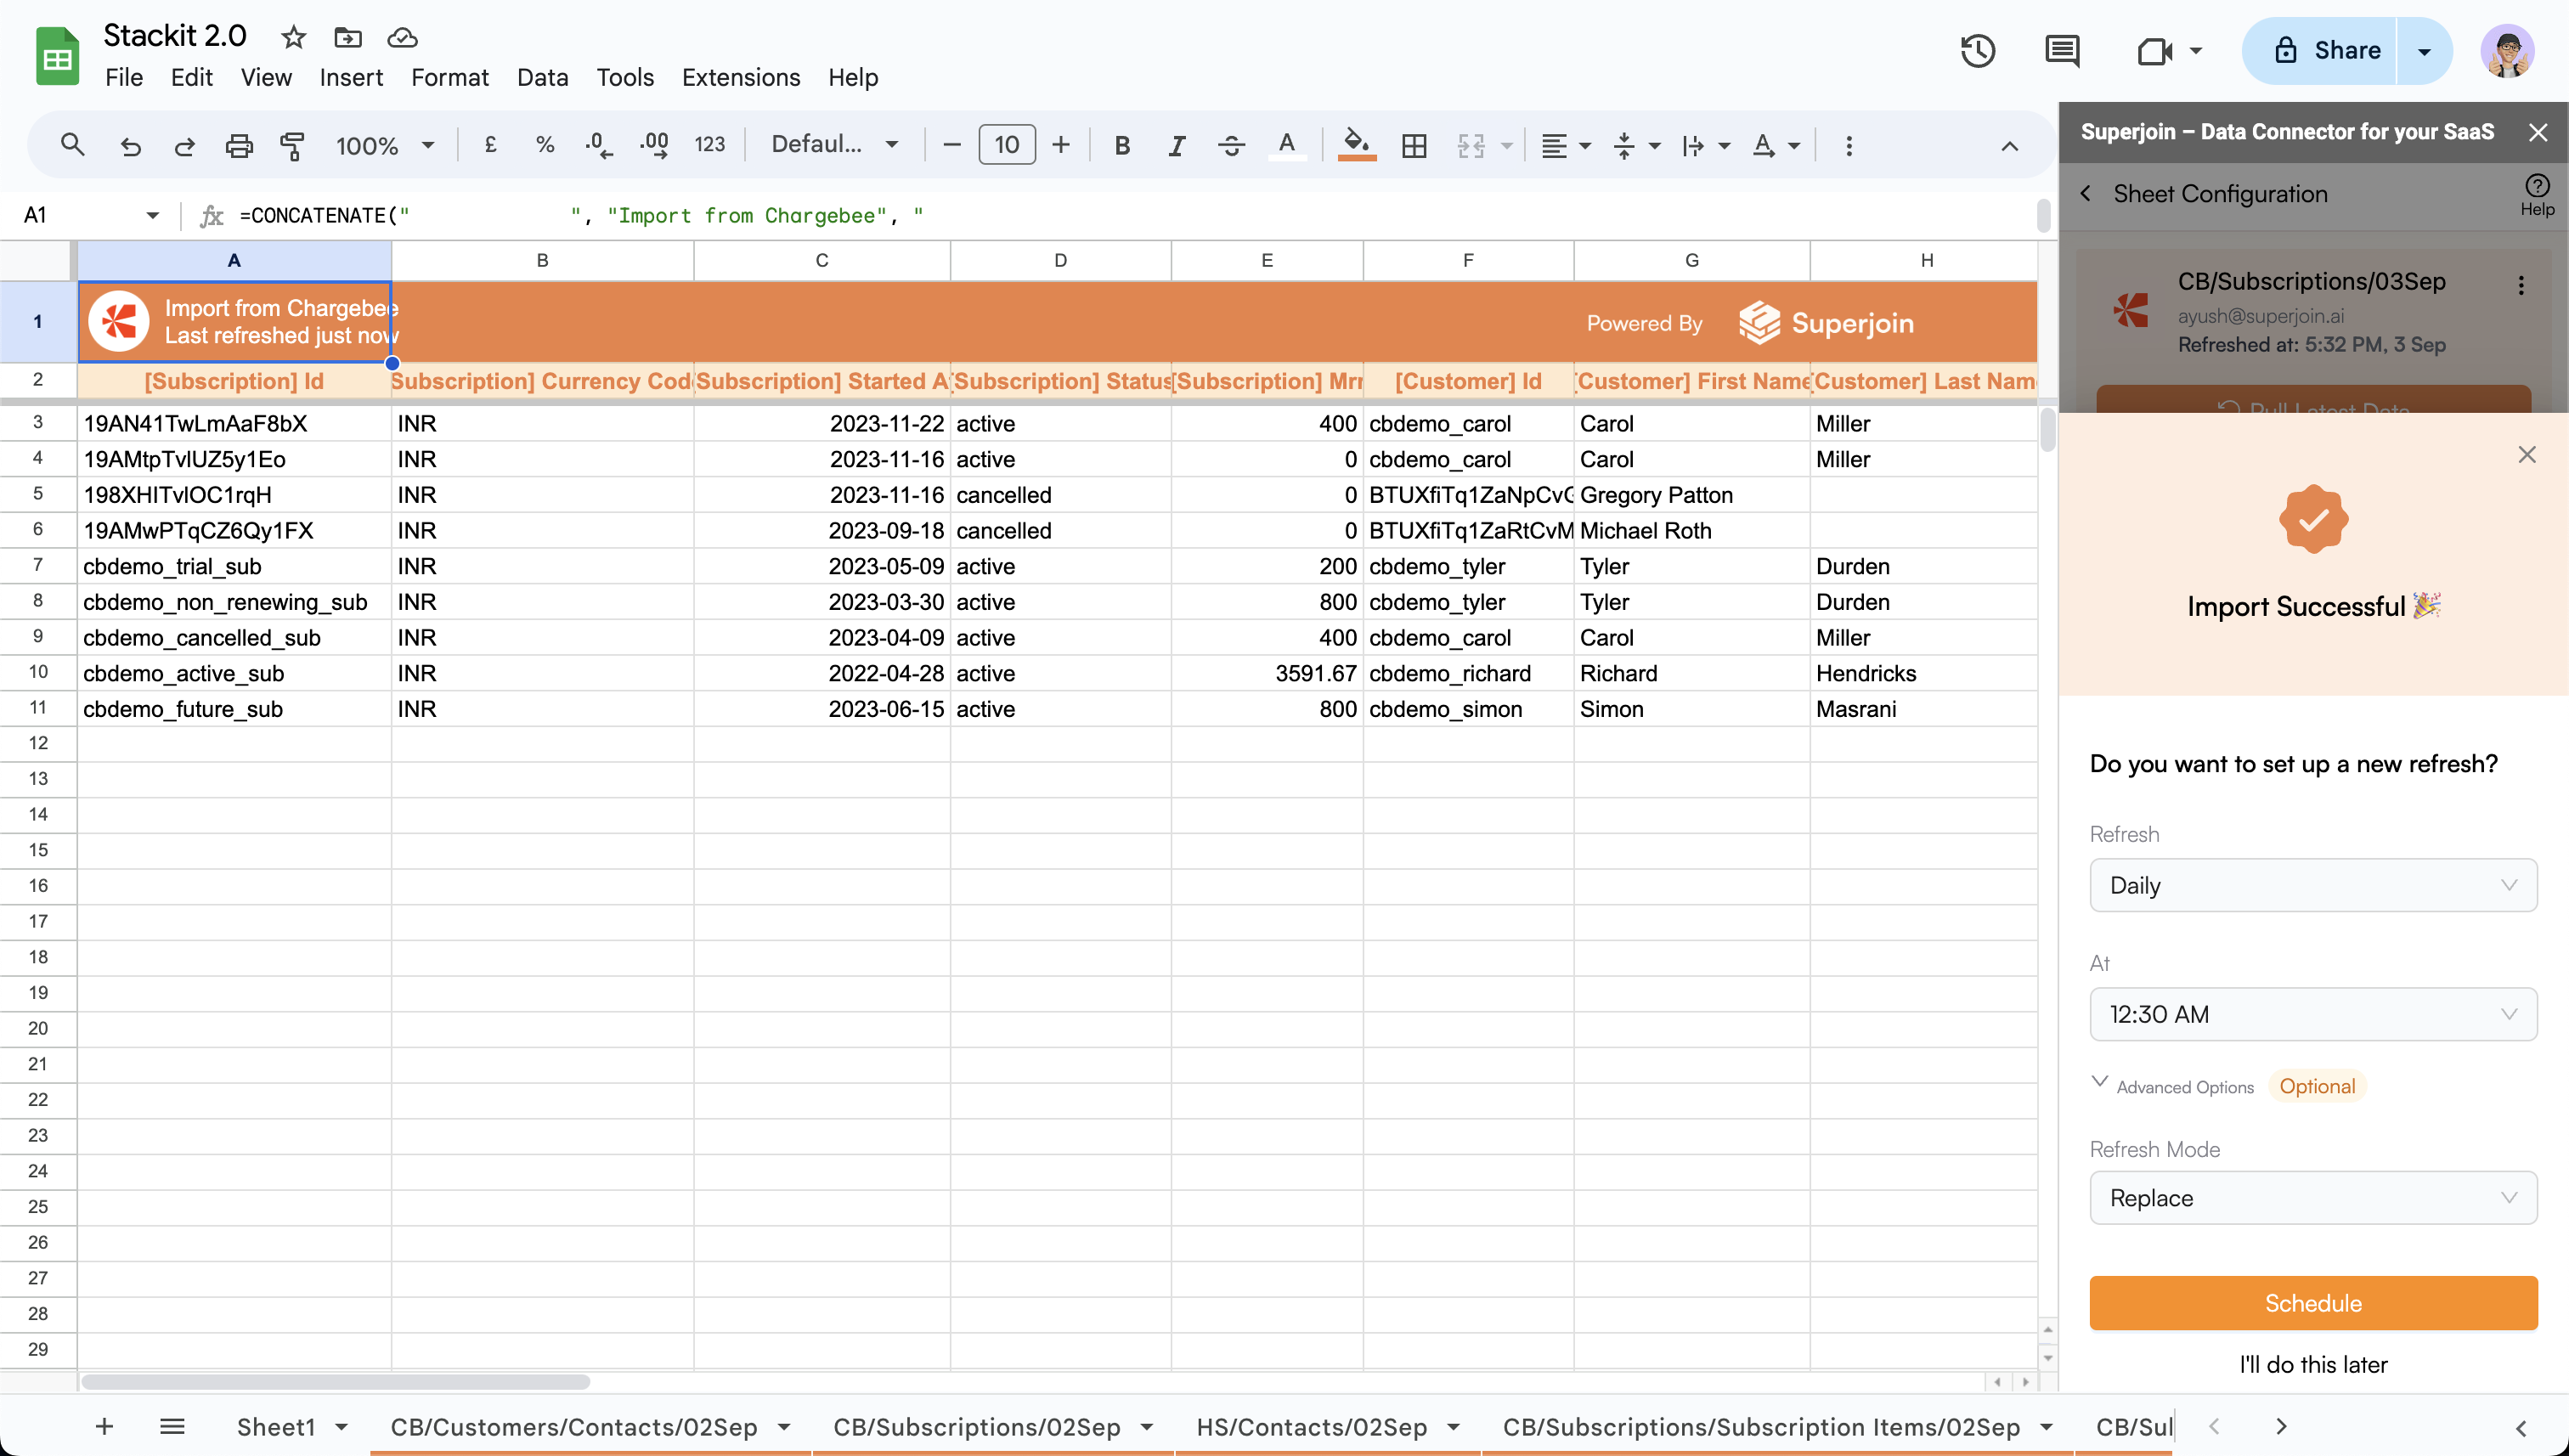 * You can choose to create a scheduled Imports right away or click `I'll do this later` to skip it.
* You can choose to creata a scheduled Imports on an `hourly`, `daily`, `weekly` or `monthly` basis.
* If `hourly`, select the desired `time interval` (Available intervals are `{6, 8, 12} hours`).
* If `daily`, select the desired `time of the day`.
* If `weekly`, select the desired `day of the week` and `time of the day`.
* If `monthly`, select the desired `date of the month` and `time of the day`.
**Advanced option (Optional):**
* Refresh mode provides the option to `append` or `replace` the data.
* **Append:** Appends the modified and new rows to the existing sheet.
* **Replace:** Replaces the modified rows and adds new rows to the existing sheet.
You can also create a `Flashback`, learn more about it [here](/features/flashbacks).
* Click on `Schedule` to schedule the Imports using the desired config.
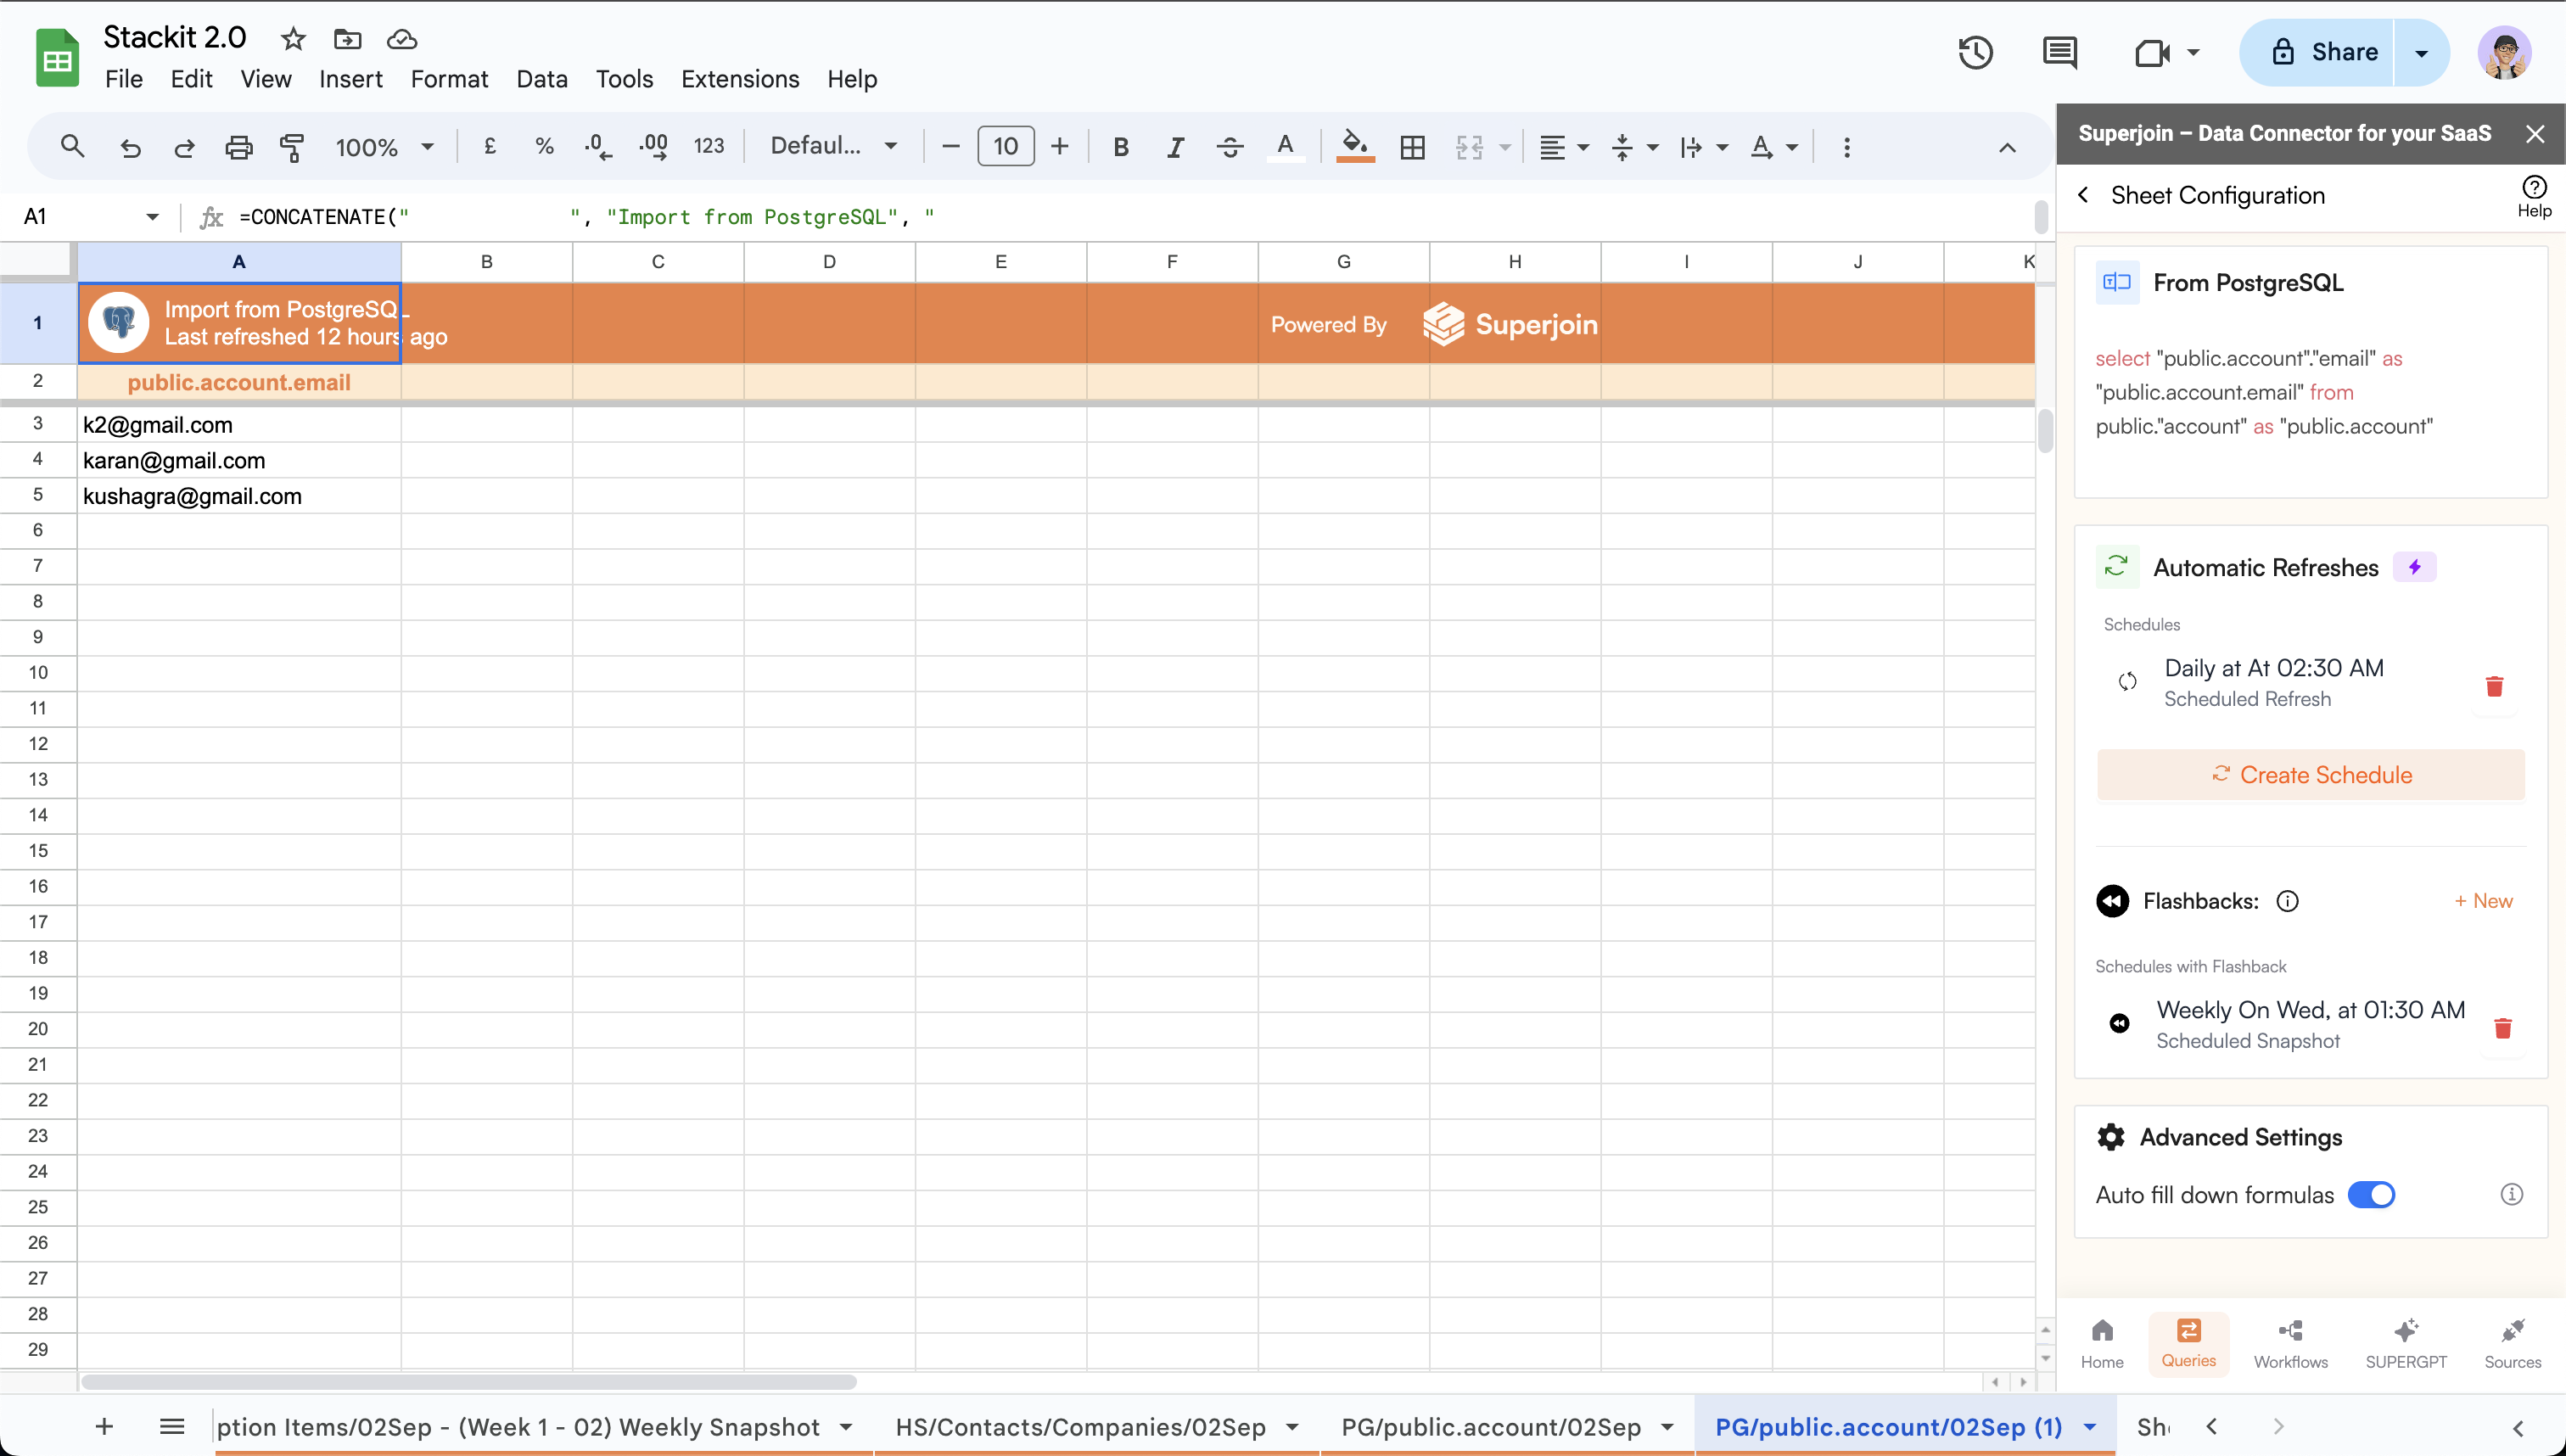
* New schedule will be displayed in the `Automatic Refreshes` card.
* You can choose to create a scheduled Imports right away or click `I'll do this later` to skip it.
* You can choose to creata a scheduled Imports on an `hourly`, `daily`, `weekly` or `monthly` basis.
* If `hourly`, select the desired `time interval` (Available intervals are `{6, 8, 12} hours`).
* If `daily`, select the desired `time of the day`.
* If `weekly`, select the desired `day of the week` and `time of the day`.
* If `monthly`, select the desired `date of the month` and `time of the day`.
**Advanced option (Optional):**
* Refresh mode provides the option to `append` or `replace` the data.
* **Append:** Appends the modified and new rows to the existing sheet.
* **Replace:** Replaces the modified rows and adds new rows to the existing sheet.
You can also create a `Flashback`, learn more about it [here](/features/flashbacks).
* Click on `Schedule` to schedule the Imports using the desired config.
* New schedule will be displayed in the `Automatic Refreshes` card.
 Click on the `Queries` tab. This will open the queries page in the sidebar.
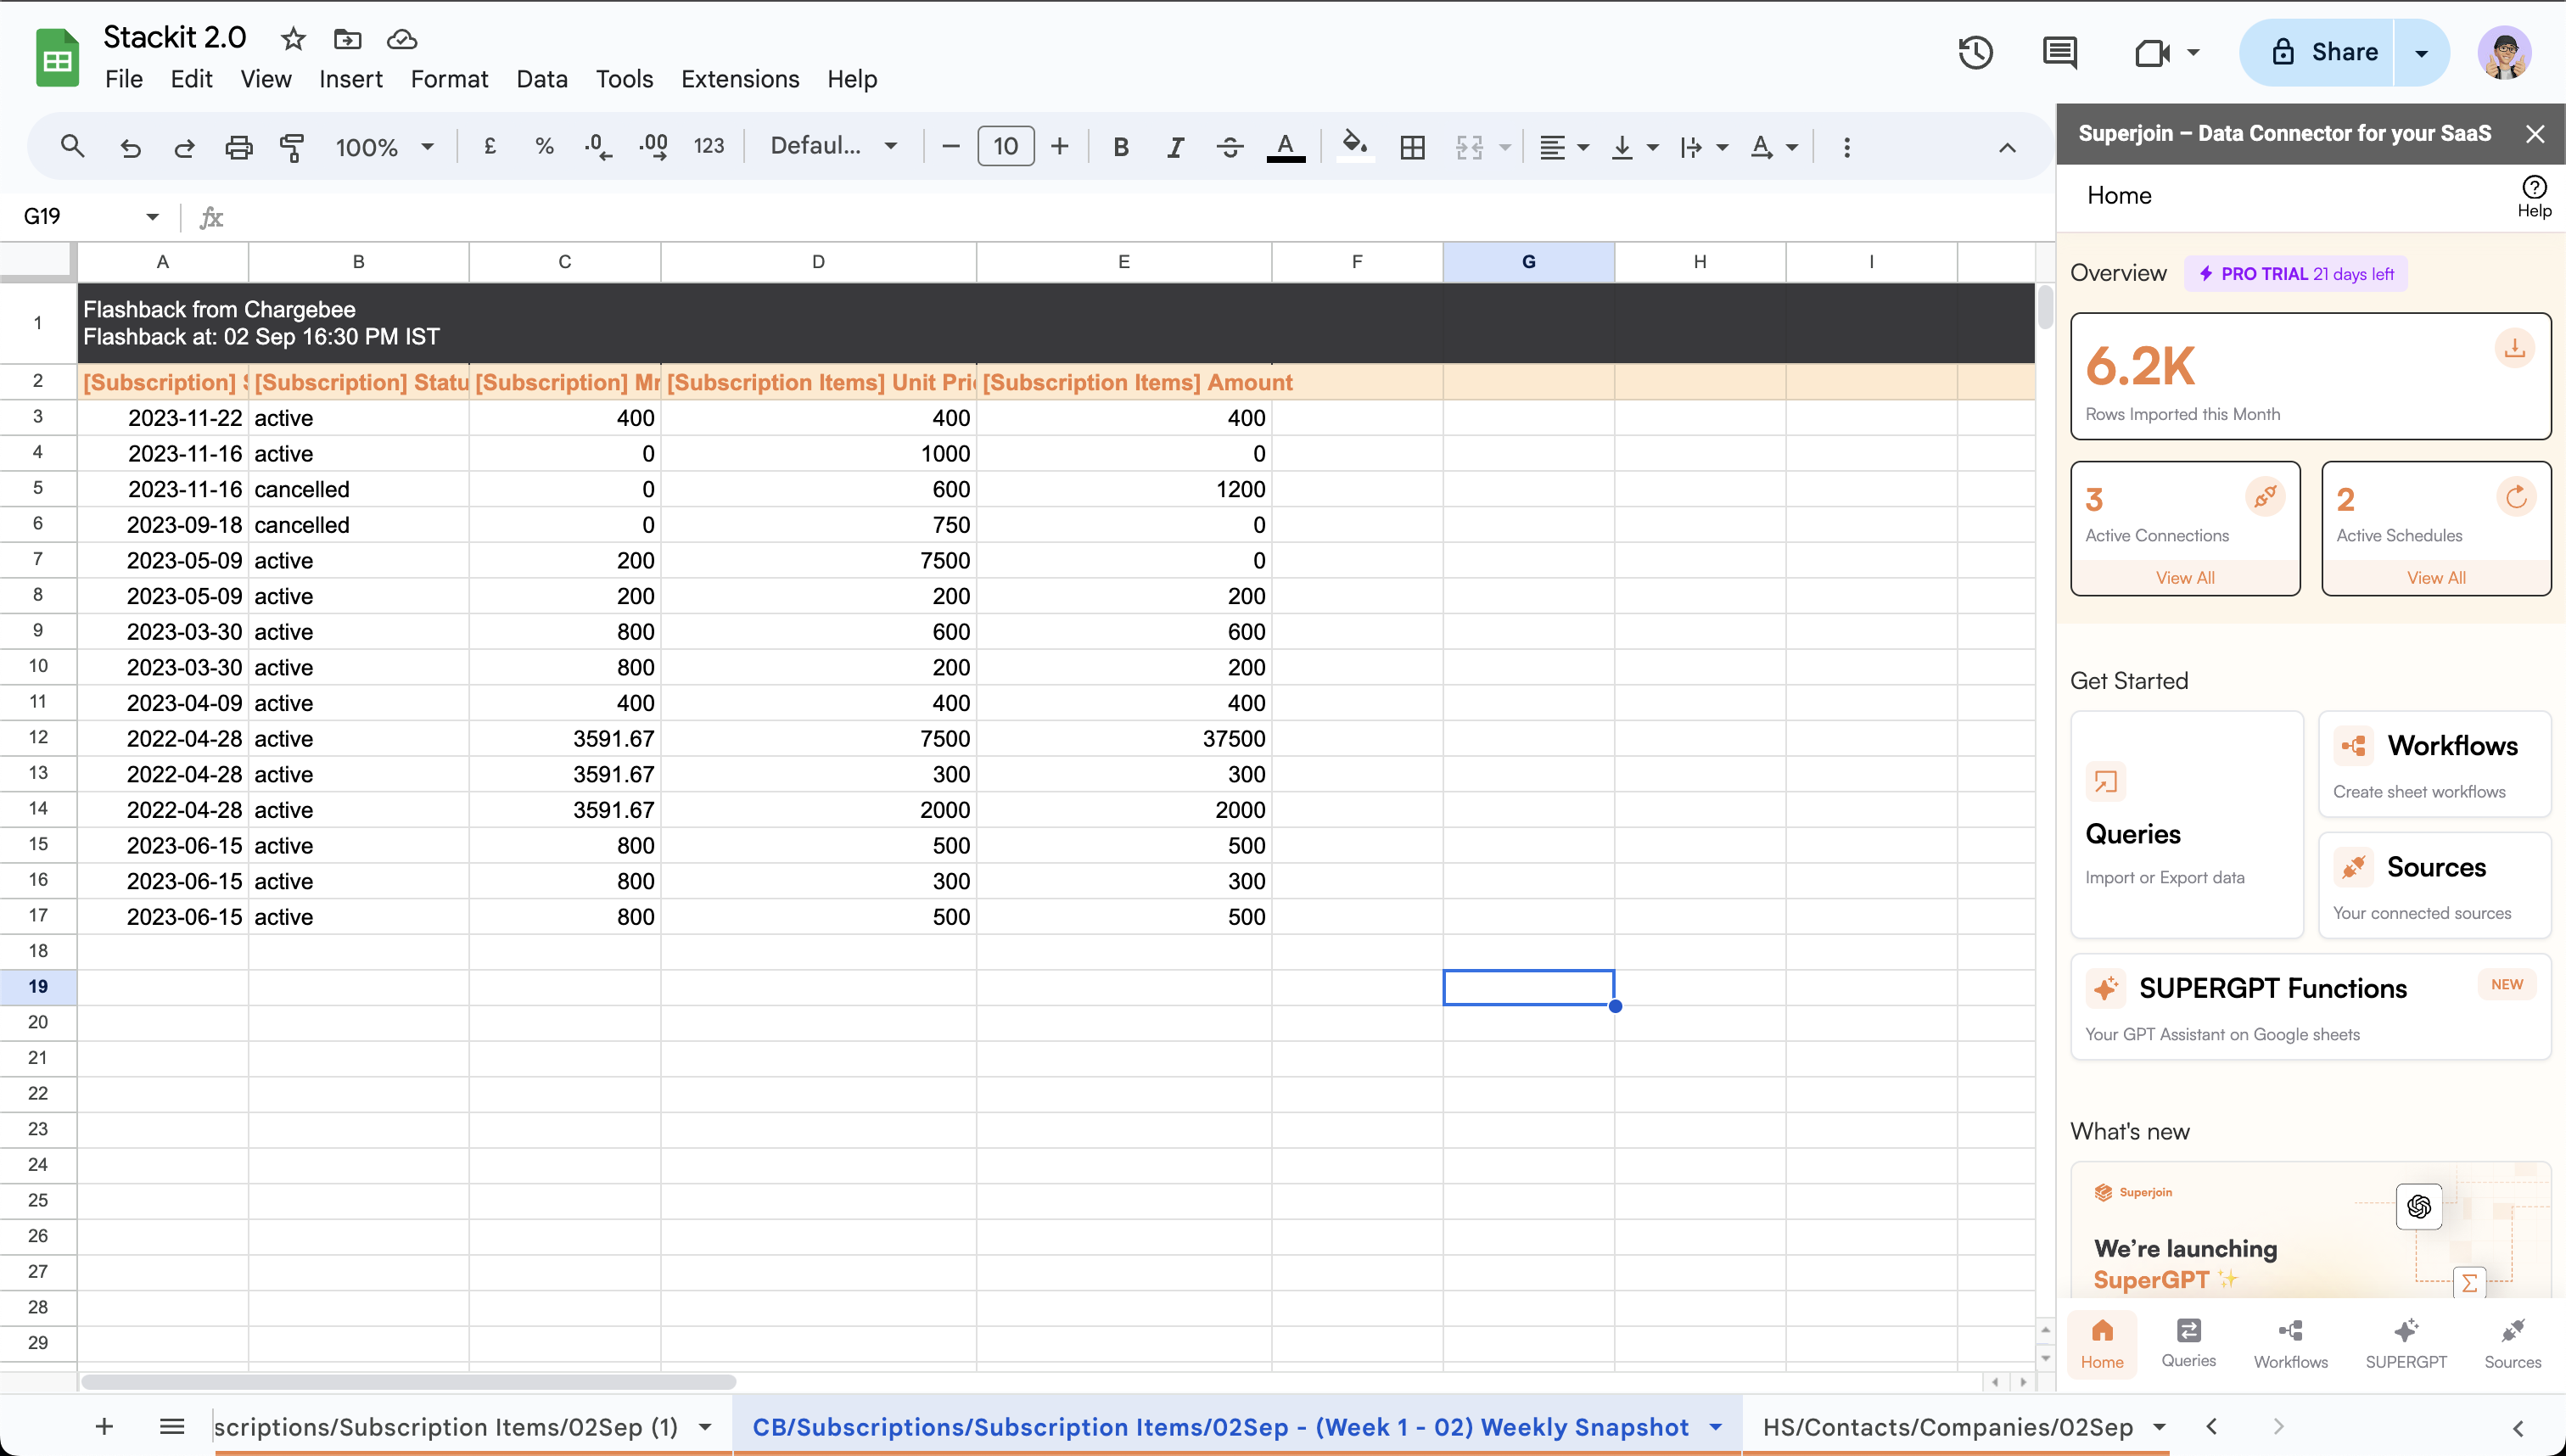 Click on the desired query which you wish to create a flashback for.
You can use the `Queries` tab in the documentation to set-up queries.
Click on the desired query which you wish to create a flashback for.
You can use the `Queries` tab in the documentation to set-up queries.
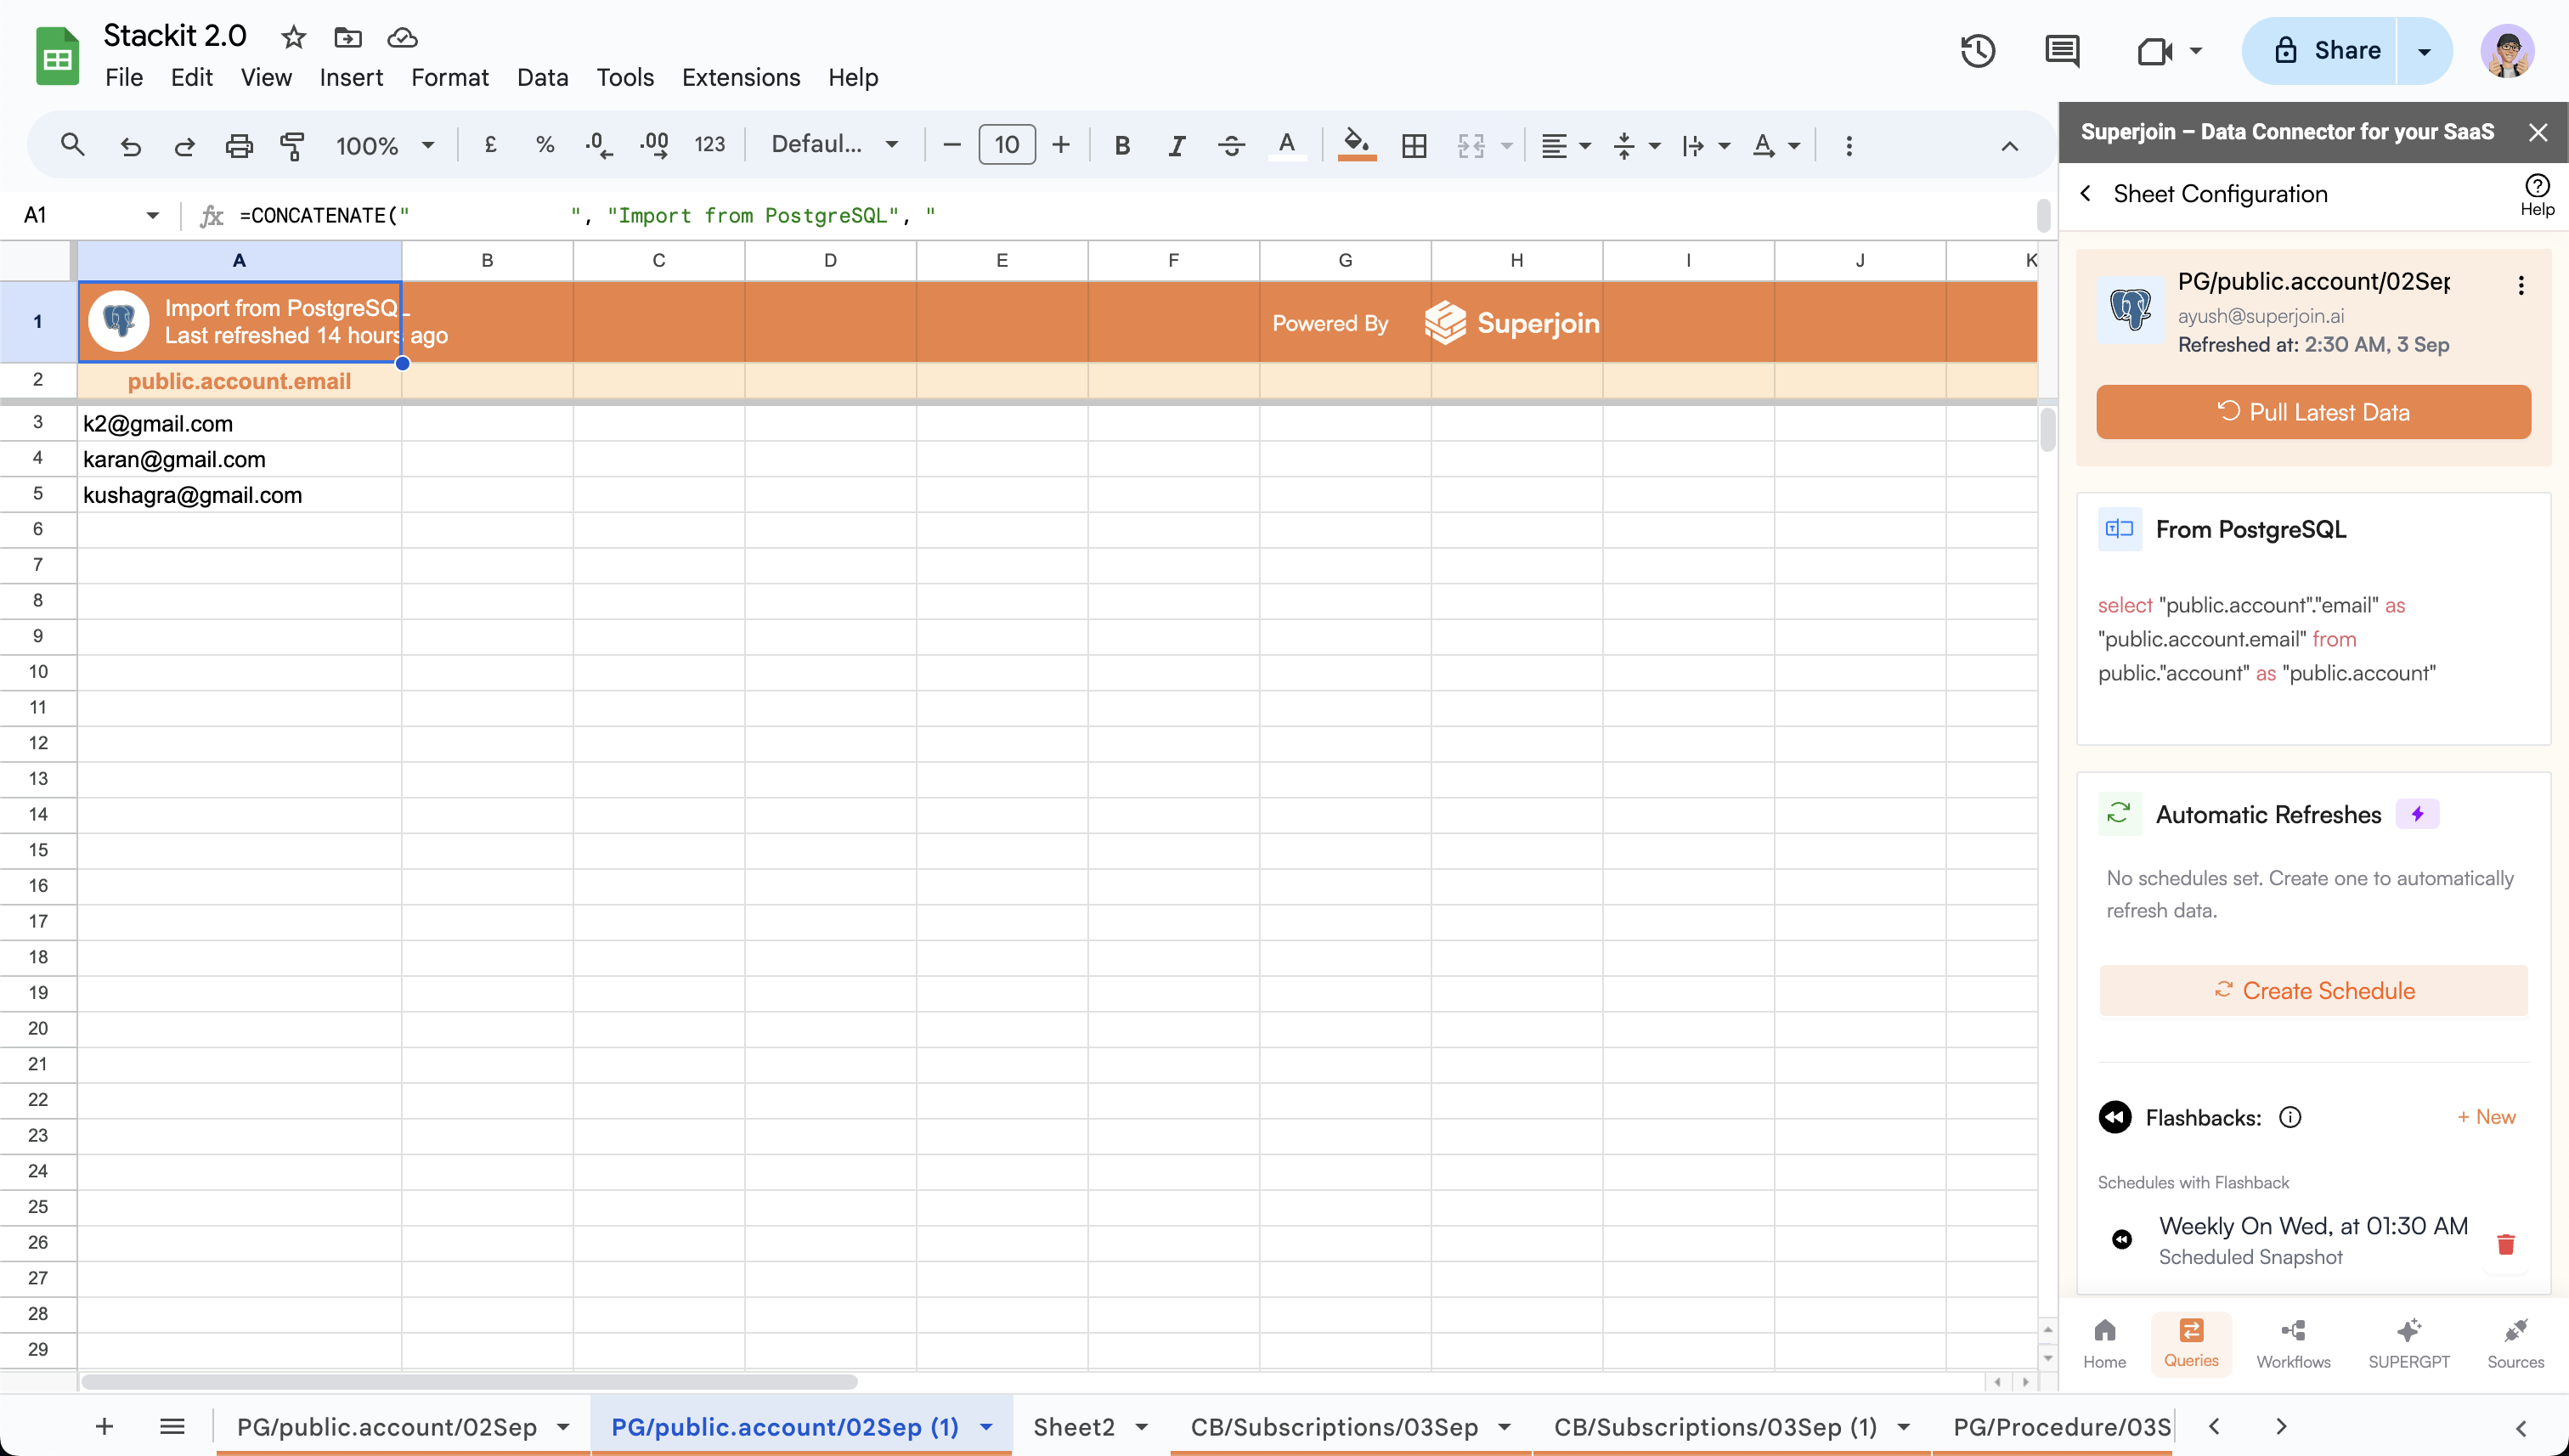
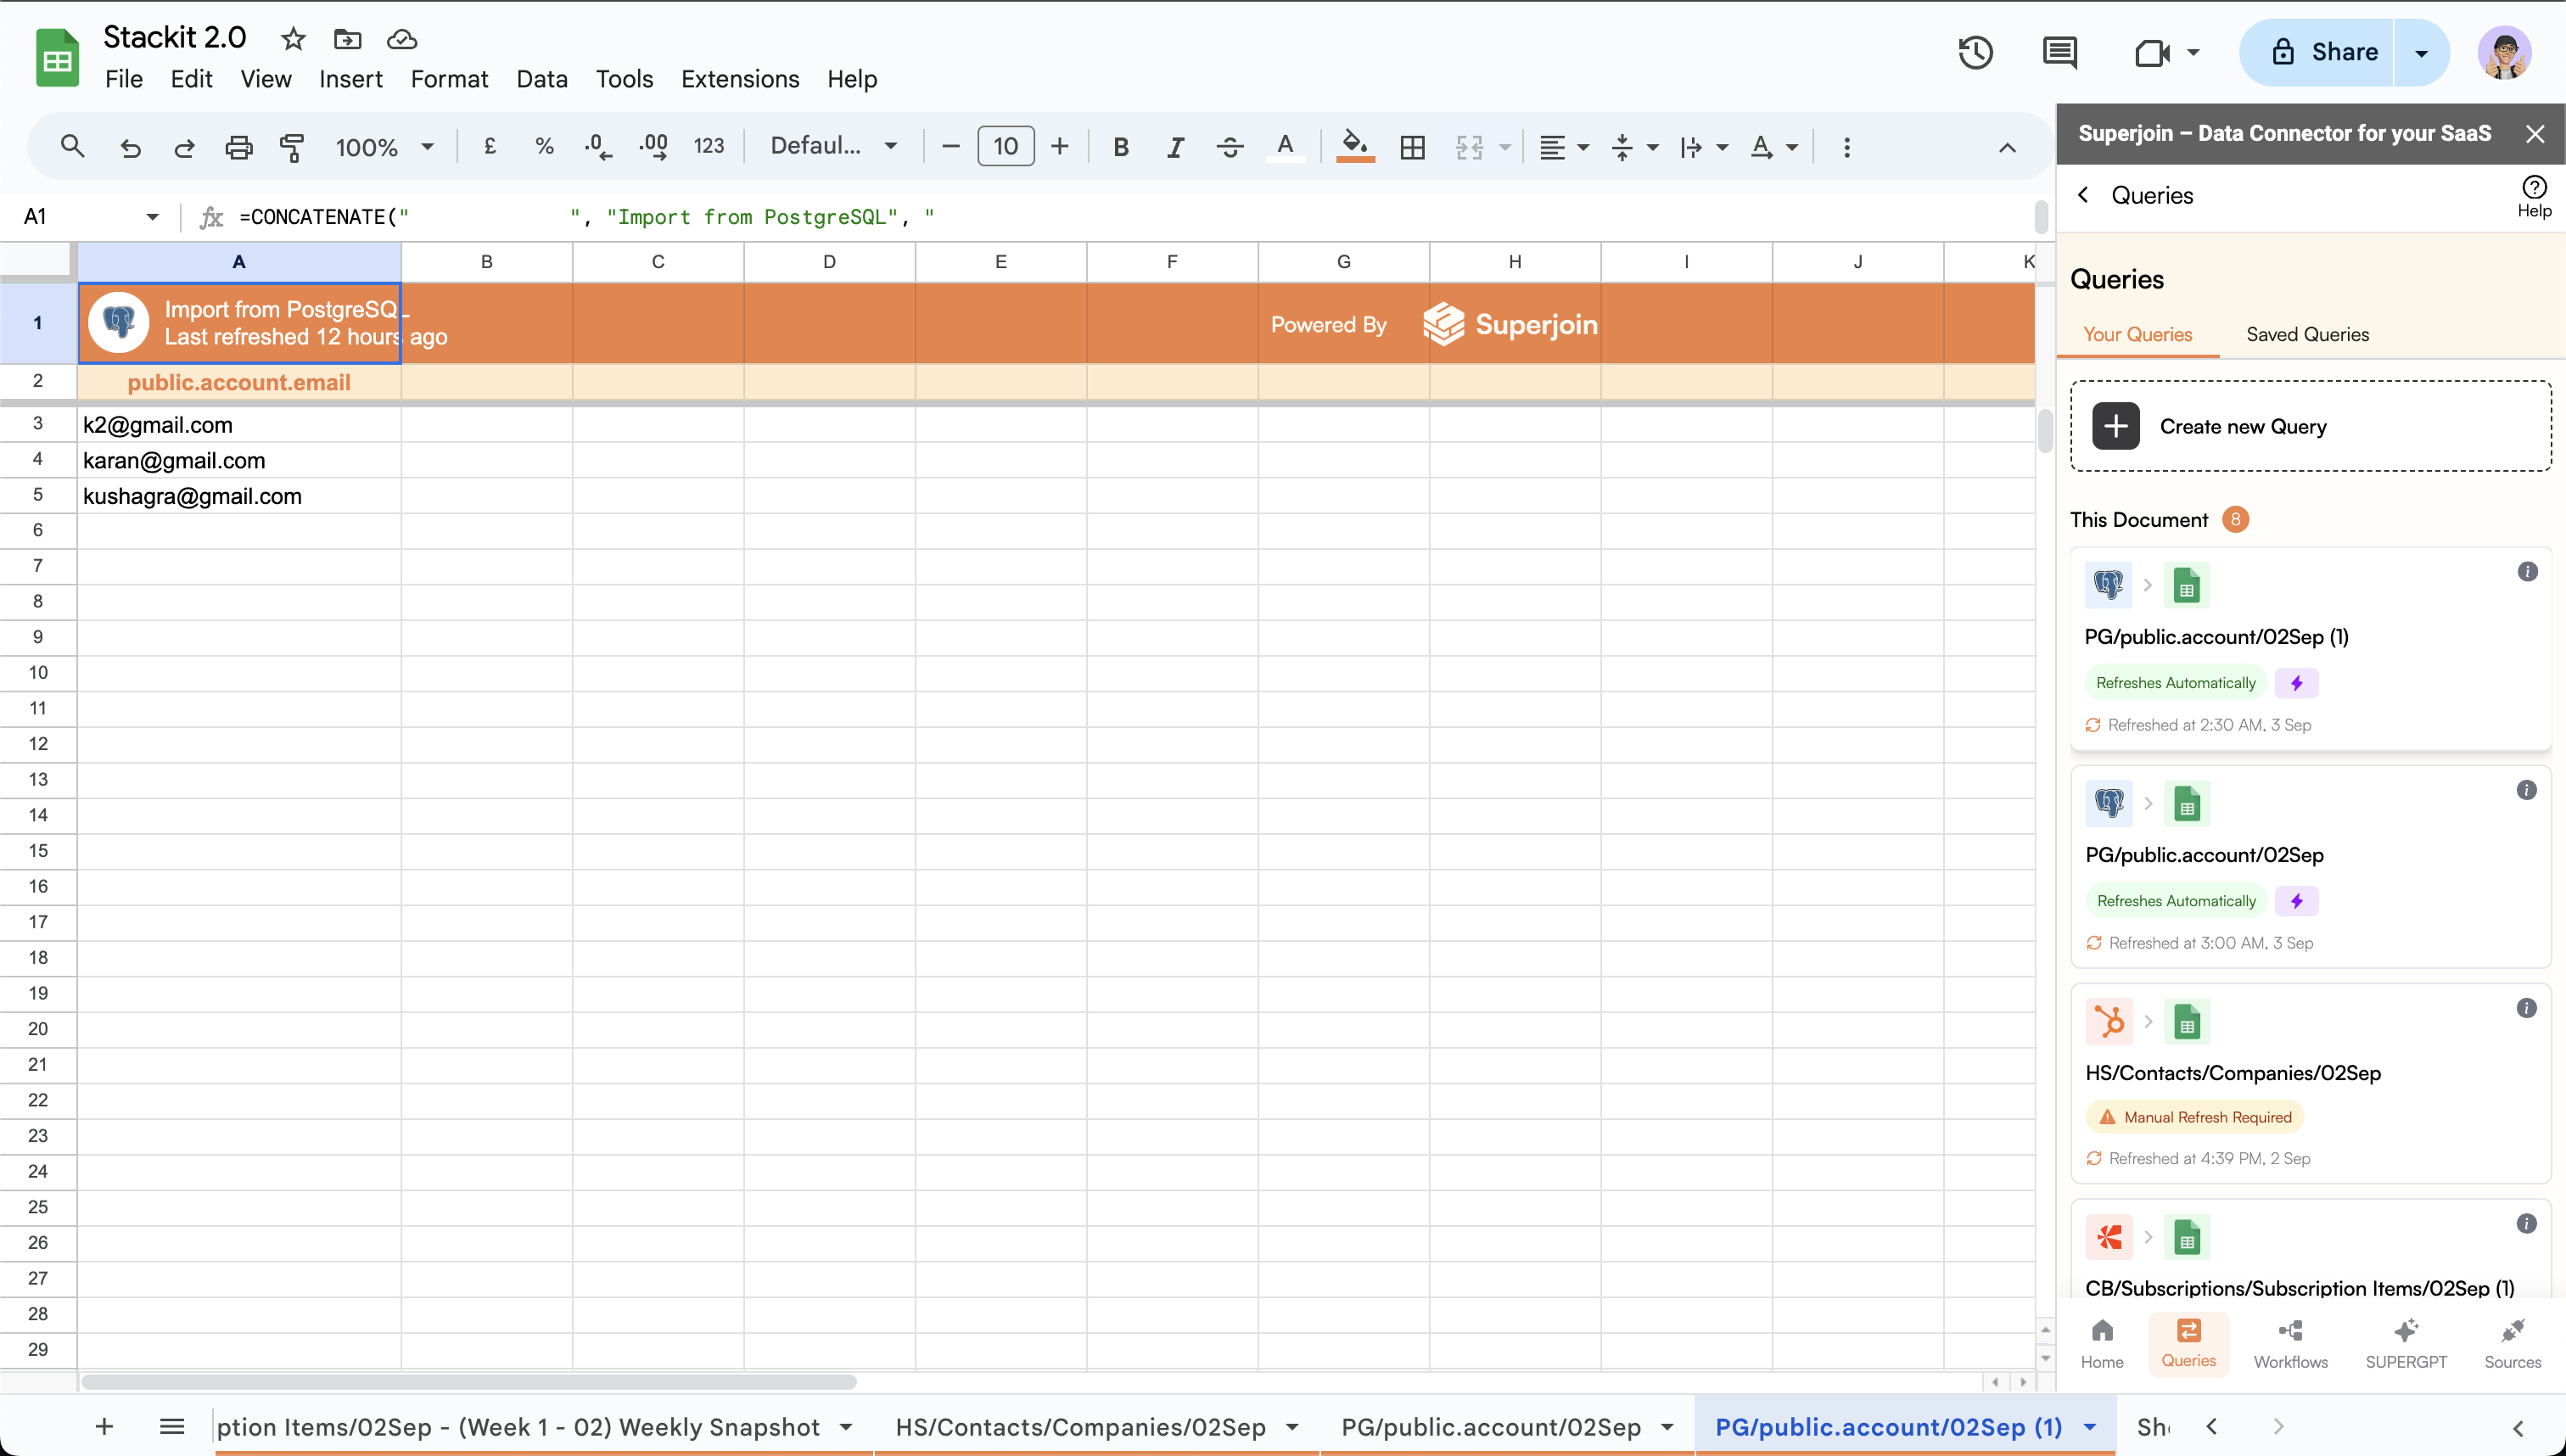 Click on `Create Schedule` button in the `Automatic Refreshes` card.
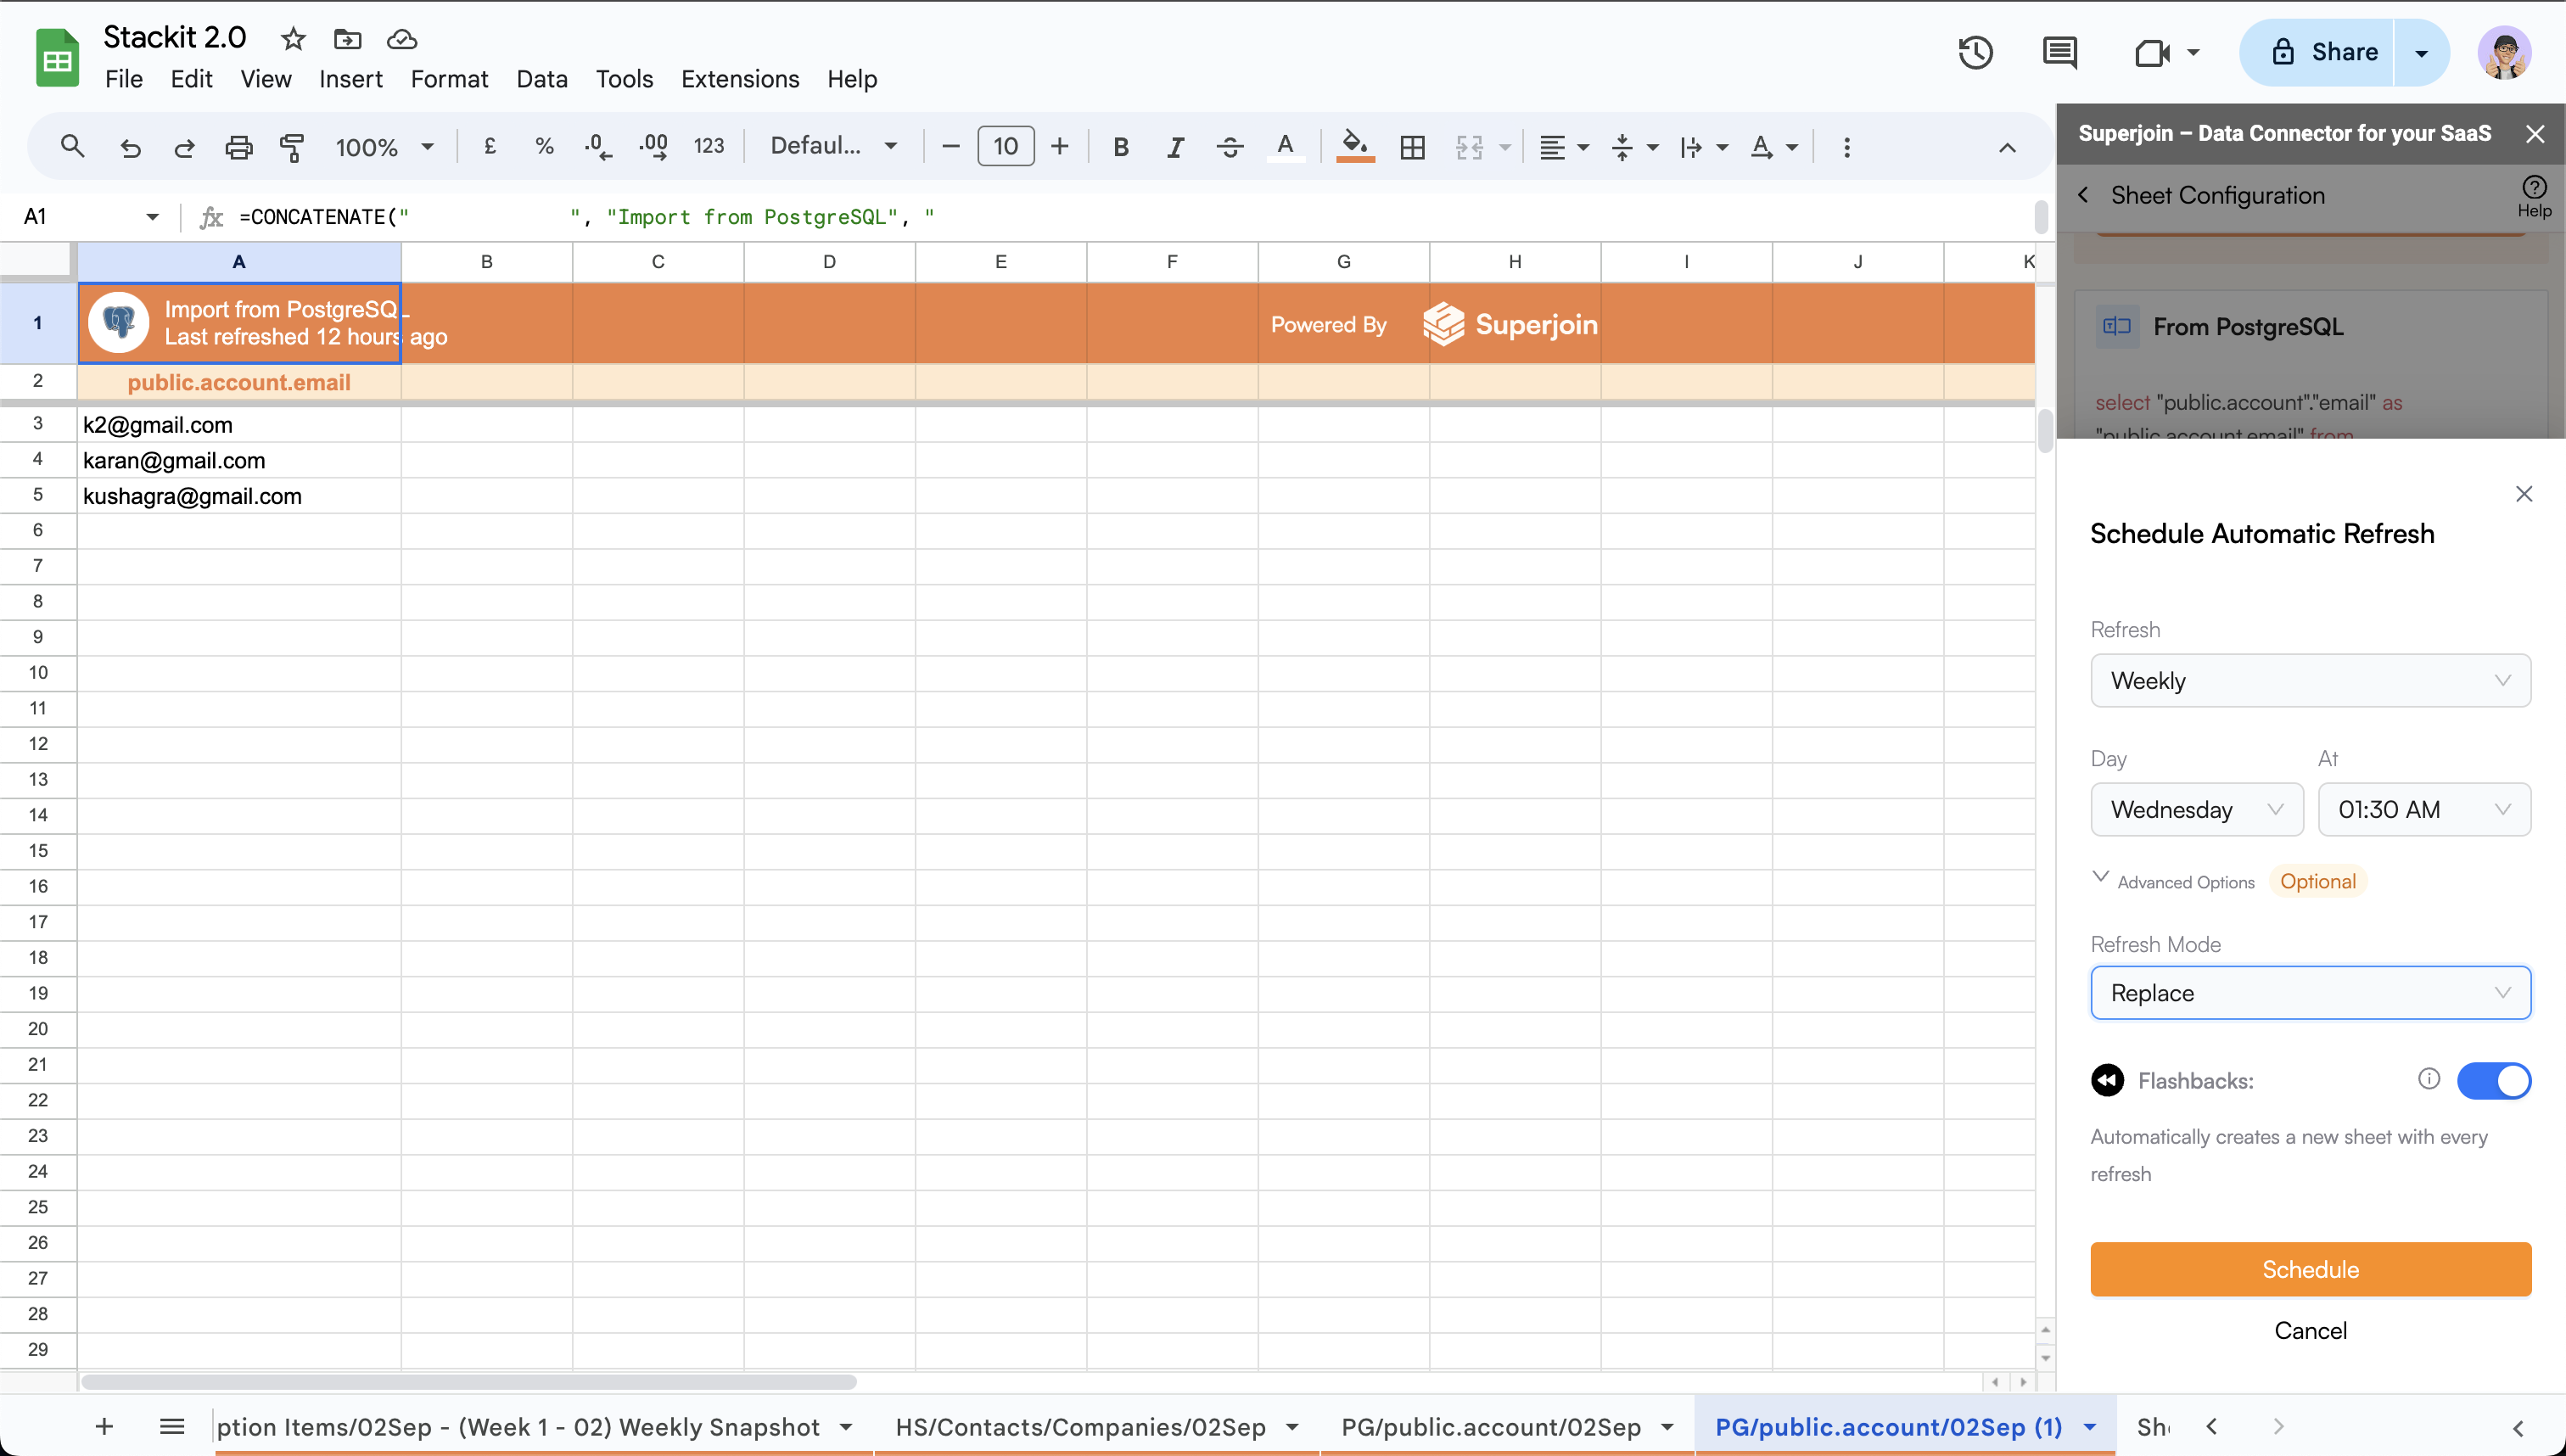 * You can choose to creata a scheduled Imports on an `hourly`, `daily`, `weekly` or `monthly` basis.
* If `hourly`, select the desired `time interval` (Available intervals are `{6, 8, 12} hours`).
* If `daily`, select the desired `time of the day`.
* If `weekly`, select the desired `day of the week` and `time of the day`.
* If `monthly`, select the desired `date of the month` and `time of the day`.
**Advanced option (Optional):**
* Refresh mode provides the option to `append` or `replace` the data.
* **Append:** Appends the modified and new rows to the existing sheet.
* **Replace:** Replaces the modified rows and adds new rows to the existing sheet.
You can also create a `Flashback`, learn more about it [here](/features/flashbacks).
* Click on `Schedule` to schedule the refresh using the desired config.
* New schedule will be displayed in the `Automatic Refreshes` card.
* You can choose to creata a scheduled Imports on an `hourly`, `daily`, `weekly` or `monthly` basis.
* If `hourly`, select the desired `time interval` (Available intervals are `{6, 8, 12} hours`).
* If `daily`, select the desired `time of the day`.
* If `weekly`, select the desired `day of the week` and `time of the day`.
* If `monthly`, select the desired `date of the month` and `time of the day`.
**Advanced option (Optional):**
* Refresh mode provides the option to `append` or `replace` the data.
* **Append:** Appends the modified and new rows to the existing sheet.
* **Replace:** Replaces the modified rows and adds new rows to the existing sheet.
You can also create a `Flashback`, learn more about it [here](/features/flashbacks).
* Click on `Schedule` to schedule the refresh using the desired config.
* New schedule will be displayed in the `Automatic Refreshes` card.