> ## Documentation Index
> Fetch the complete documentation index at: https://docs.superjoin.ai/llms.txt
> Use this file to discover all available pages before exploring further.

# Connect your Xero to Google Sheets

> Effortlessly connect your Xero accounting data to Google Sheets for unified reporting and analysis.

### Why use Superjoin's Google Sheets-Xero Integration?

<CardGroup cols={2}>
  <Card title="Quick and Easy Integration" icon="plug" iconType="duotone">
    We've meticulously organized your accounting data to ensure easy accessibility in a format you're already familiar with.
  </Card>

  <Card title="Preview your imports visually" icon="magnifying-glass" iconType="duotone">
    Get a sneak peek of your financial data. Select invoices, contacts, accounts, and more before importing.
  </Card>

  <Card title="Automatic Refreshes" icon="rotate" iconType="duotone">
    Enjoy one-click refreshes or schedule regular updates to ensure your financial reports are always up to date.
  </Card>

  <Card title="Power of Google Sheets" icon="table-cells" iconType="duotone">
    Combine Xero's robust accounting capabilities with Google Sheets' collaborative analysis features.
  </Card>
</CardGroup>

## Step-by-step walkthrough: How to connect Xero to Google Sheets.

<Steps titleSize="h3">
  <Step title="Get Add-ons">
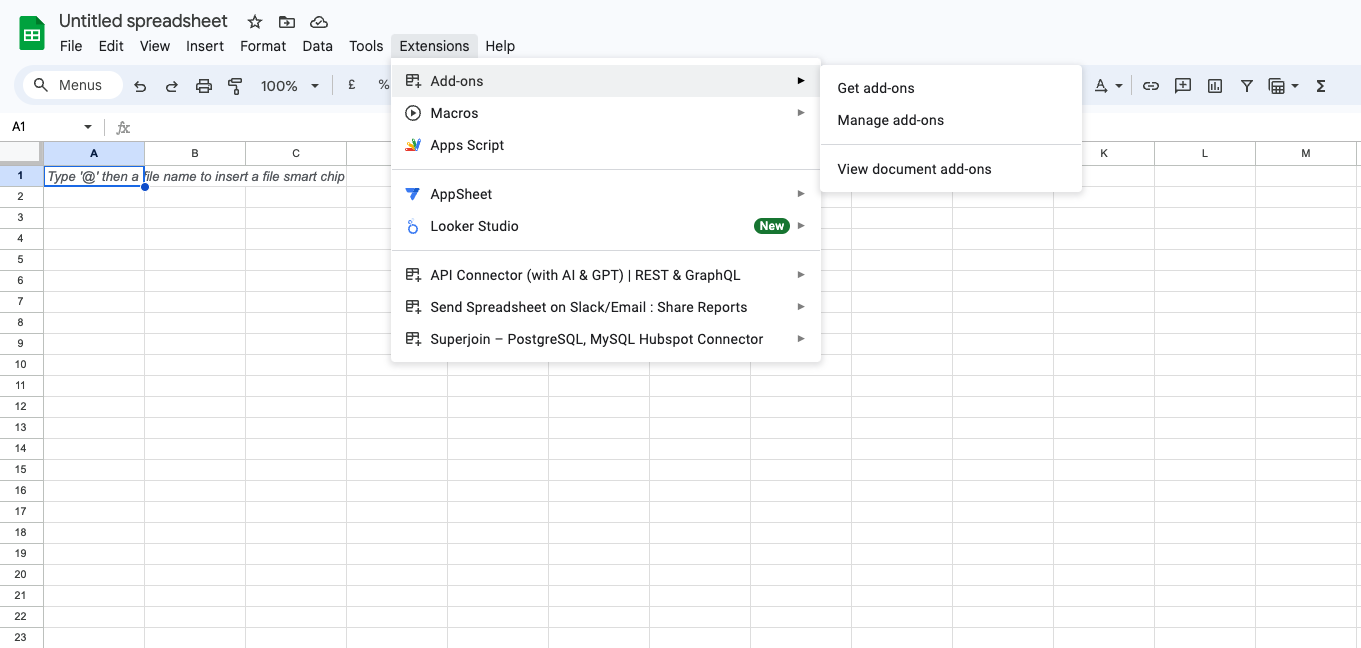
    Select `Add-ons` and choose `Get Add-ons`. This action will redirect you to the Google Workspace Marketplace.
    <Frame>
      <img src="https://mintcdn.com/superjoin/YLExbgl86h2tZ50q/images/getaddons.png?fit=max&auto=format&n=YLExbgl86h2tZ50q&q=85&s=ba23d07d1410cd3afb25454c5581cc85" width="1361" height="648" data-path="images/getaddons.png" />
    </Frame>
  </Step>

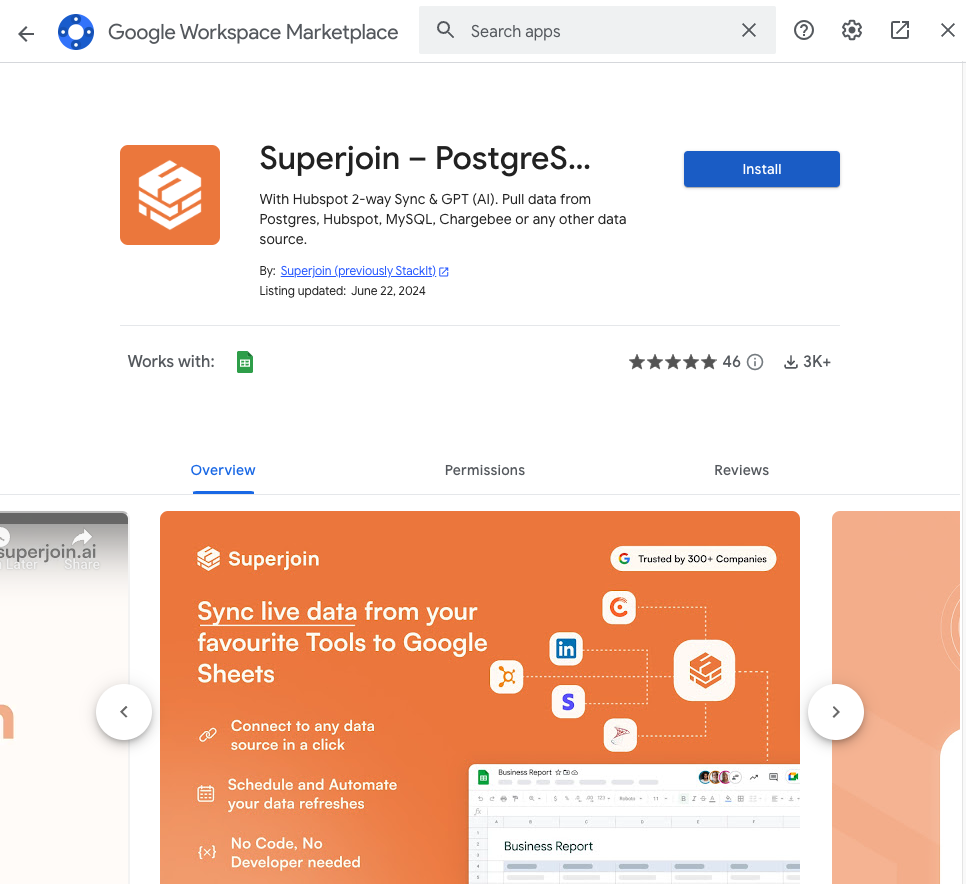
  <Step title="Search Superjoin">
    In the Google Workspace Marketplace pop-up window, search for "Superjoin".
  </Step>

  <Step title="Click on Install">
    Click on `Extensions` from the Google Sheets menu.
    <Note>**Note:** For the best experience, install Superjoin where there's only a single account logged in the Chrome profile.</Note>

    <Frame>
      <img src="https://mintcdn.com/superjoin/gjRFjFkthepgDSdX/images/marketplace.png?fit=max&auto=format&n=gjRFjFkthepgDSdX&q=85&s=8b32a5ed819c10448985a7e3df6f7731" width="966" height="884" data-path="images/marketplace.png" />
    </Frame>
  </Step>

  <Step title="Launch Superjoin">
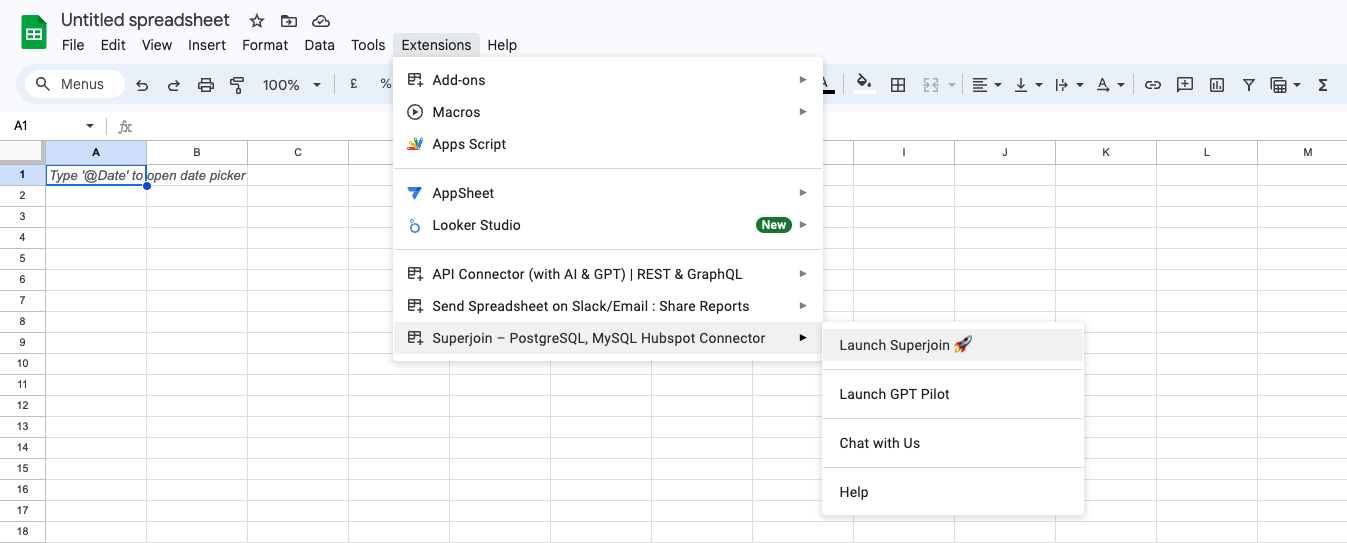
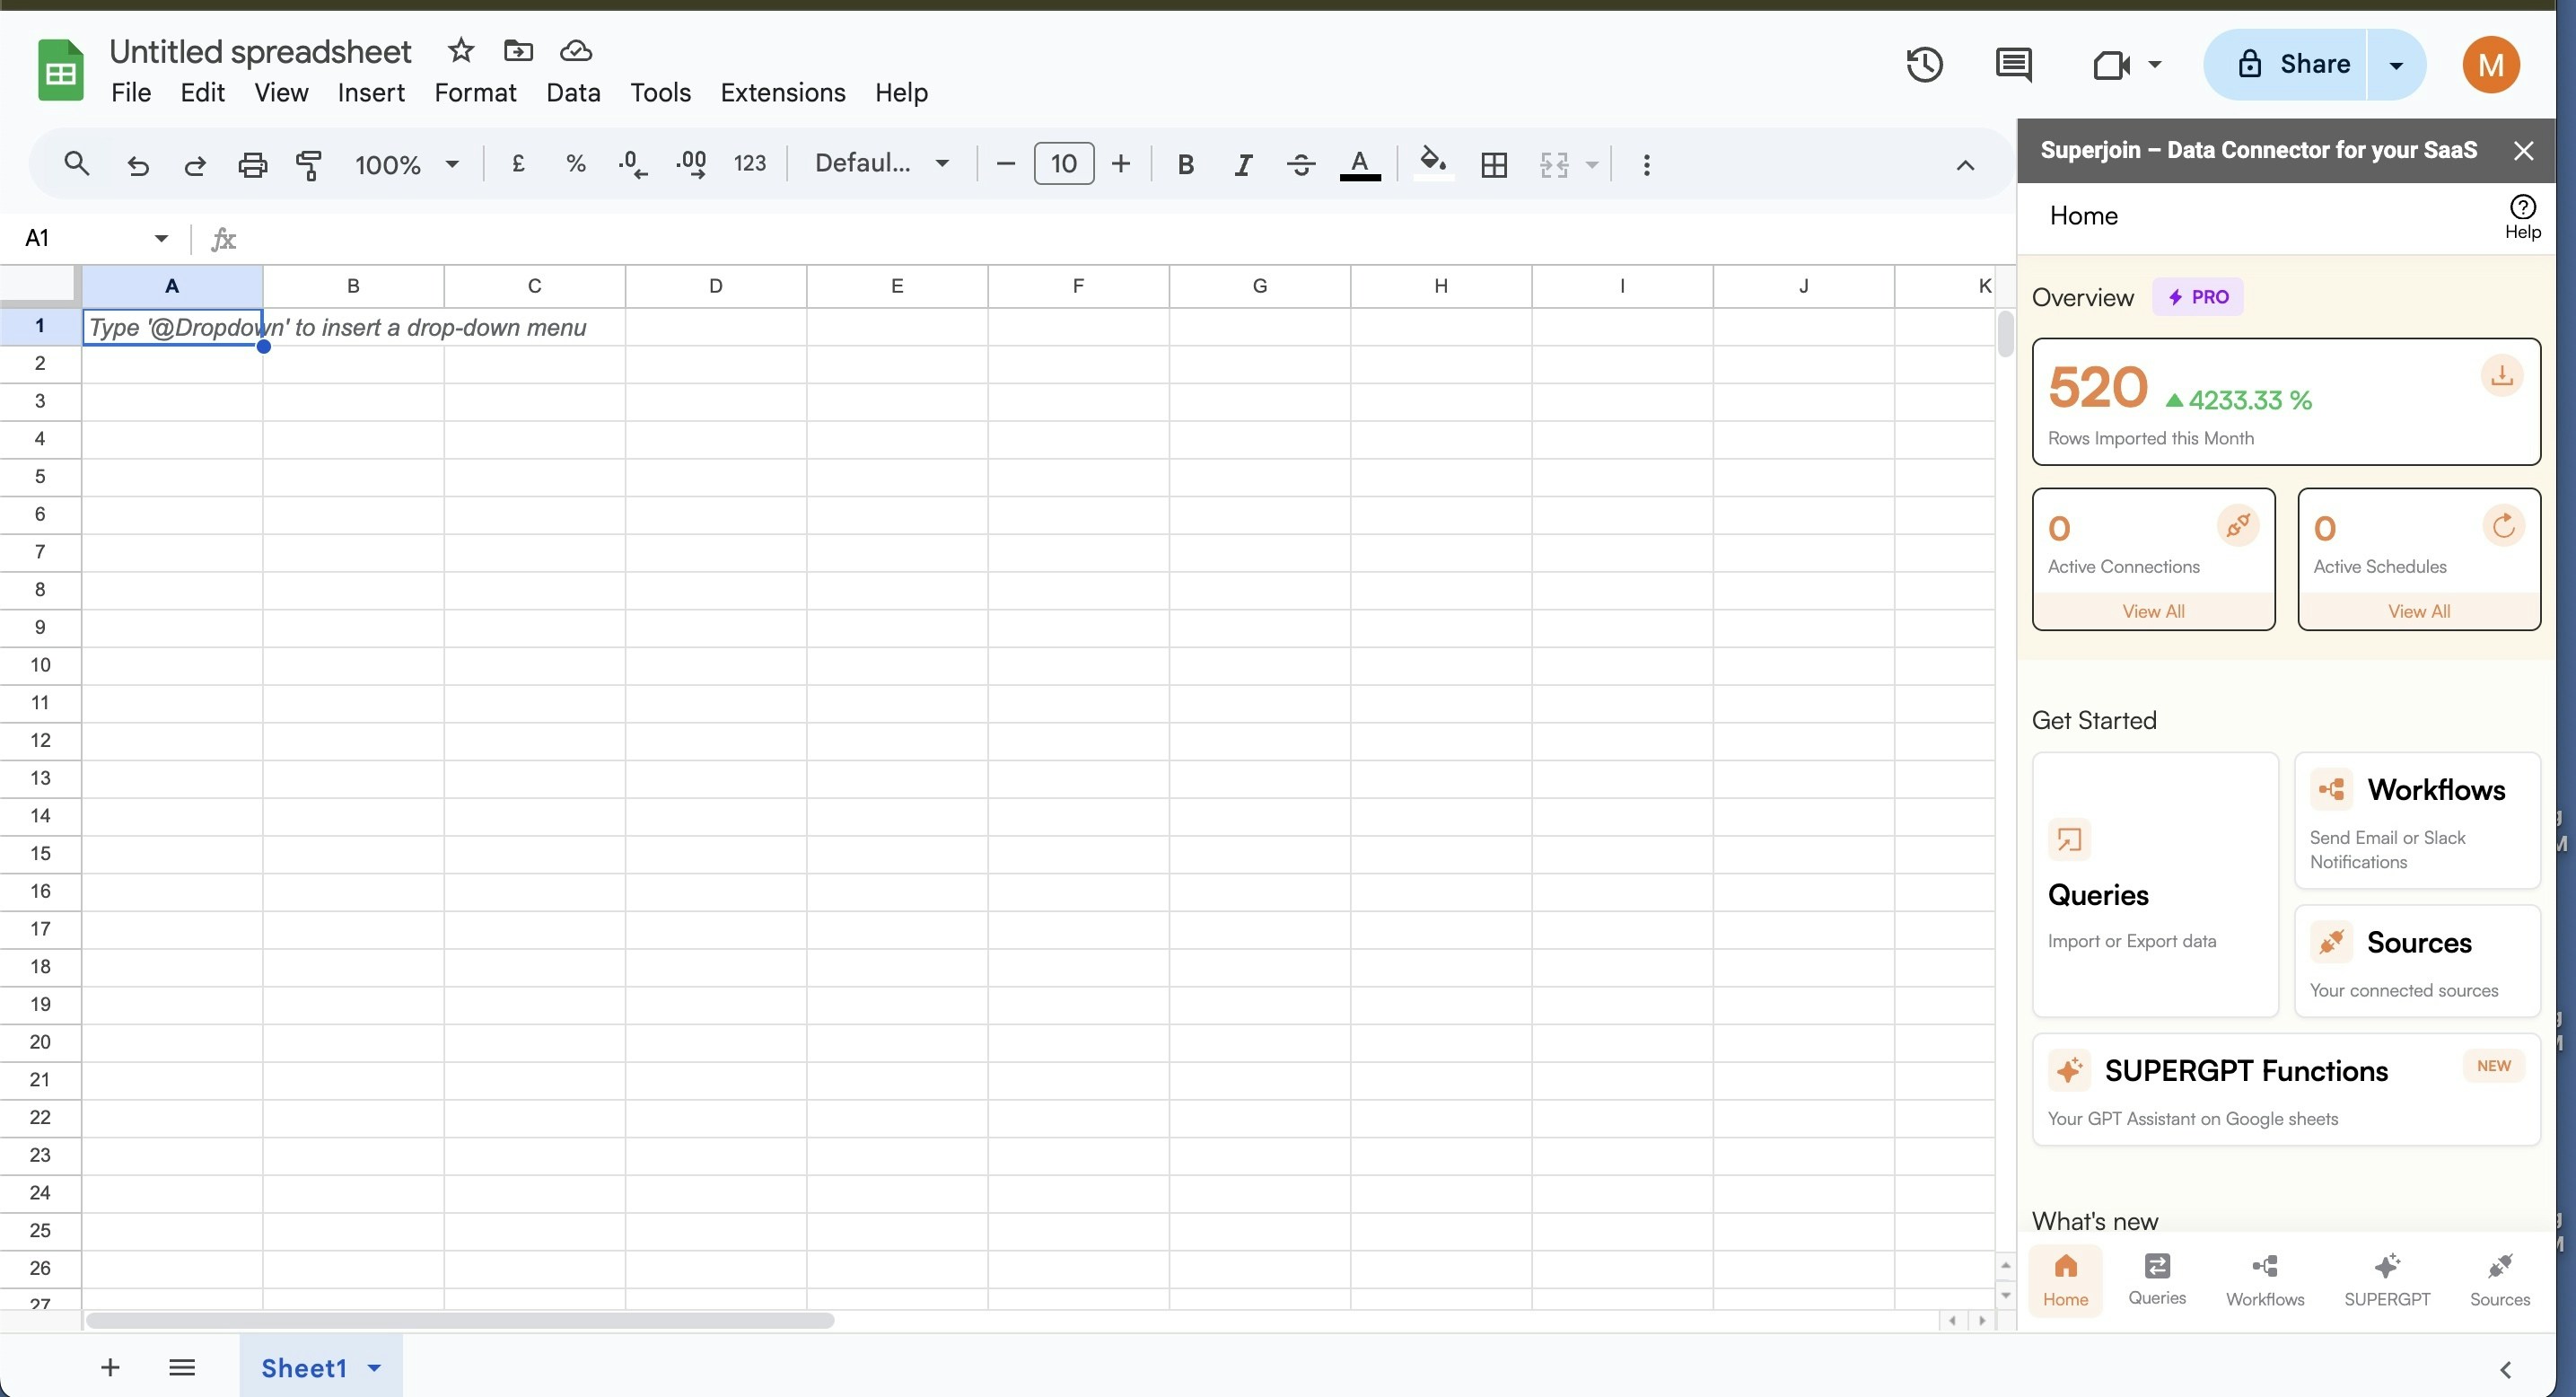
    Once installed, navigate back to the `Extensions` menu tab in Google Sheets. Launch Superjoin from here. You should now see Superjoin running as a side panel on the right side of your screen.
    <Frame>
      <img src="https://mintcdn.com/superjoin/gjRFjFkthepgDSdX/images/launchstackit.png?fit=max&auto=format&n=gjRFjFkthepgDSdX&q=85&s=14e2ecb541402cb914b79951a8faff16" width="1347" height="543" data-path="images/launchstackit.png" />
    </Frame>

    <br />

    <Frame>
      <img src="https://mintcdn.com/superjoin/ko3_UmqC3SF-ISko/images/xero/xero_1.jpeg?fit=max&auto=format&n=ko3_UmqC3SF-ISko&q=85&s=99b9301615fce97e3c978365641a62bf" width="2870" height="1556" data-path="images/xero/xero_1.jpeg" />
    </Frame>
  </Step>

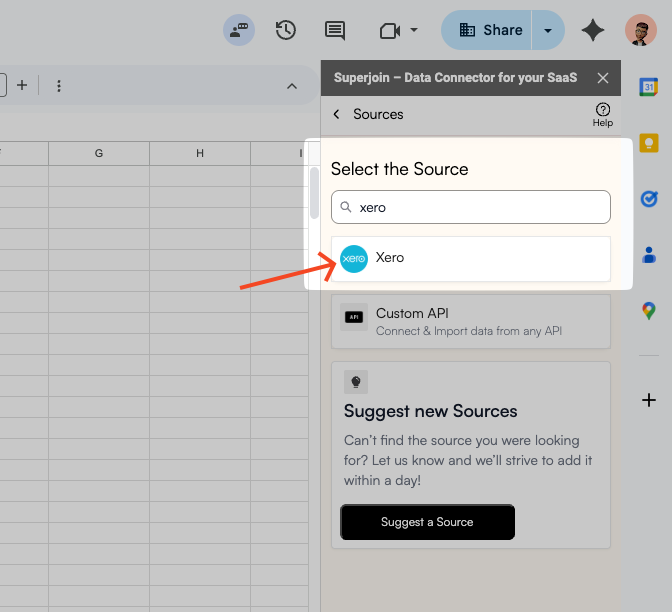
  <Step title="Pick Xero">
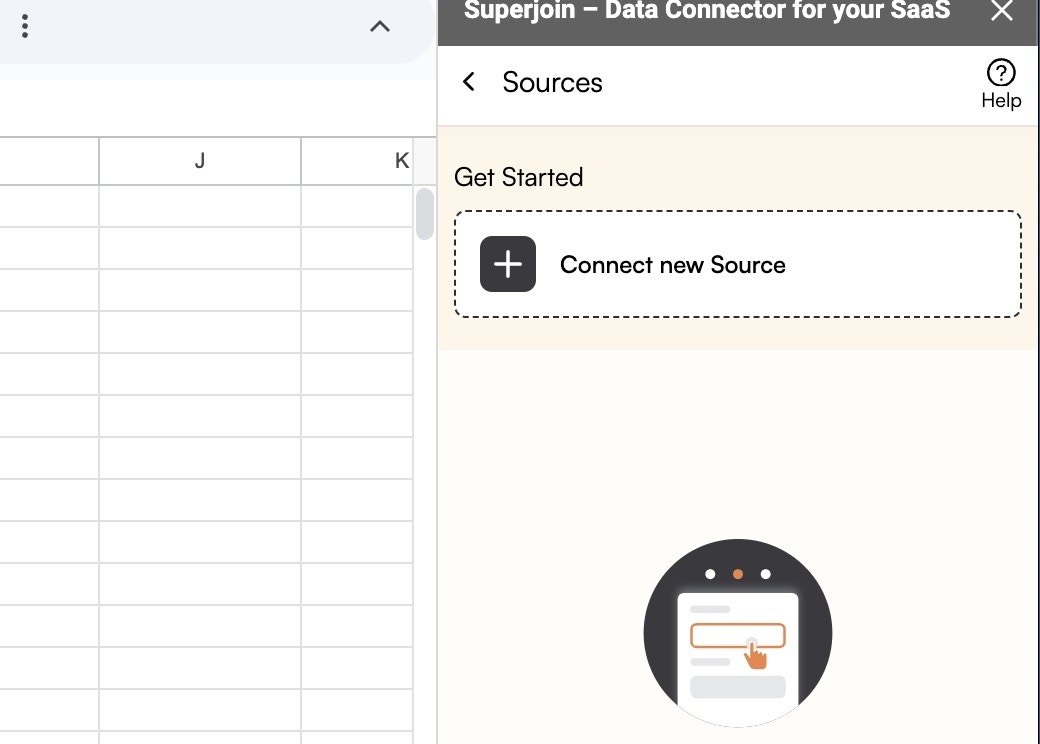
    Click on "Connect new Source" and select Xero from the list of available data sources.
    <Frame>
      <img src="https://mintcdn.com/superjoin/ko3_UmqC3SF-ISko/images/xero/xero_2.jpeg?fit=max&auto=format&n=ko3_UmqC3SF-ISko&q=85&s=cb9196a1c176b4d148a70c51ccfacda3" width="1040" height="744" data-path="images/xero/xero_2.jpeg" />
    </Frame>

    <br />

    <Frame>
      <img src="https://mintcdn.com/superjoin/ko3_UmqC3SF-ISko/images/xero/xero_3.png?fit=max&auto=format&n=ko3_UmqC3SF-ISko&q=85&s=f8270f6524c5d1bcd9eba6d7692e4818" width="672" height="612" data-path="images/xero/xero_3.png" />
    </Frame>
  </Step>

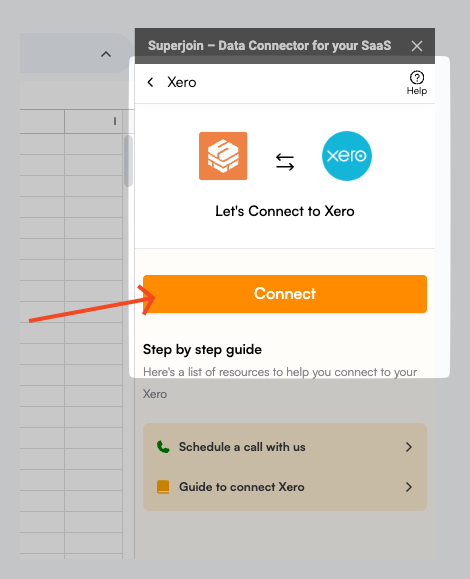
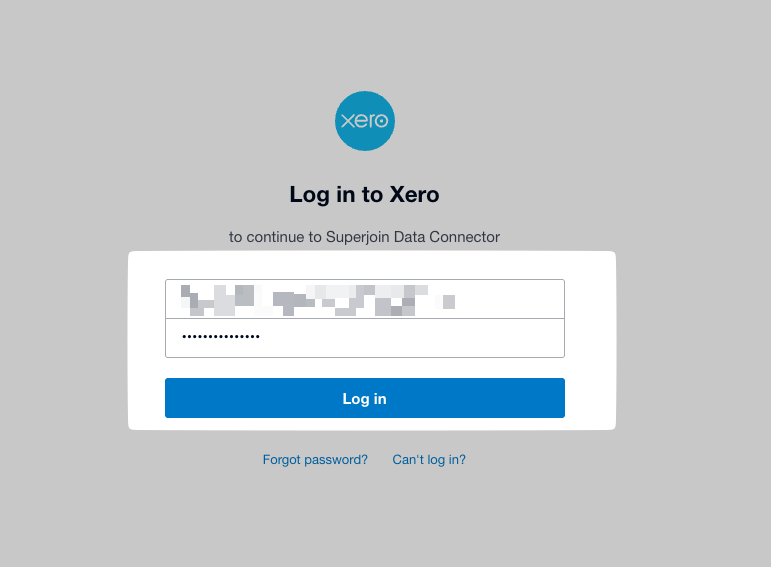
  <Step title="Connect your account">
    <Frame>
      <img src="https://mintcdn.com/superjoin/ko3_UmqC3SF-ISko/images/xero/xero_4.png?fit=max&auto=format&n=ko3_UmqC3SF-ISko&q=85&s=40a62d42be79839b3c3ee3511f769e04" width="470" height="579" data-path="images/xero/xero_4.png" />
    </Frame>

    <br />

    <Frame>
      <img src="https://mintcdn.com/superjoin/ko3_UmqC3SF-ISko/images/xero/xero_5.png?fit=max&auto=format&n=ko3_UmqC3SF-ISko&q=85&s=420ee5016137182db836d112514037fa" width="771" height="567" data-path="images/xero/xero_5.png" />
    </Frame>
  </Step>

  <Step title="Select data">
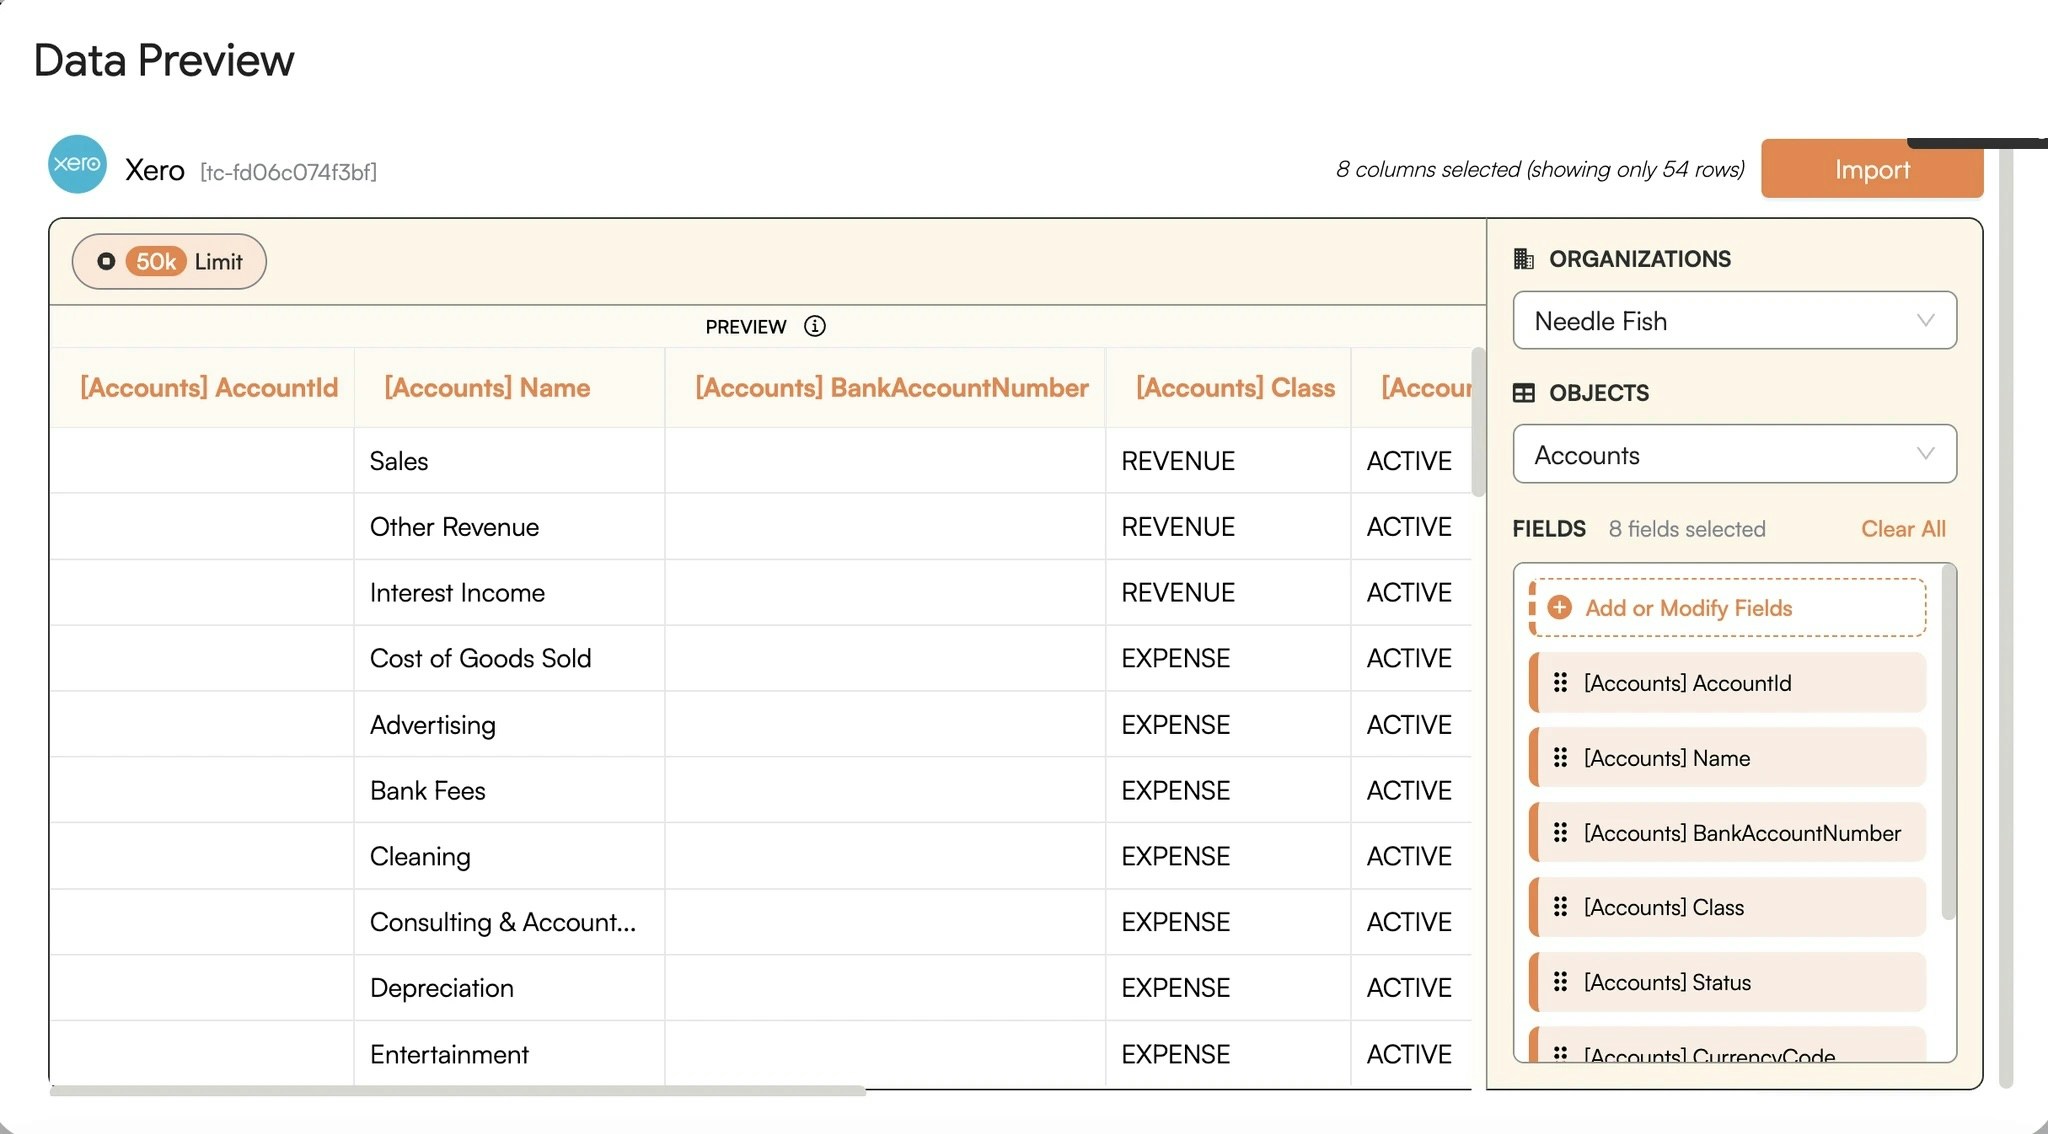
    Choose the type of data you want to import (Invoices, Contacts, Accounts, Bank Transactions, etc.) and apply any filters to narrow down your selection.
    <Frame>
      <img src="https://mintcdn.com/superjoin/ko3_UmqC3SF-ISko/images/xero/xero_6.jpeg?fit=max&auto=format&n=ko3_UmqC3SF-ISko&q=85&s=74f0e0a01e5eee7f35d5cccffd66562a" width="2048" height="1134" data-path="images/xero/xero_6.jpeg" />
    </Frame>
  </Step>

  <Step title="Click Import">
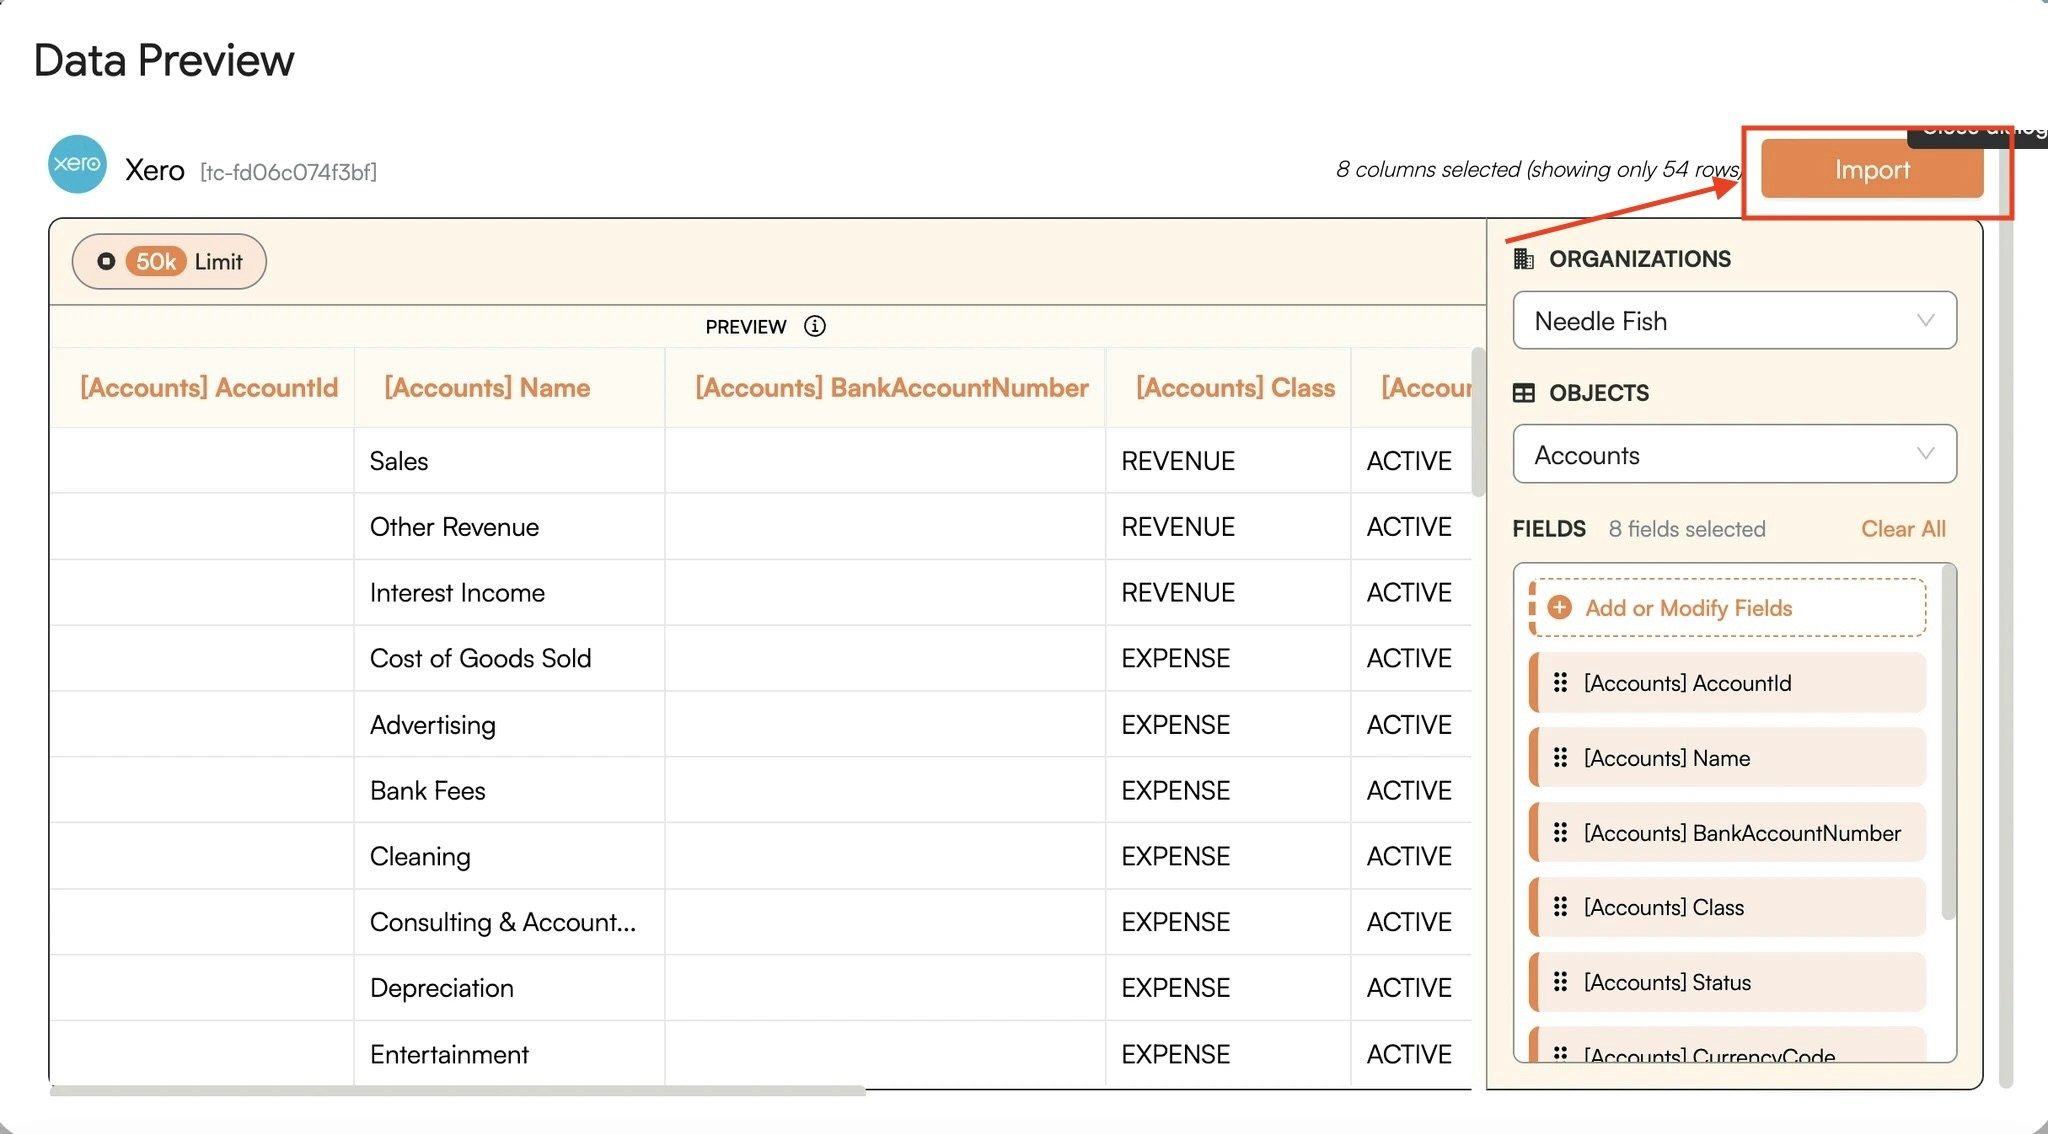
    Now simply click on the "Import" button to bring this selected data into your Google Sheets.
    <Frame>
      <img src="https://mintcdn.com/superjoin/ko3_UmqC3SF-ISko/images/xero/xero_7.jpg?fit=max&auto=format&n=ko3_UmqC3SF-ISko&q=85&s=42f192b09a15aa68d0e46a44d4c11b77" width="2048" height="1134" data-path="images/xero/xero_7.jpg" />
    </Frame>

    <br />
  </Step>

  <Step title="Data pulled! Setup an auto-refresh schedule.">
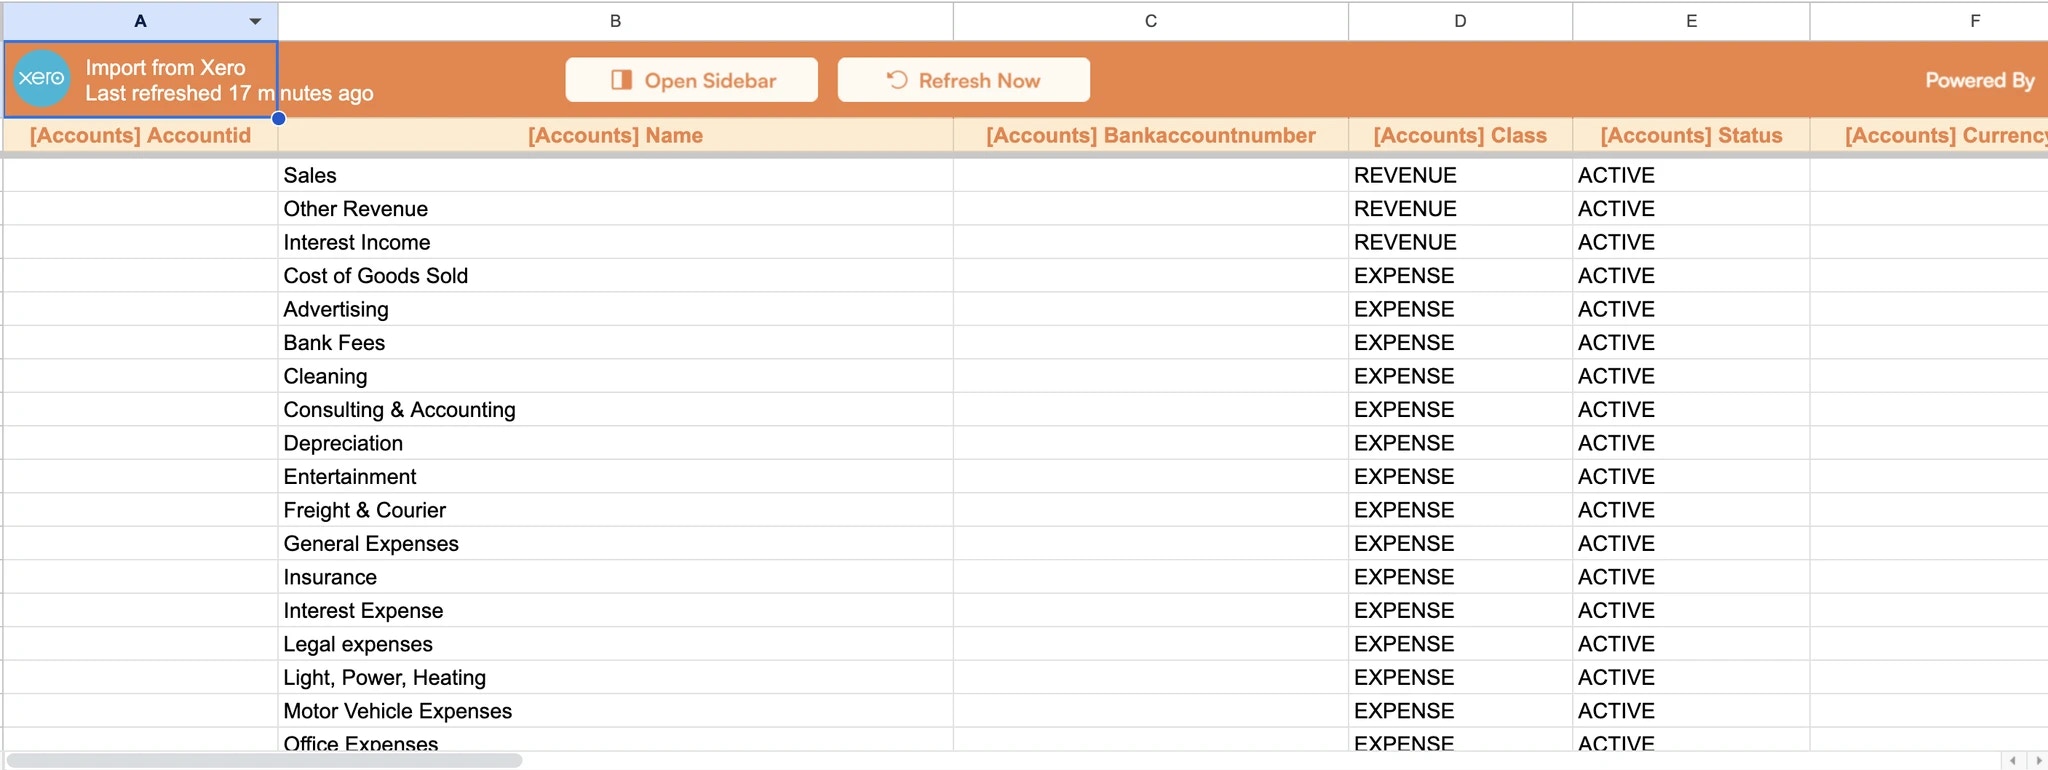
    Superjoin lets you refresh your imported data instantly with one click or set it to auto-refresh on a pre-set schedule. This way, you won't need to manually update your Xero data in Google Sheets to reflect changes from the source.
    <Frame>
      <img src="https://mintcdn.com/superjoin/ko3_UmqC3SF-ISko/images/xero/xero_10.webp?fit=max&auto=format&n=ko3_UmqC3SF-ISko&q=85&s=55d321df108962700f2872c4ac32965e" width="2048" height="770" data-path="images/xero/xero_10.webp" />
    </Frame>

    <br />
  </Step>
</Steps>

##### Hope this guide helped you pull data from your Xero to Google Sheets.

##### If you have any further doubts, please don't hesitate to reach out to our support team [support@superjoin.ai](mailto:support@superjoin.ai). Thank you!