> ## Documentation Index
> Fetch the complete documentation index at: https://docs.superjoin.ai/llms.txt
> Use this file to discover all available pages before exploring further.
# Connect your MySQL Database to Google Sheets
> Move your MySQL data to Google Sheets with ease! This guide connects them in just a few clicks - no coding needed.
Superjoin has revolutionized the way organizations connect to MySQL databases, offering secure and efficient connection solutions. This guide will walk you through setting up a connection with Superjoin, ensuring you can leverage the full capabilities of Superjoin with your MySQL database. 🚀
## Step-by-step walkthrough: How to connect MySQL to Google Sheets
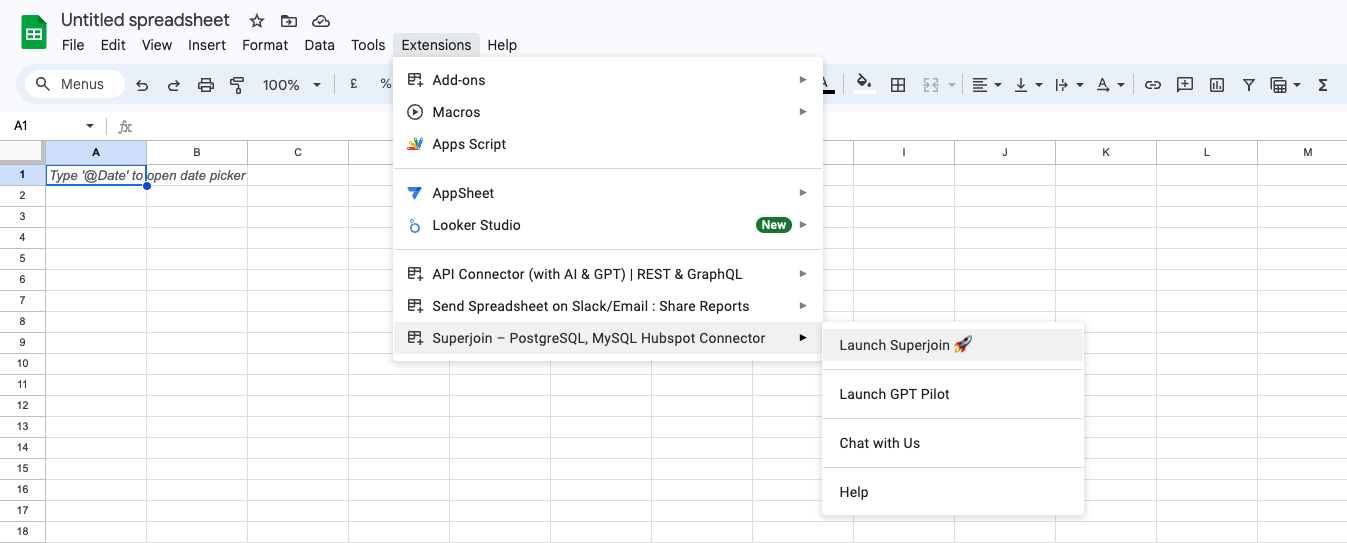
Once Superjoin is installed, navigate to the `Extensions` menu tab in Google Sheets. Launch Superjoin from here. You should now see Superjoin running as a side panel on the right side of your screen.
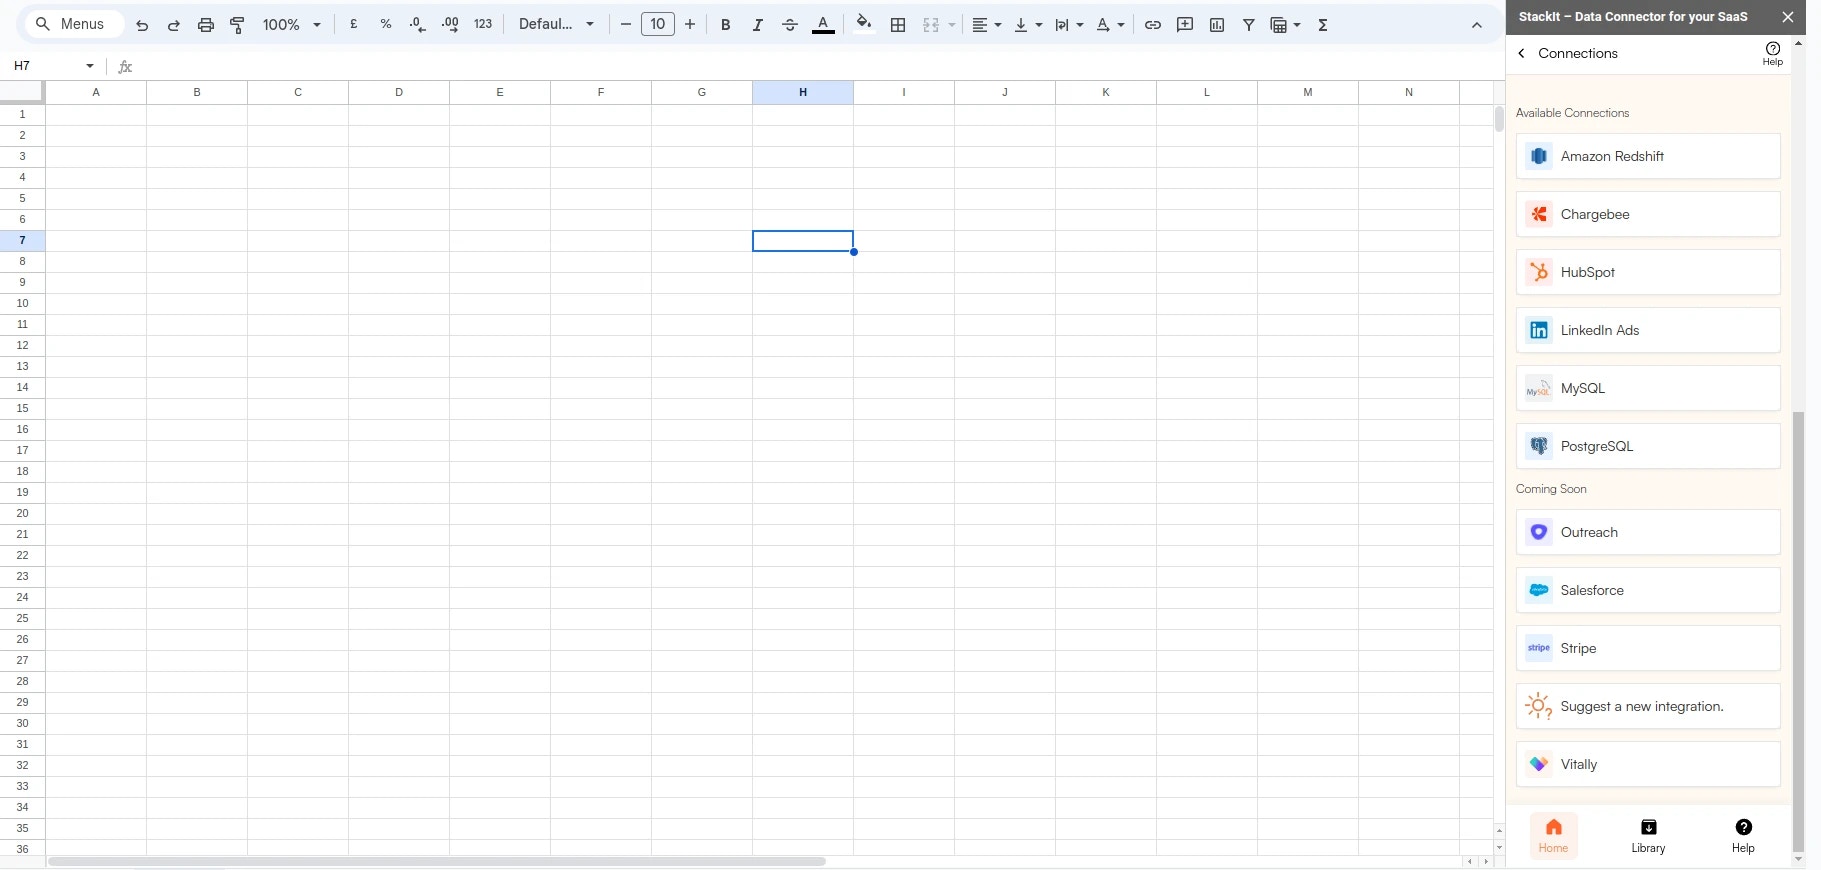
Select MySQL from the list of available data sources.
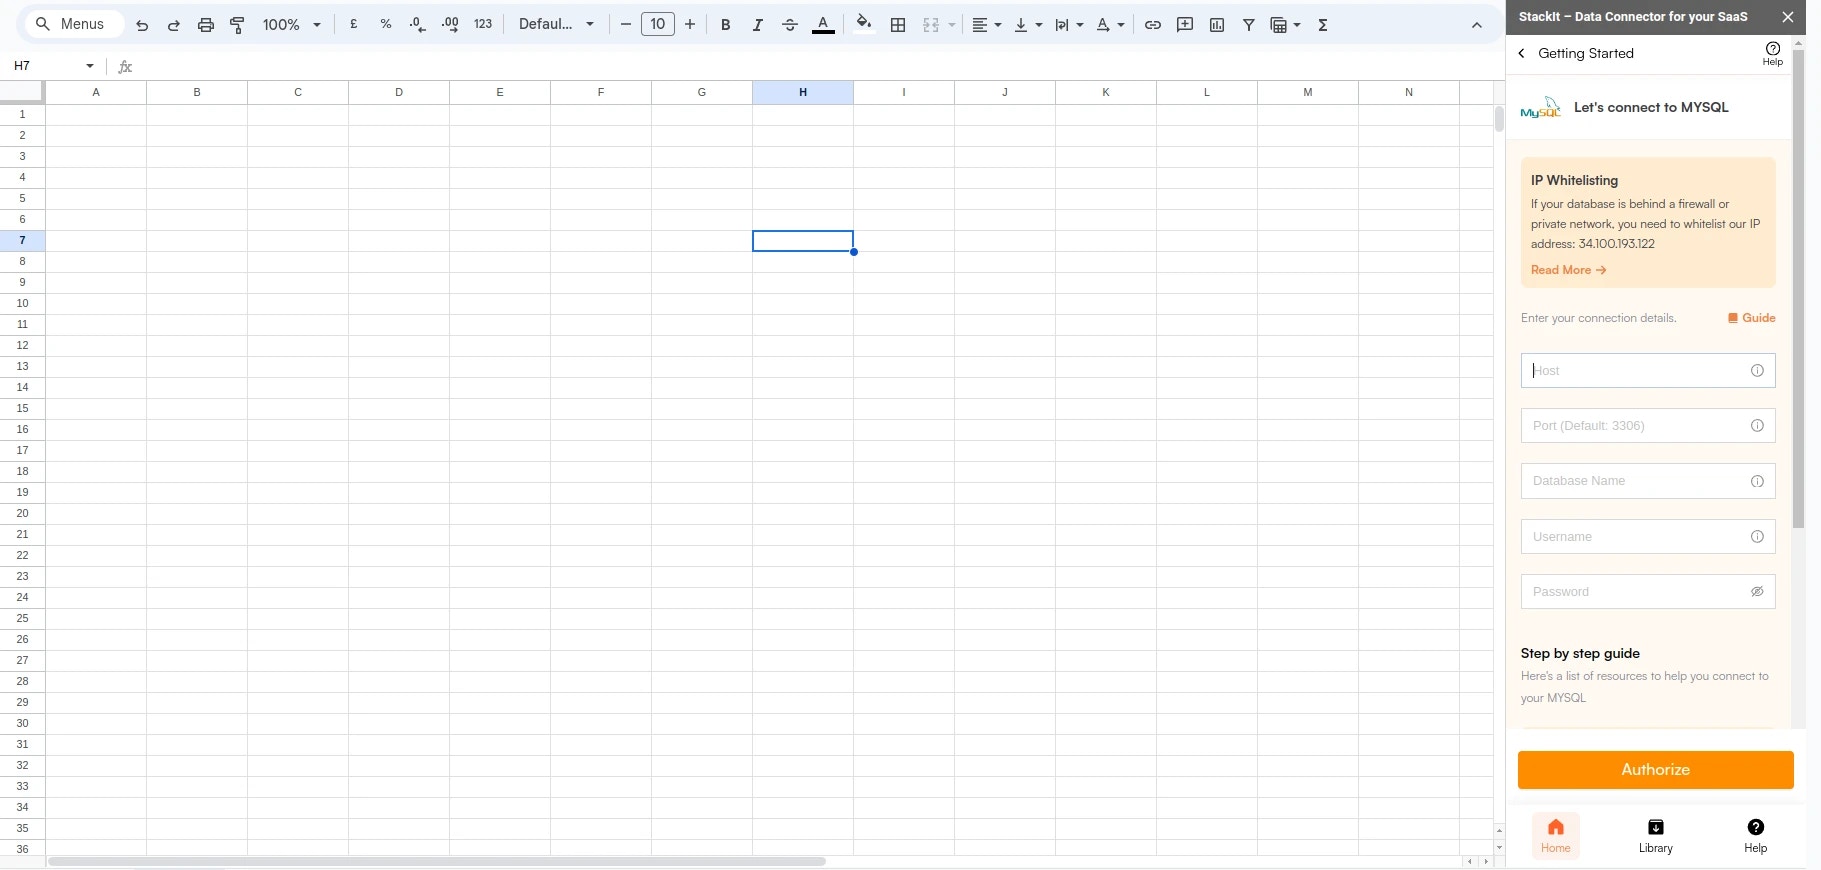
Enter your connection credentials.
Avoid using local IP address (127.0.0.1) or private IP addresses like 192.168.1.100 (192.168.X.X). A private IP address for a server is like a private address of your device in a home or office network which can only be accessed from within the network and not from outside.
Typically, you can find these details in the configuration files of the application that interacts with your database, such as a config.php, .env, or other server-side configuration files. Alternatively, you may access these details from your database management system like phpMyAdmin or directly through MySQL command line using the status command.
| Field | Description | Example |
| -------- | ----------------------------------------------------------------------- | ---------------------- |
| Host | Enter the path to your database, which could be a URL or an IP address. | mydatabase.example.com |
| Port | Use the specific port for your MySQL database. | Default is 3306 |
| Database | Specify the name of the database you want to query. | mydatabase |
| User | Enter the username for connecting to your MySQL database. | admin or user123 |
| Password | Provide the password corresponding to the specified user. | password123 |
## Setting up Amazon RDS
Head over to the AWS RDS page to get a step by step guide to connect or troubleshoot connectivity.