Step-by-step walkthrough: How to connect Snowflake to Google Sheets
1
Get Add-ons
Select 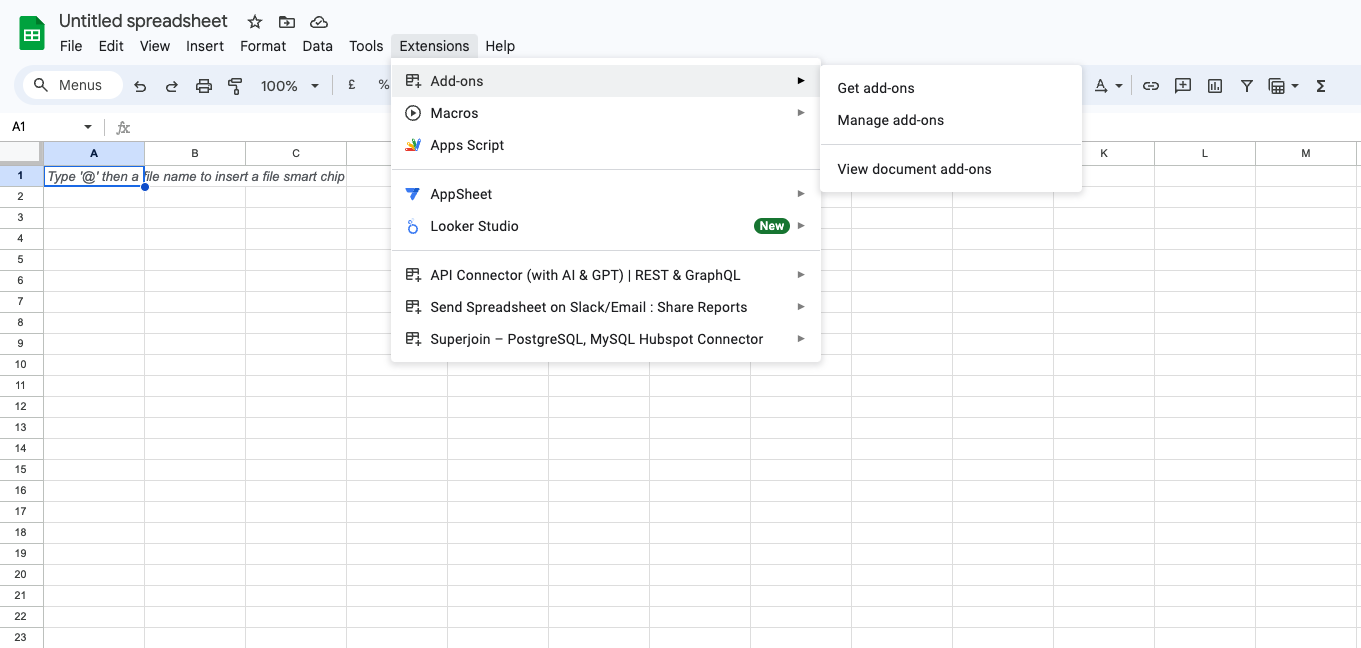
Add-ons and choose Get Add-ons. This action will redirect you to the Google Workspace Marketplace.2
Click on Install
Click on 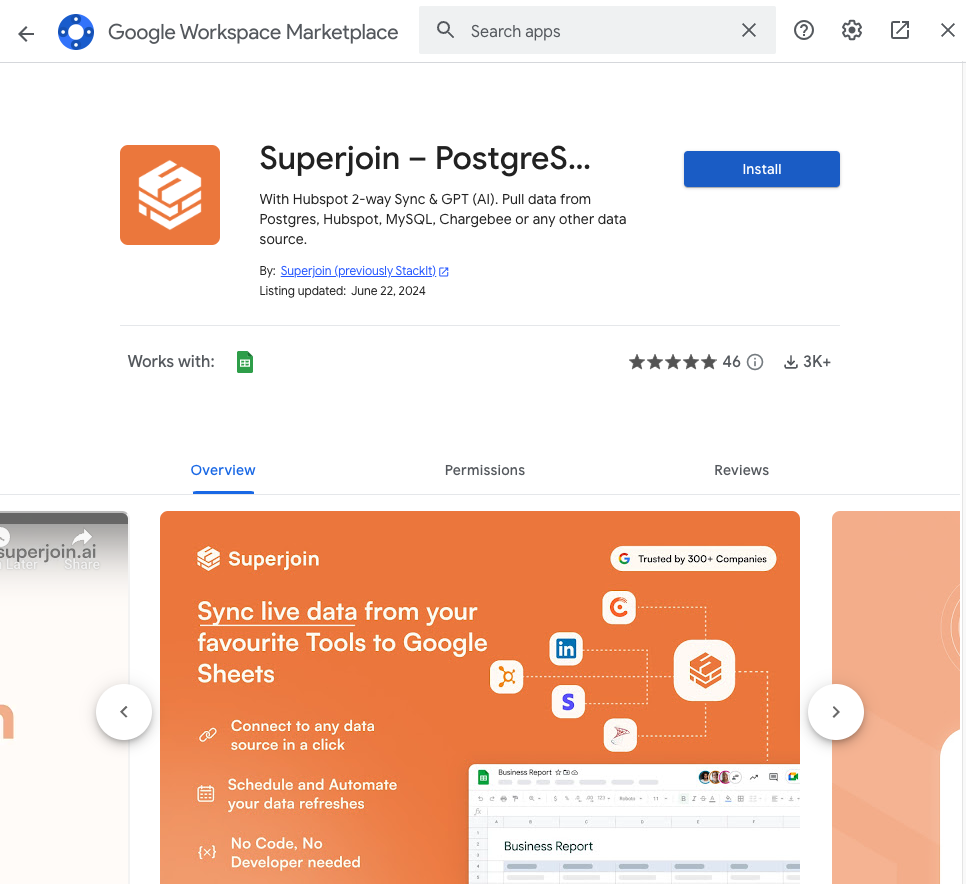
Extensions from the Google Sheets menu. Note: For the best experience, install Superjoin where there’s only a single account is logged in the Chrome profile.3
Launch Superjoin
Once installed, navigate back to the 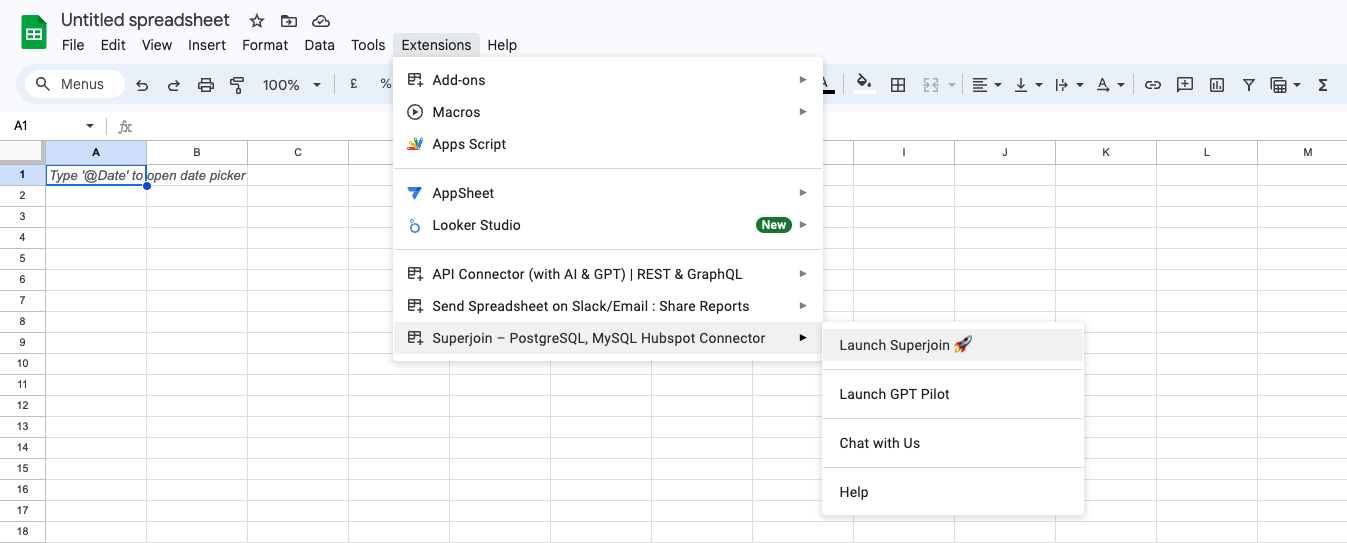
Extensions menu tab in Google Sheets. Launch Superjoin from here. You should now see Superjoin running as a side panel on the right side of your screen.4
Go to sources list
Go to sources and click on “Connect new Source”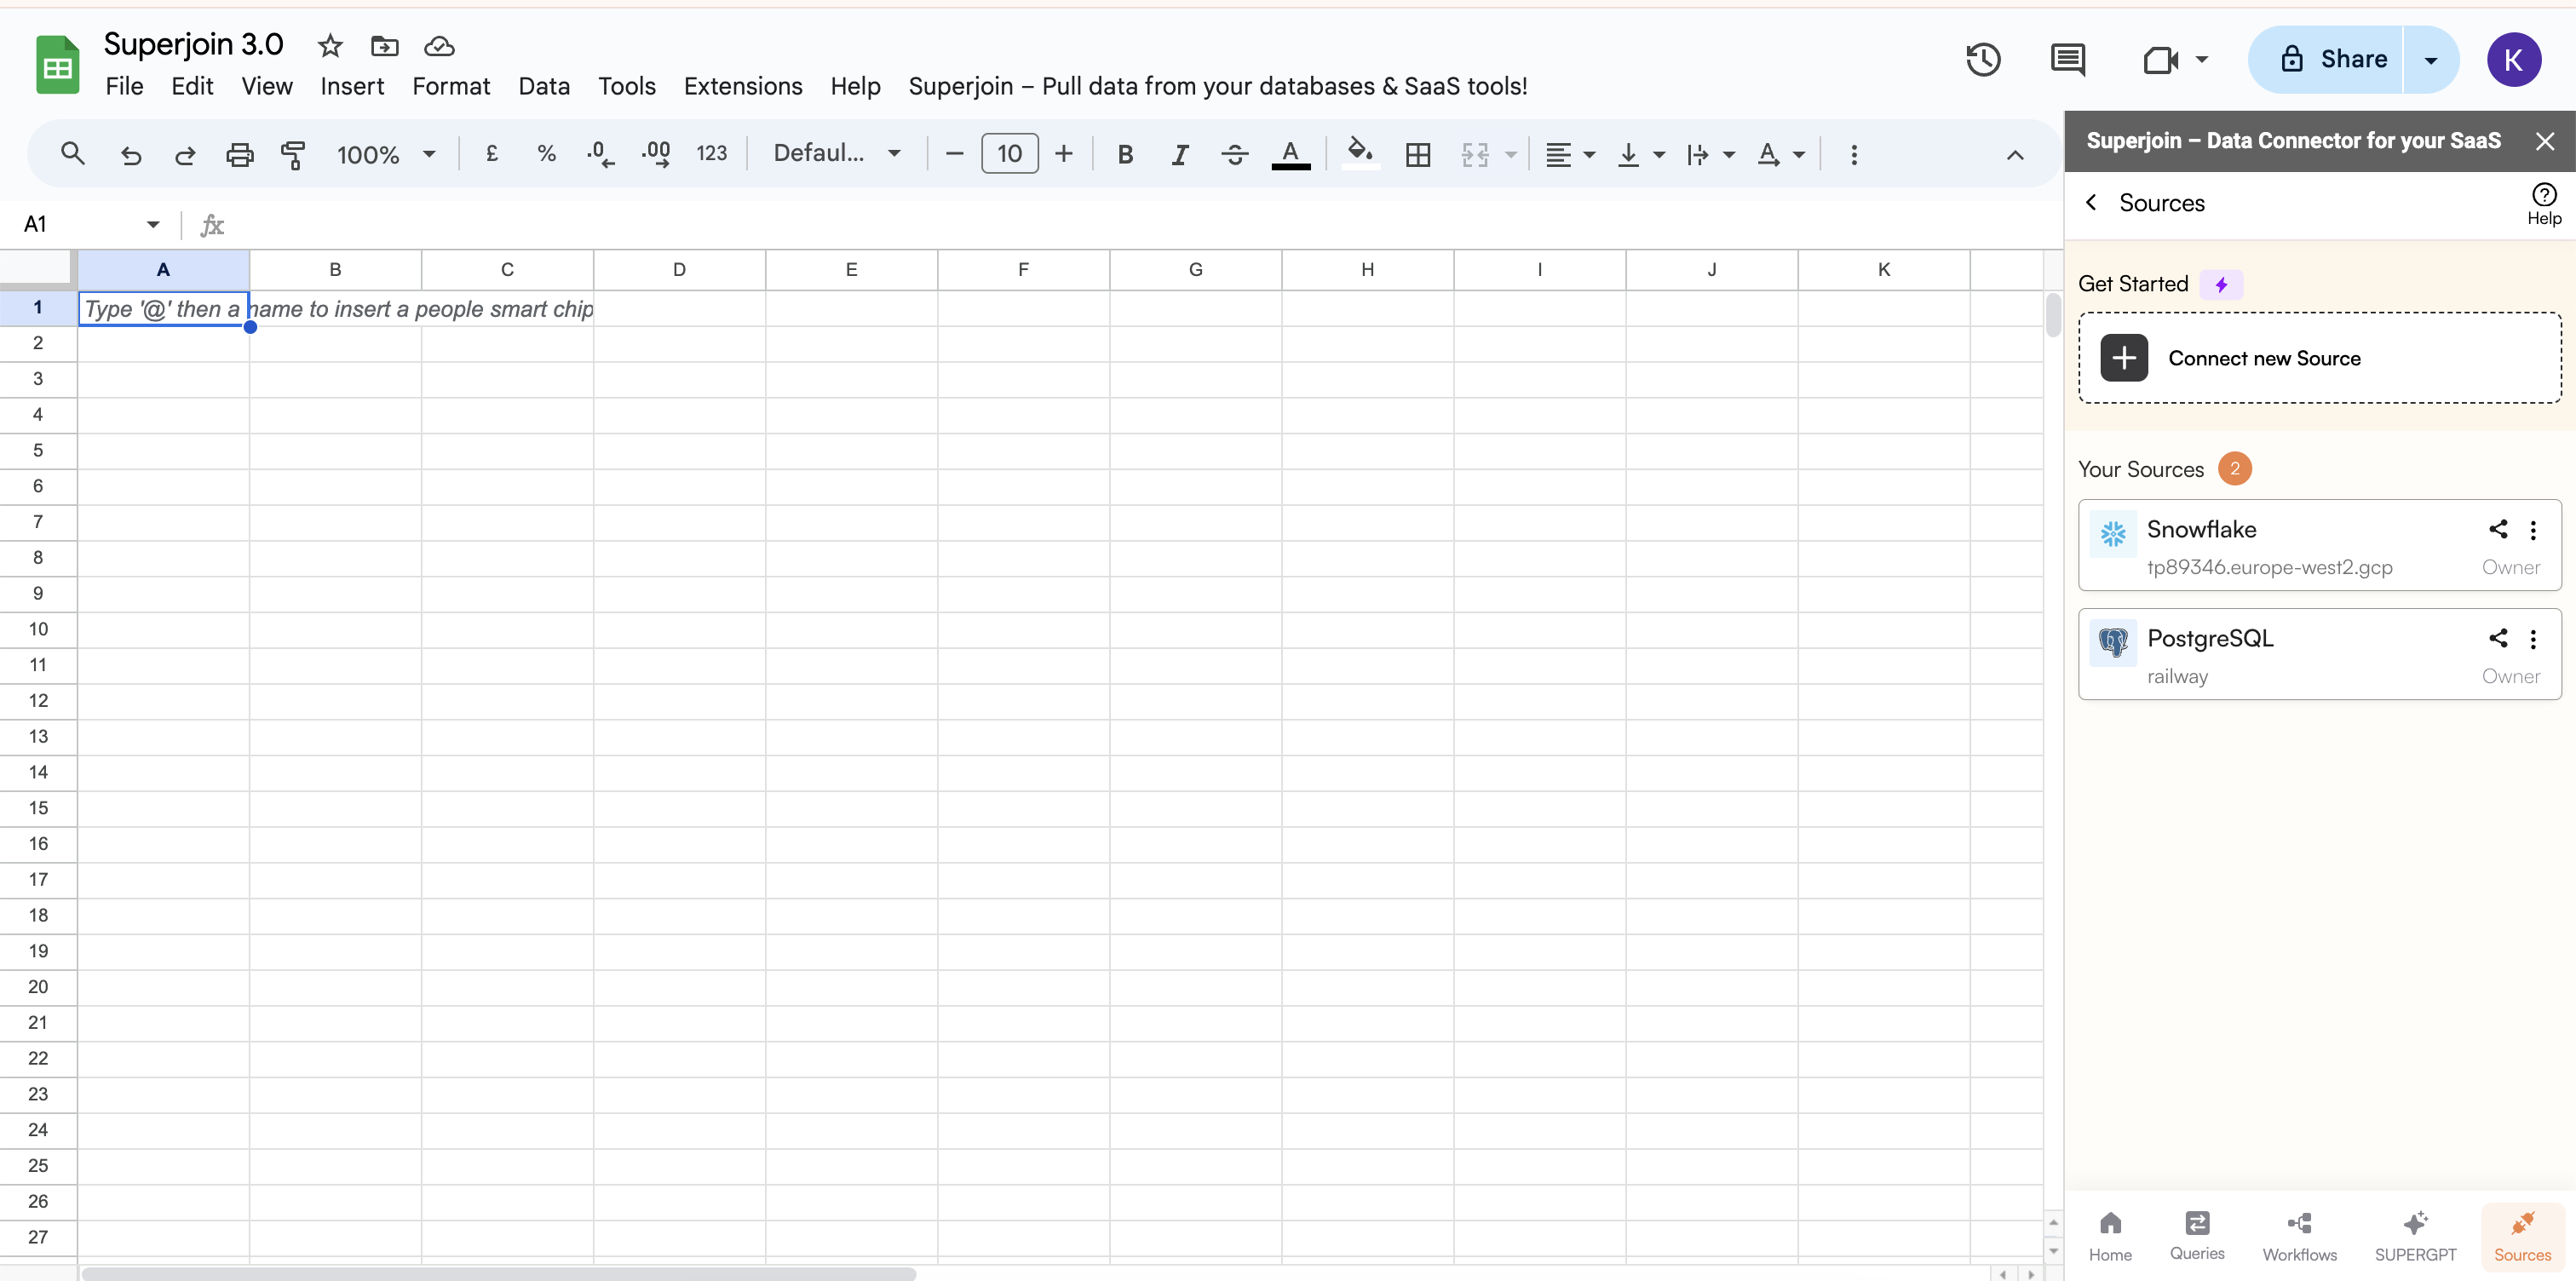
5
Search for Snowflake
Type Snowflake in the search bar and click on Snowflake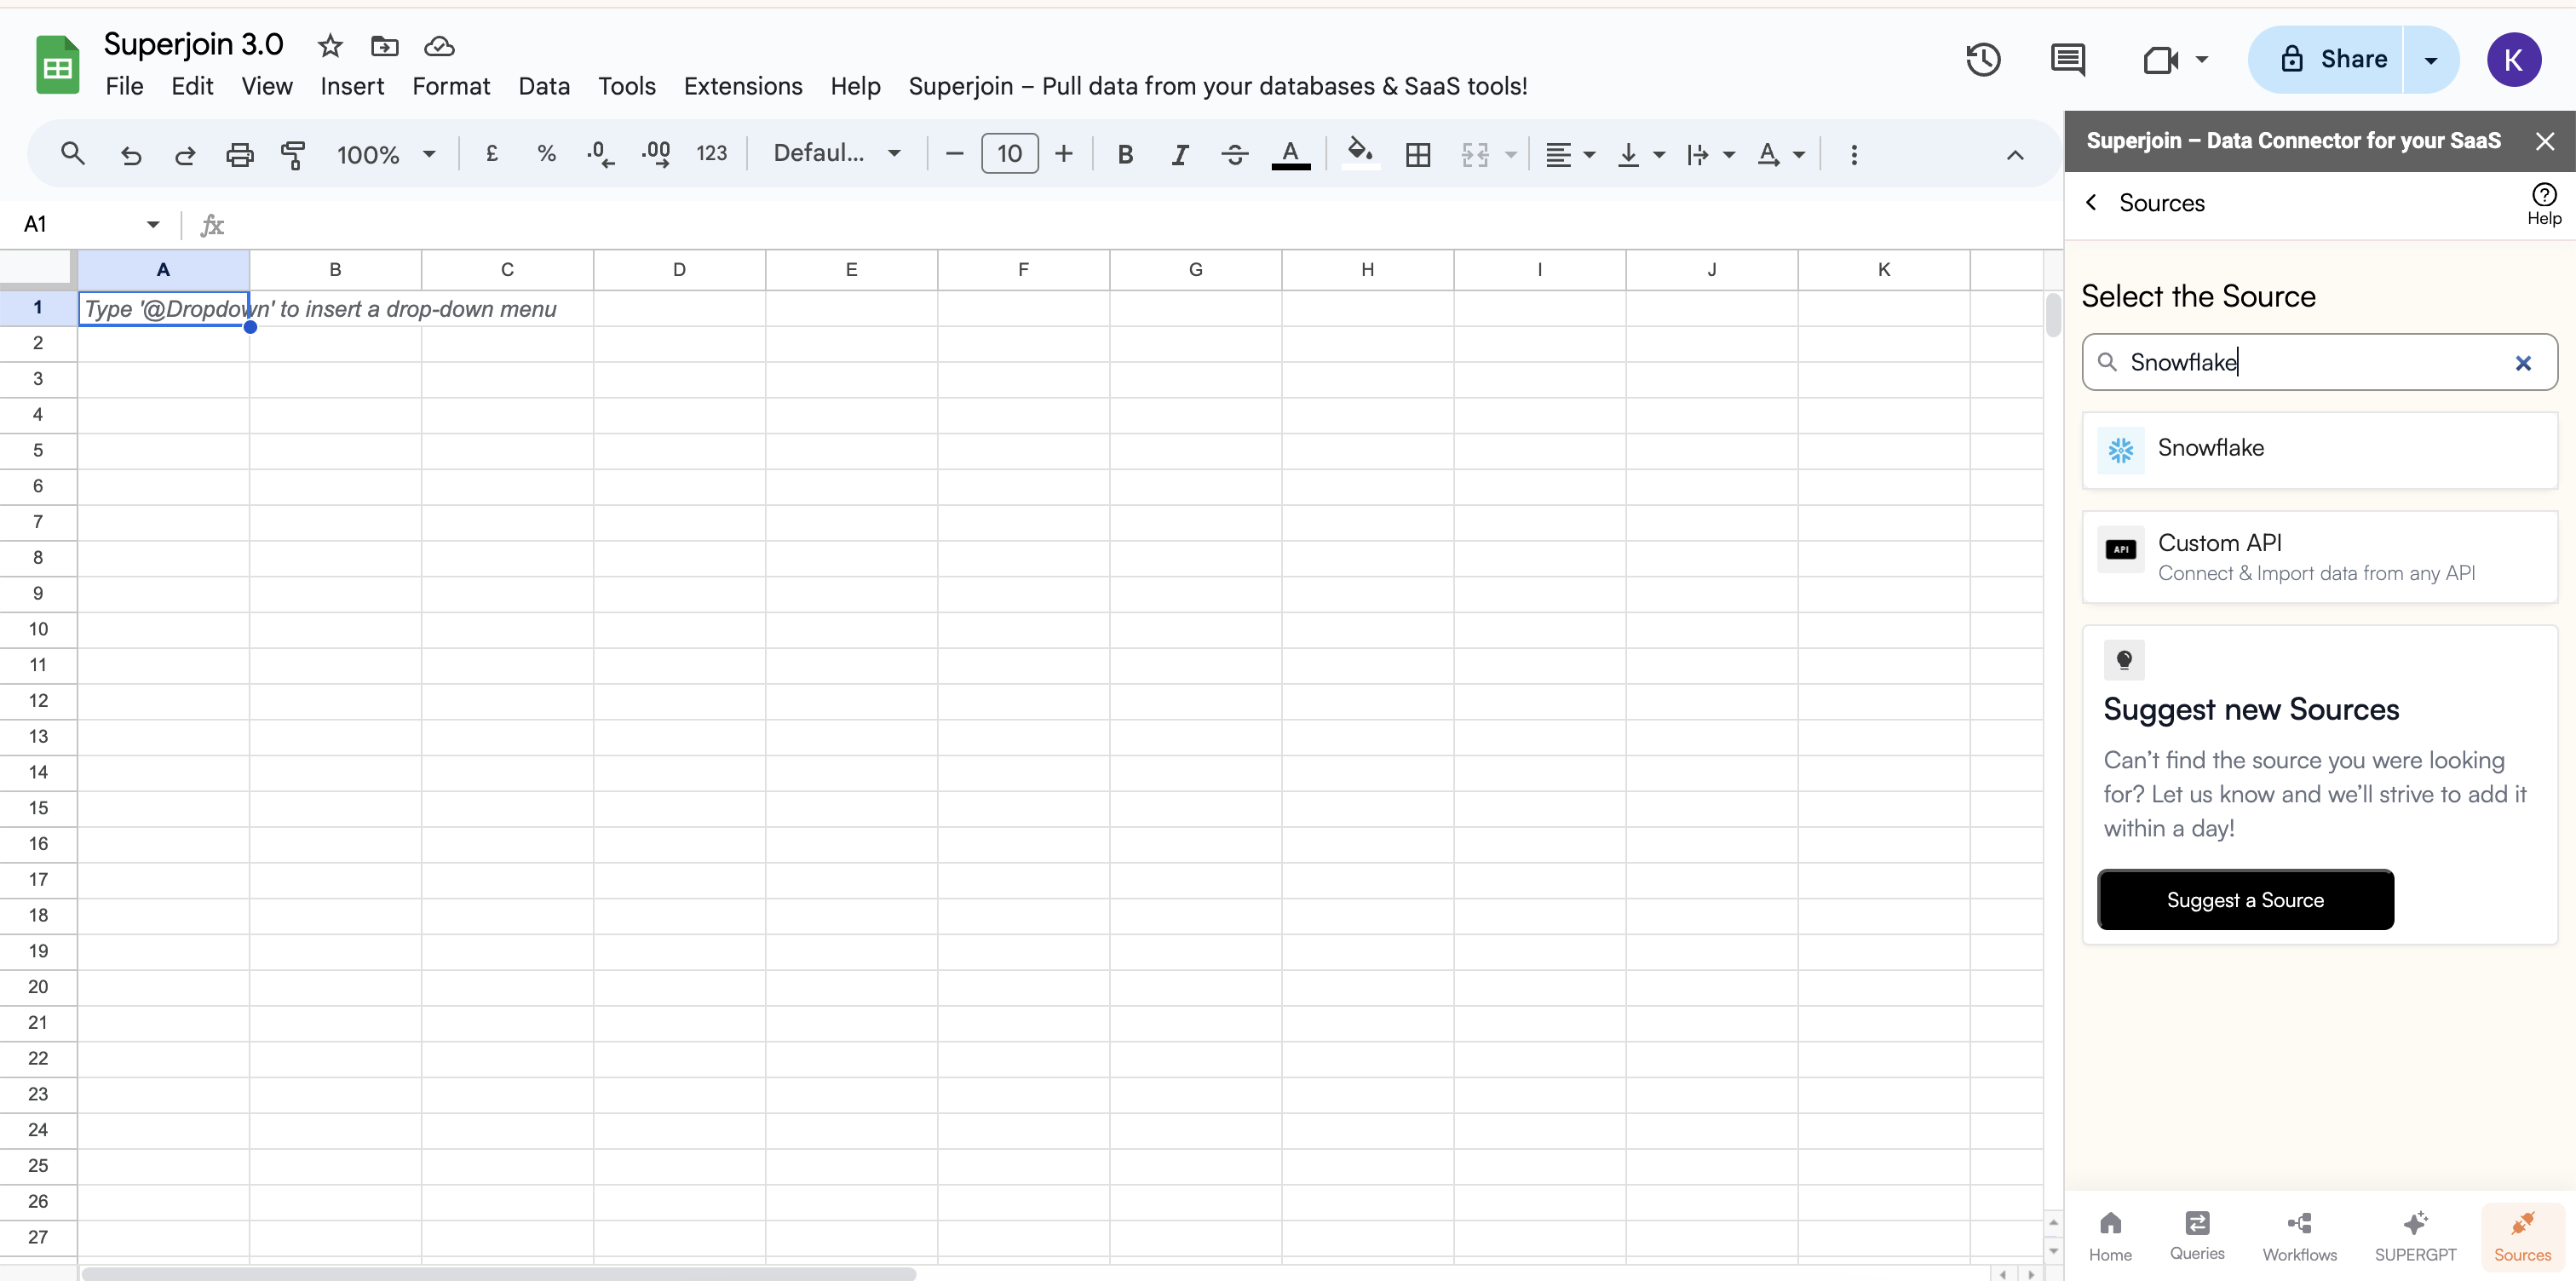
6
Connect your account
Connect to your Snowflake account using your account, username, private key and
warehouse name.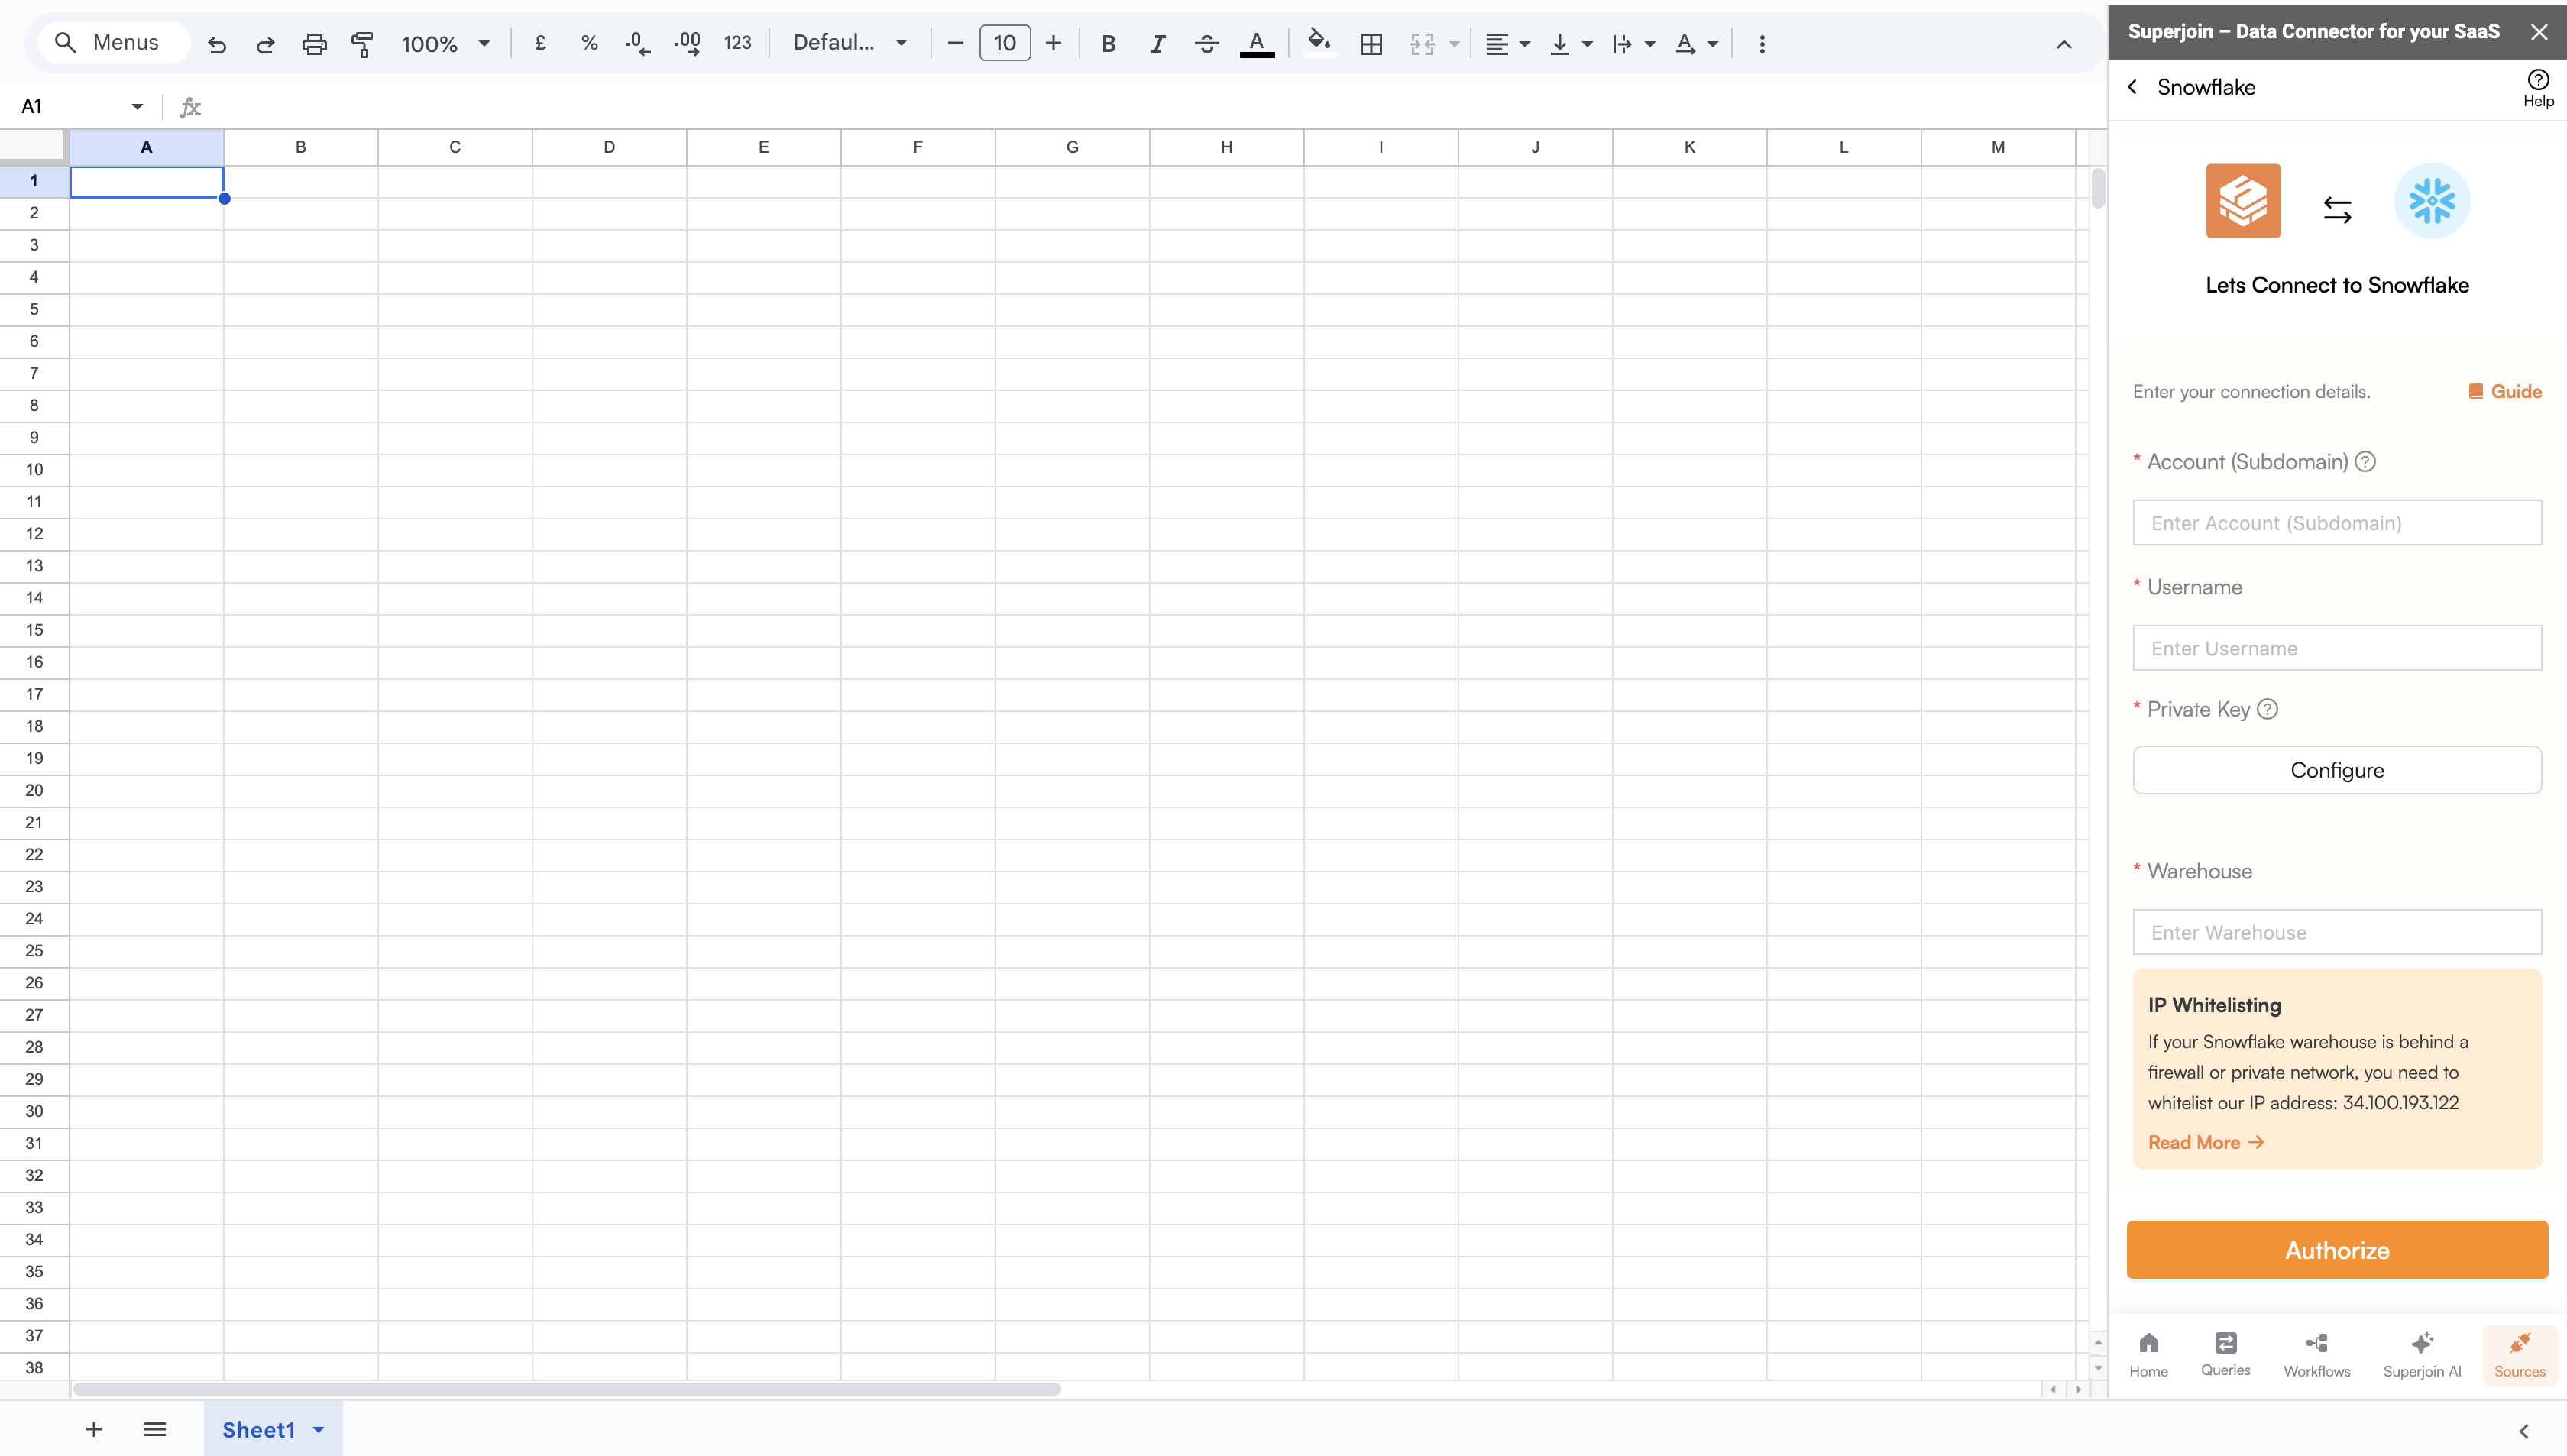
warehouse name.
7
Get Account Subdomain
Login to your Snowflake account and click on 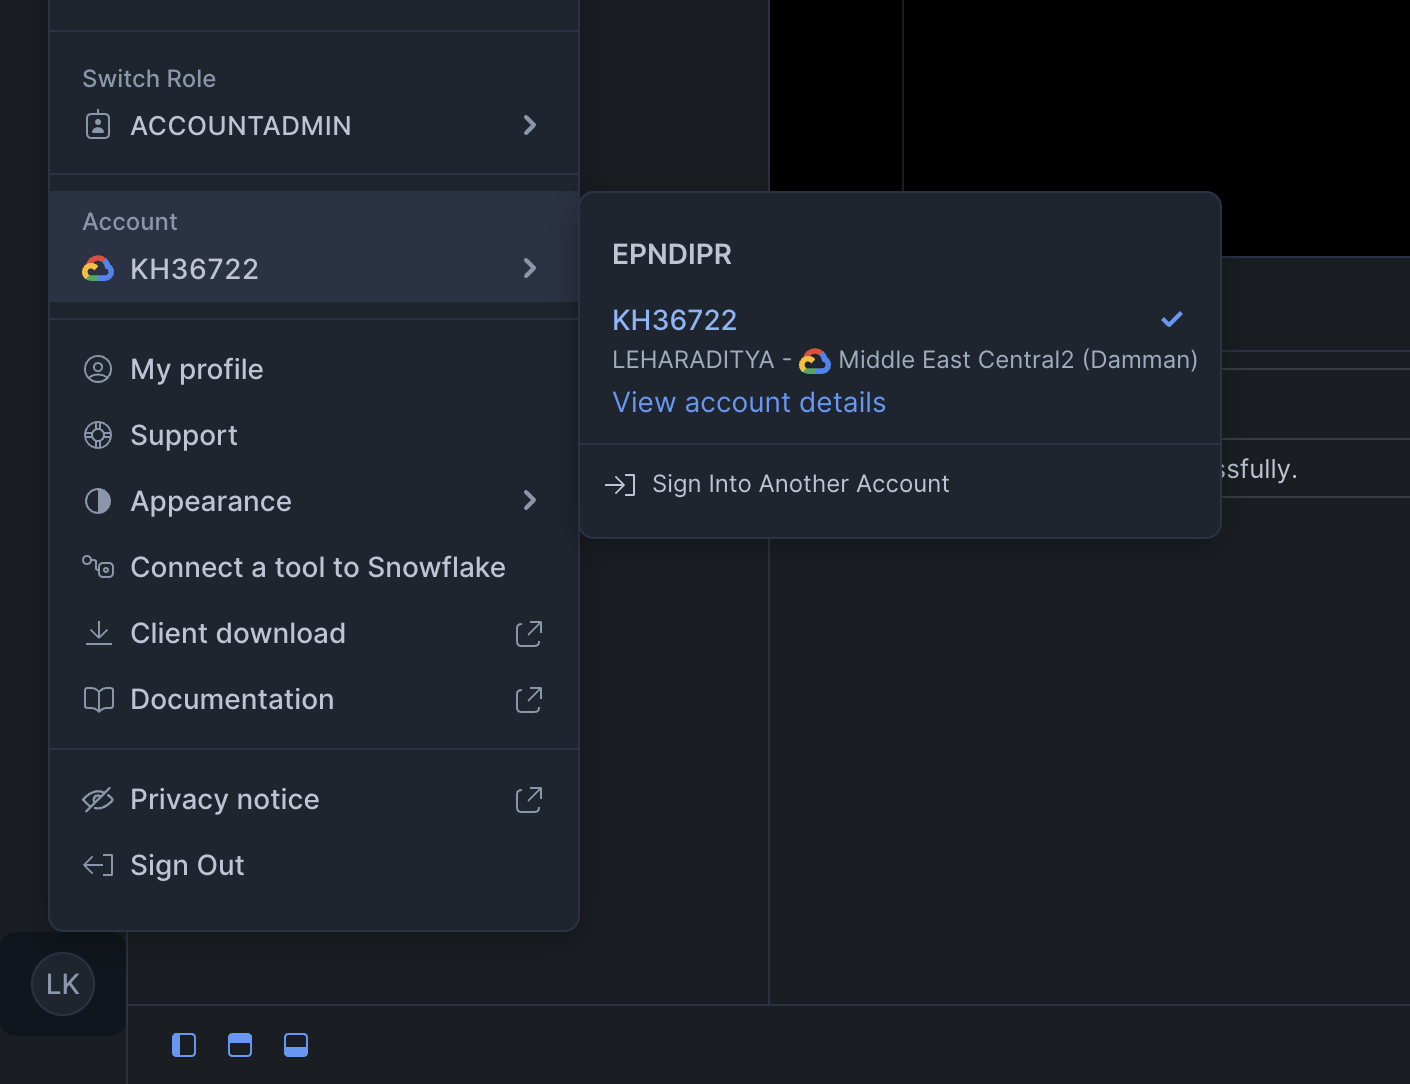
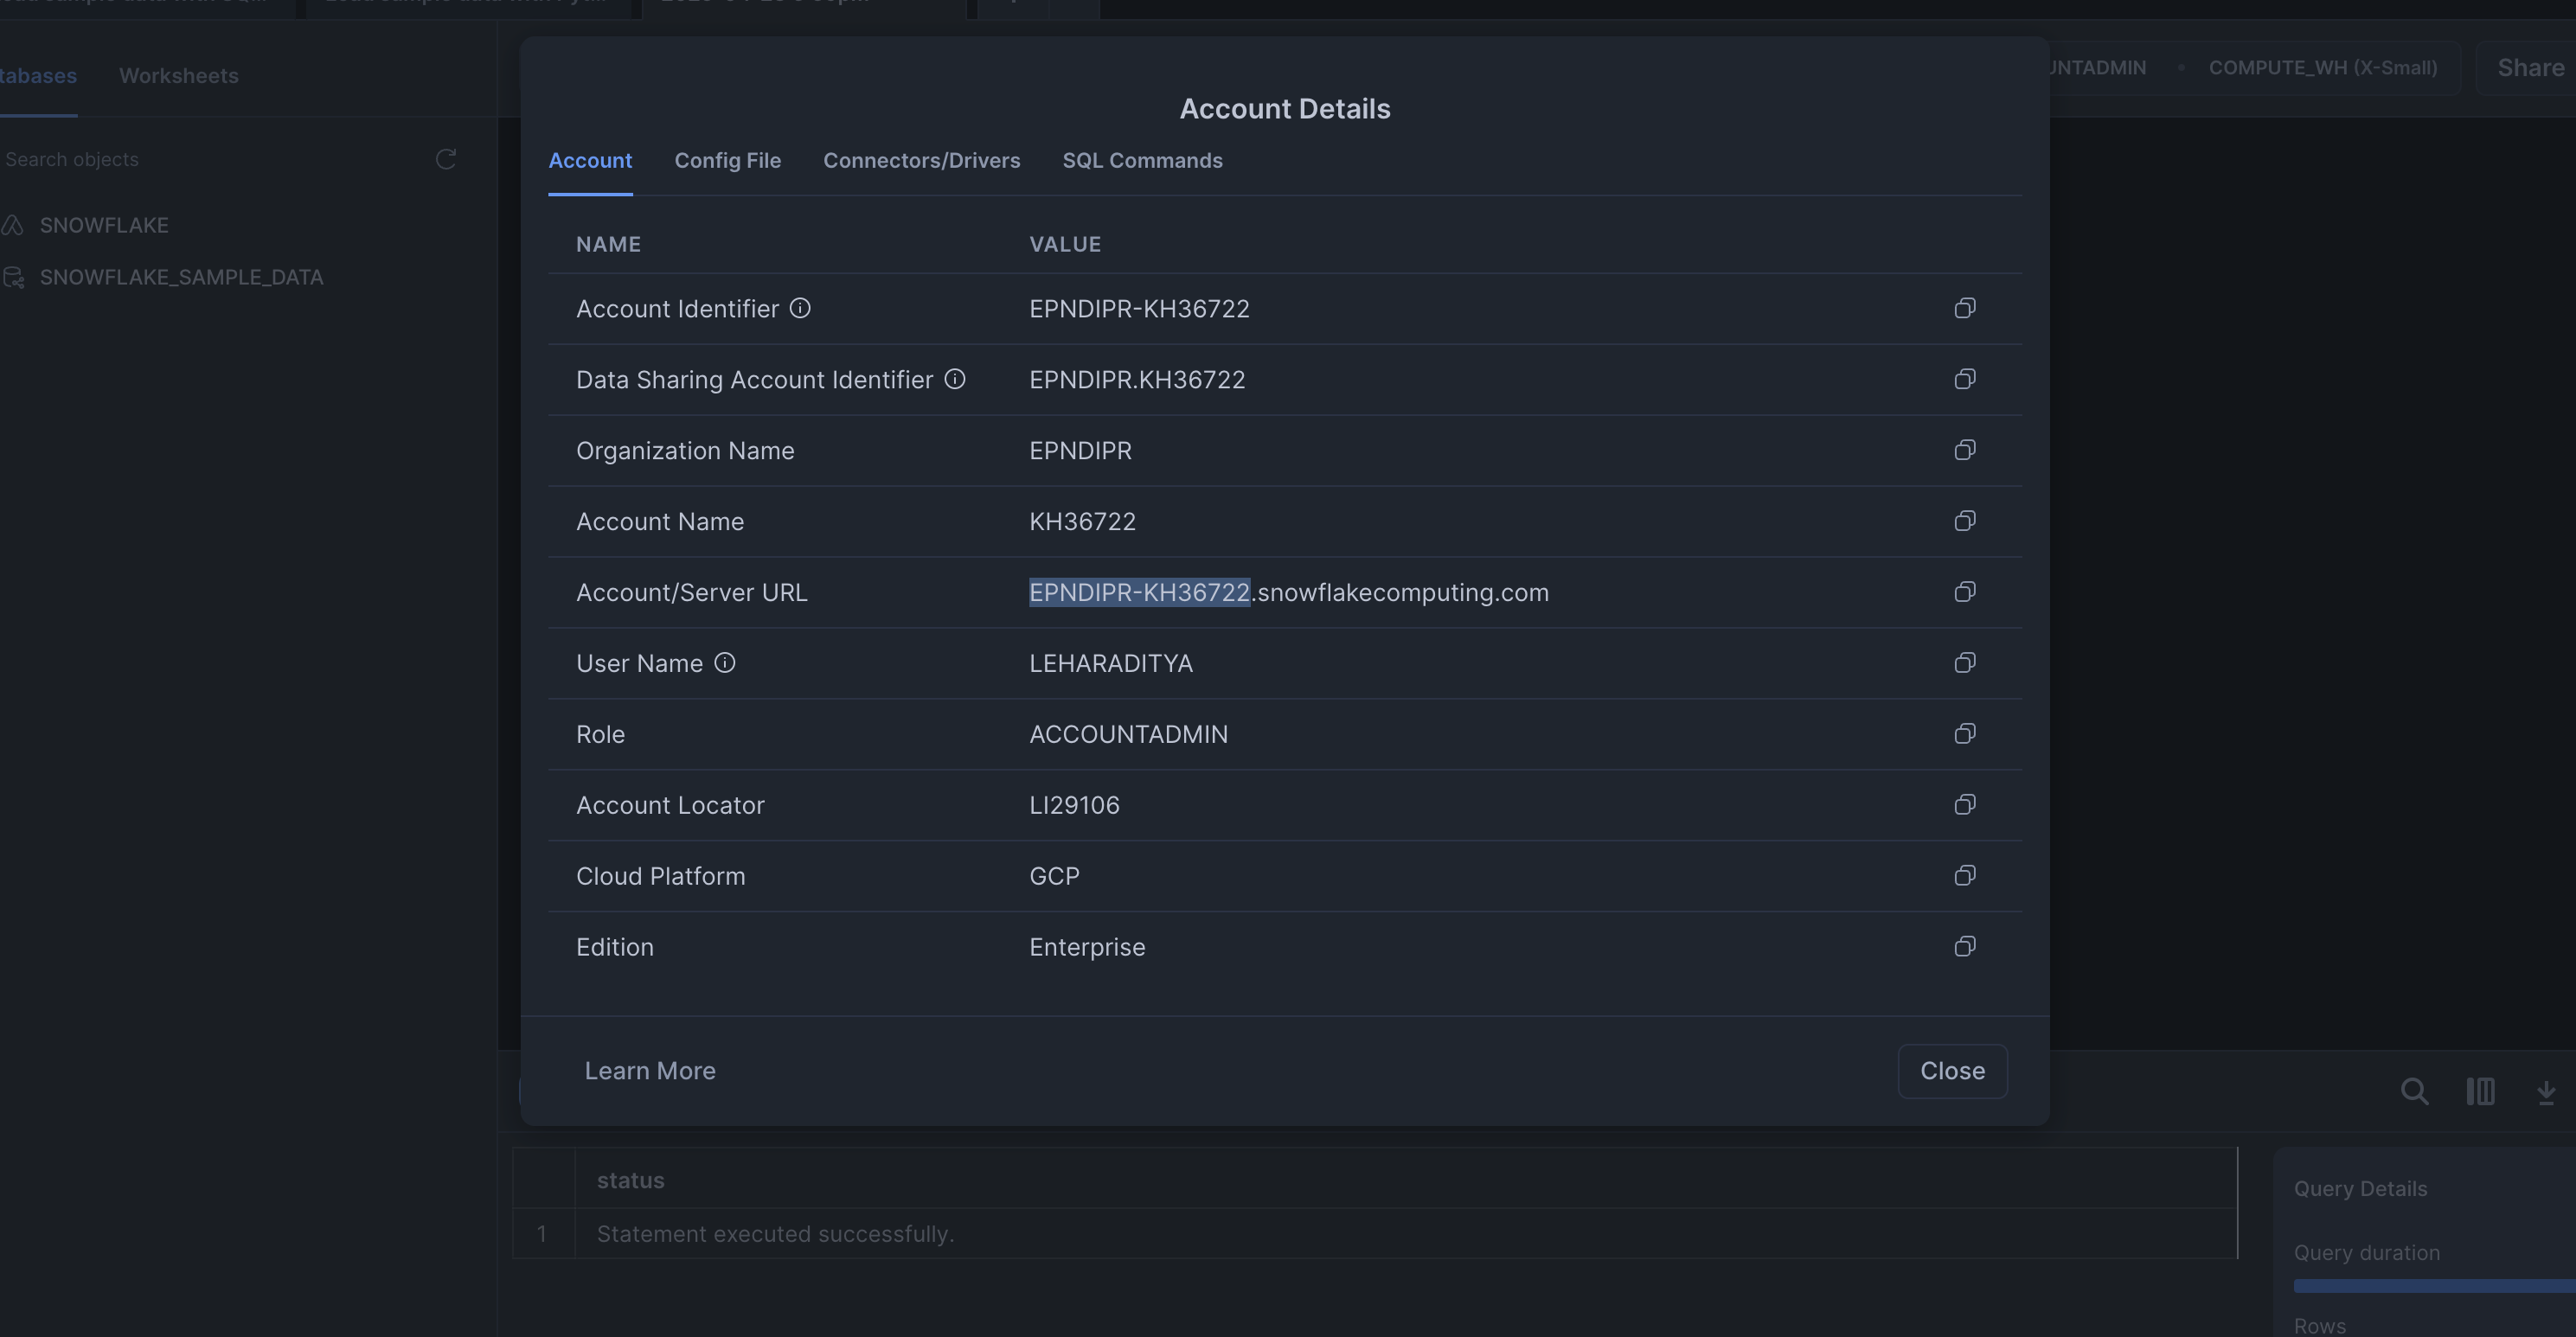
View account details as shown in the screenshot below.https://{subdomain}.snowflakecomputing.comYou may also note the User name.8
Fill up the form
Once you are done filling up 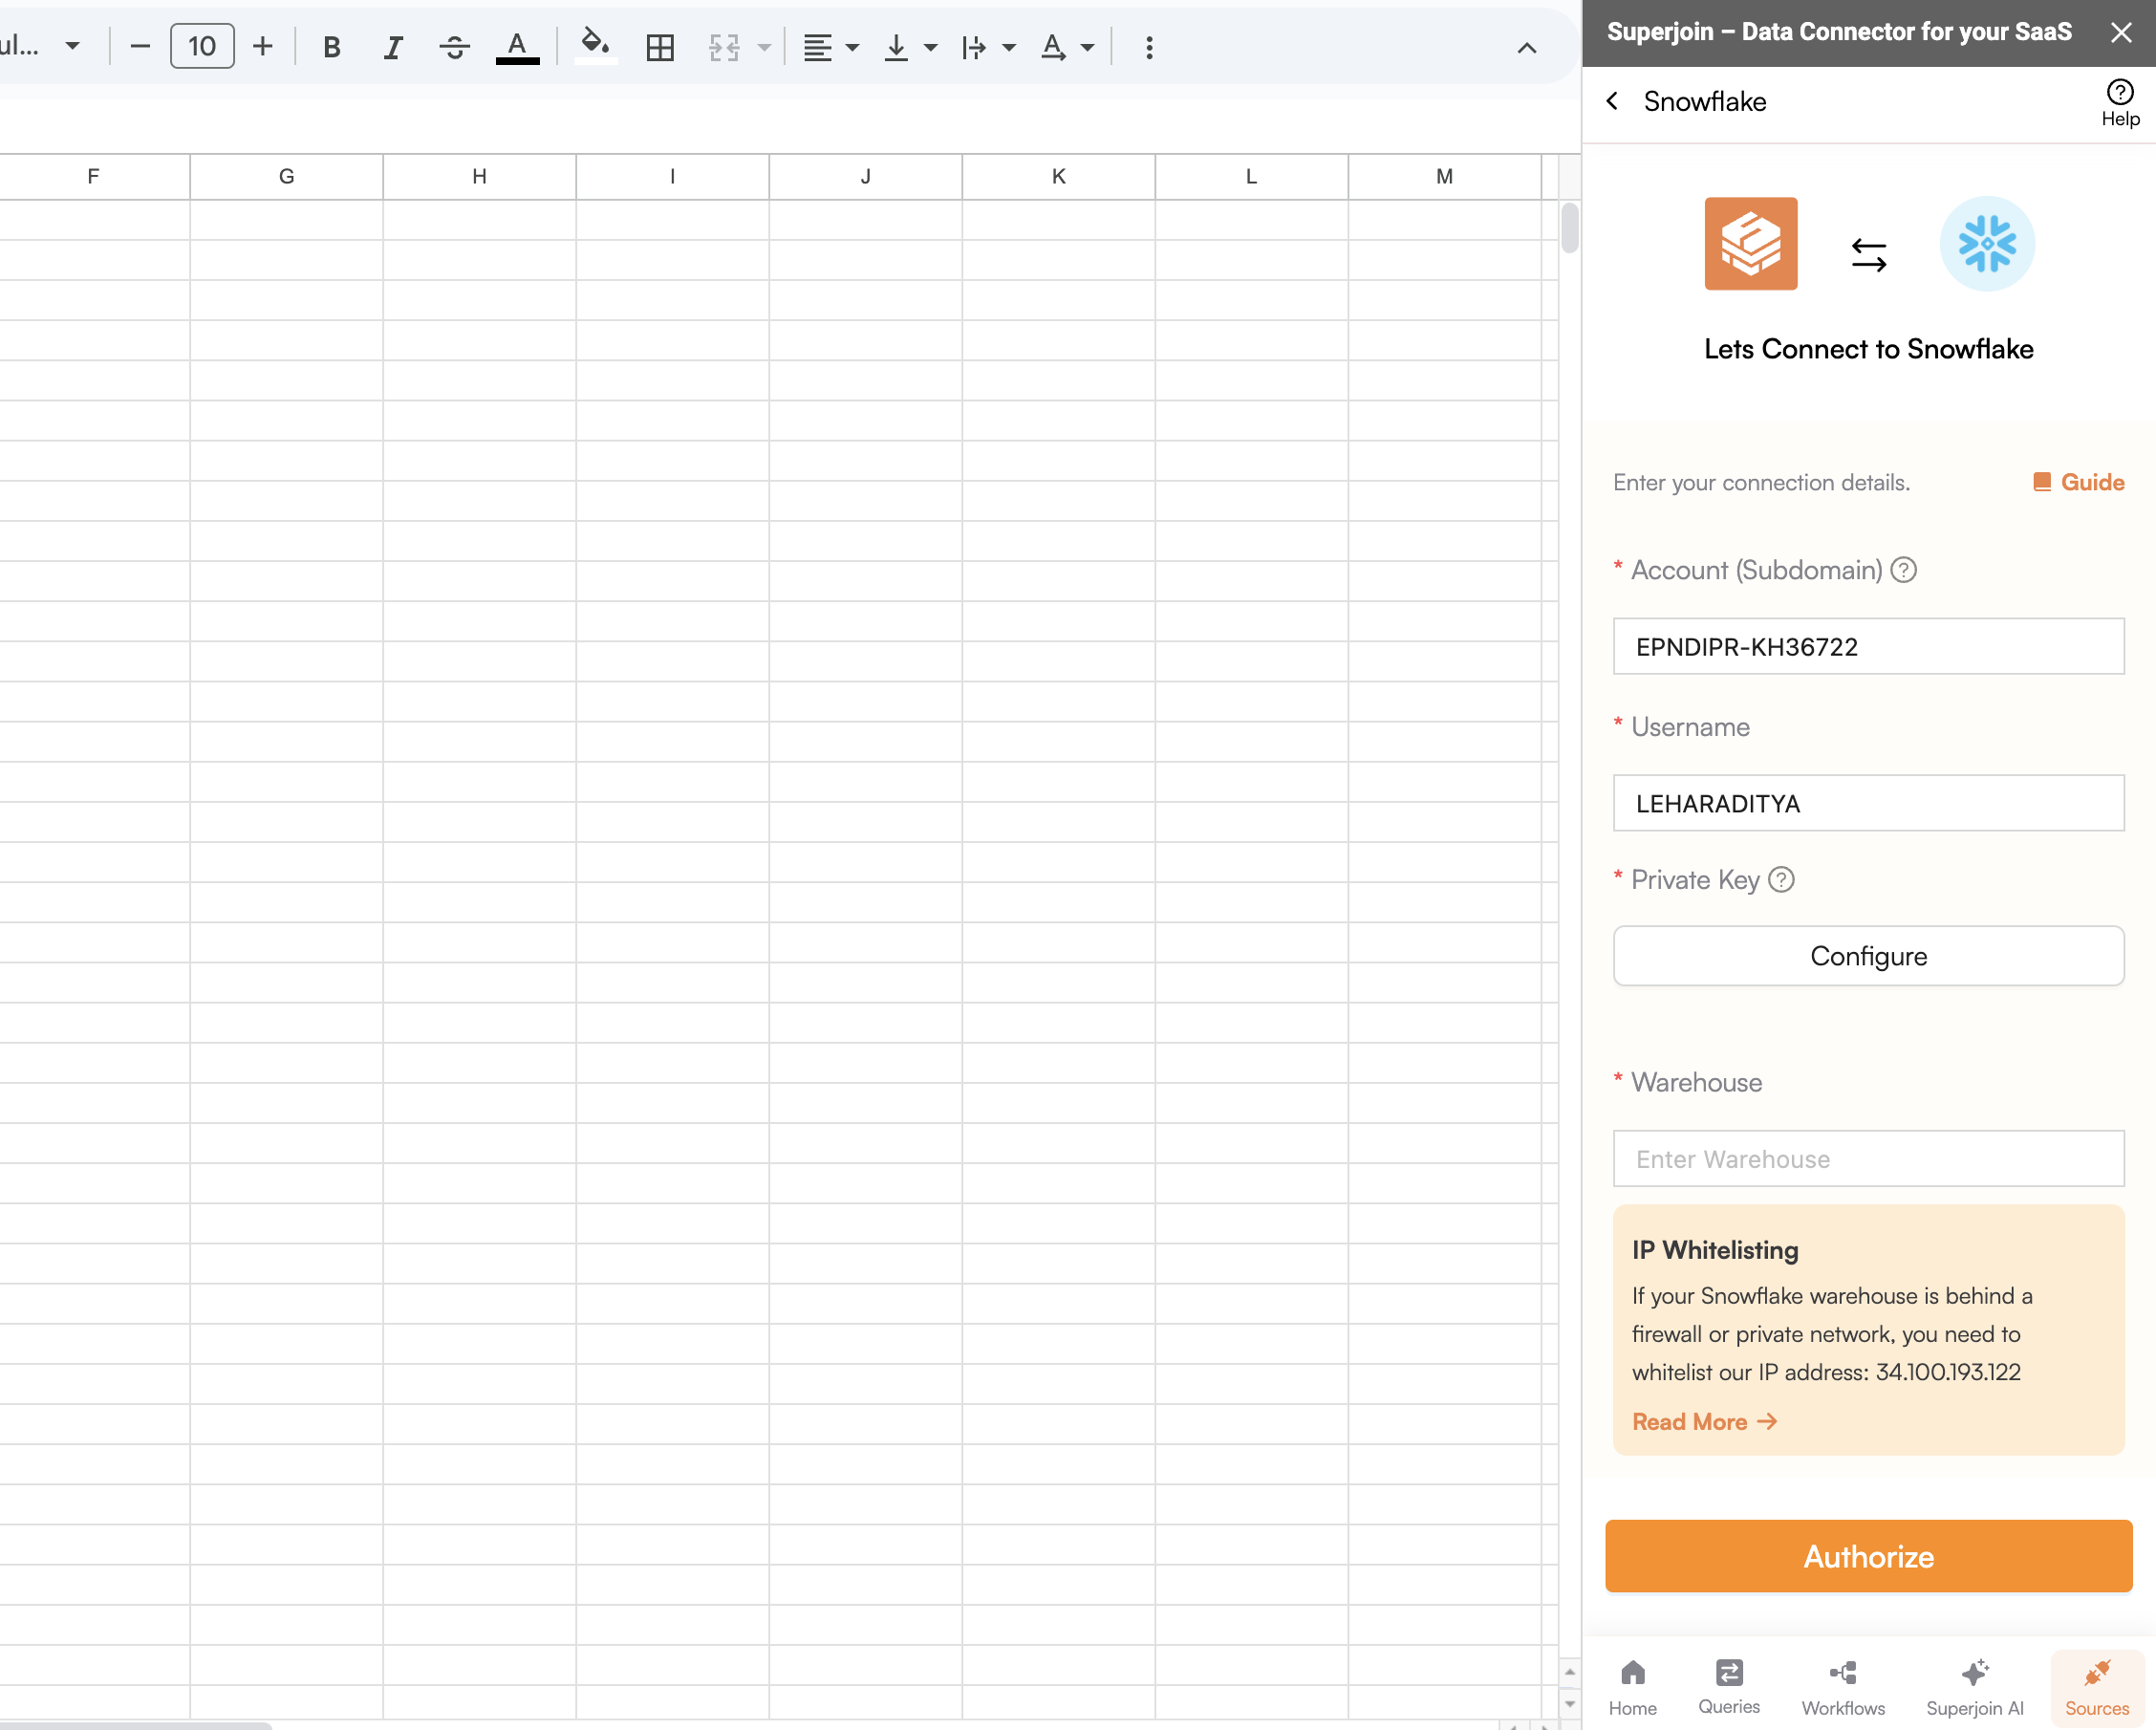
Account, User, and Warehouse, You can begin authorization. Click on Configure under Private Key.Snowflake supports RSA certificate for authorization.9
Provide your Private Key
Superjoin provides you 2 ways of authorization: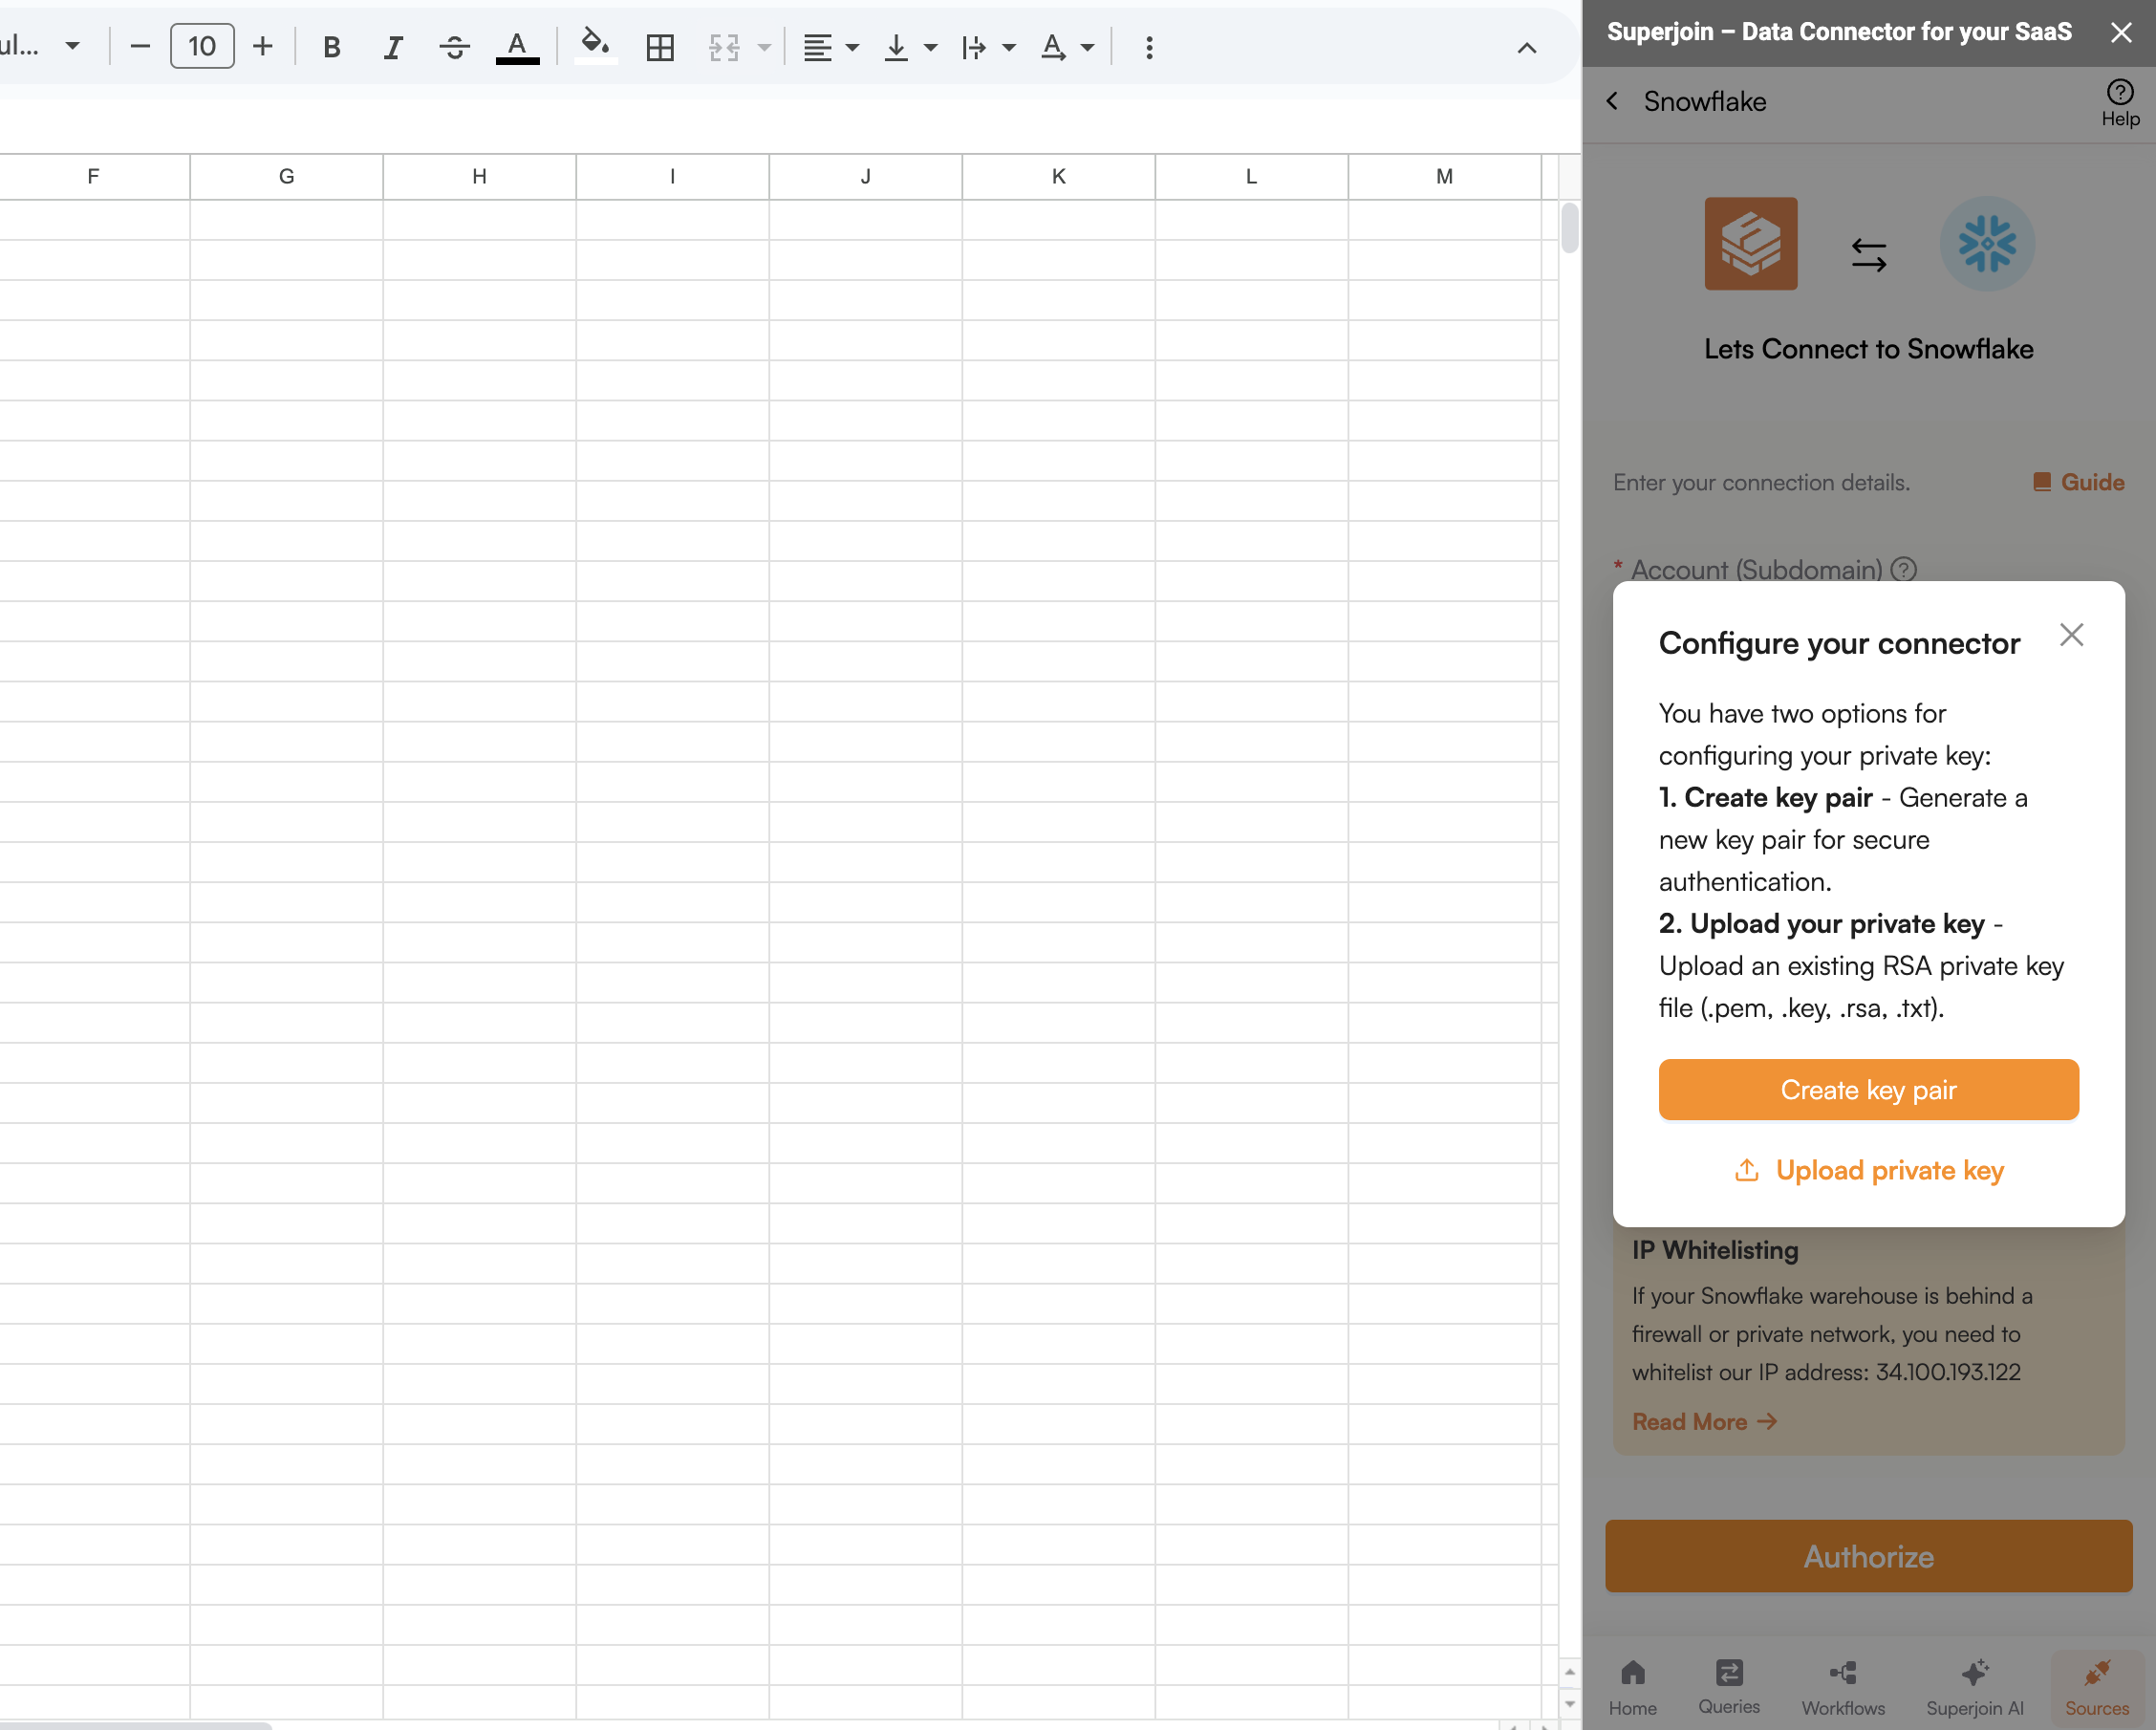
- Create Key Pair - Superjoin will create a key pair for you. We save the private key securely and provide you the public key. This public key has to be used in the Snowflake account.
- Upload Private Key - You can upload your private key file. We support both
encryptedandunencryptedprivate keys. We will generate a public key which you can use in the Snowflake account.
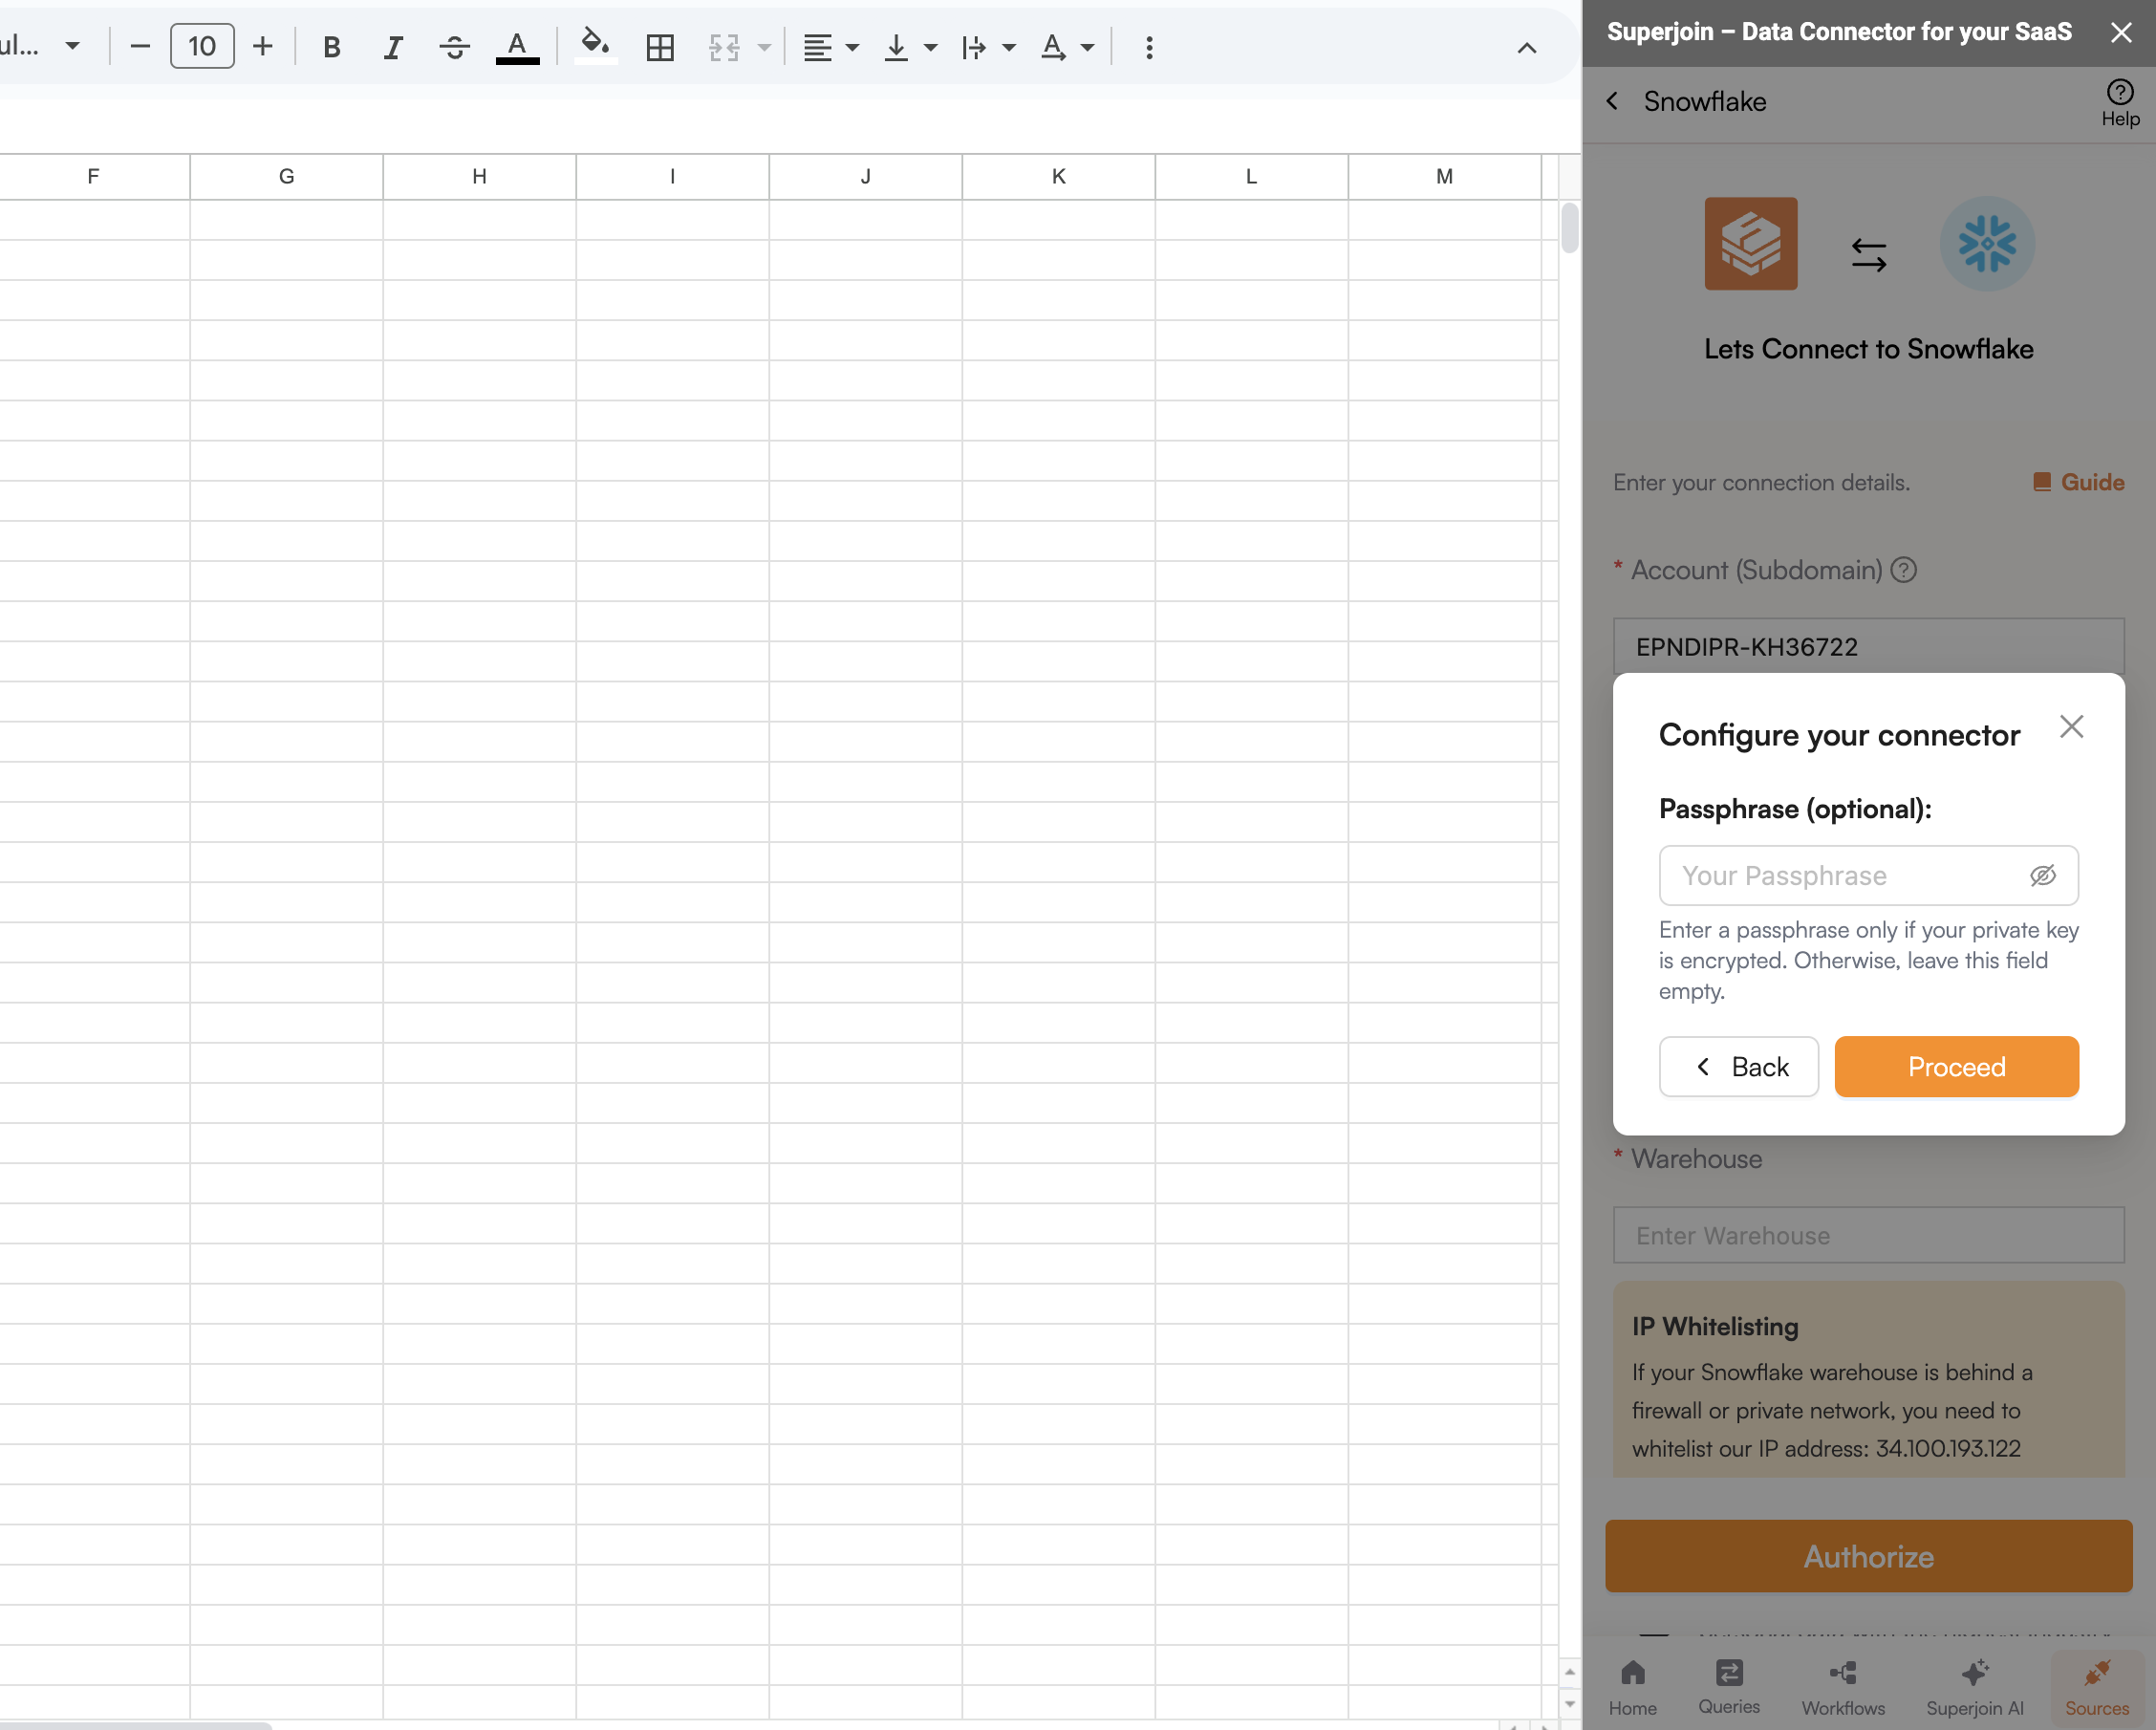
When uploading an encrypted private key, you will need to provide the passphrase.
All your credentials will be encrypted with the highest industry standards. Learn more
10
Using the public key
Once you have decided on the way you want to authorize, you will be presented with a public key.
This will allow us to communicate with your Snowflake account. You may copy the public key and add it to your Snowflake account.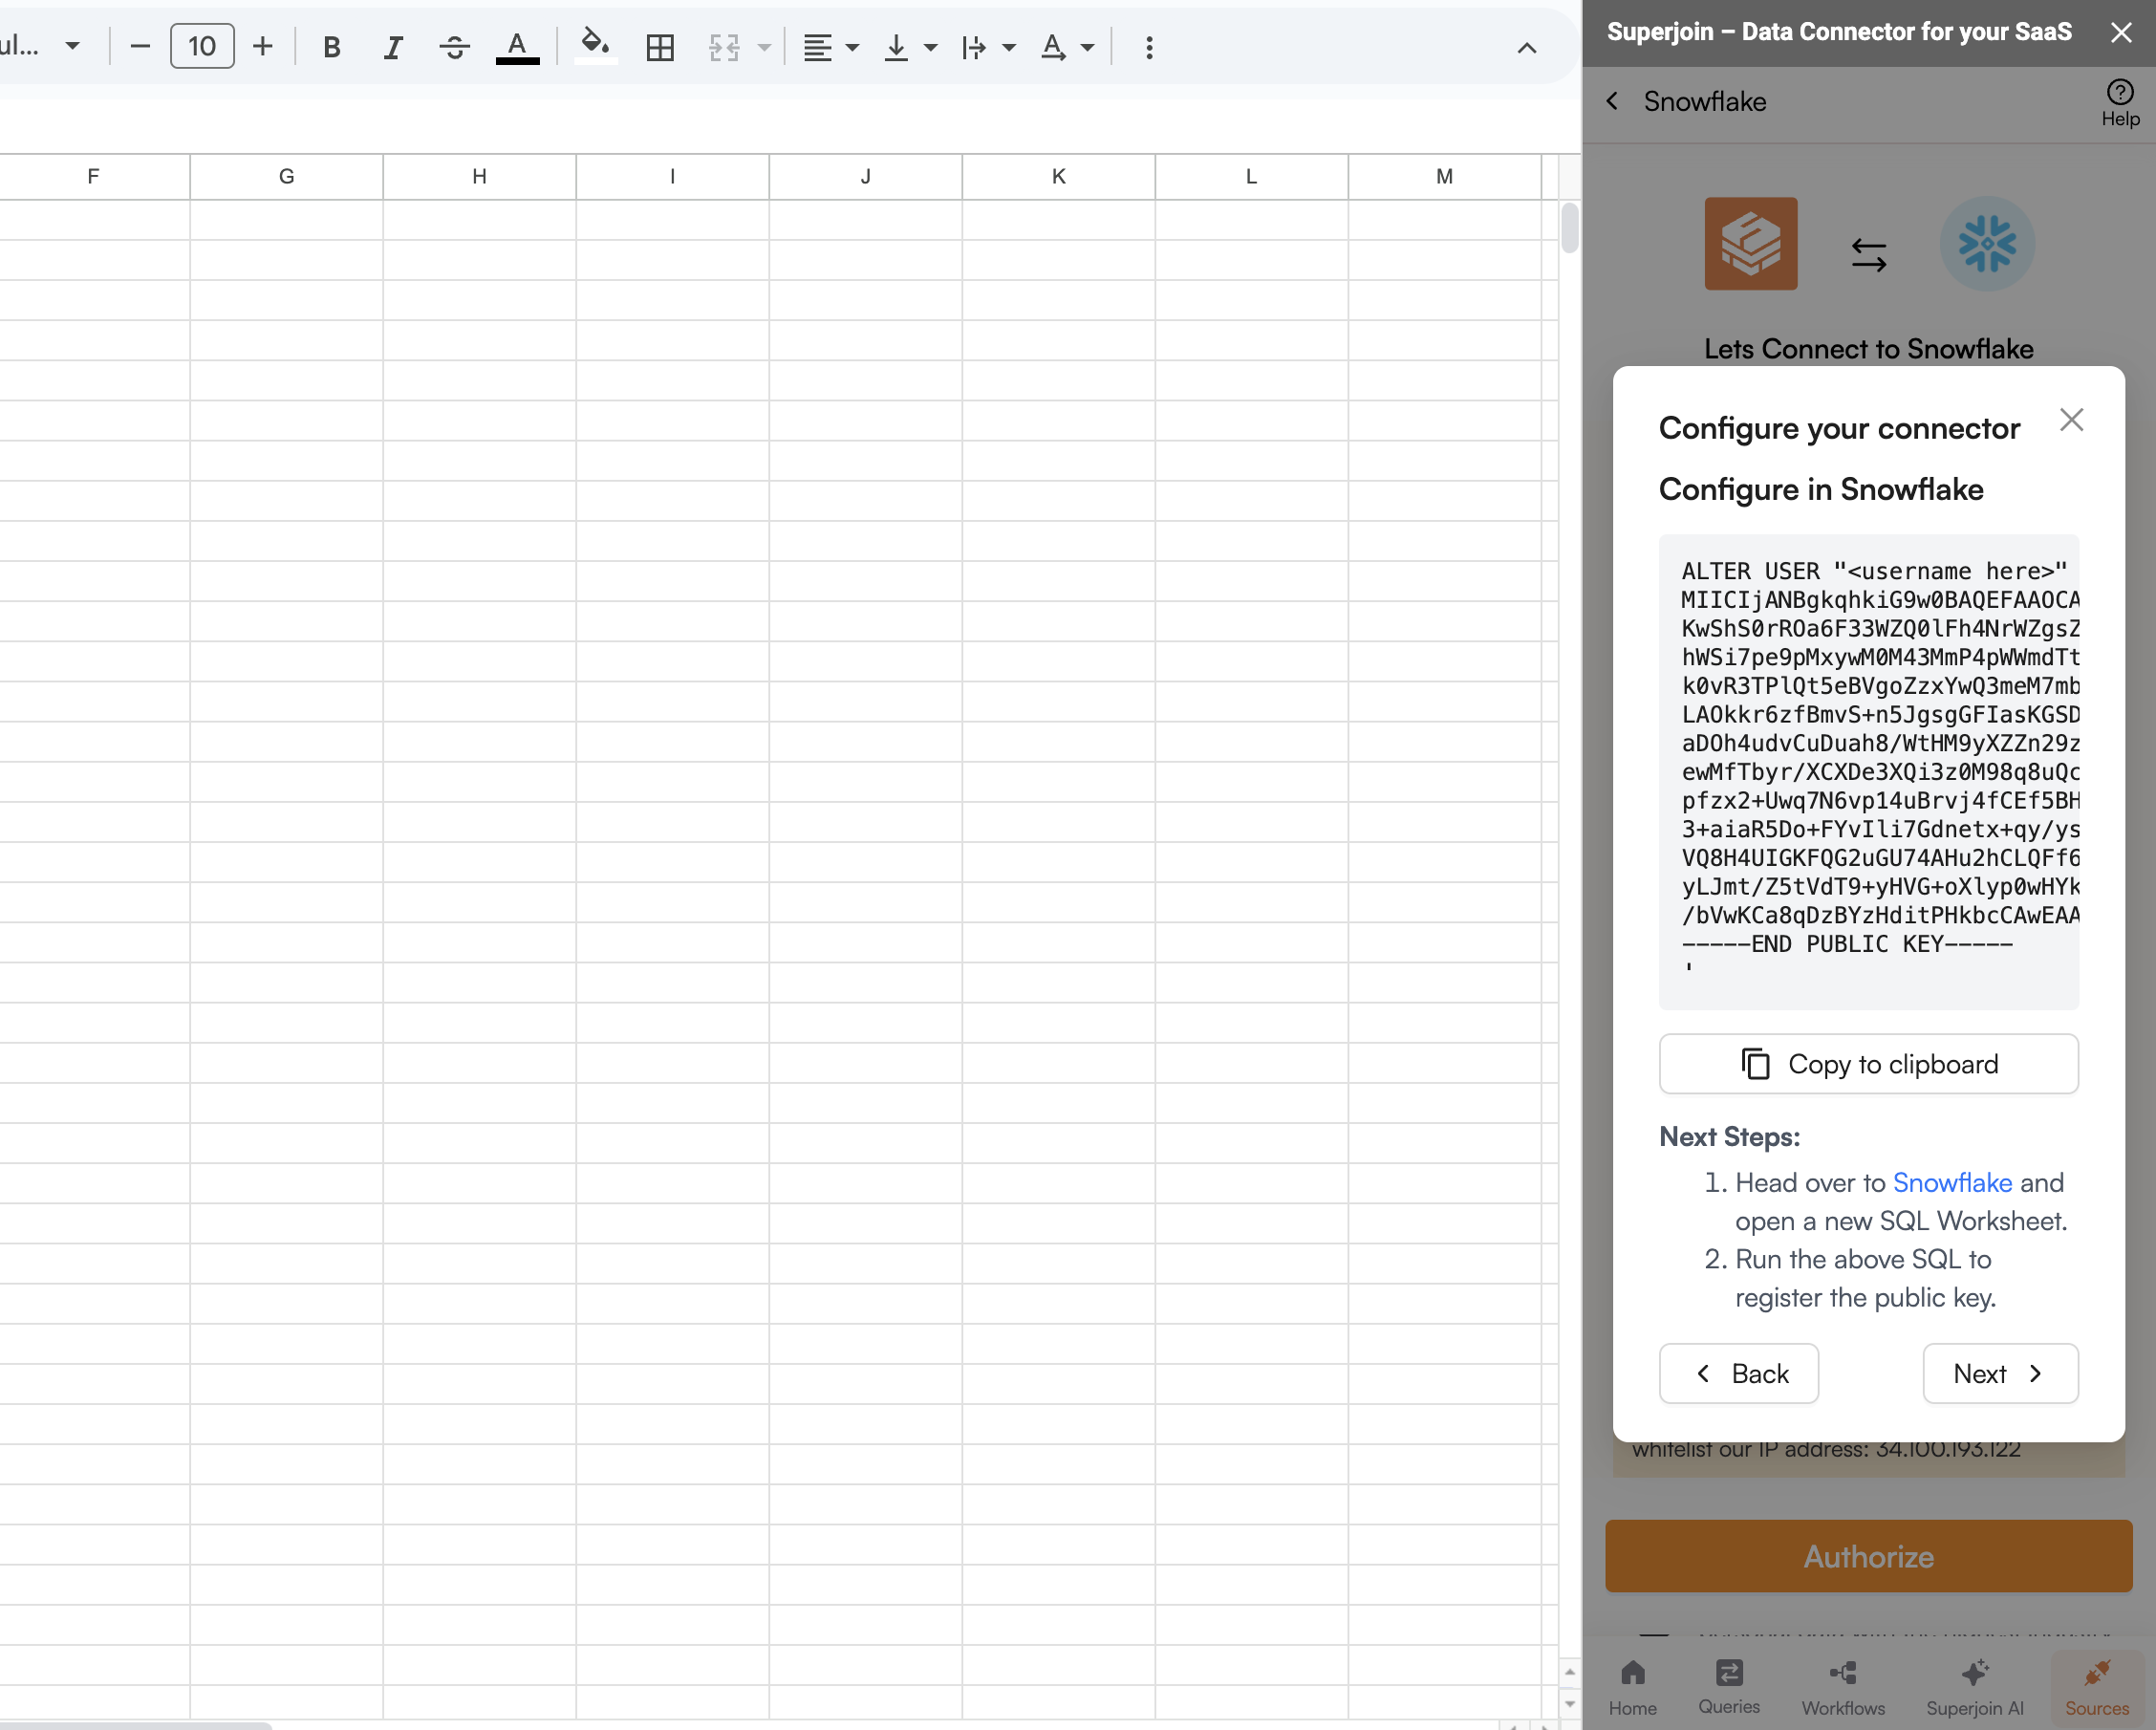
11
Adding the public key to Snowflake
After copying the public key, you can add it to your Snowflake account. Head over to Snowflake. Here you may create a new SQL Workspace. Then in the code editor, you can paste the public key. Make sure to replace 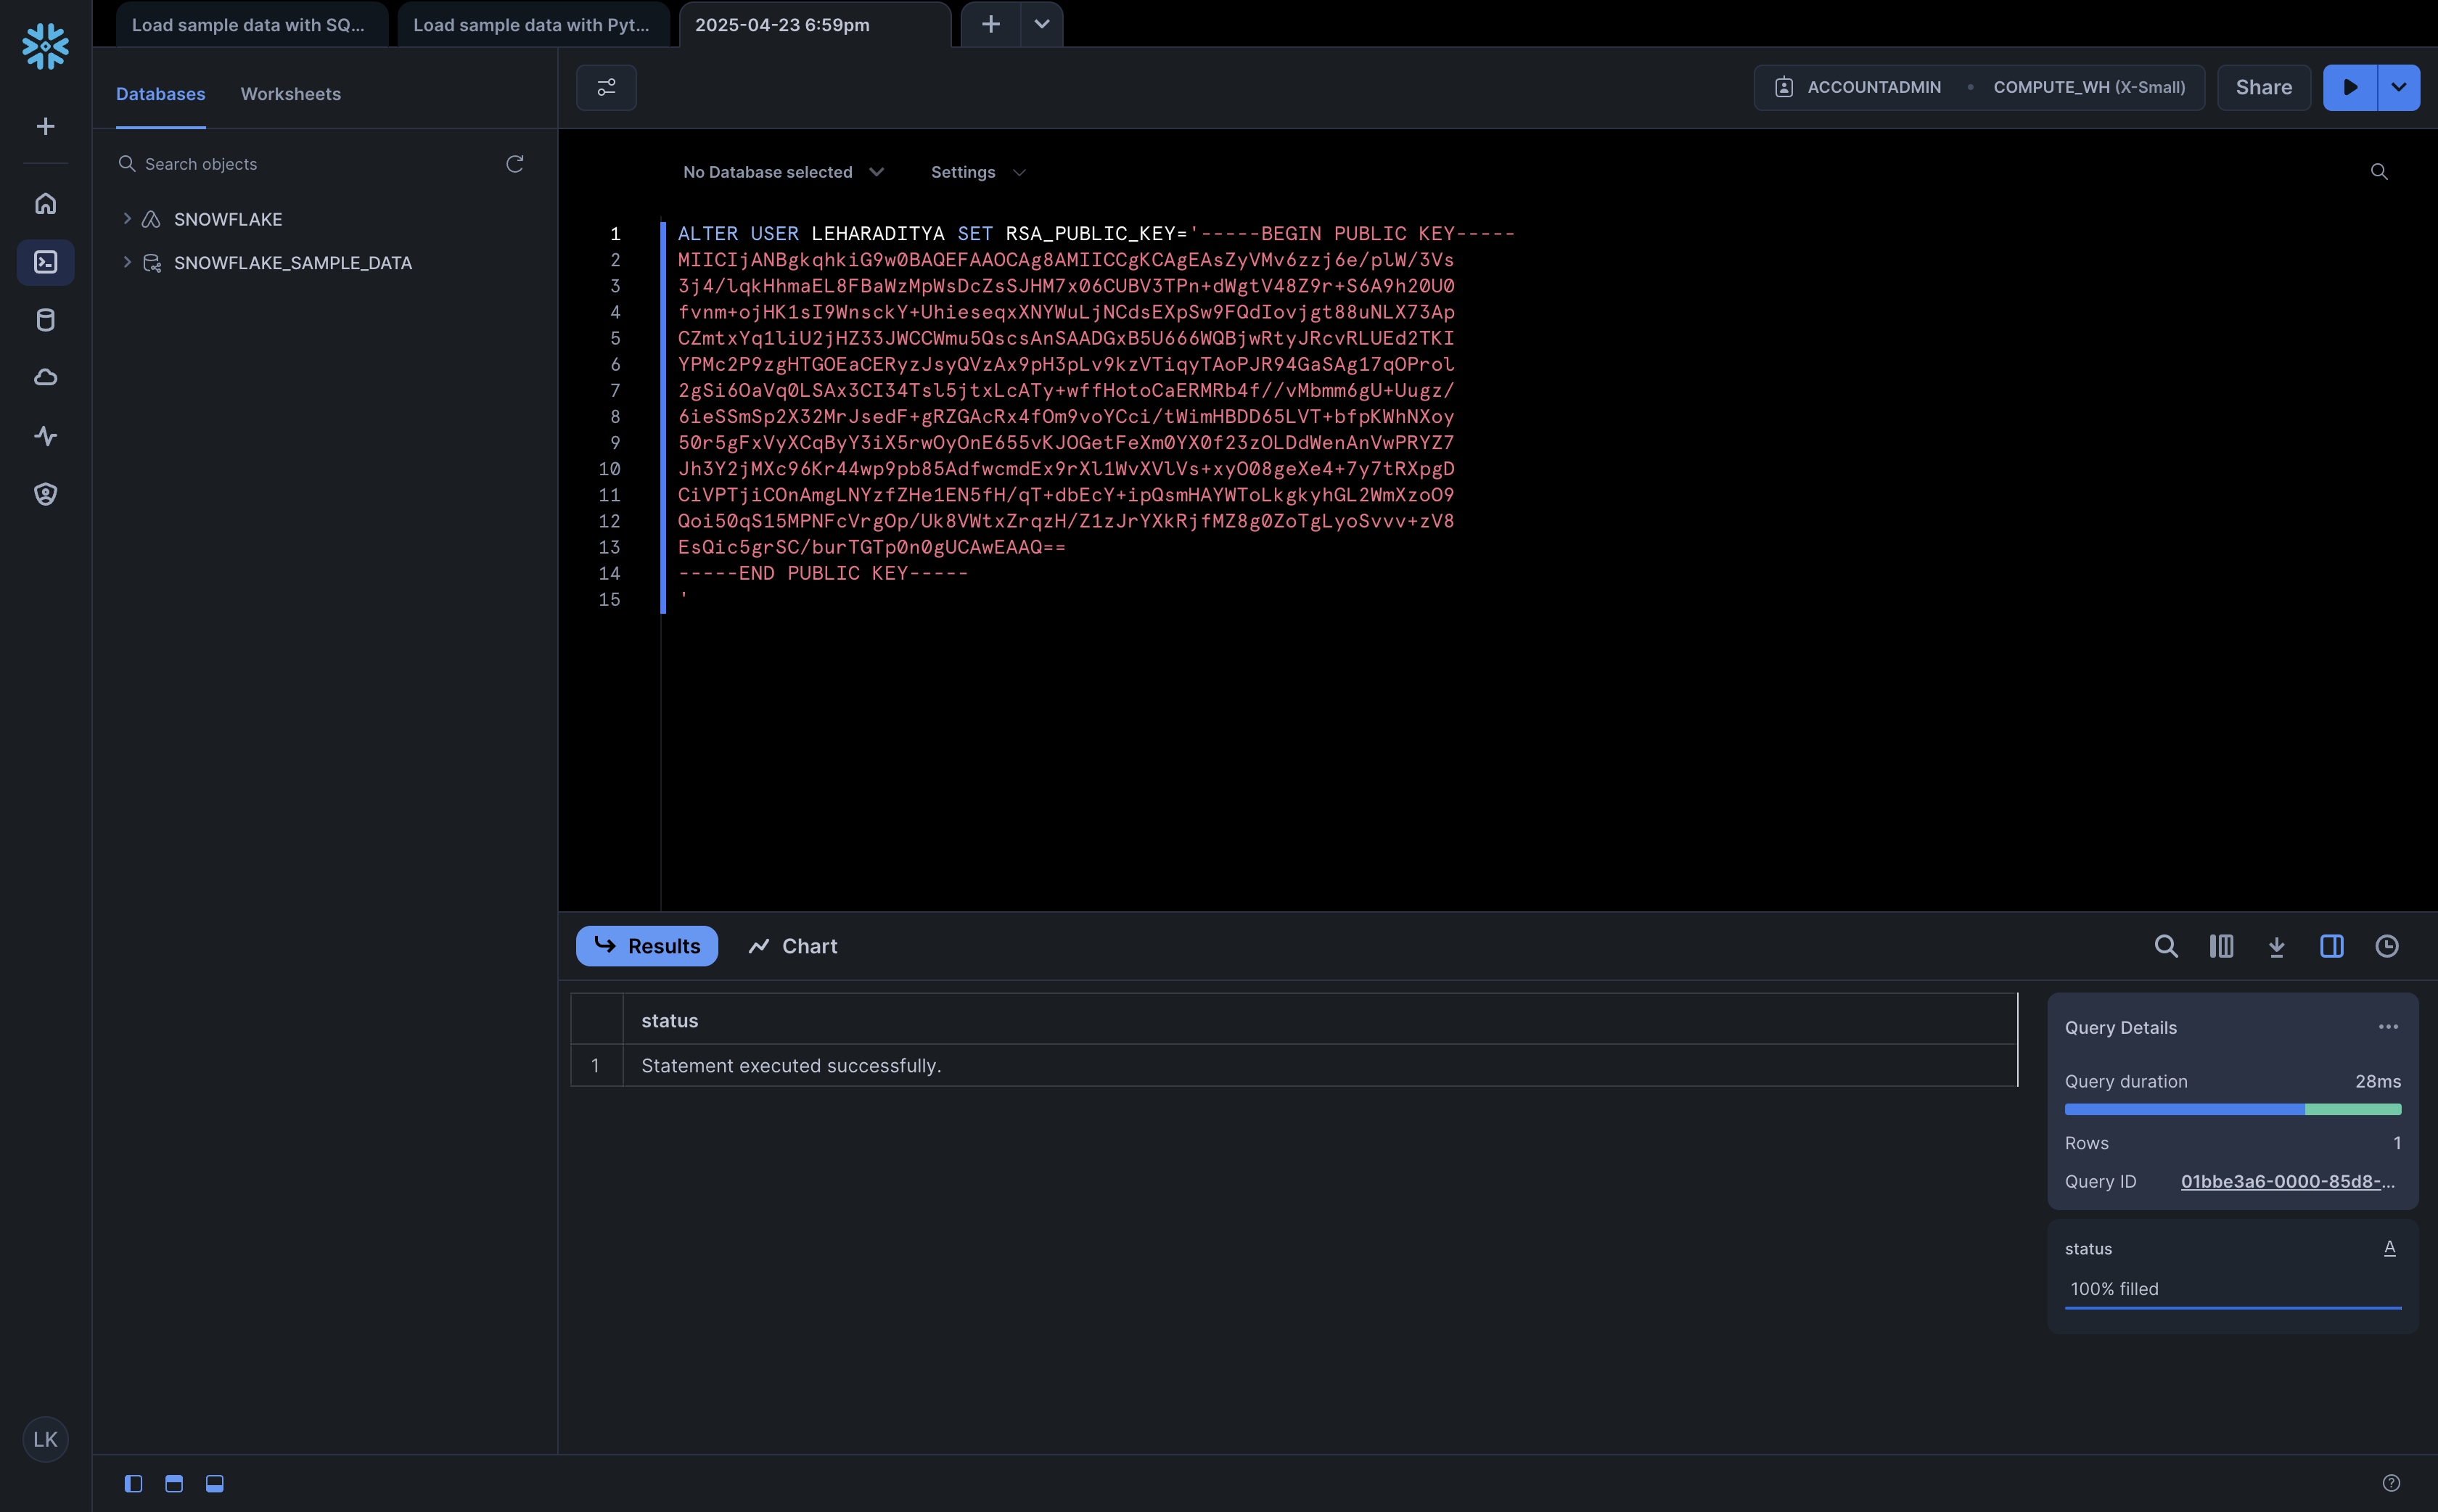
<username here> with your actual user name.12
Return to Superjoin
Once the query execution is successful, you can return to Superjoin. Clicking 
Next will close the modal window.
And you are all set to go! Click on Authorize to complete the process.