- Google Sheets
- Microsoft Excel
Understanding Upserts in HubSpot
What is an Upsert? An upsert operation allows you to both insert new records and update existing ones in a single action.Why can’t we use HubSpot Record IDs? HubSpot’s native Record IDs are read-only fields. This means:- ✅ You can use them to update existing records
- ❌ You cannot use them to insert new records (because new records don’t have Record IDs yet)
Supported Objects: Upserts are available for the following HubSpot objects:CRM Objects: Contacts, Companies, Deals, Leads, TicketsCommerce Objects: Products, Quotes, Line Items, Carts, Discounts, Fees, Invoices, Orders, TaxesEngagement Objects: Calls, Emails, Meetings, Notes, Tasks, Communications, Postal Mails
Part 1: Setup in HubSpot
Why are we doing this? We need to create a custom unique identifier field in HubSpot that works for both new and existing records, since the built-in Record ID cannot be used for inserts.
1
Click Settings in HubSpot
Click the 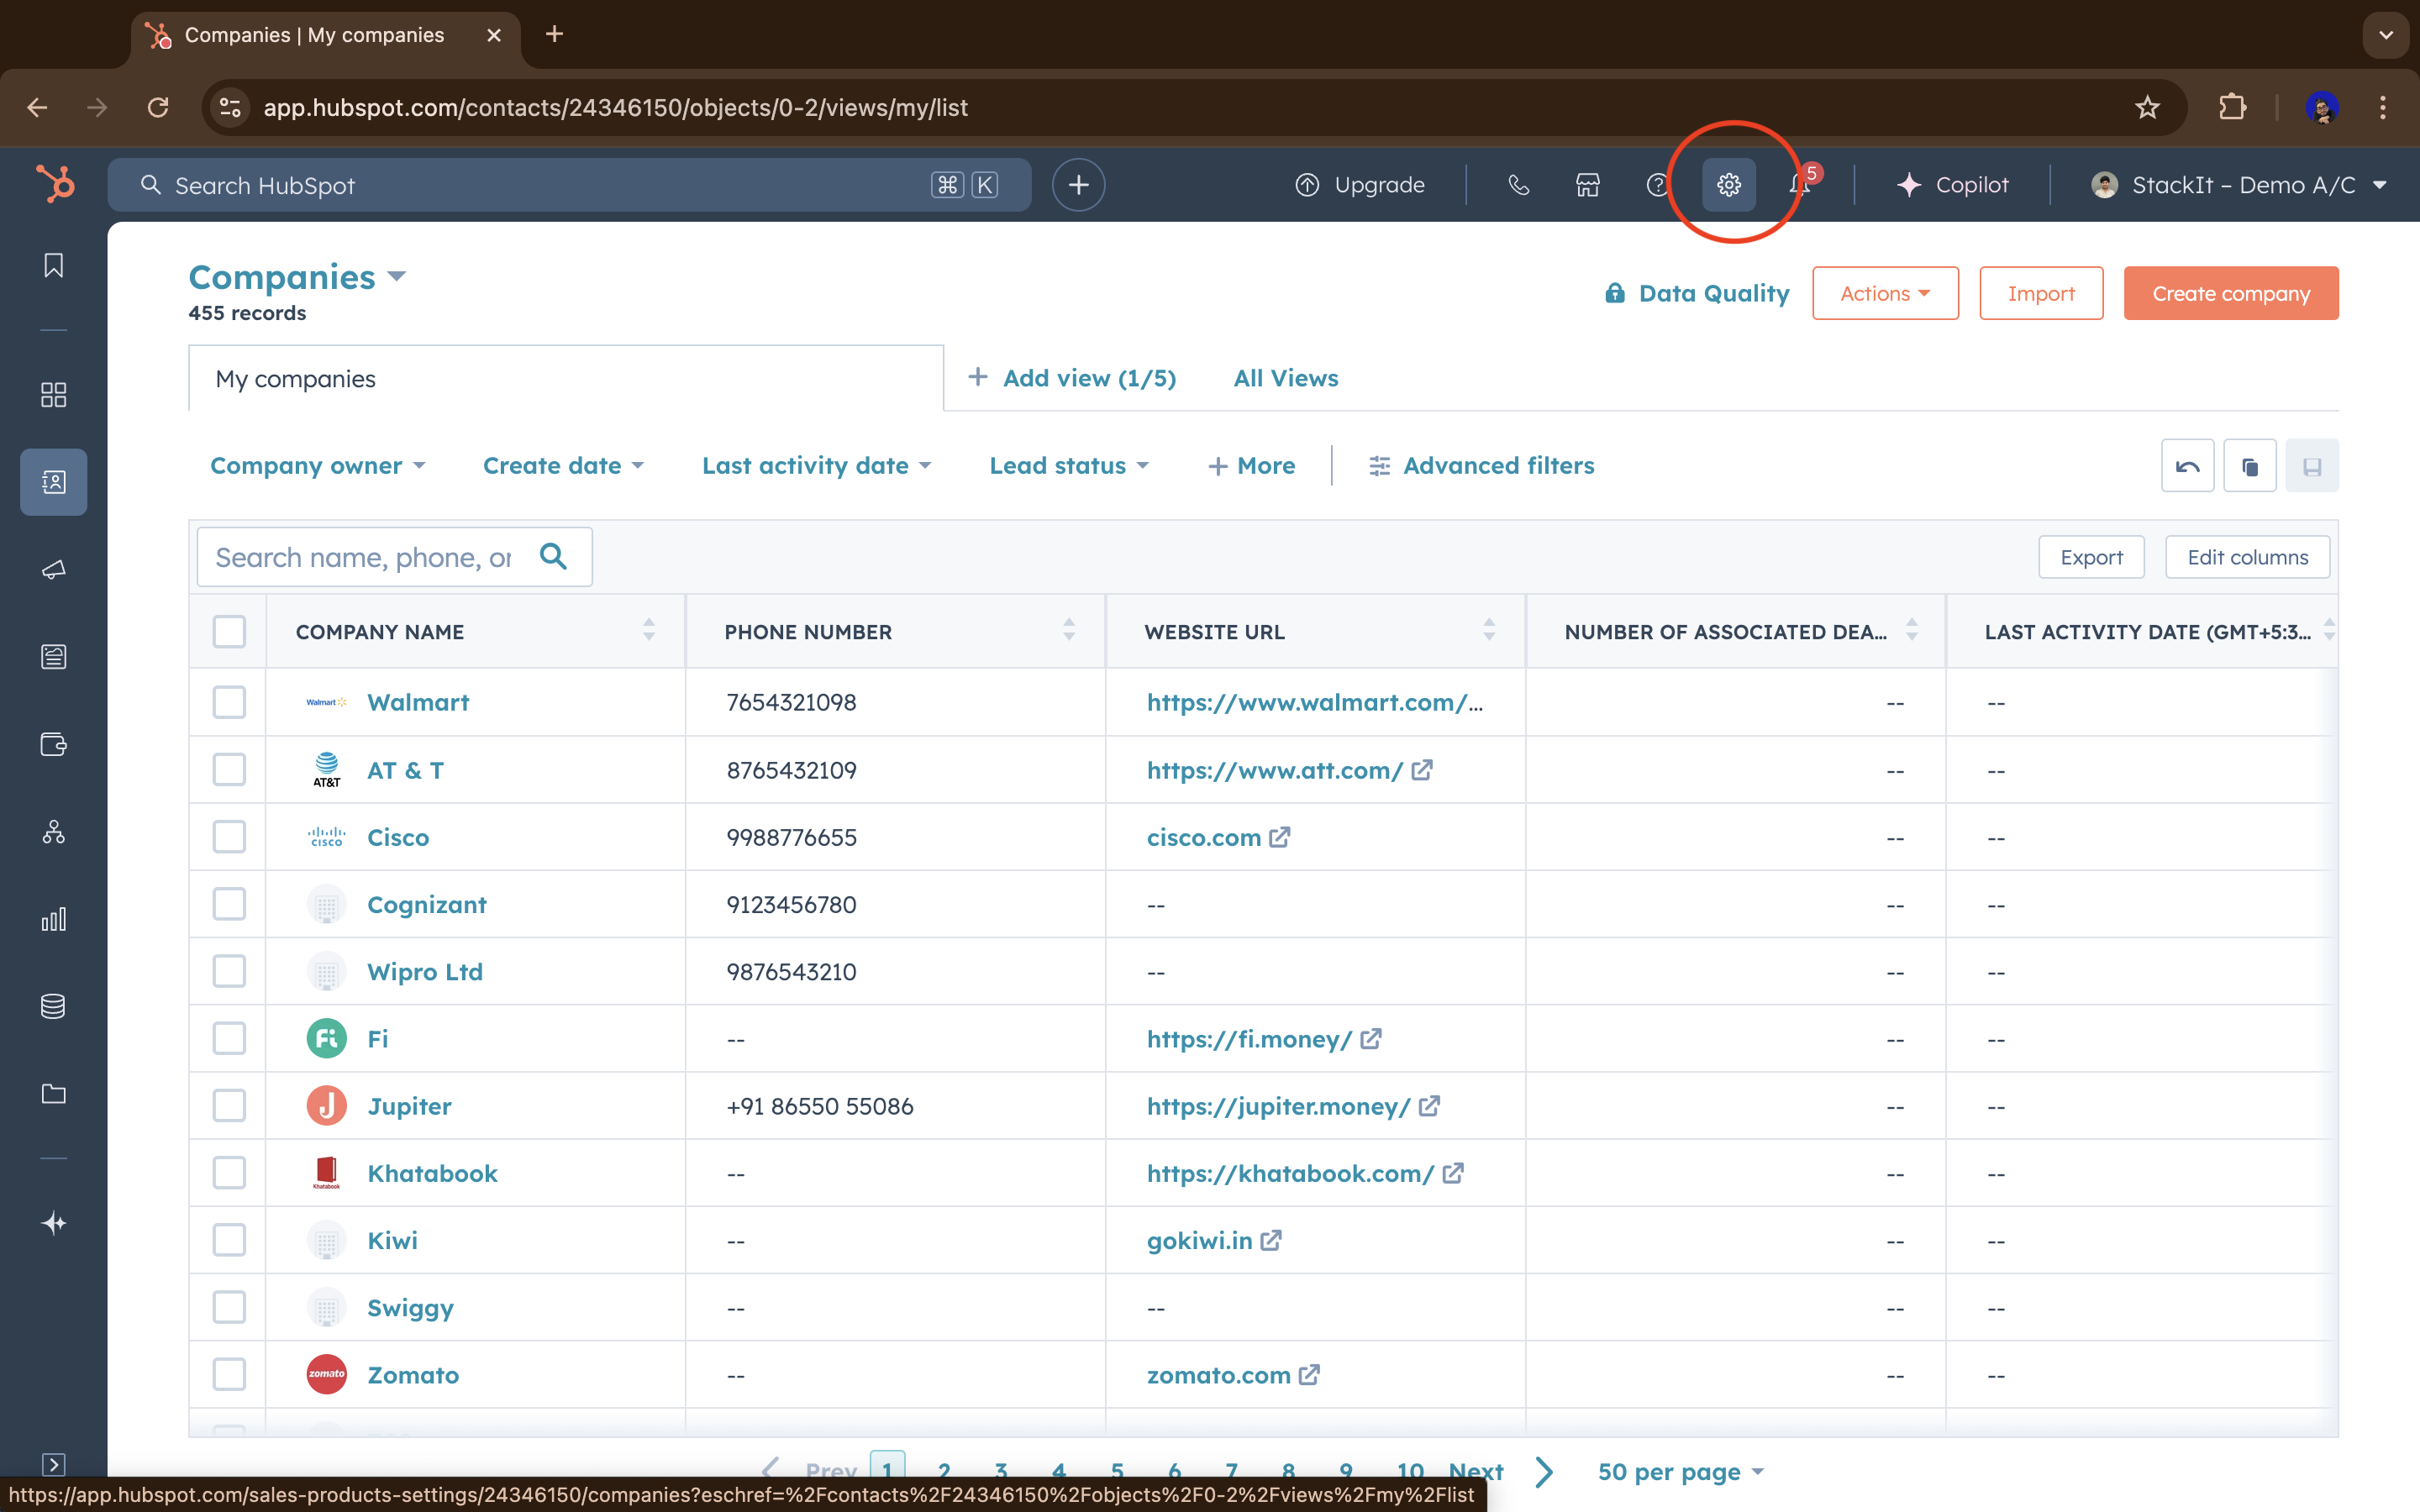
Settings button that’s on the navigation bar.2
Navigate to Properties
Scroll down the Settings sidebar menu on the left and click on 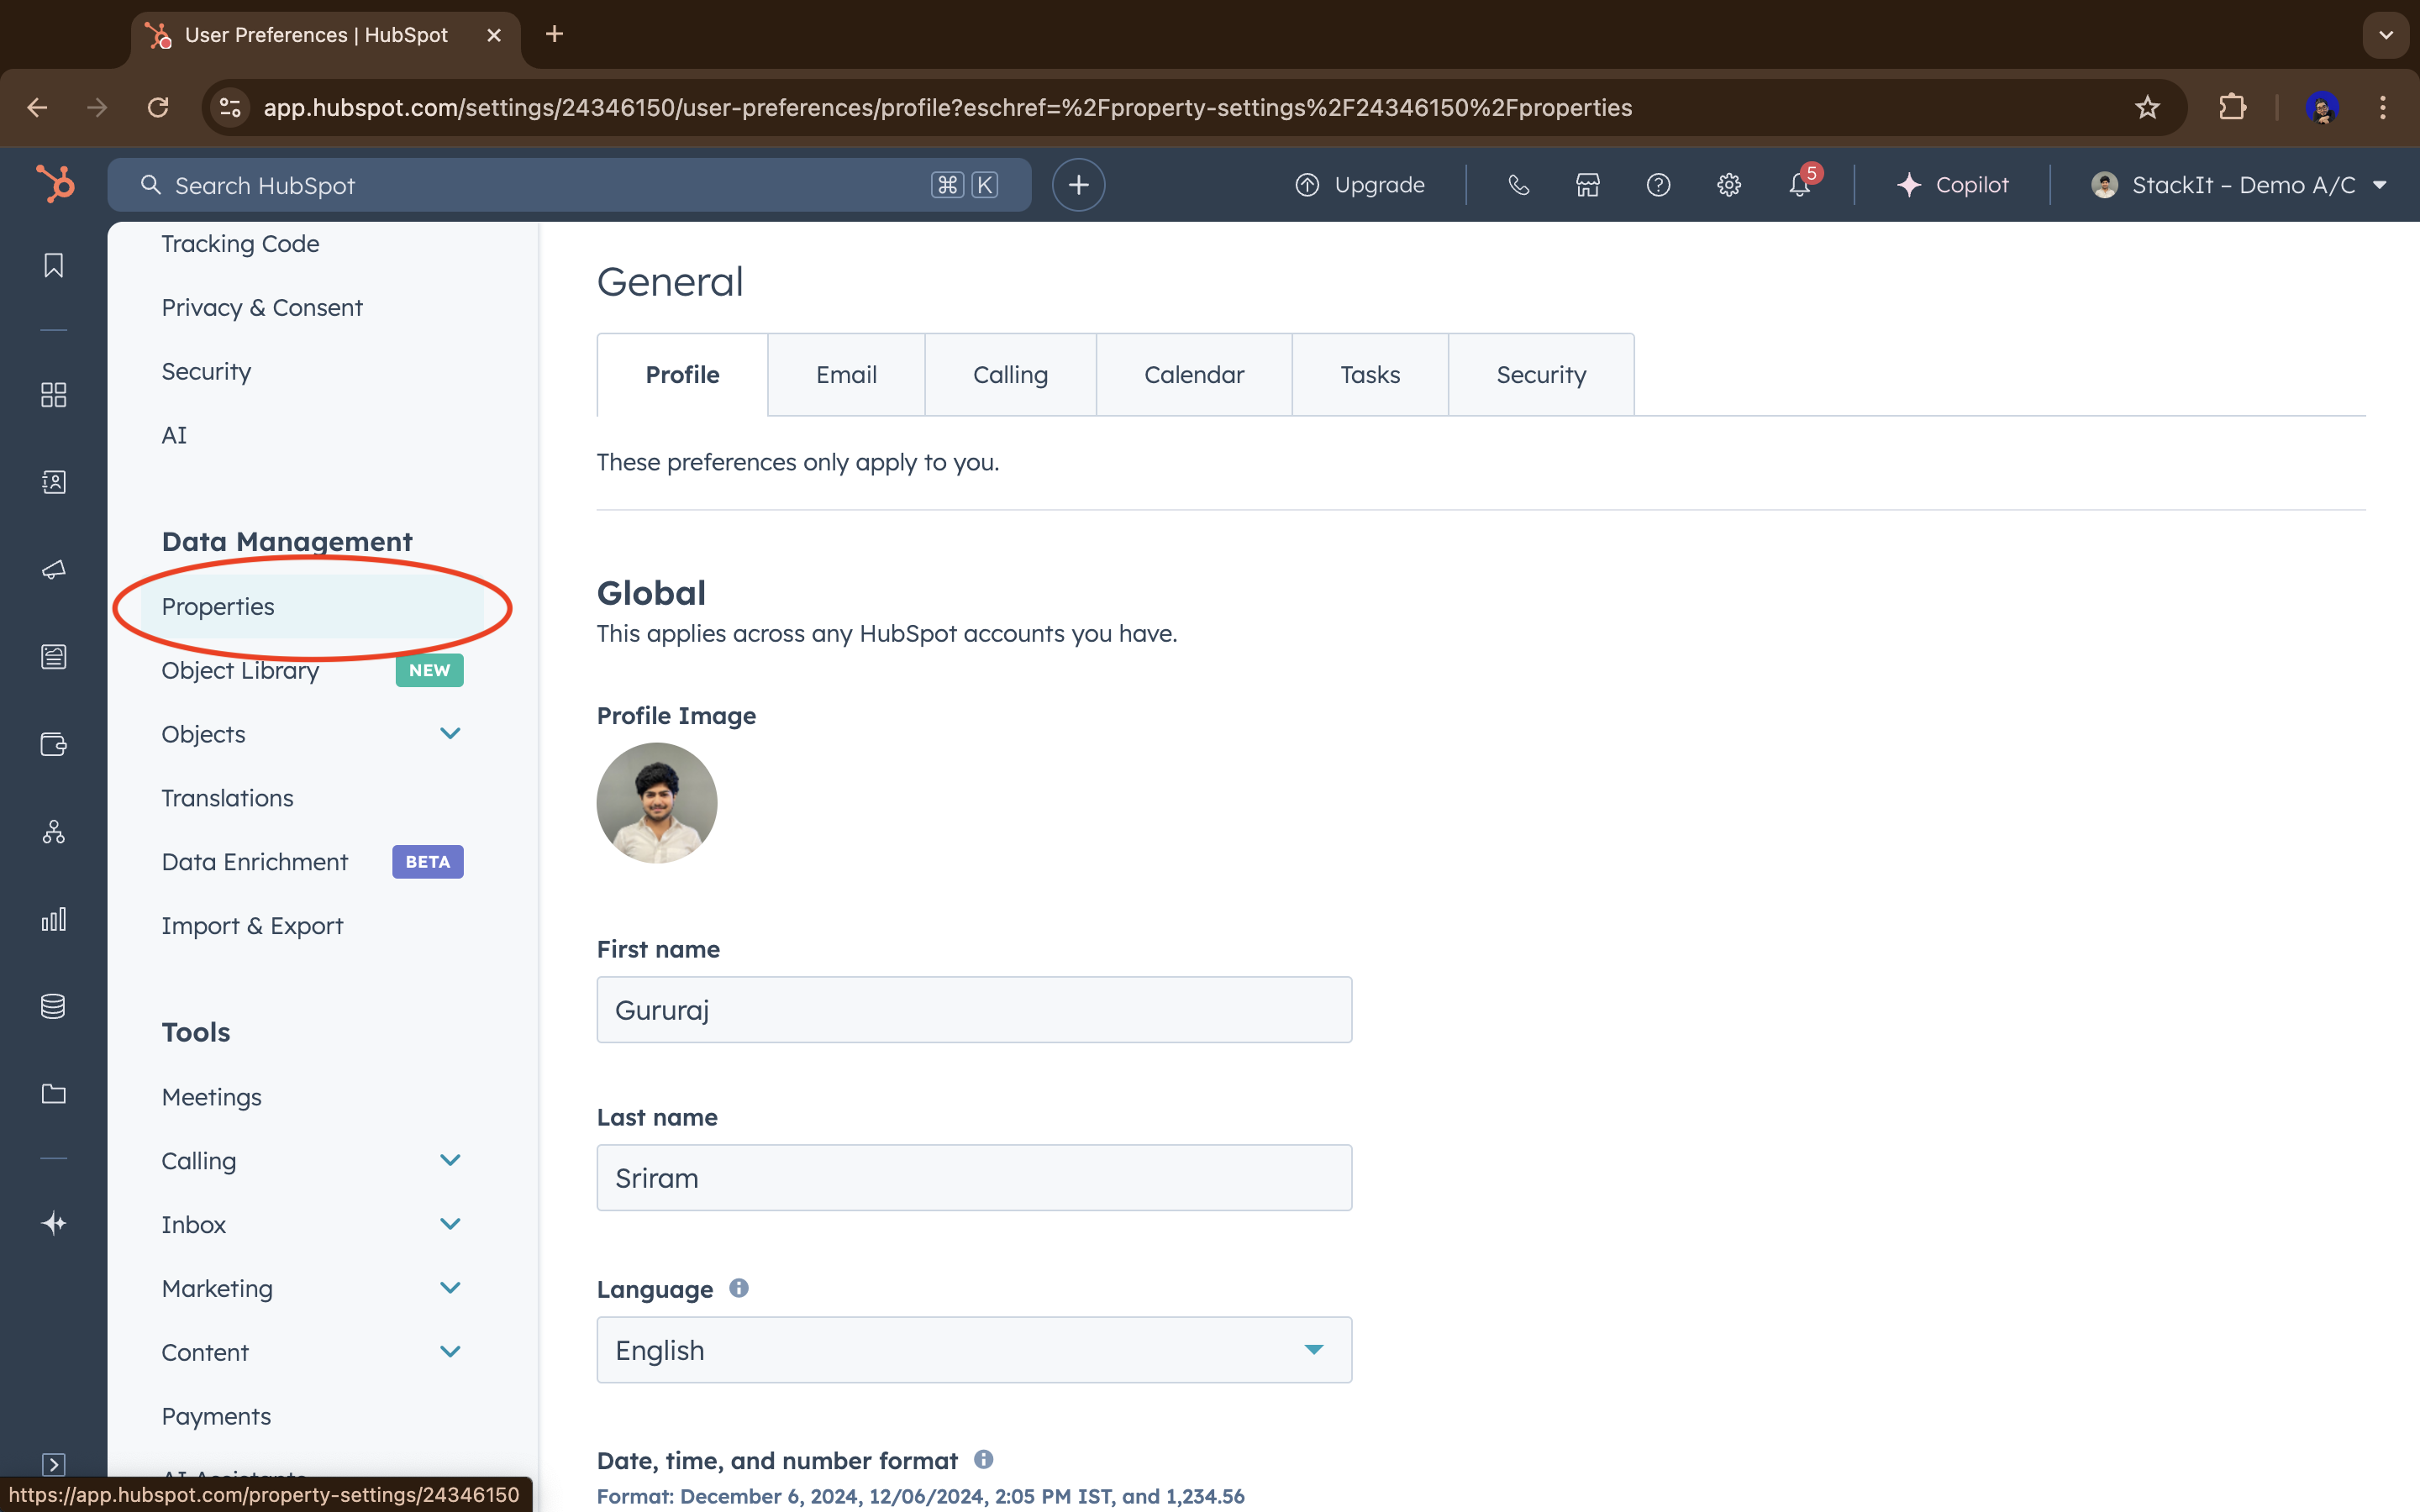
Properties3
Create a new property
Select the Object in which you want to create this new field in then click on the orange colored button on the right called 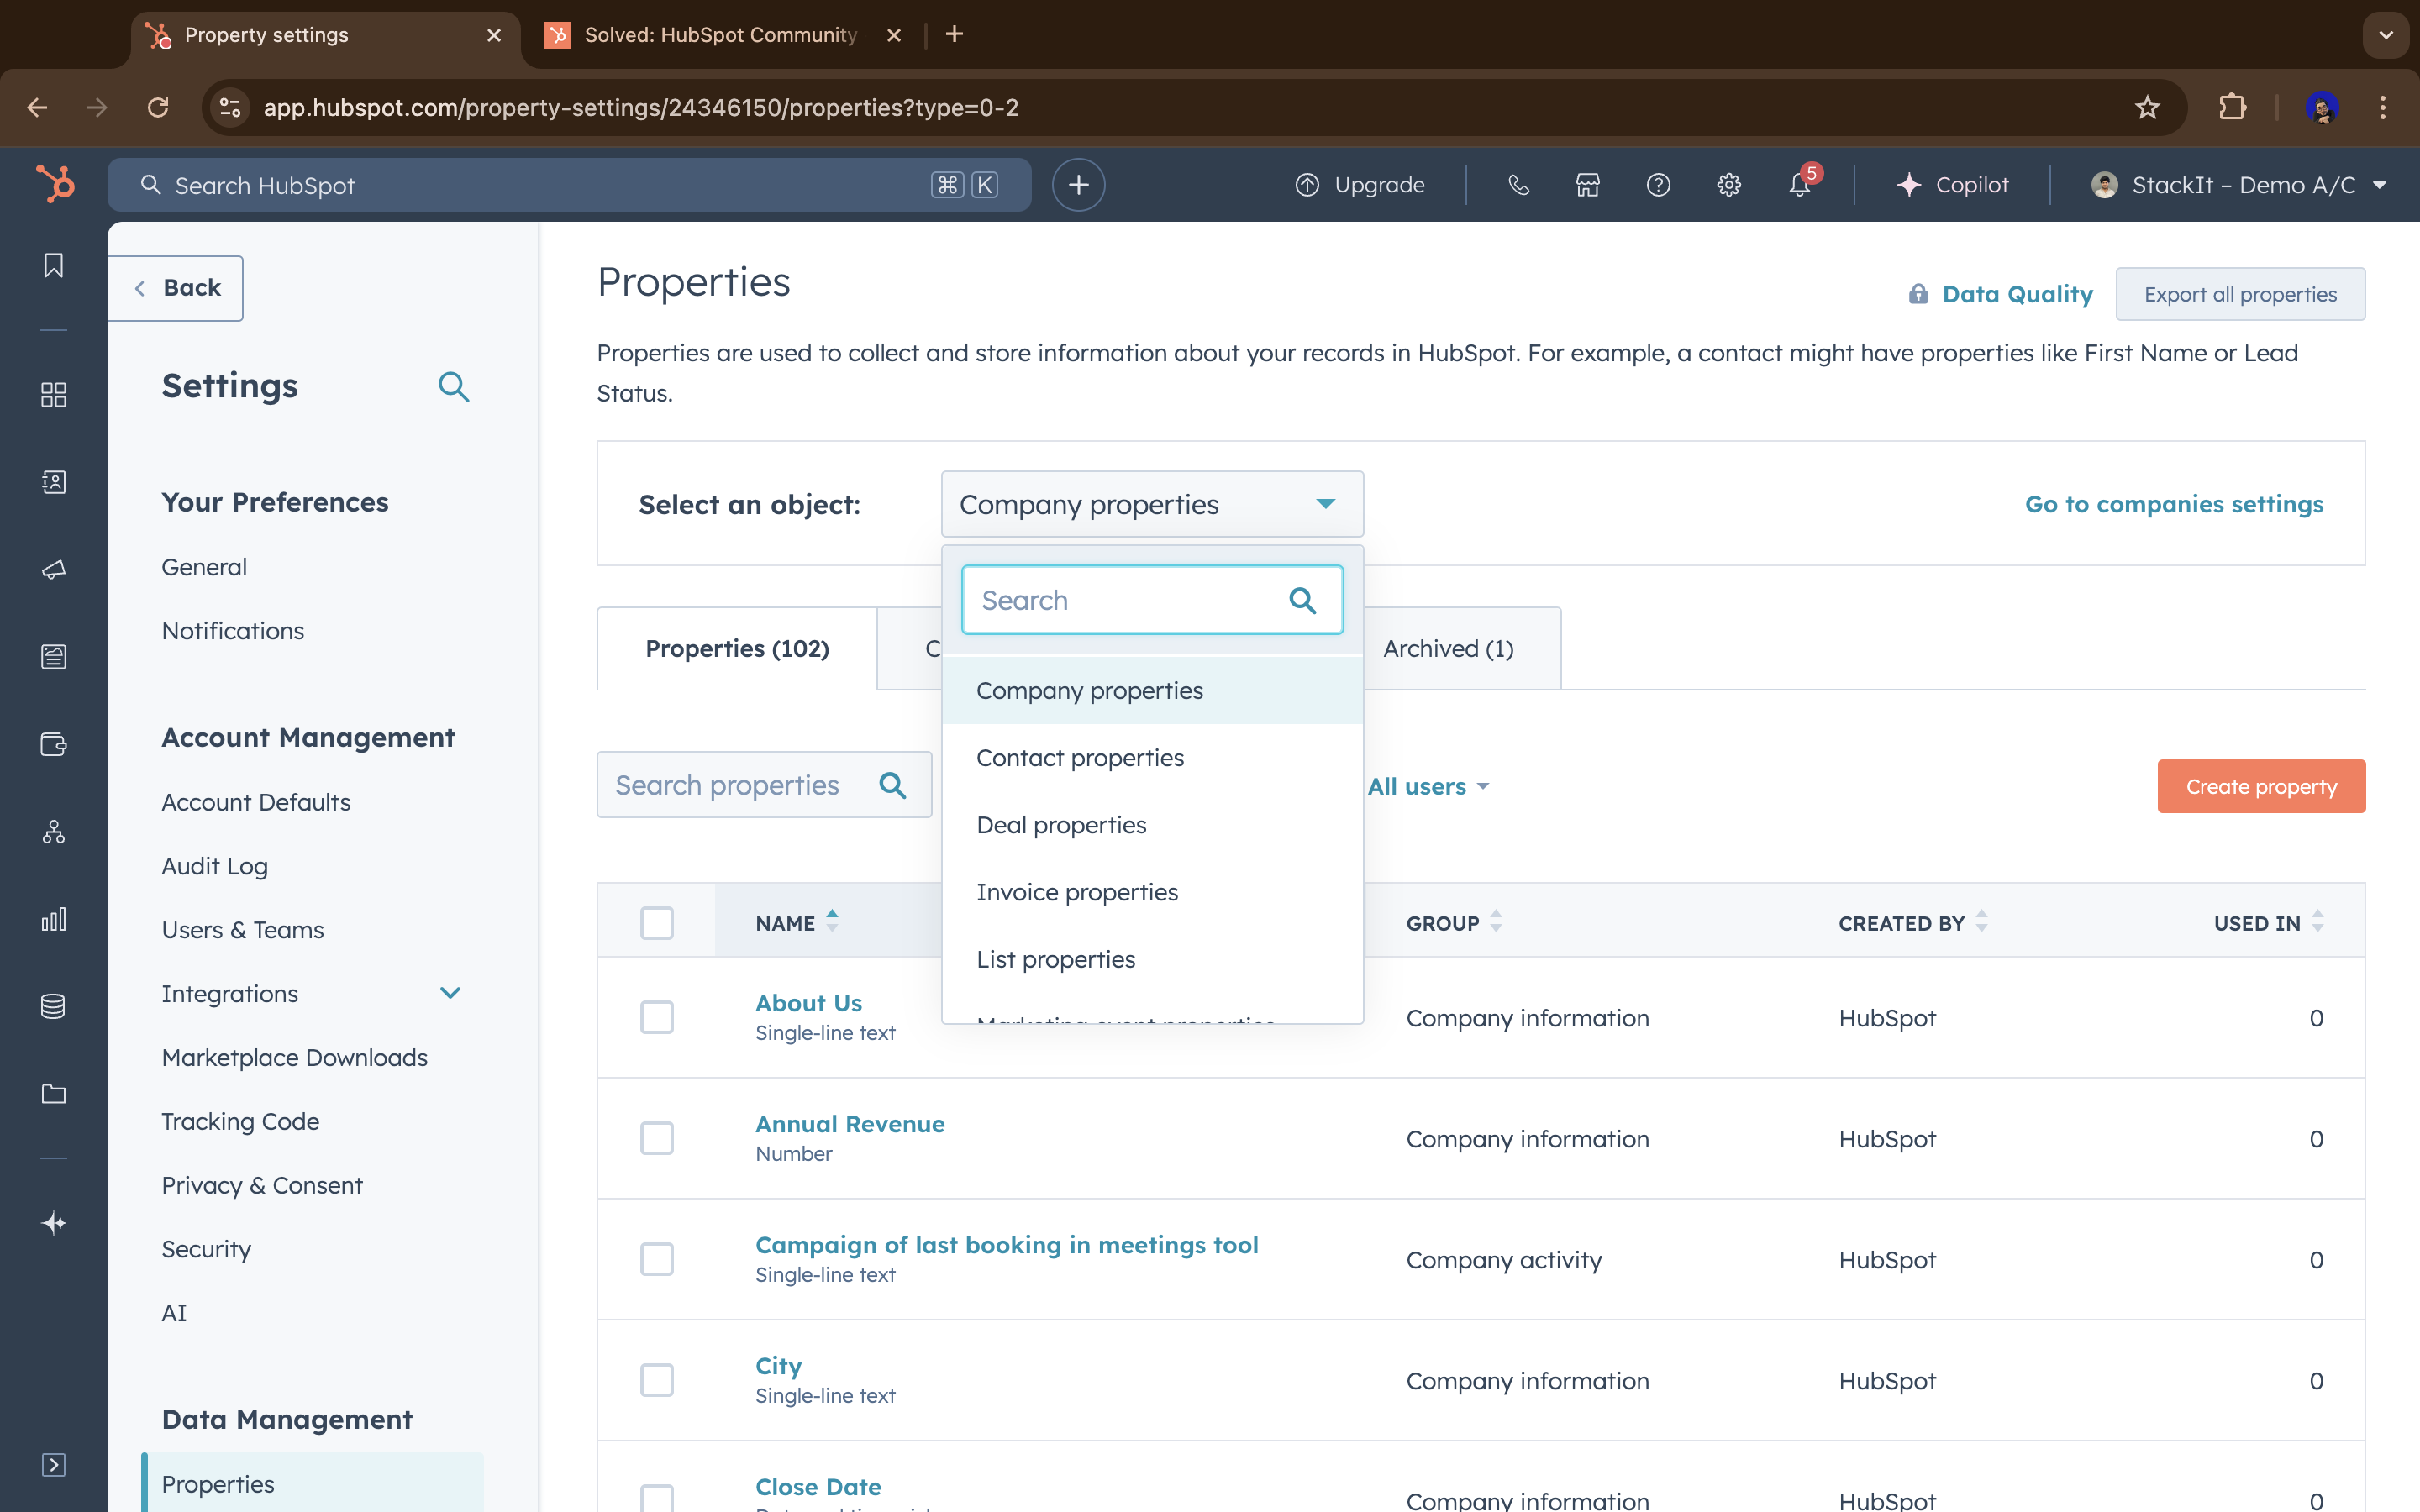
Create property4
Fill in property details
Fill in the details of the field.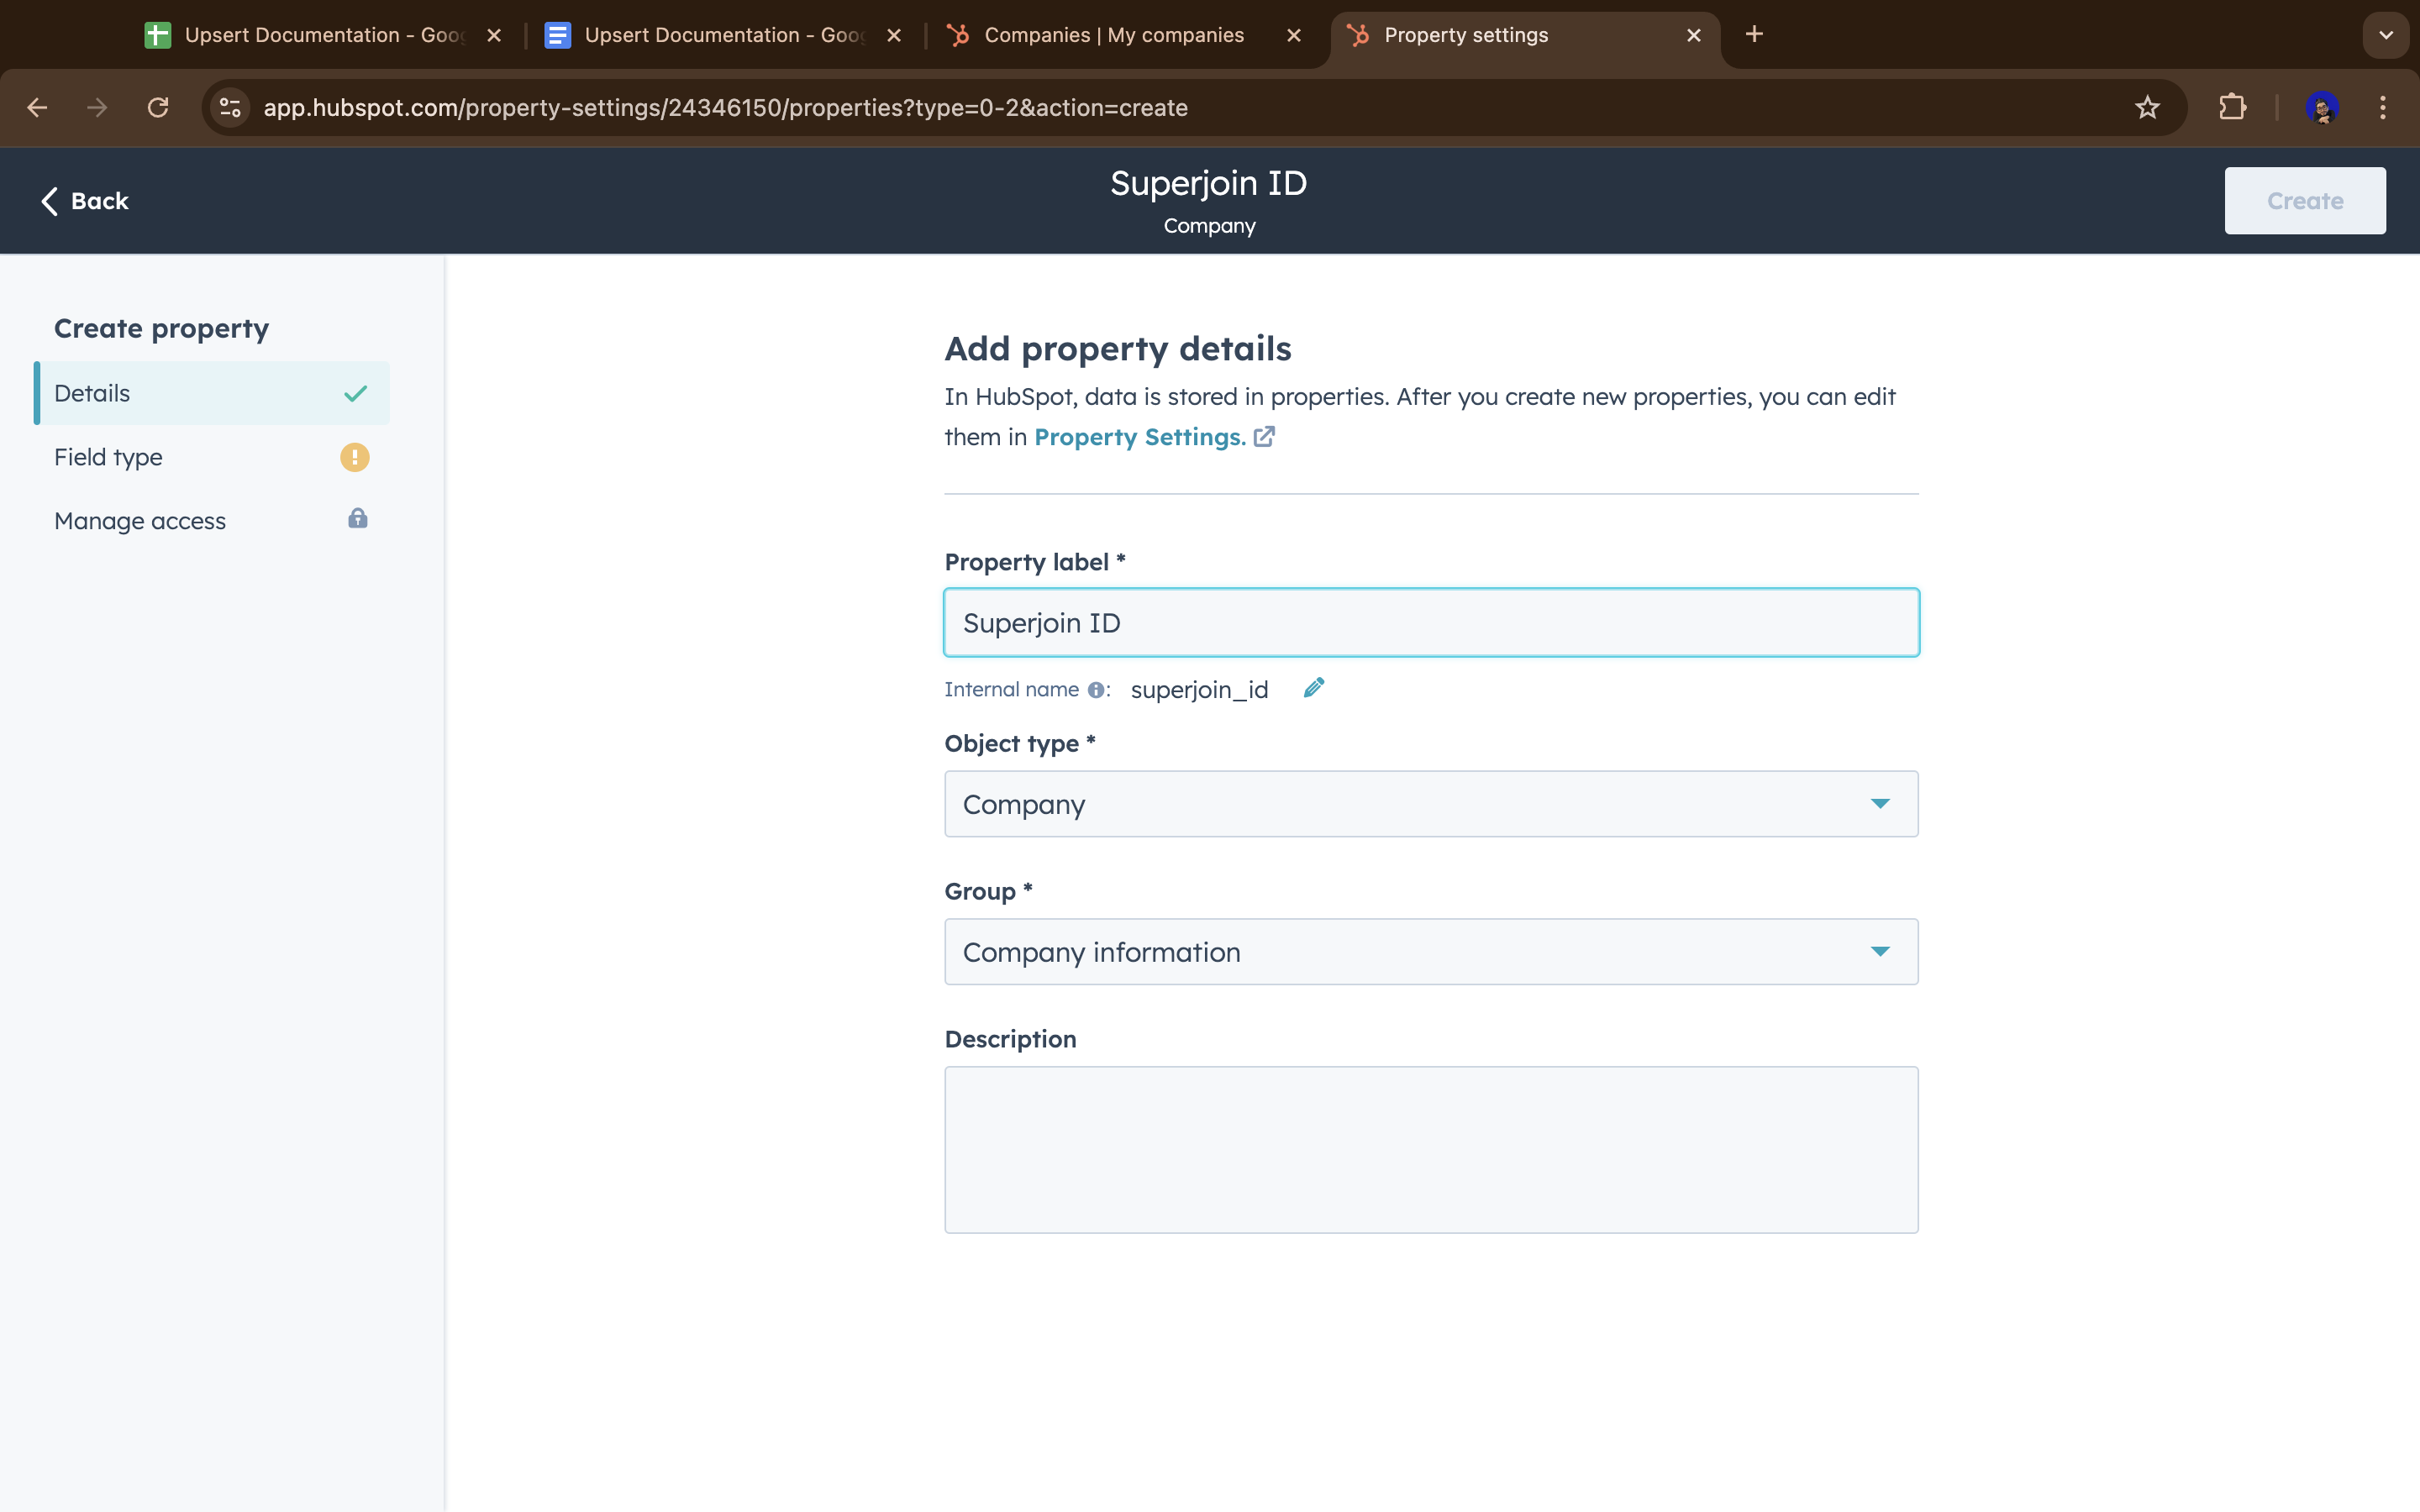
5
Set field type to Number
Choose 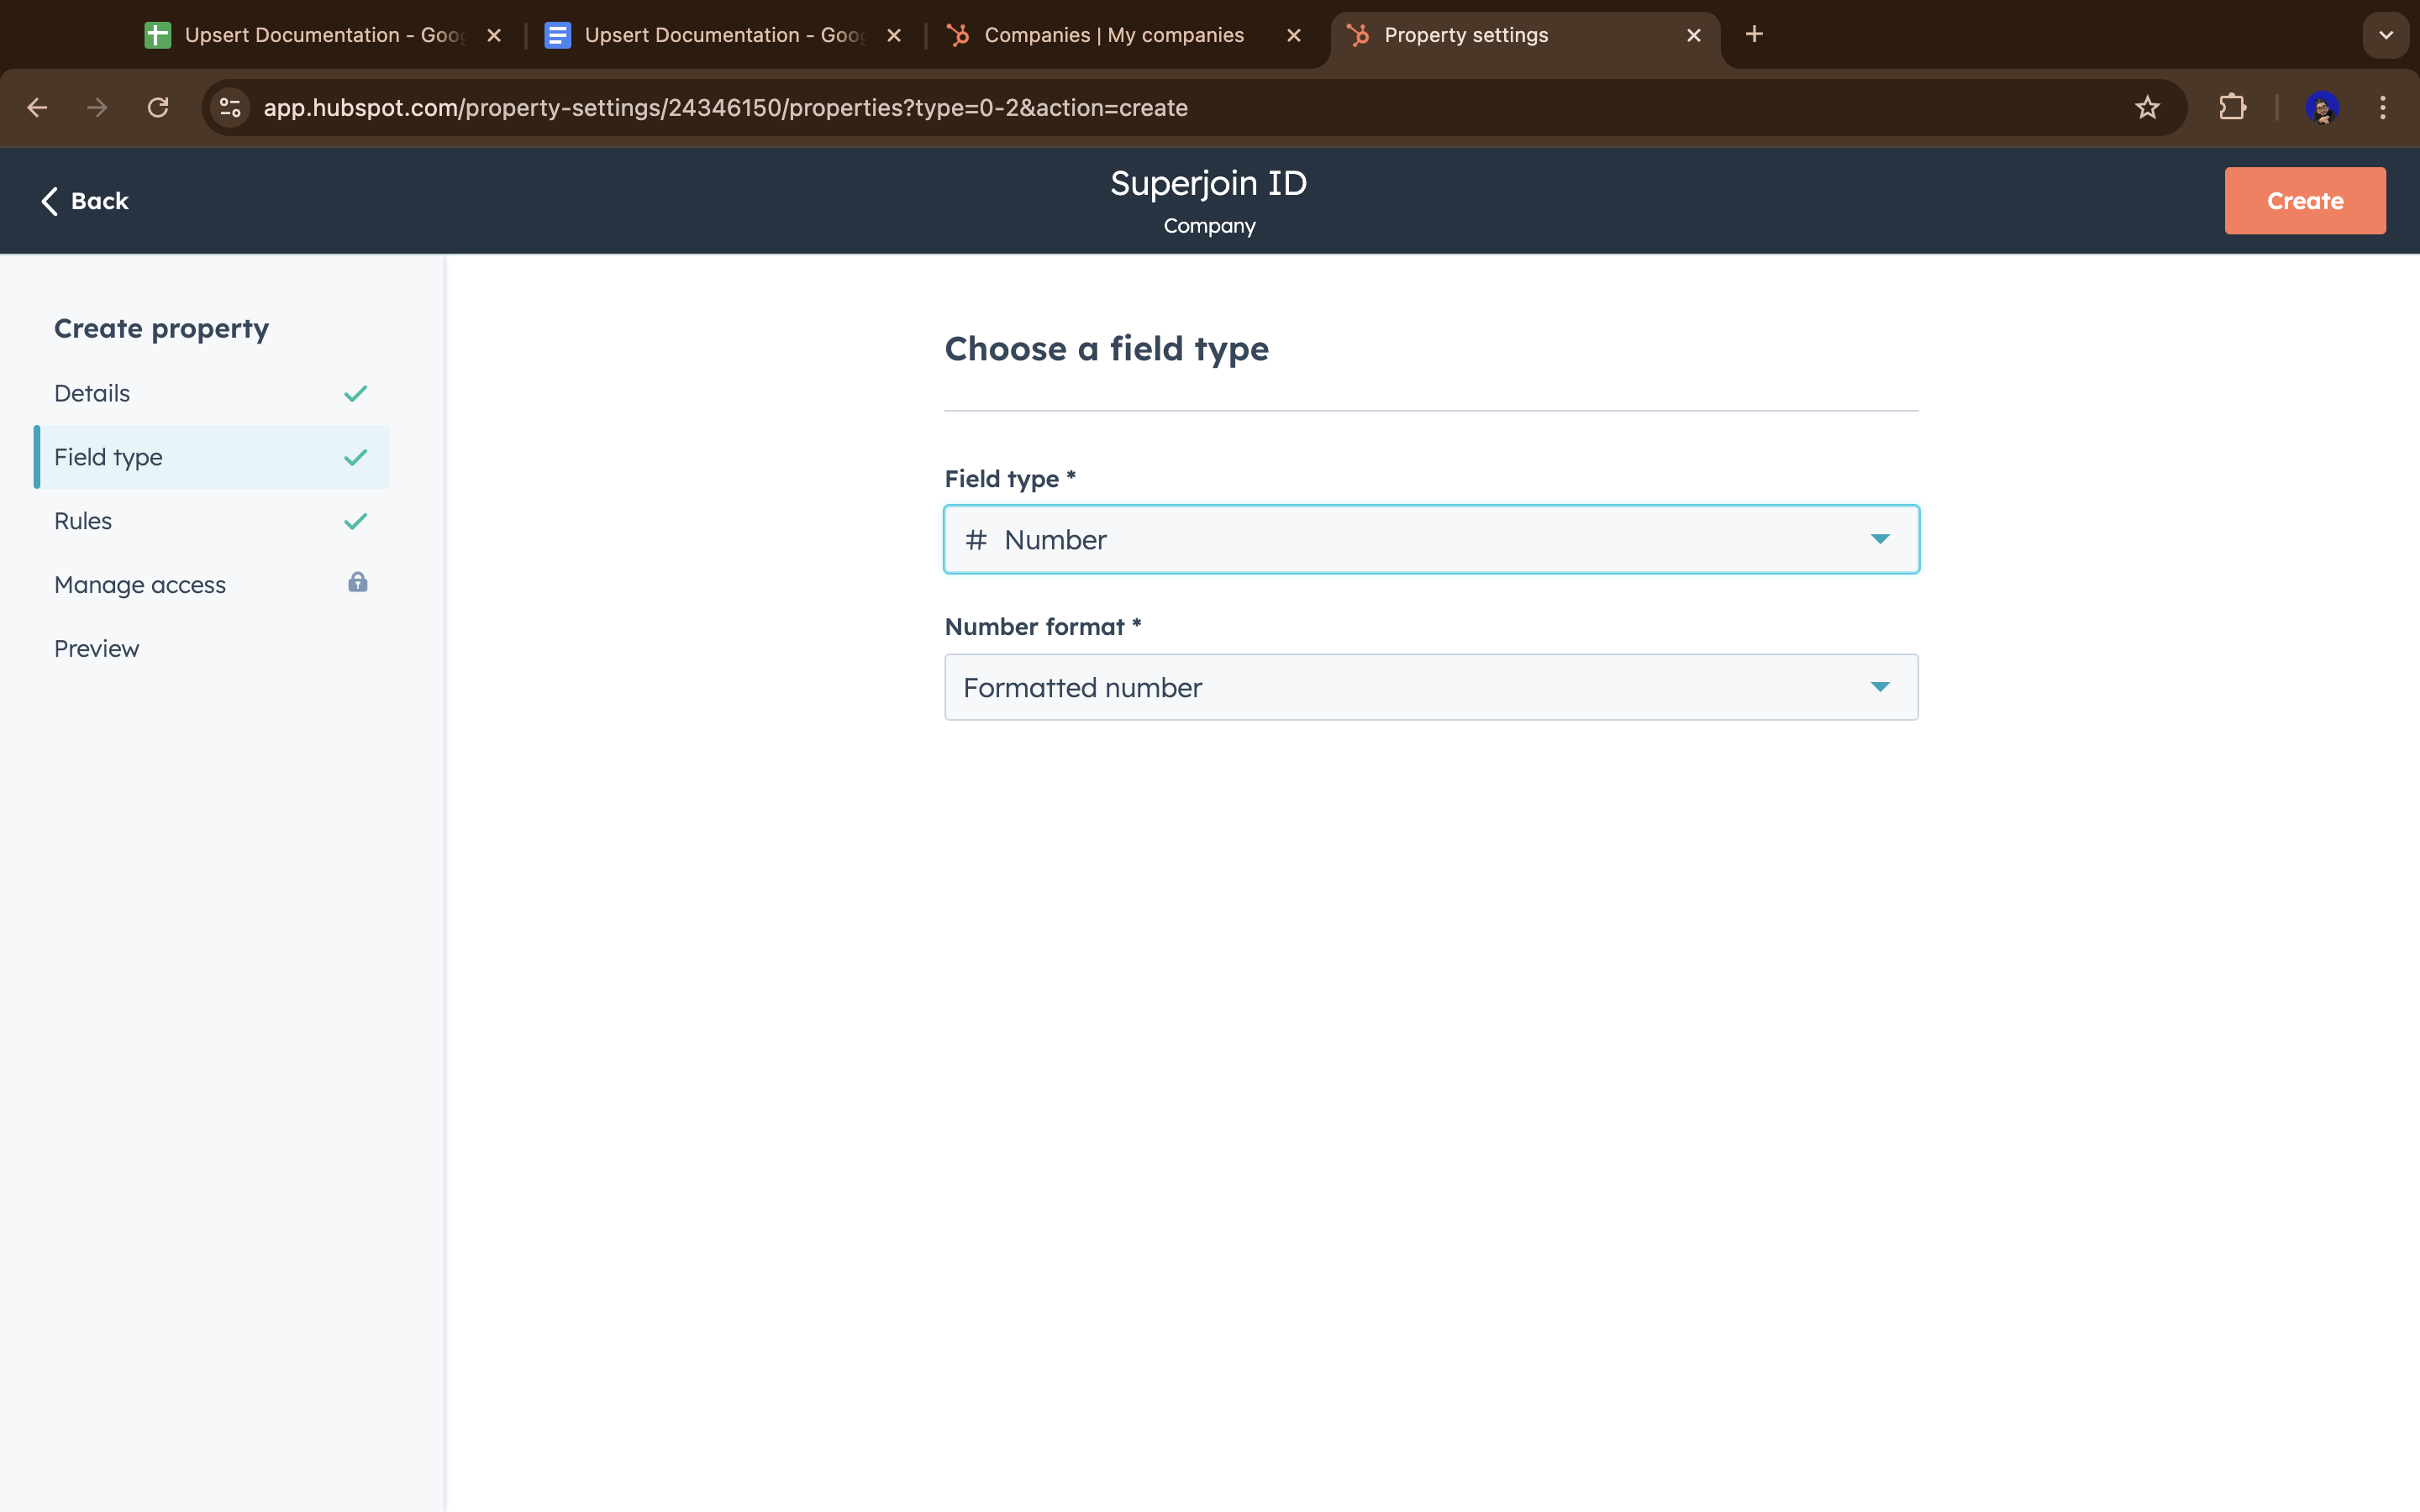
Number as the field type.6
Make the field unique
Important: Make sure to check the “Unique value” option (as shown in the image). This ensures each record has a distinct identifier. Click the orange 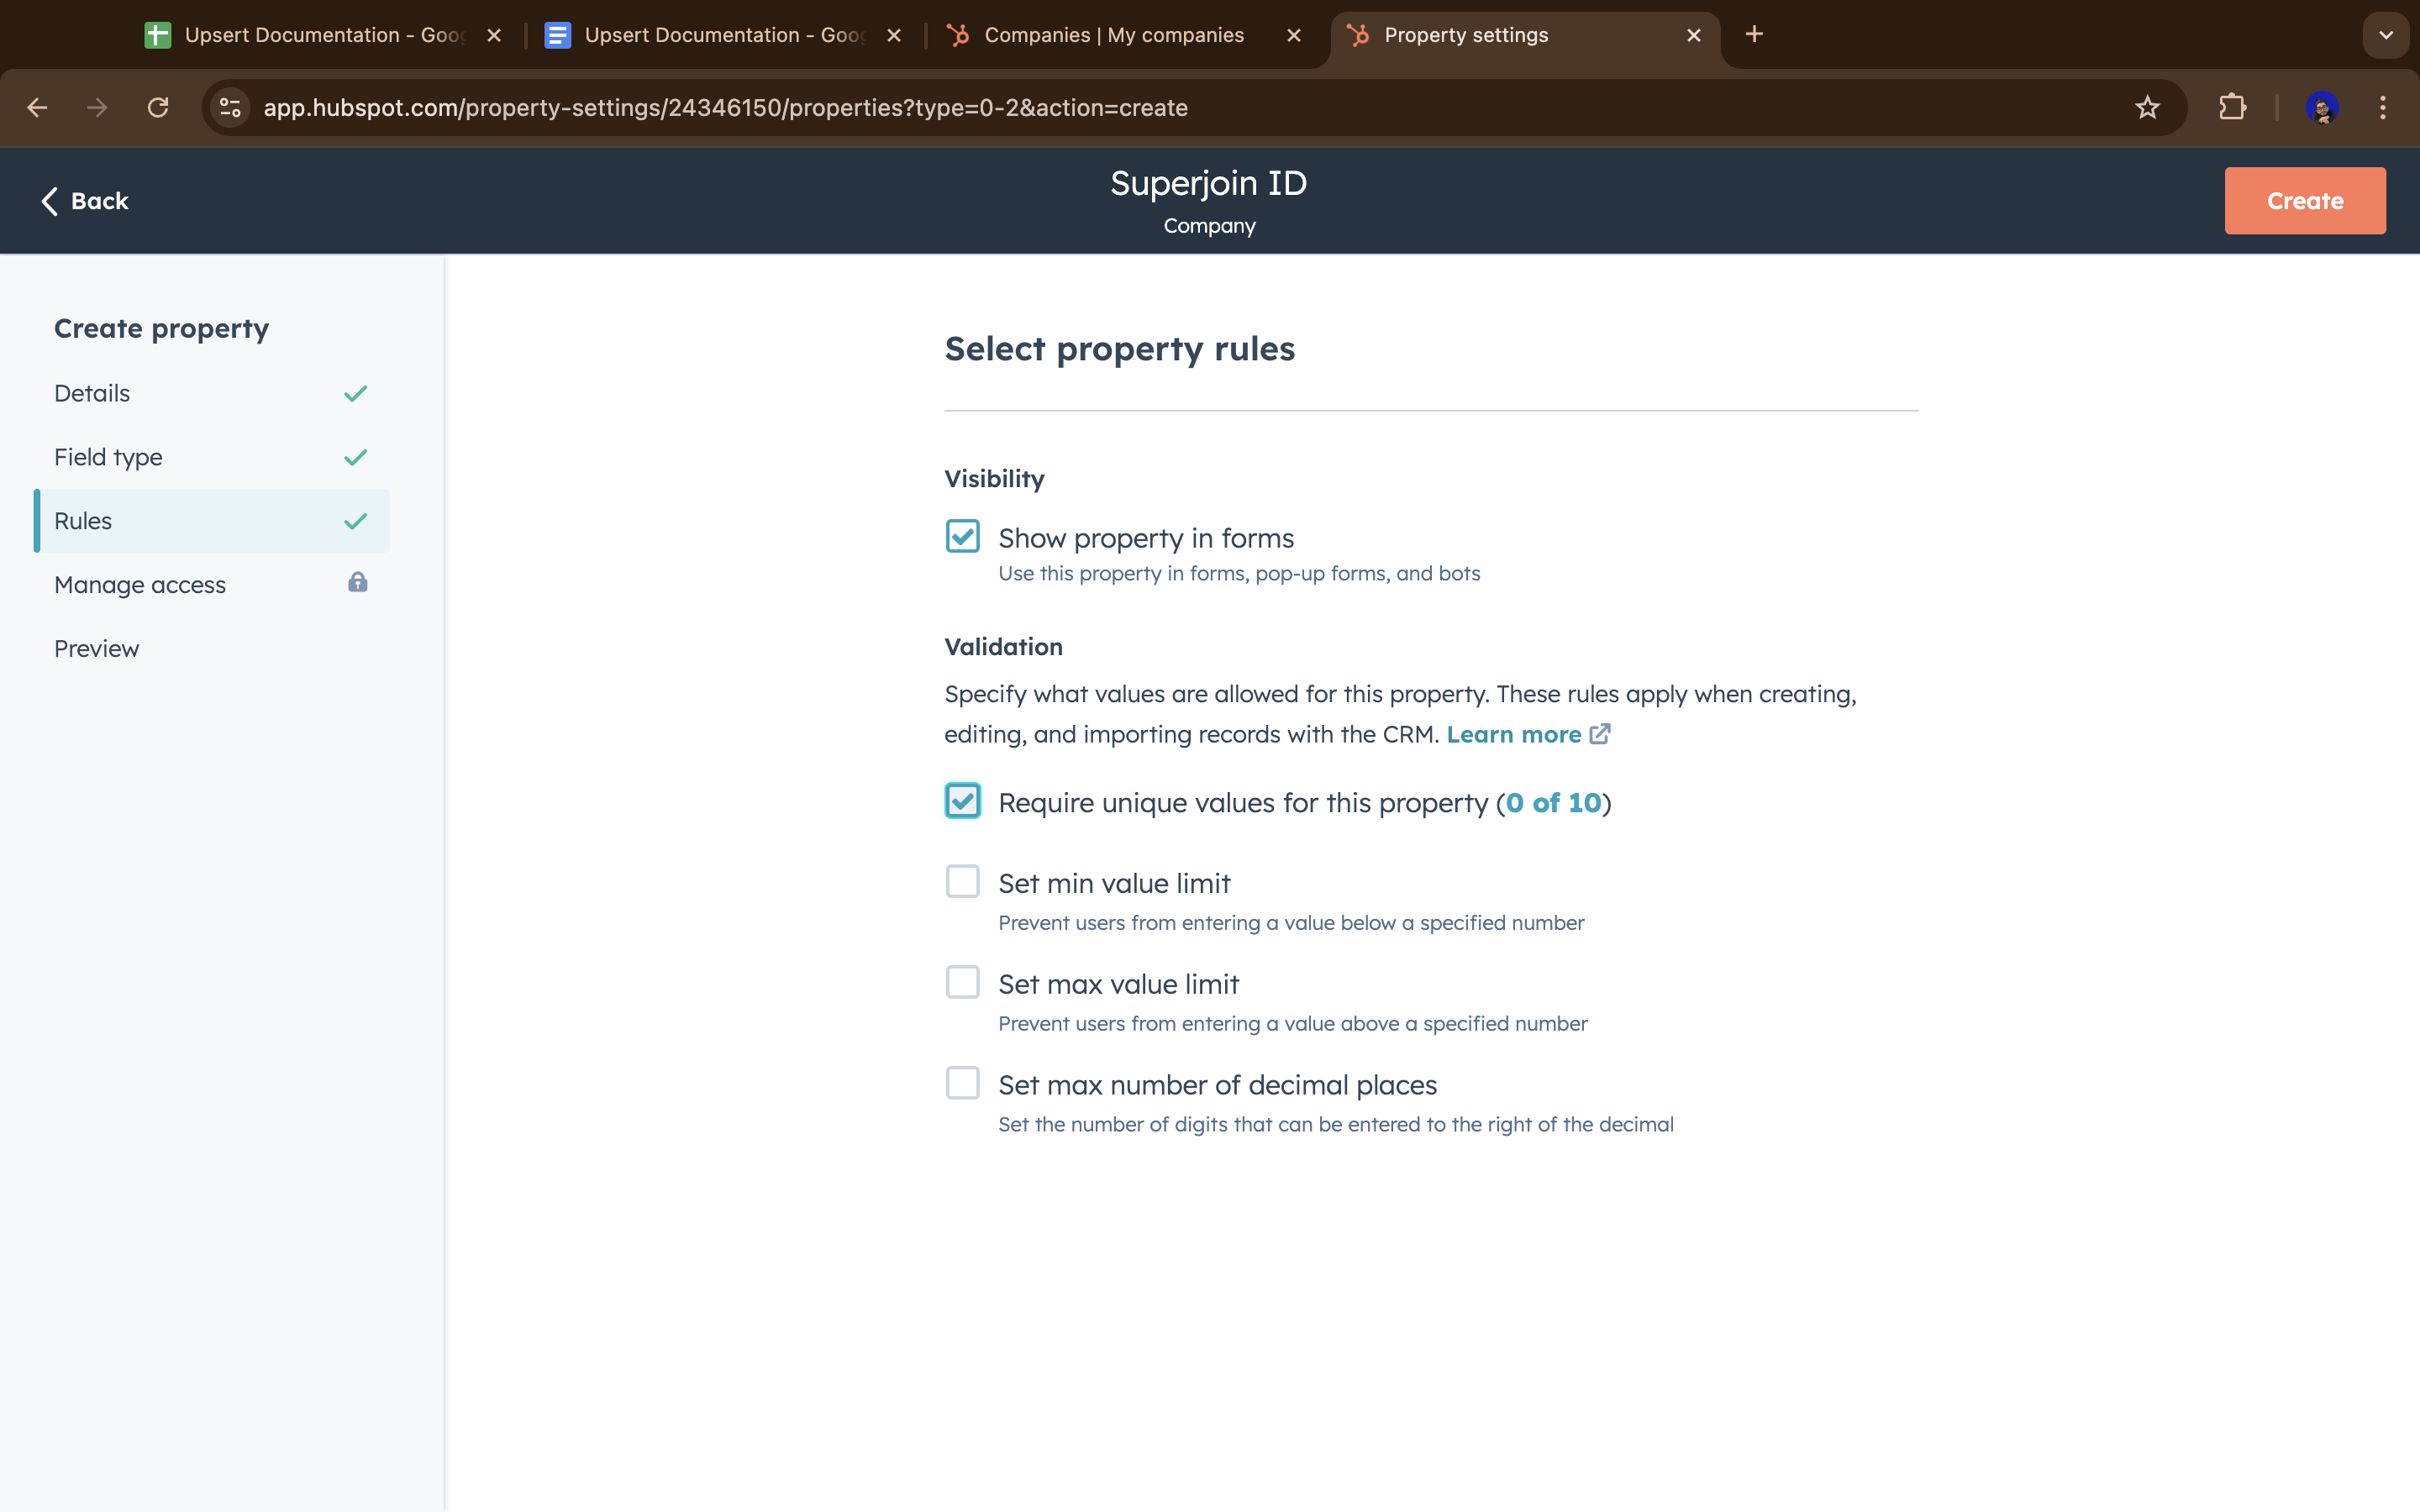
Create button on the top right.Part 2: Setup and Upsert in Superjoin
What are we doing now? We’ll prepare your Google Sheets with the custom unique identifier, validate it with HubSpot, and then perform upserts.
1
Create the unique identifier field in Google Sheets
In your Google Sheet, create a new column with the same name as the HubSpot field you just created.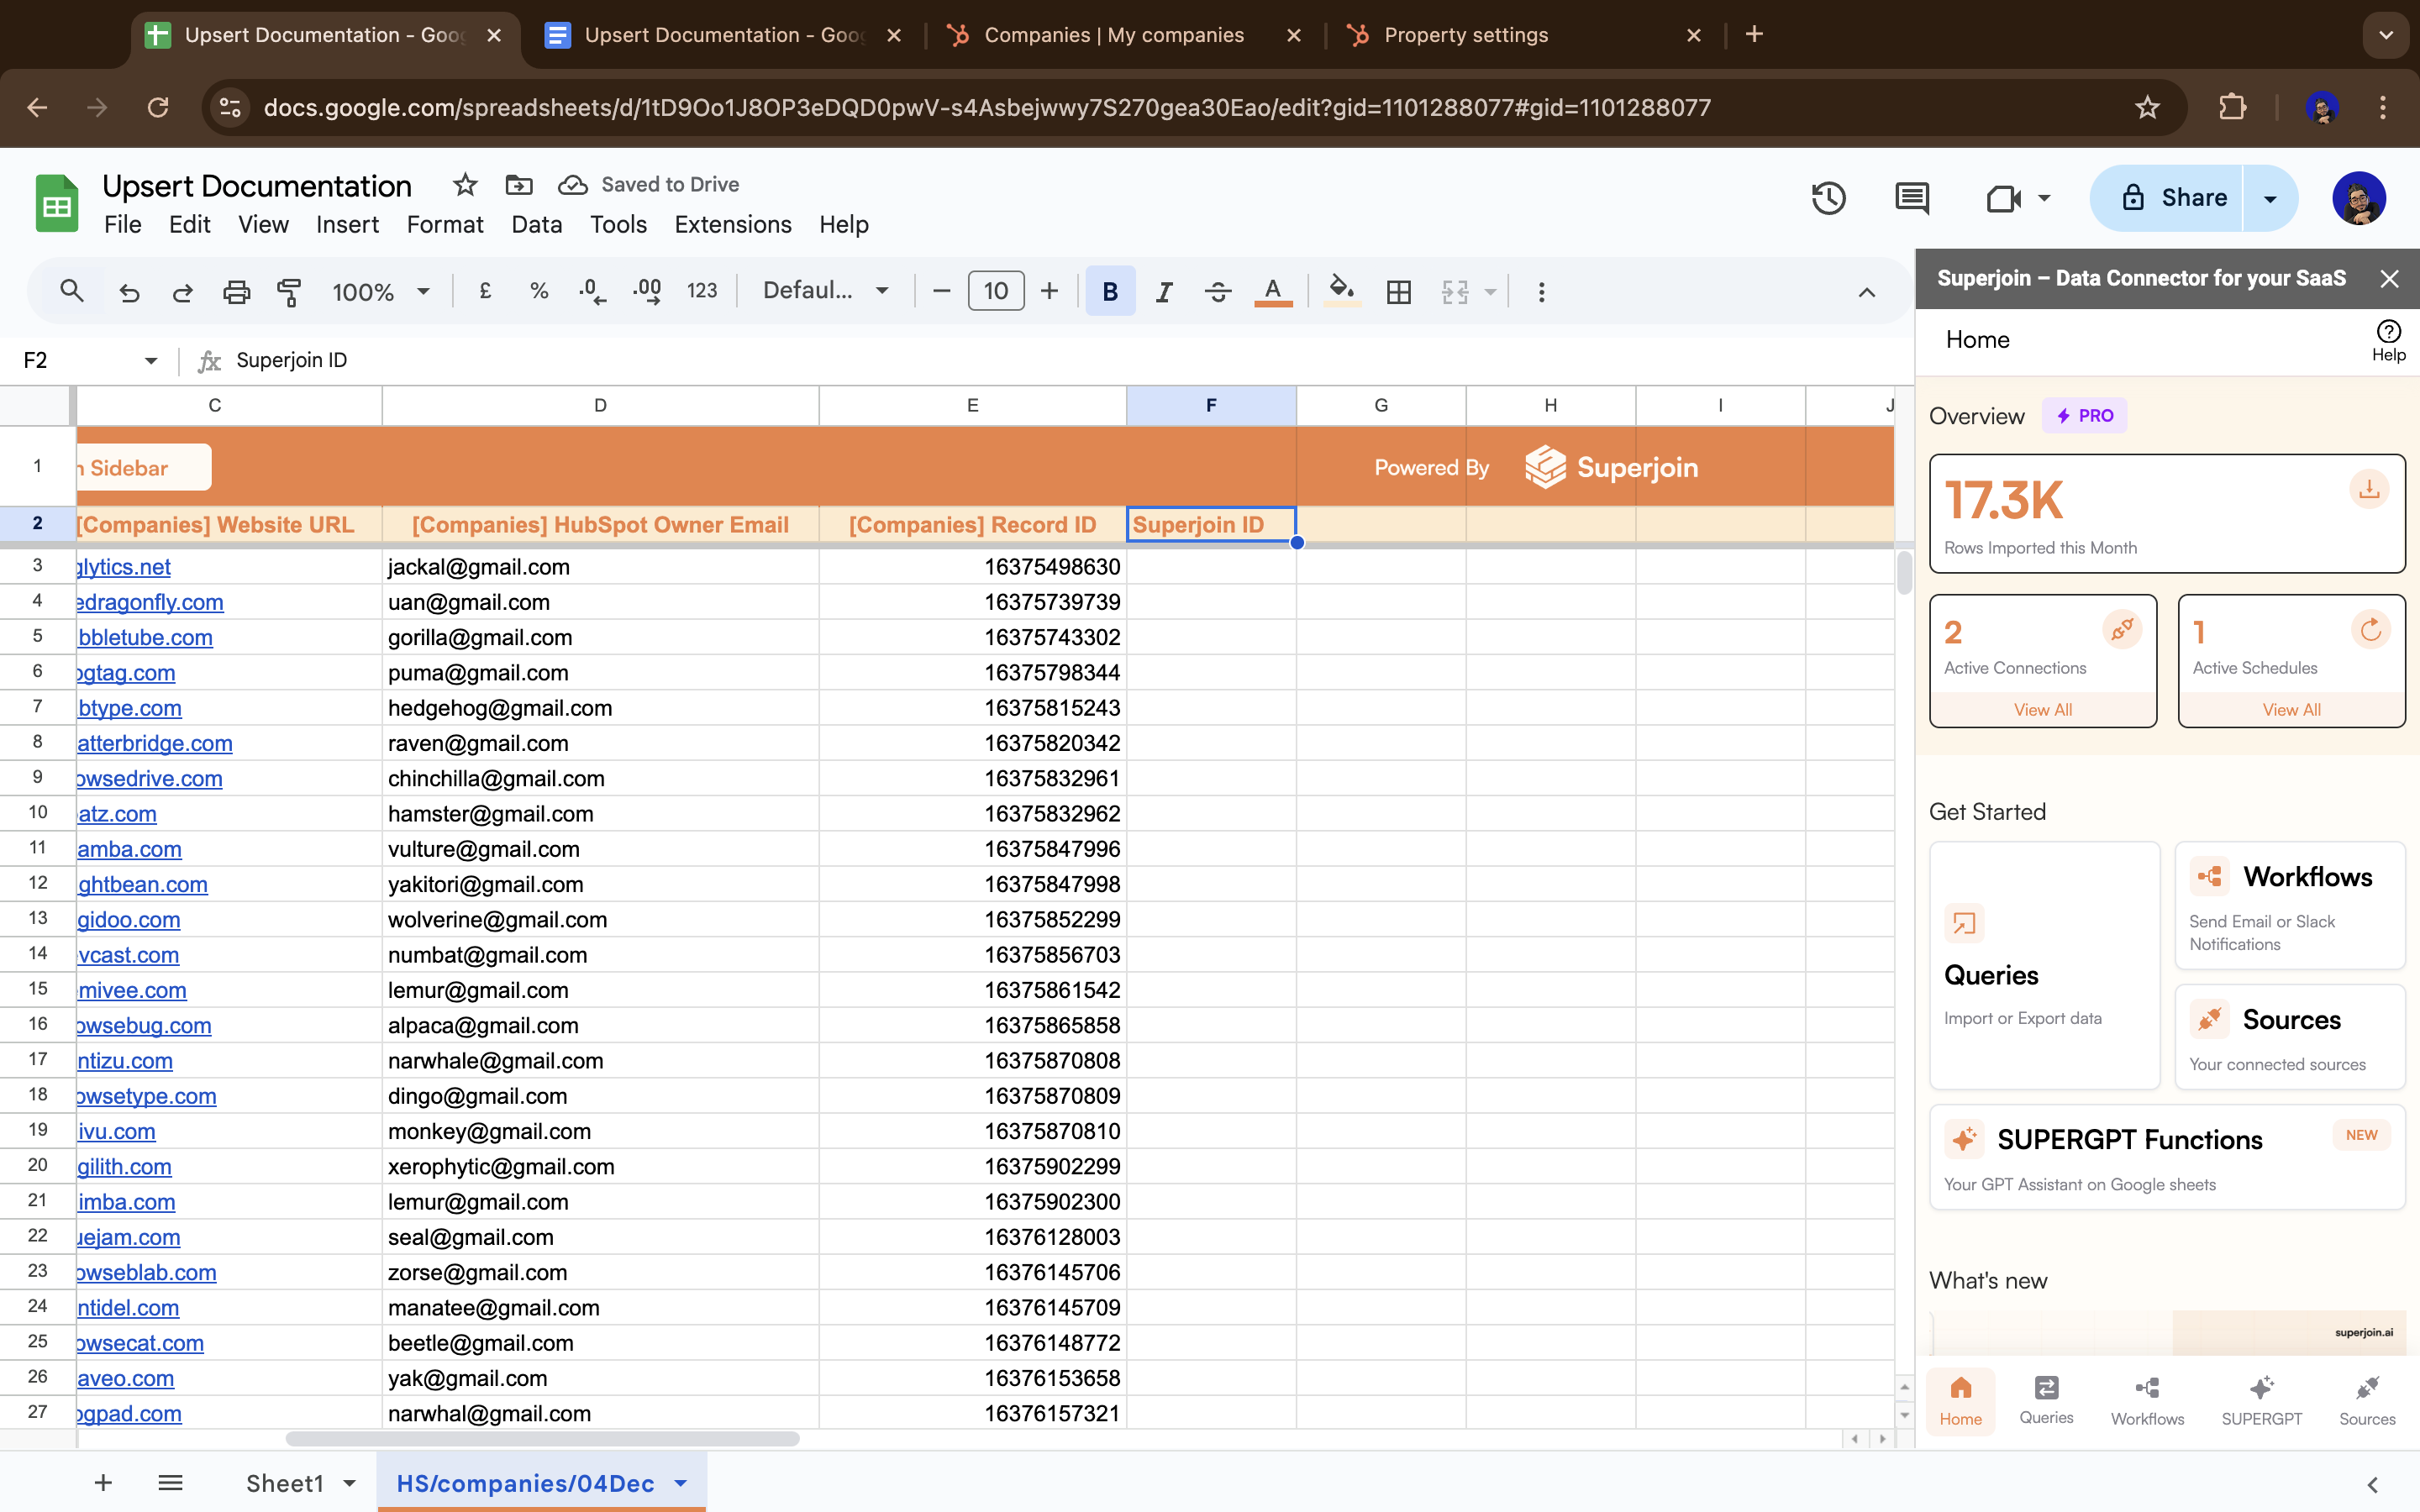
The column name must match exactly with your HubSpot property name for proper mapping.
2
Populate the field with unique values
Now you need to fill this column with unique values: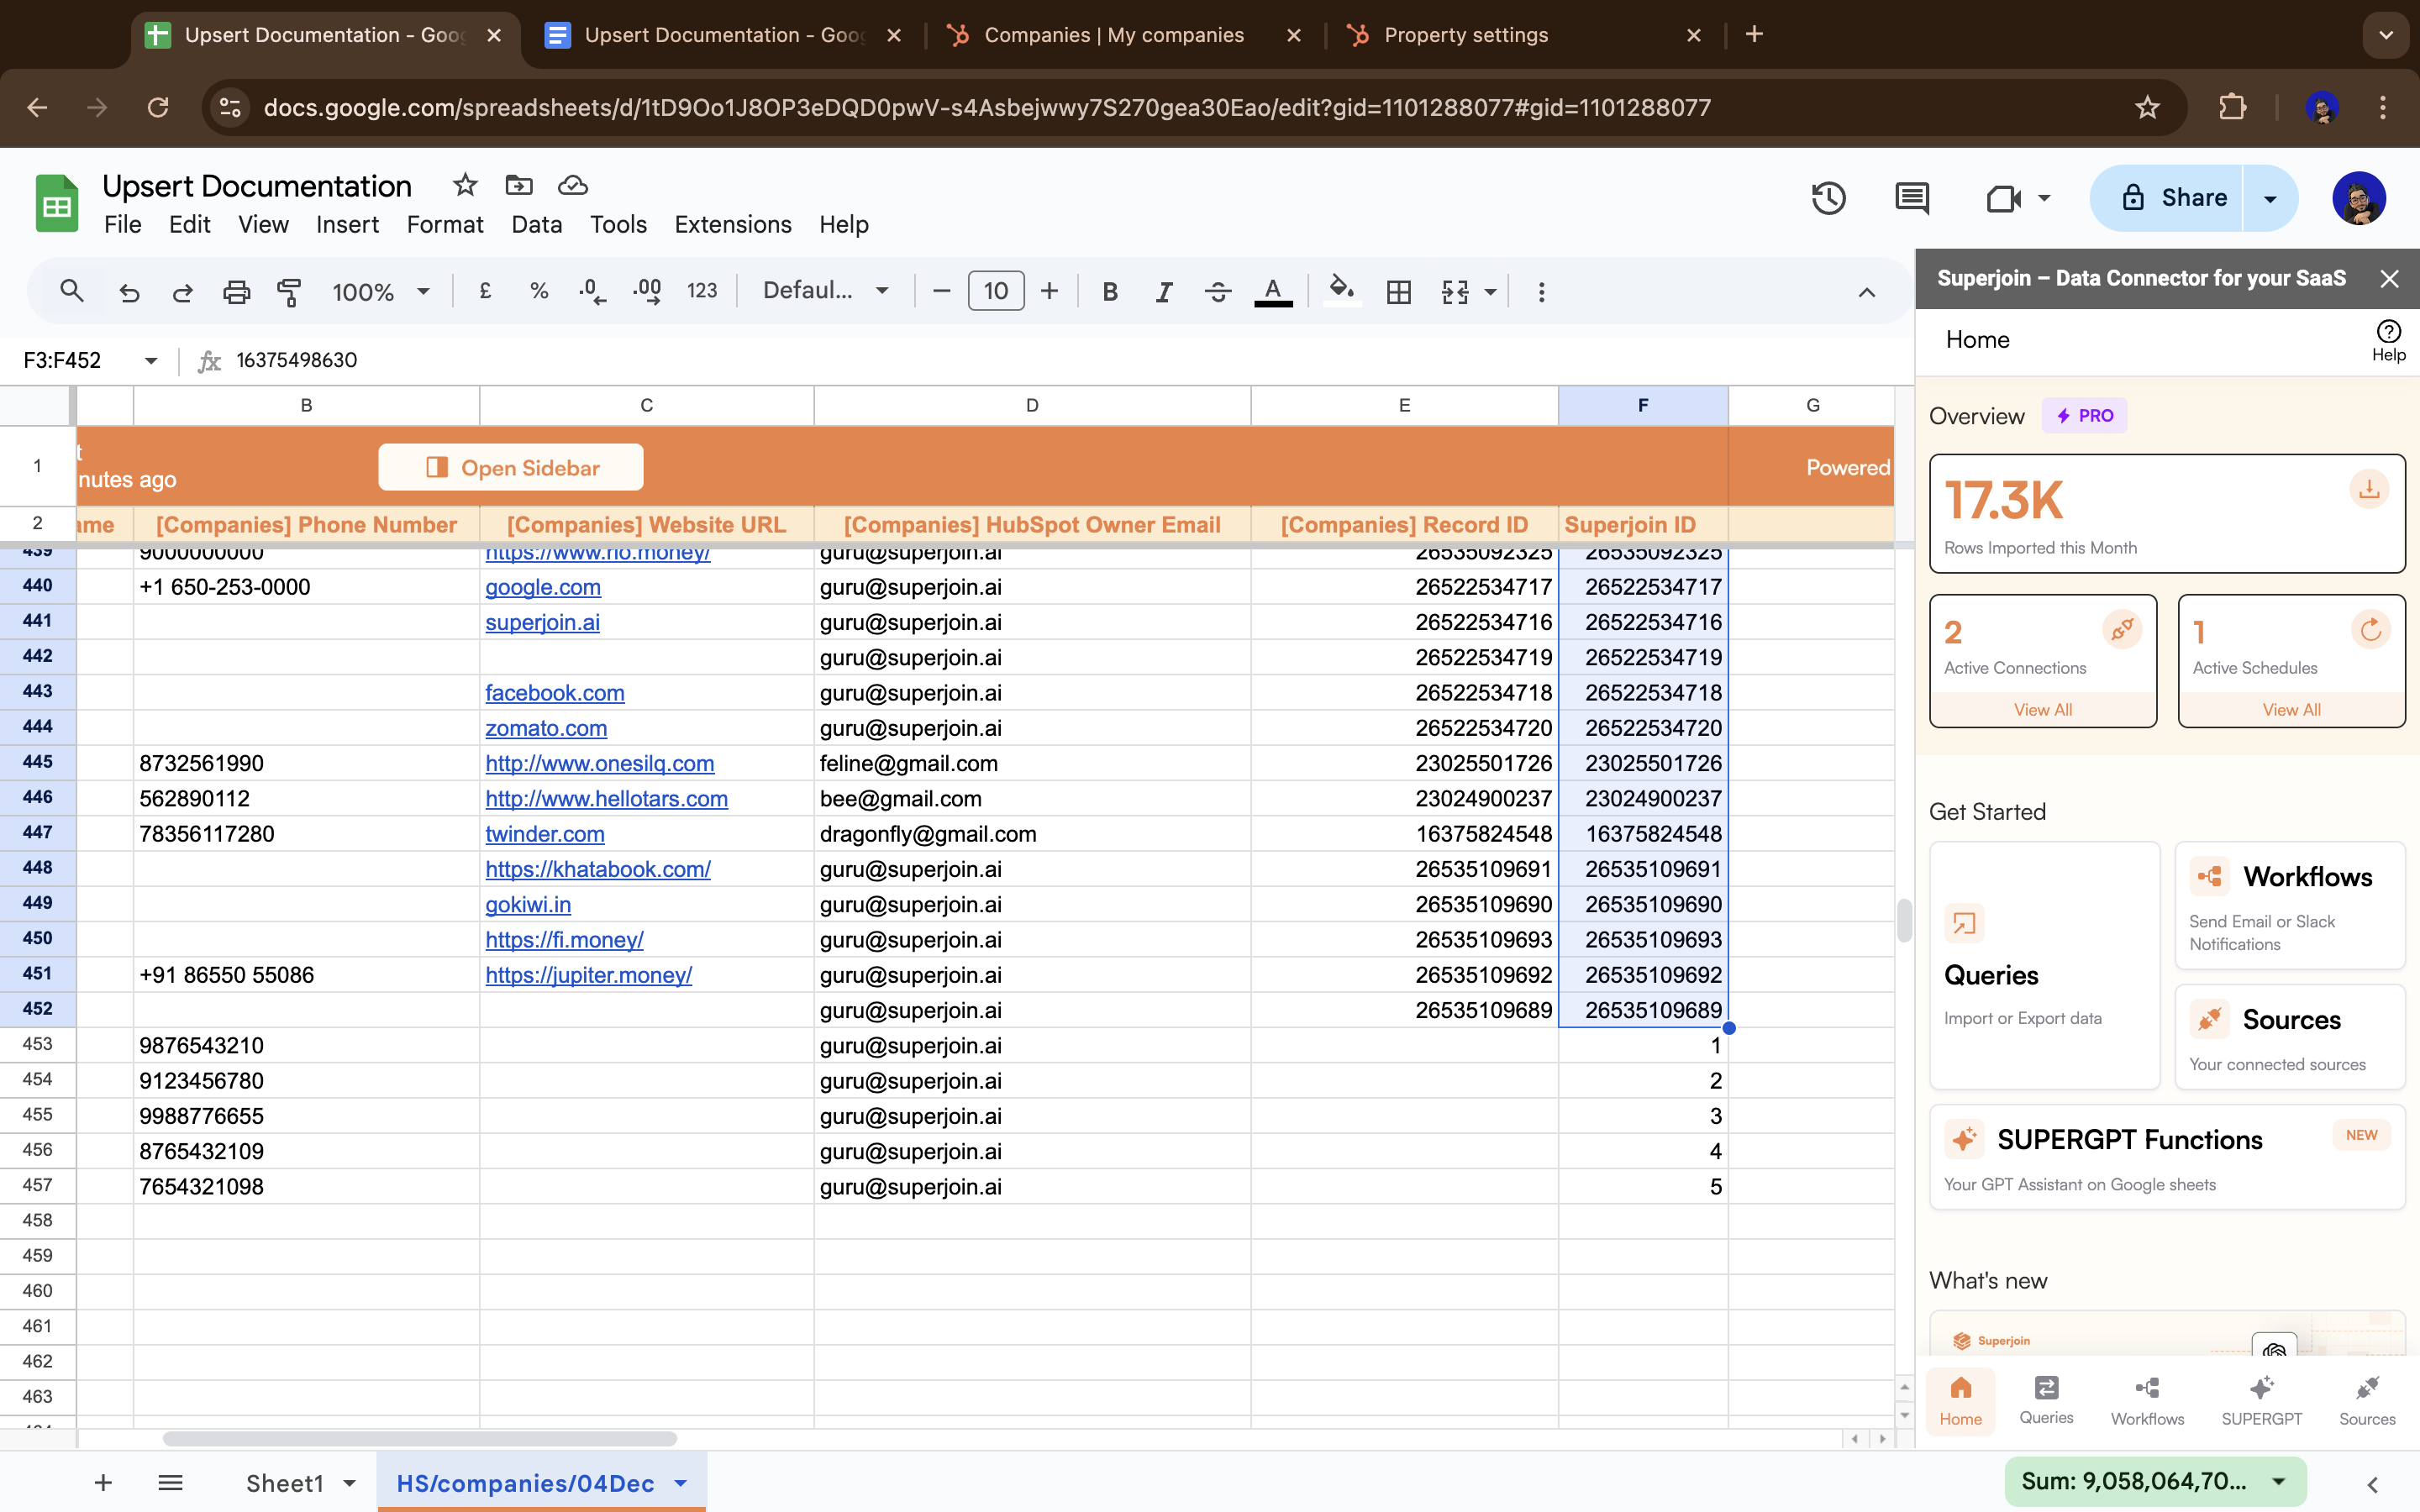
For existing records
Copy the HubSpot Record IDs into this new field
For new records
Use any unique numbers (e.g., 10001, 10002, etc.)
Don’t have Record IDs? If you don’t have Record IDs for existing records, check out the FAQ: What if I don’t have Record IDs? below to learn how to import them from HubSpot first.
3
Choose Update action
Why this step? Before HubSpot allows upserts using your custom field, it needs to see the field populated with data at least once. We’ll do a one-time update to validate it.Choose the 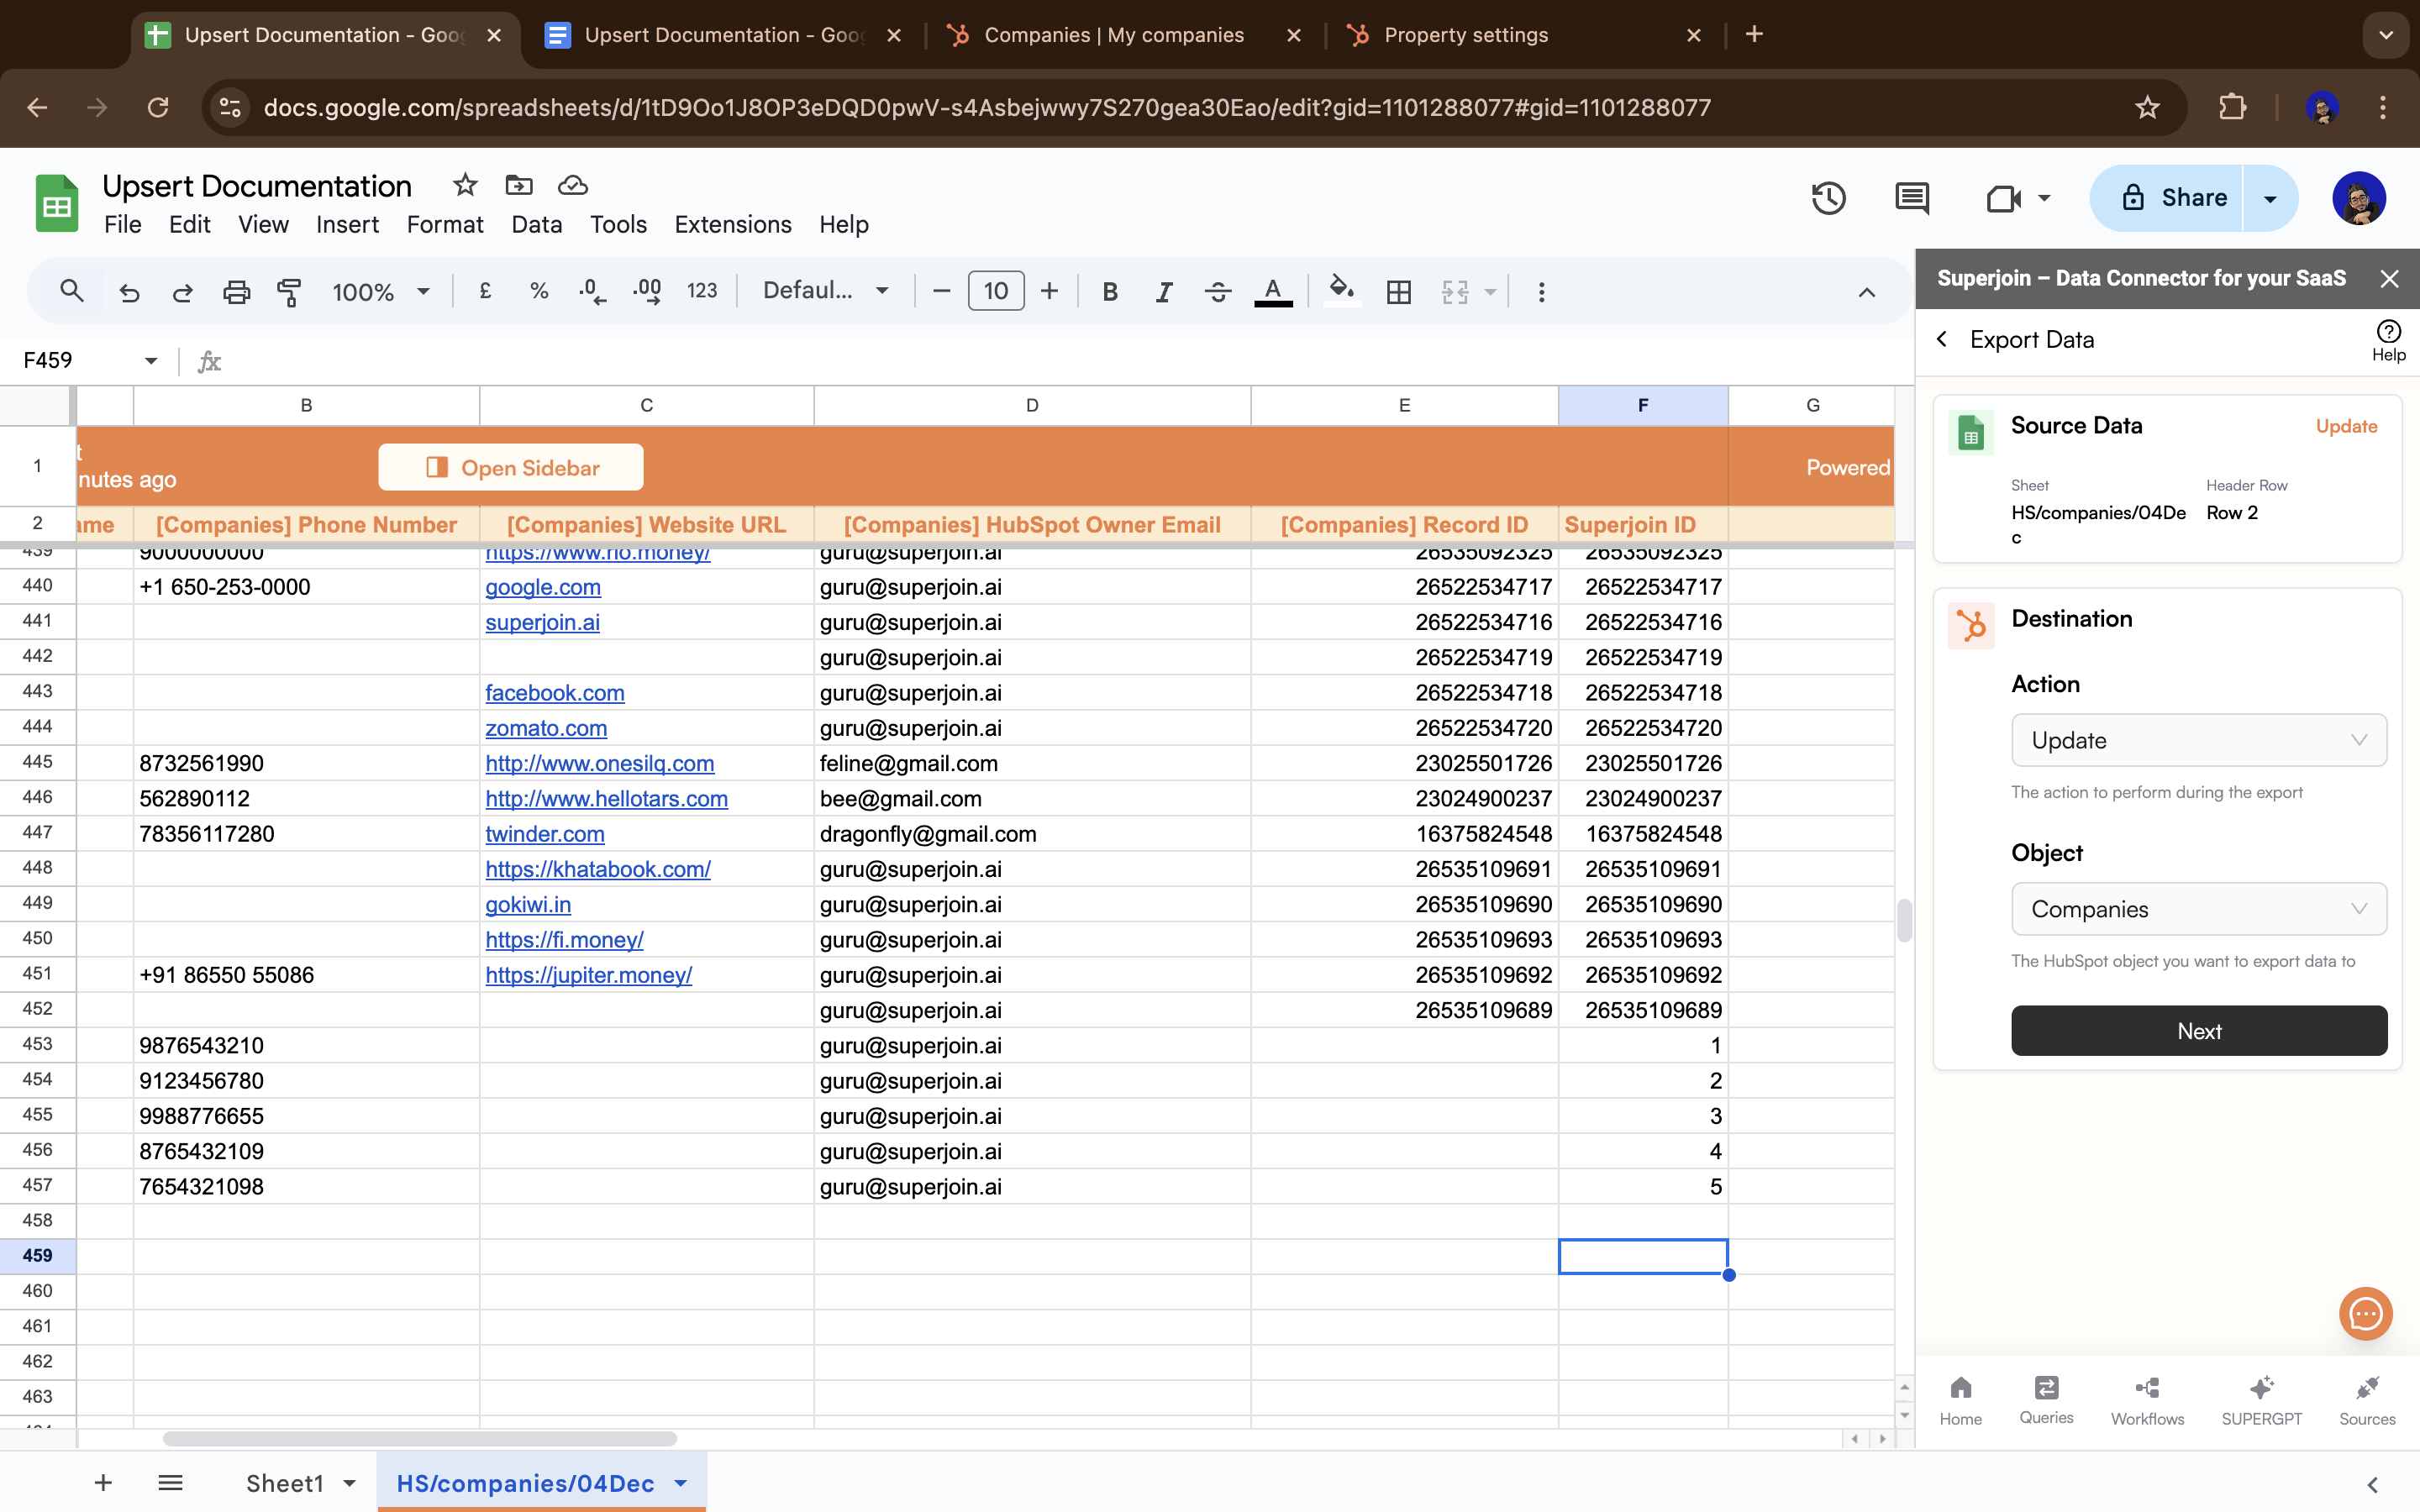
Update action and click Next.4
Map fields including custom ID
Map all the fields to their respective HubSpot fields, including your new custom unique identifier field. Click 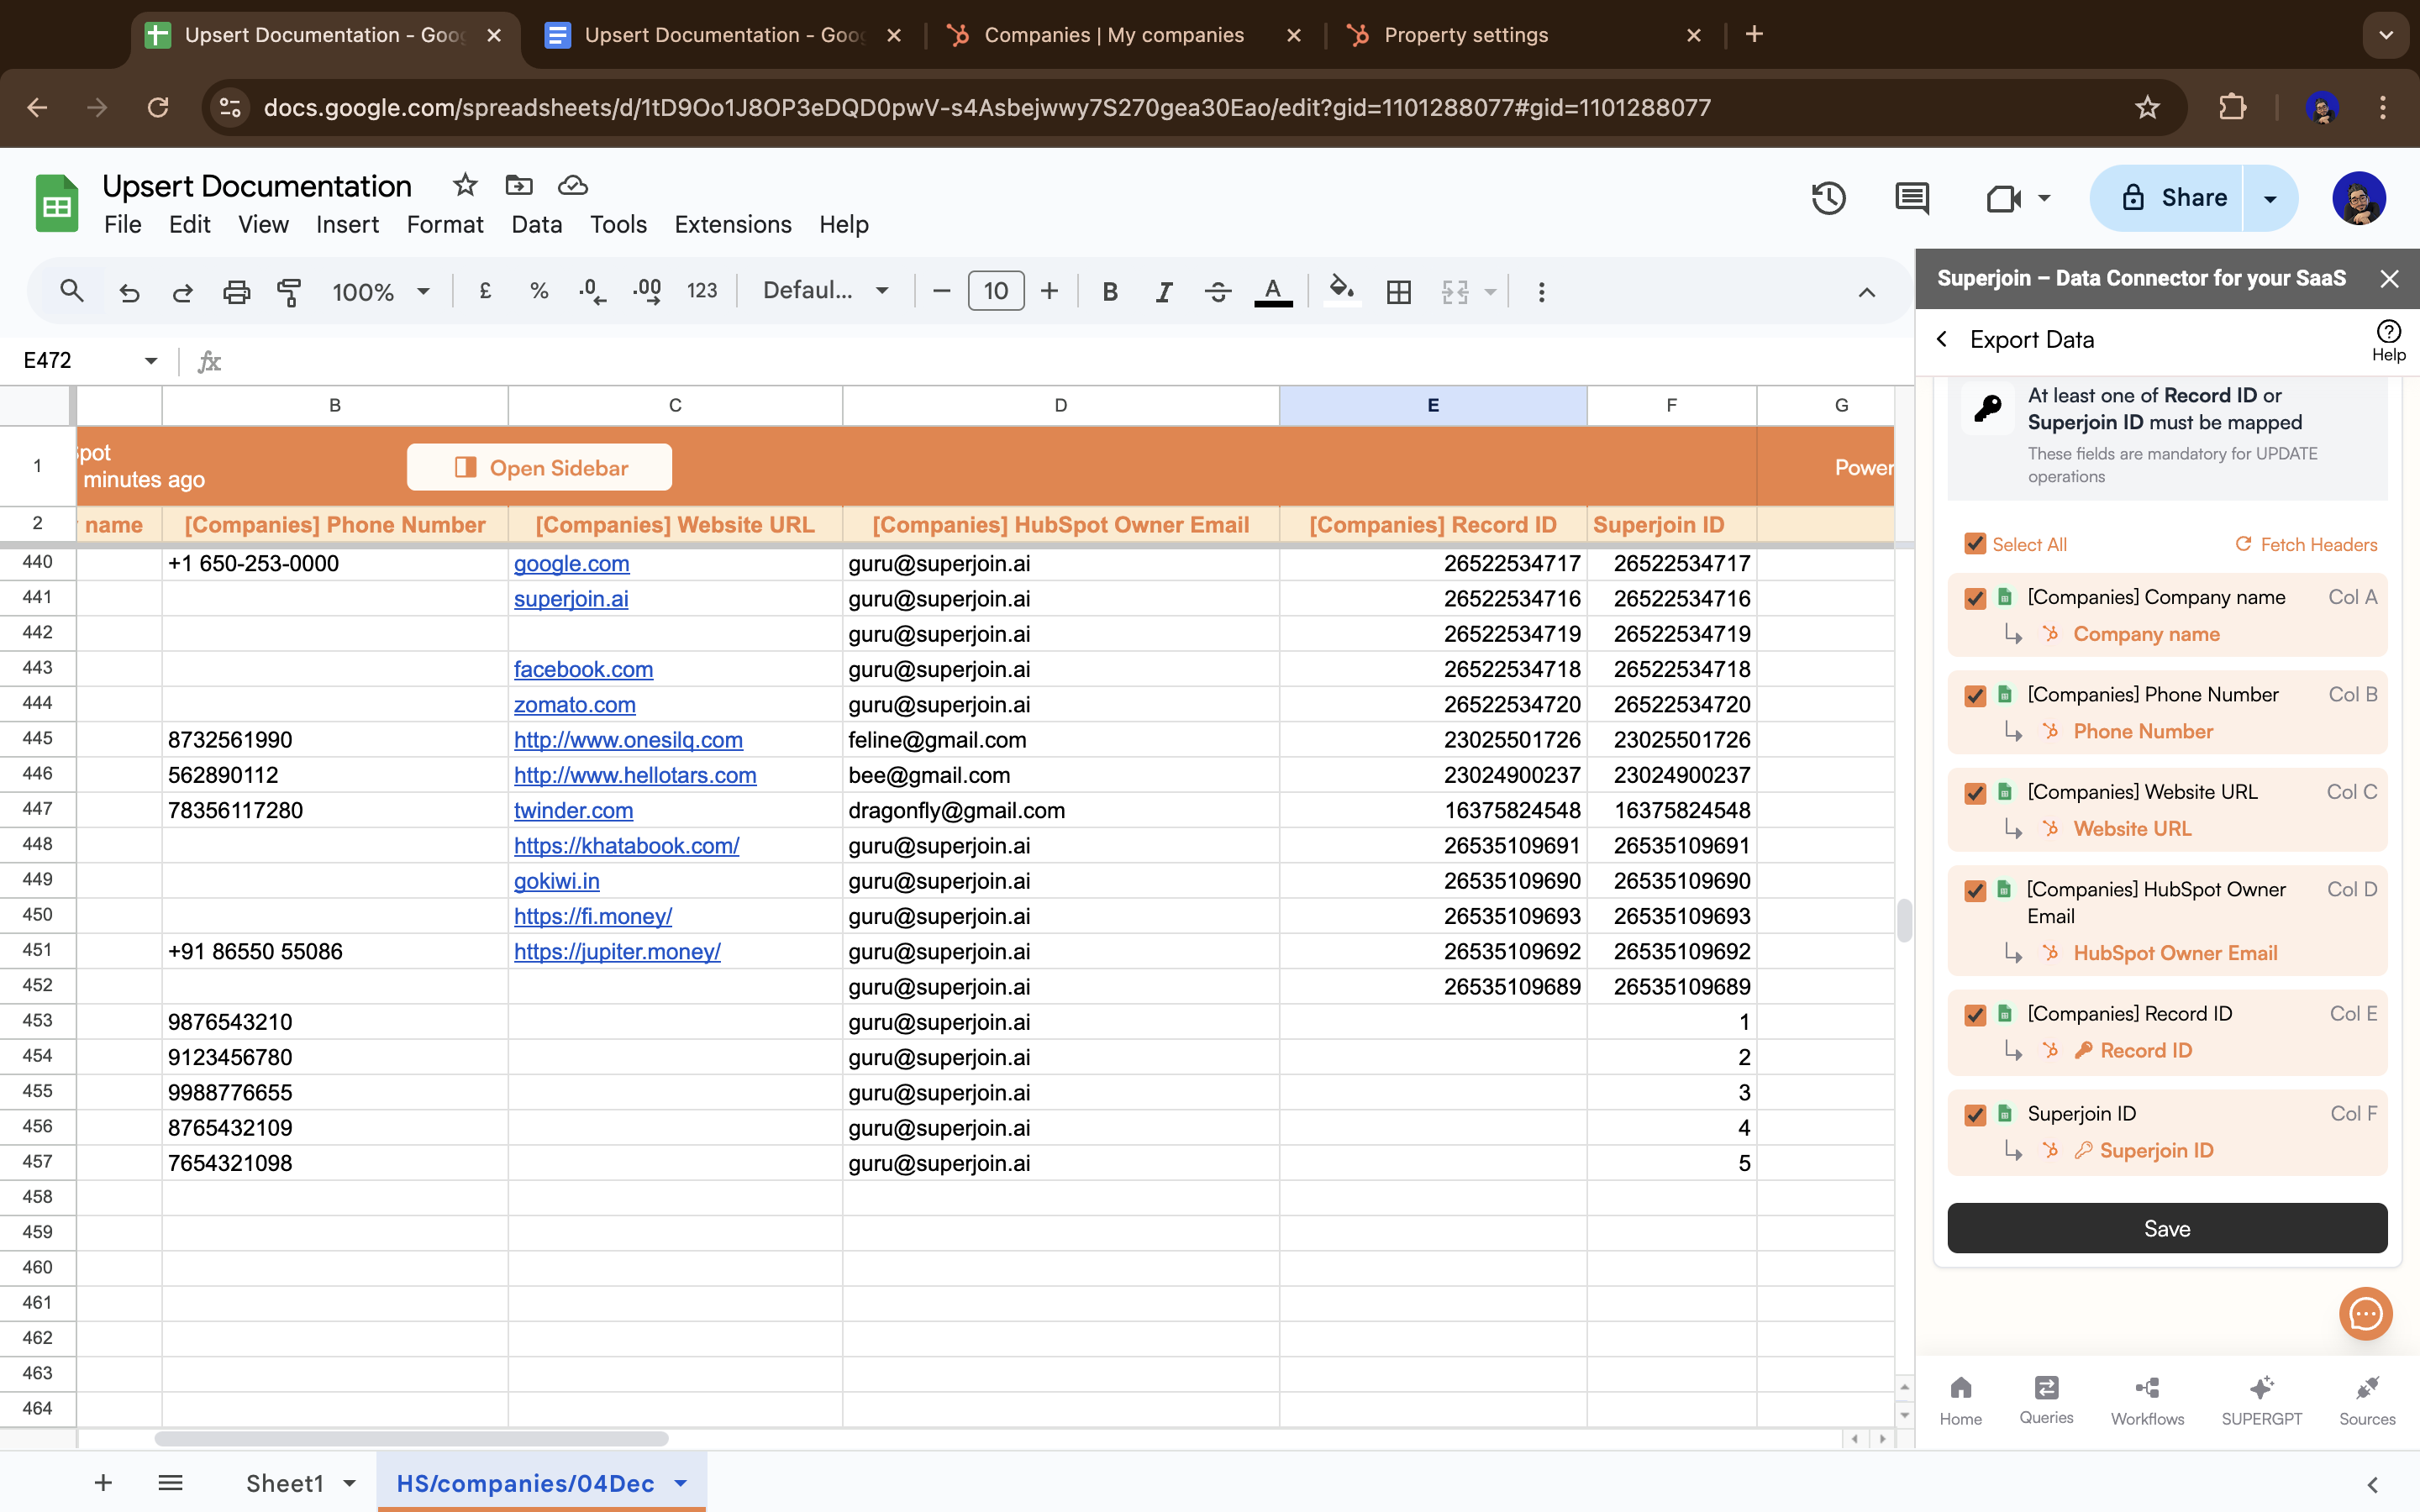
Save and then click Export.5
Select entire sheet to update
Select the 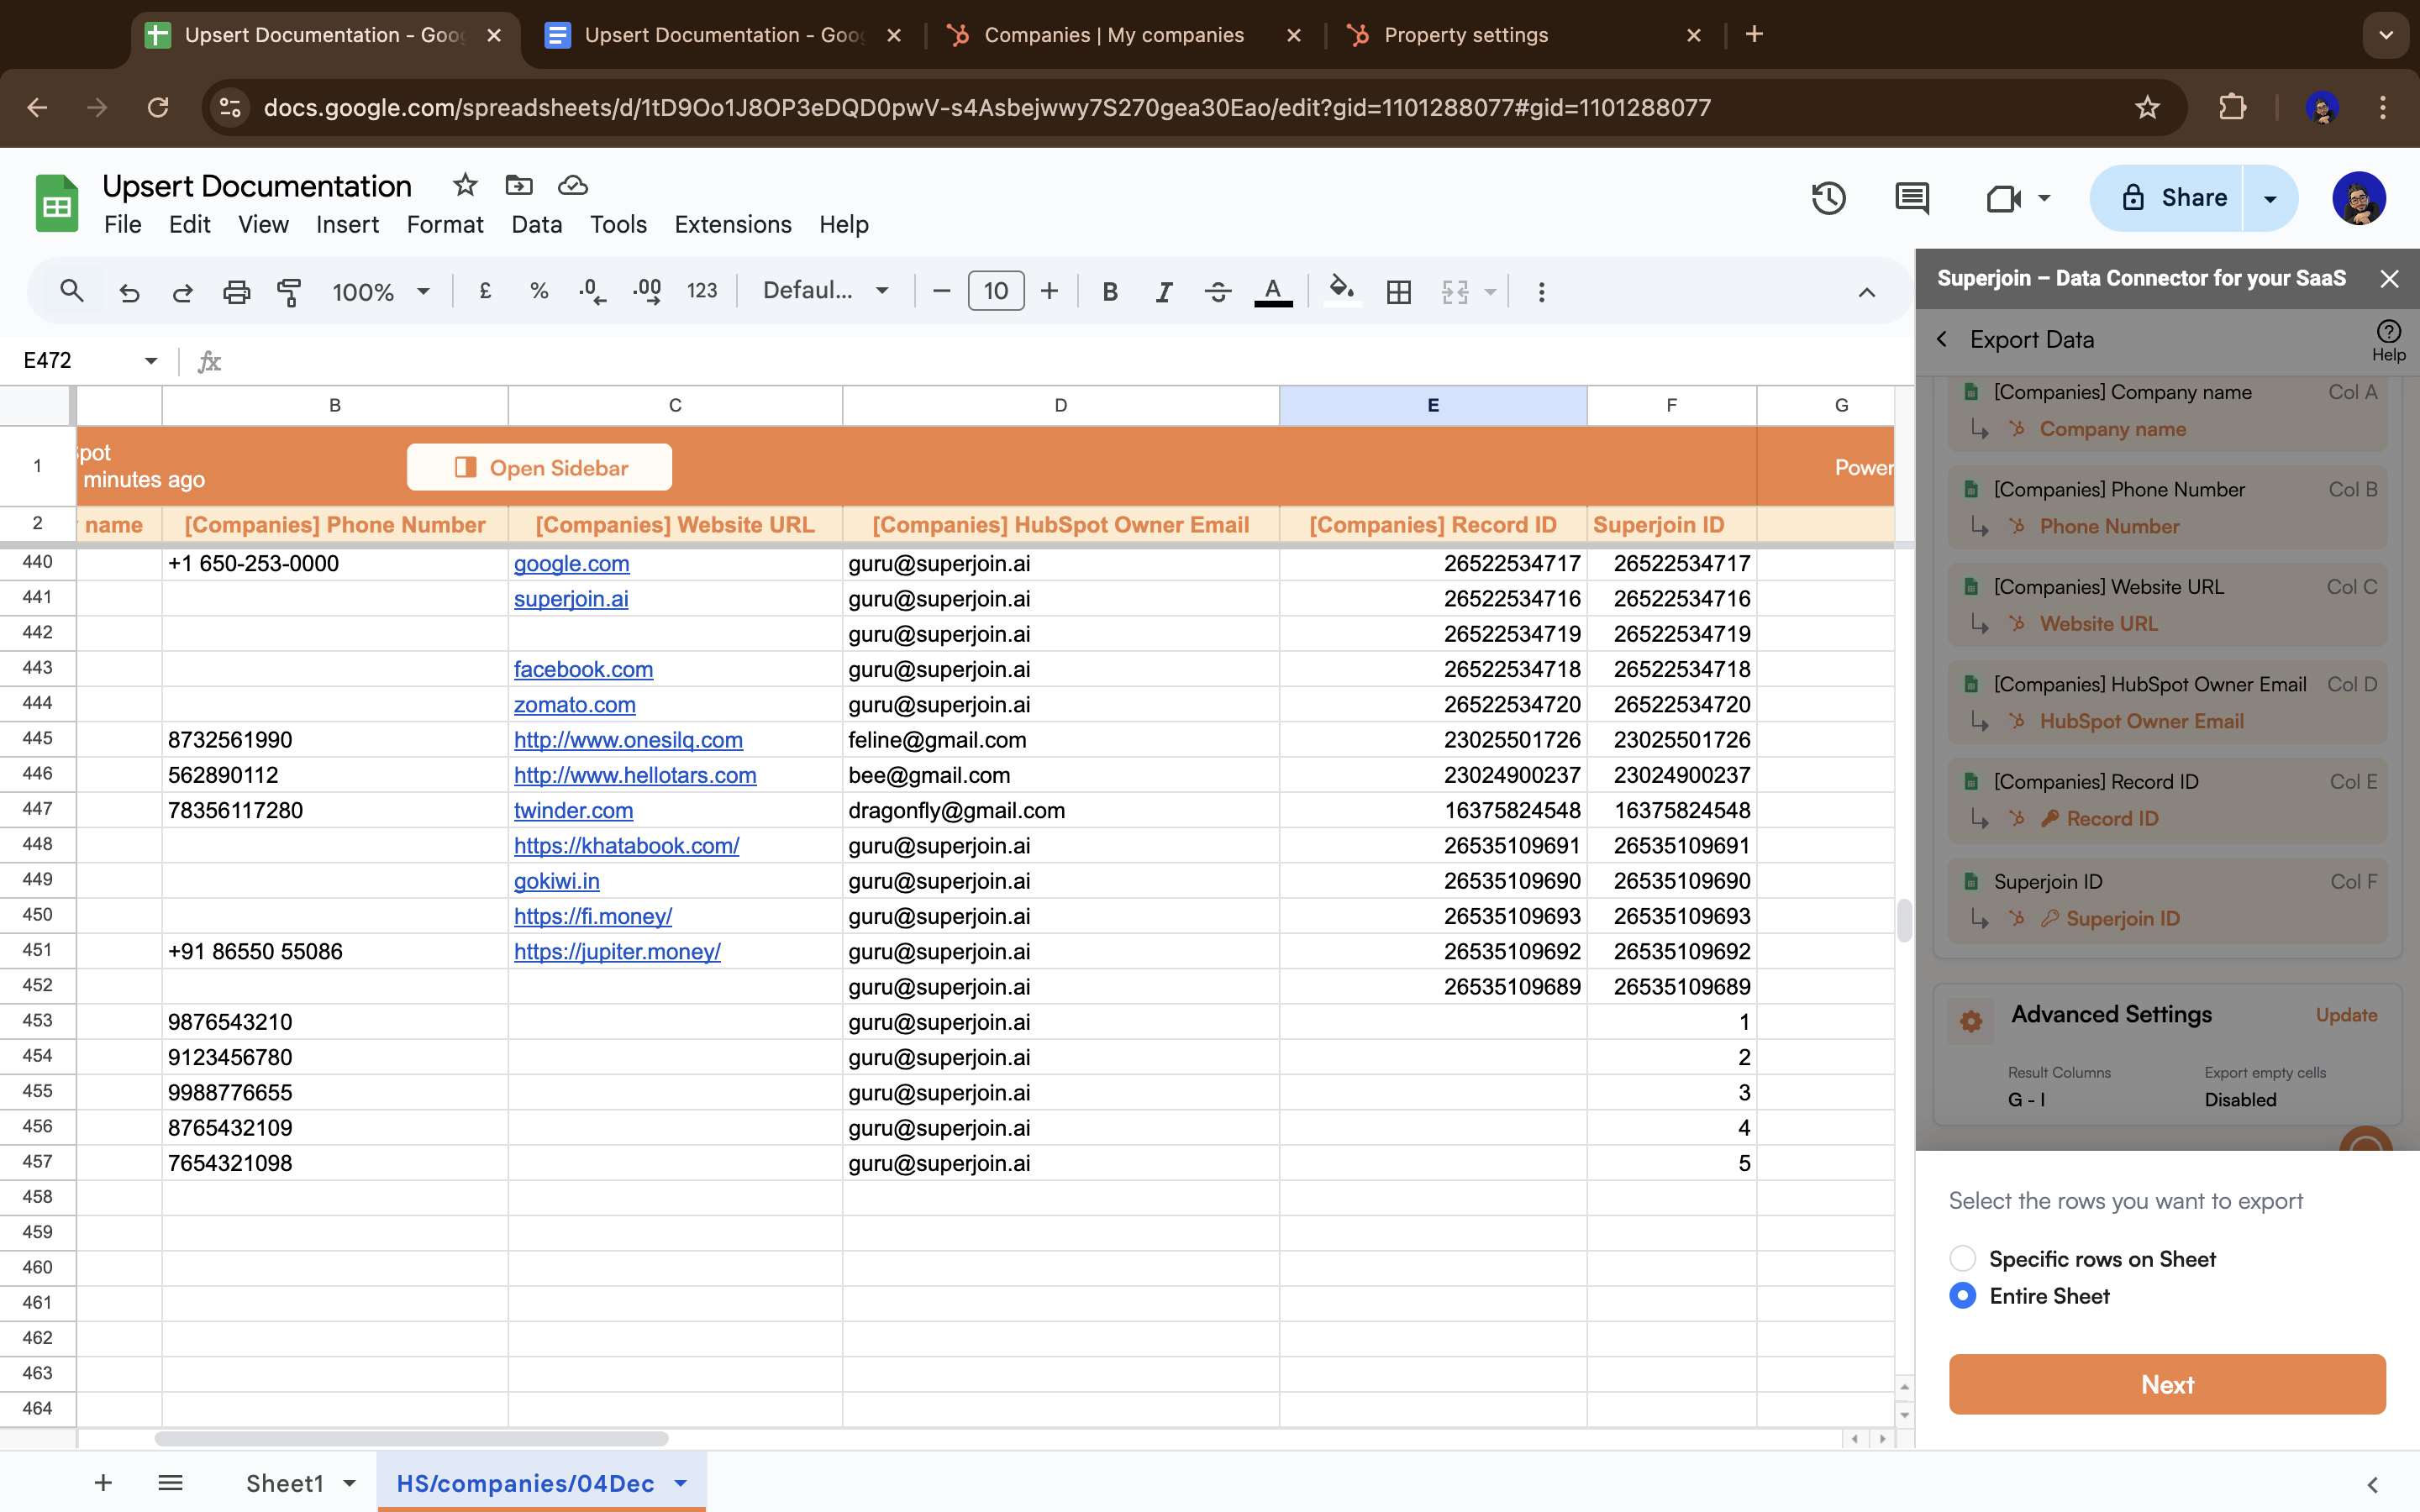
Entire Sheet option, then click Next and update the data.6
Validation complete
What happened? Your existing records were updated with the custom unique identifier values. New records were skipped (since the 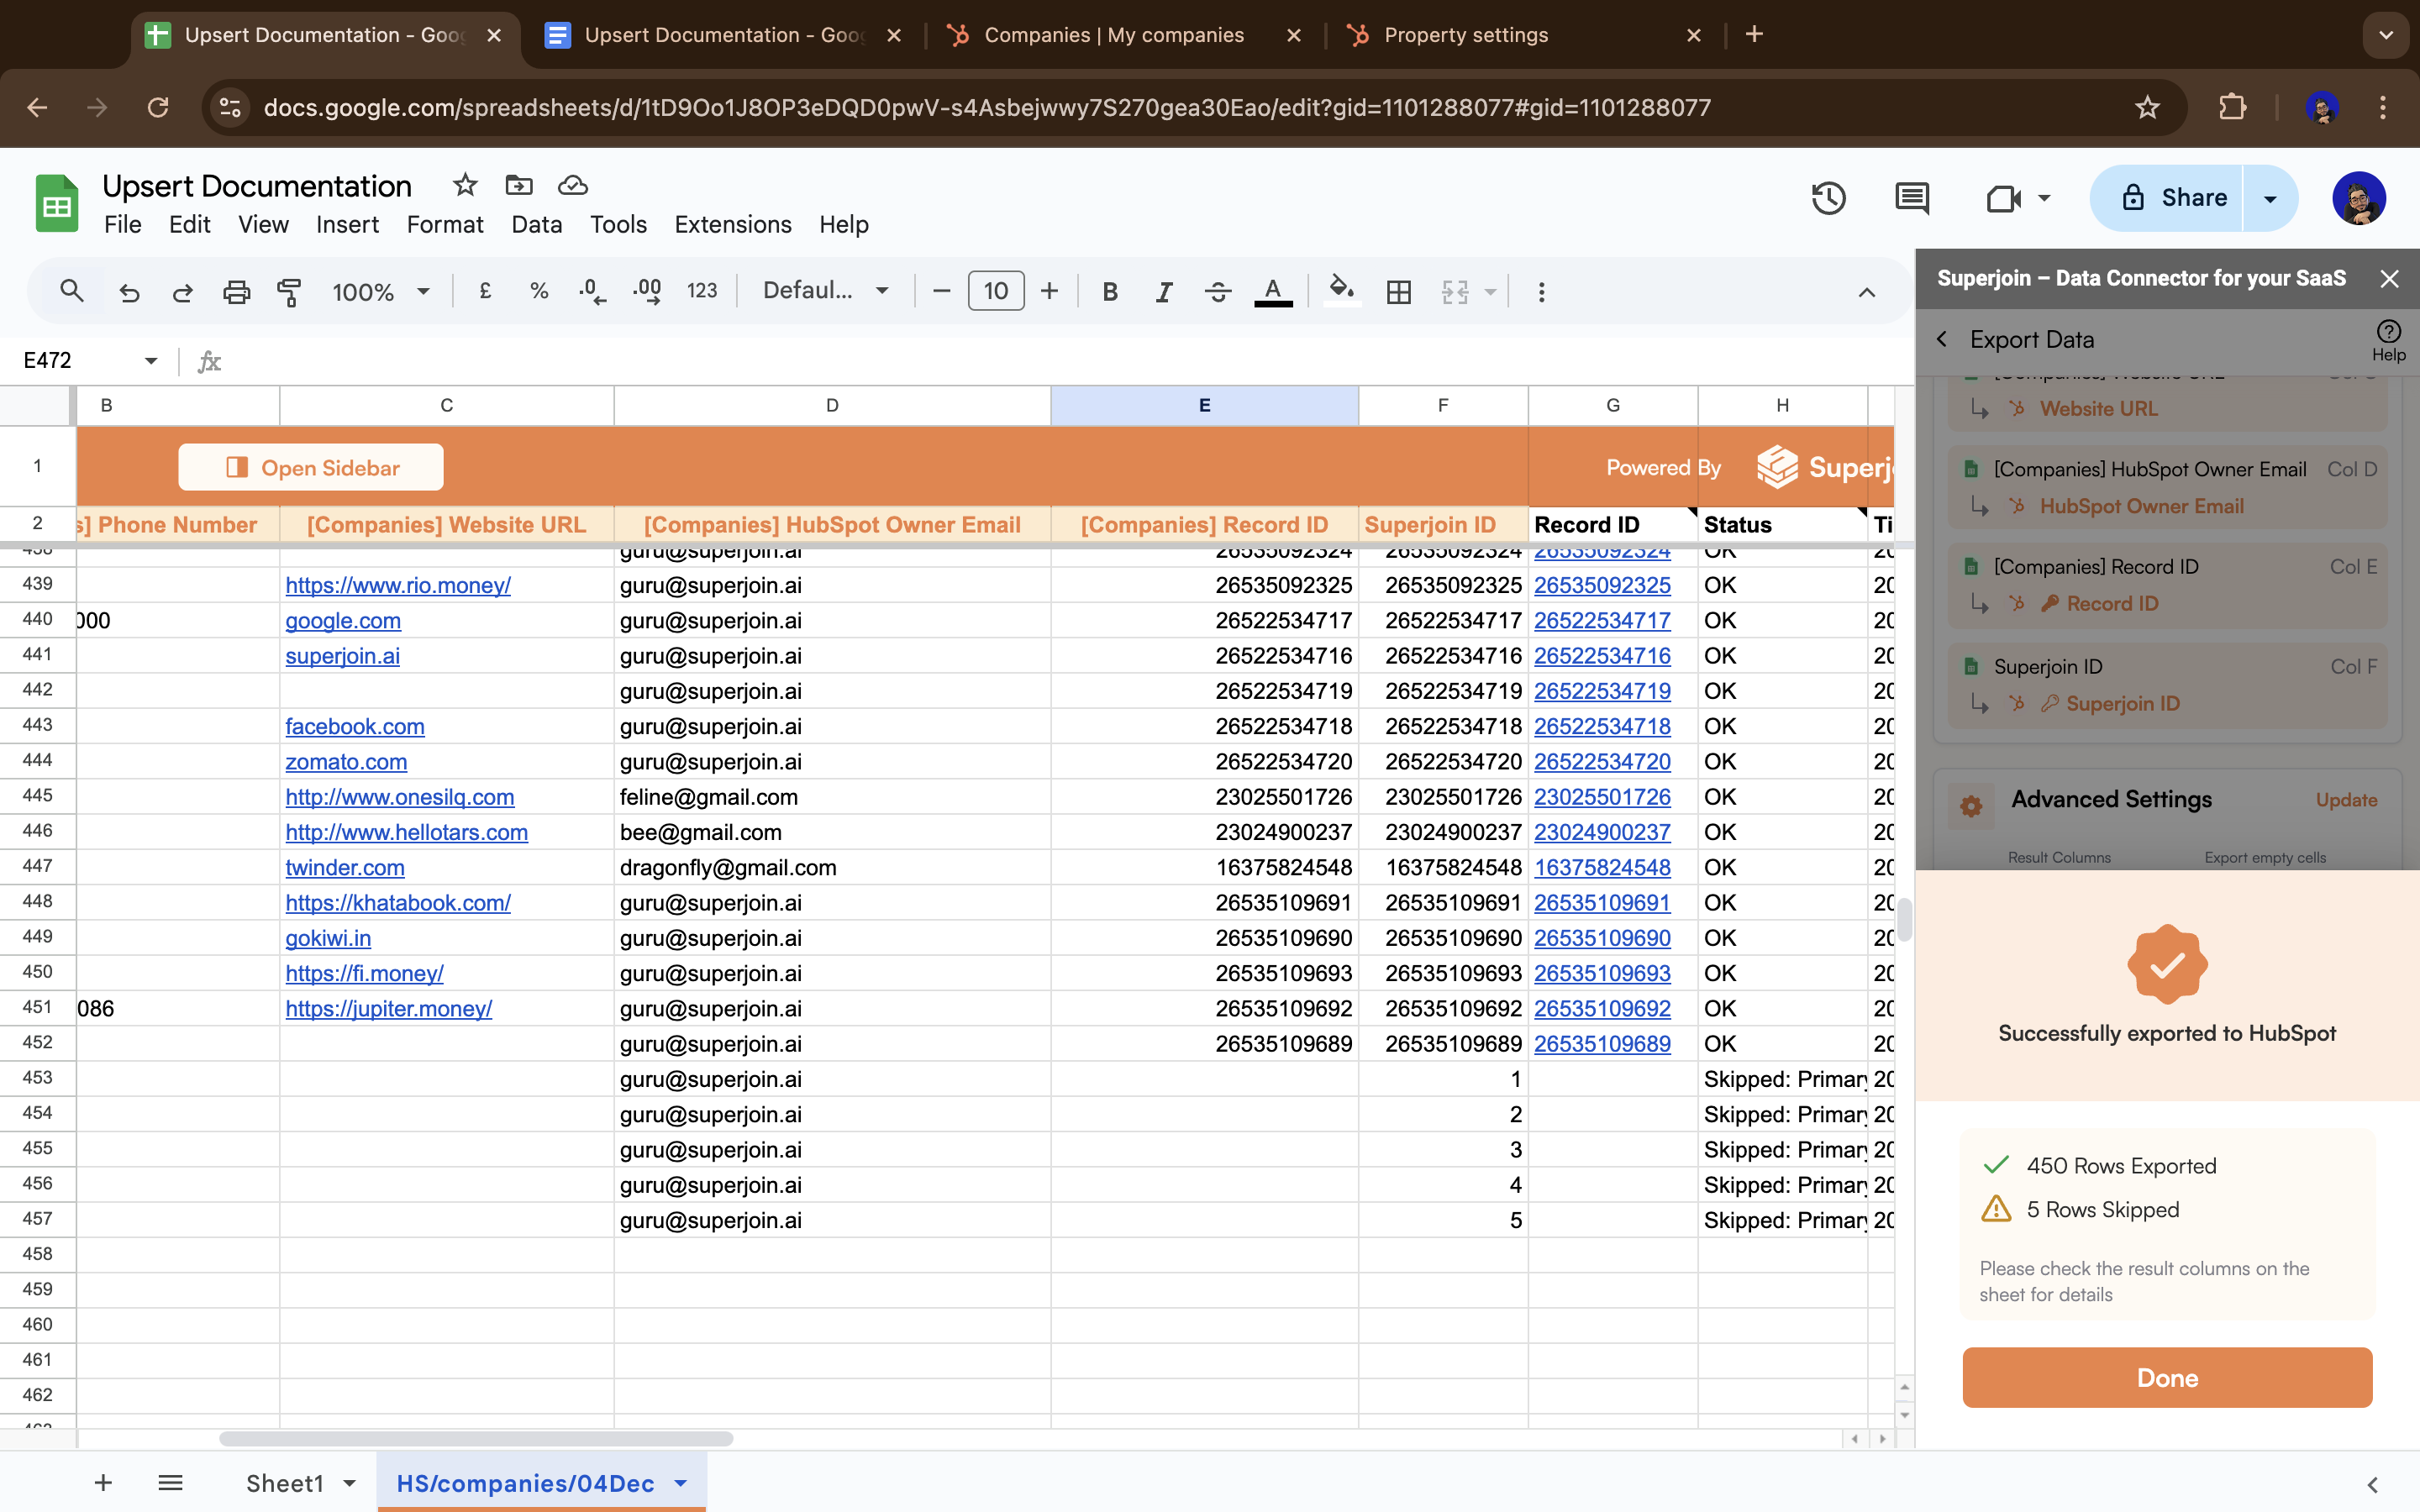
Update action can’t insert new data).Your custom field is now validated and ready for upserts! ✅This validation step only needs to be done once. After this, you can perform upserts freely.
7
Choose Upsert action
Now the magic happens! You can update existing records AND insert new records in a single operation.Choose the 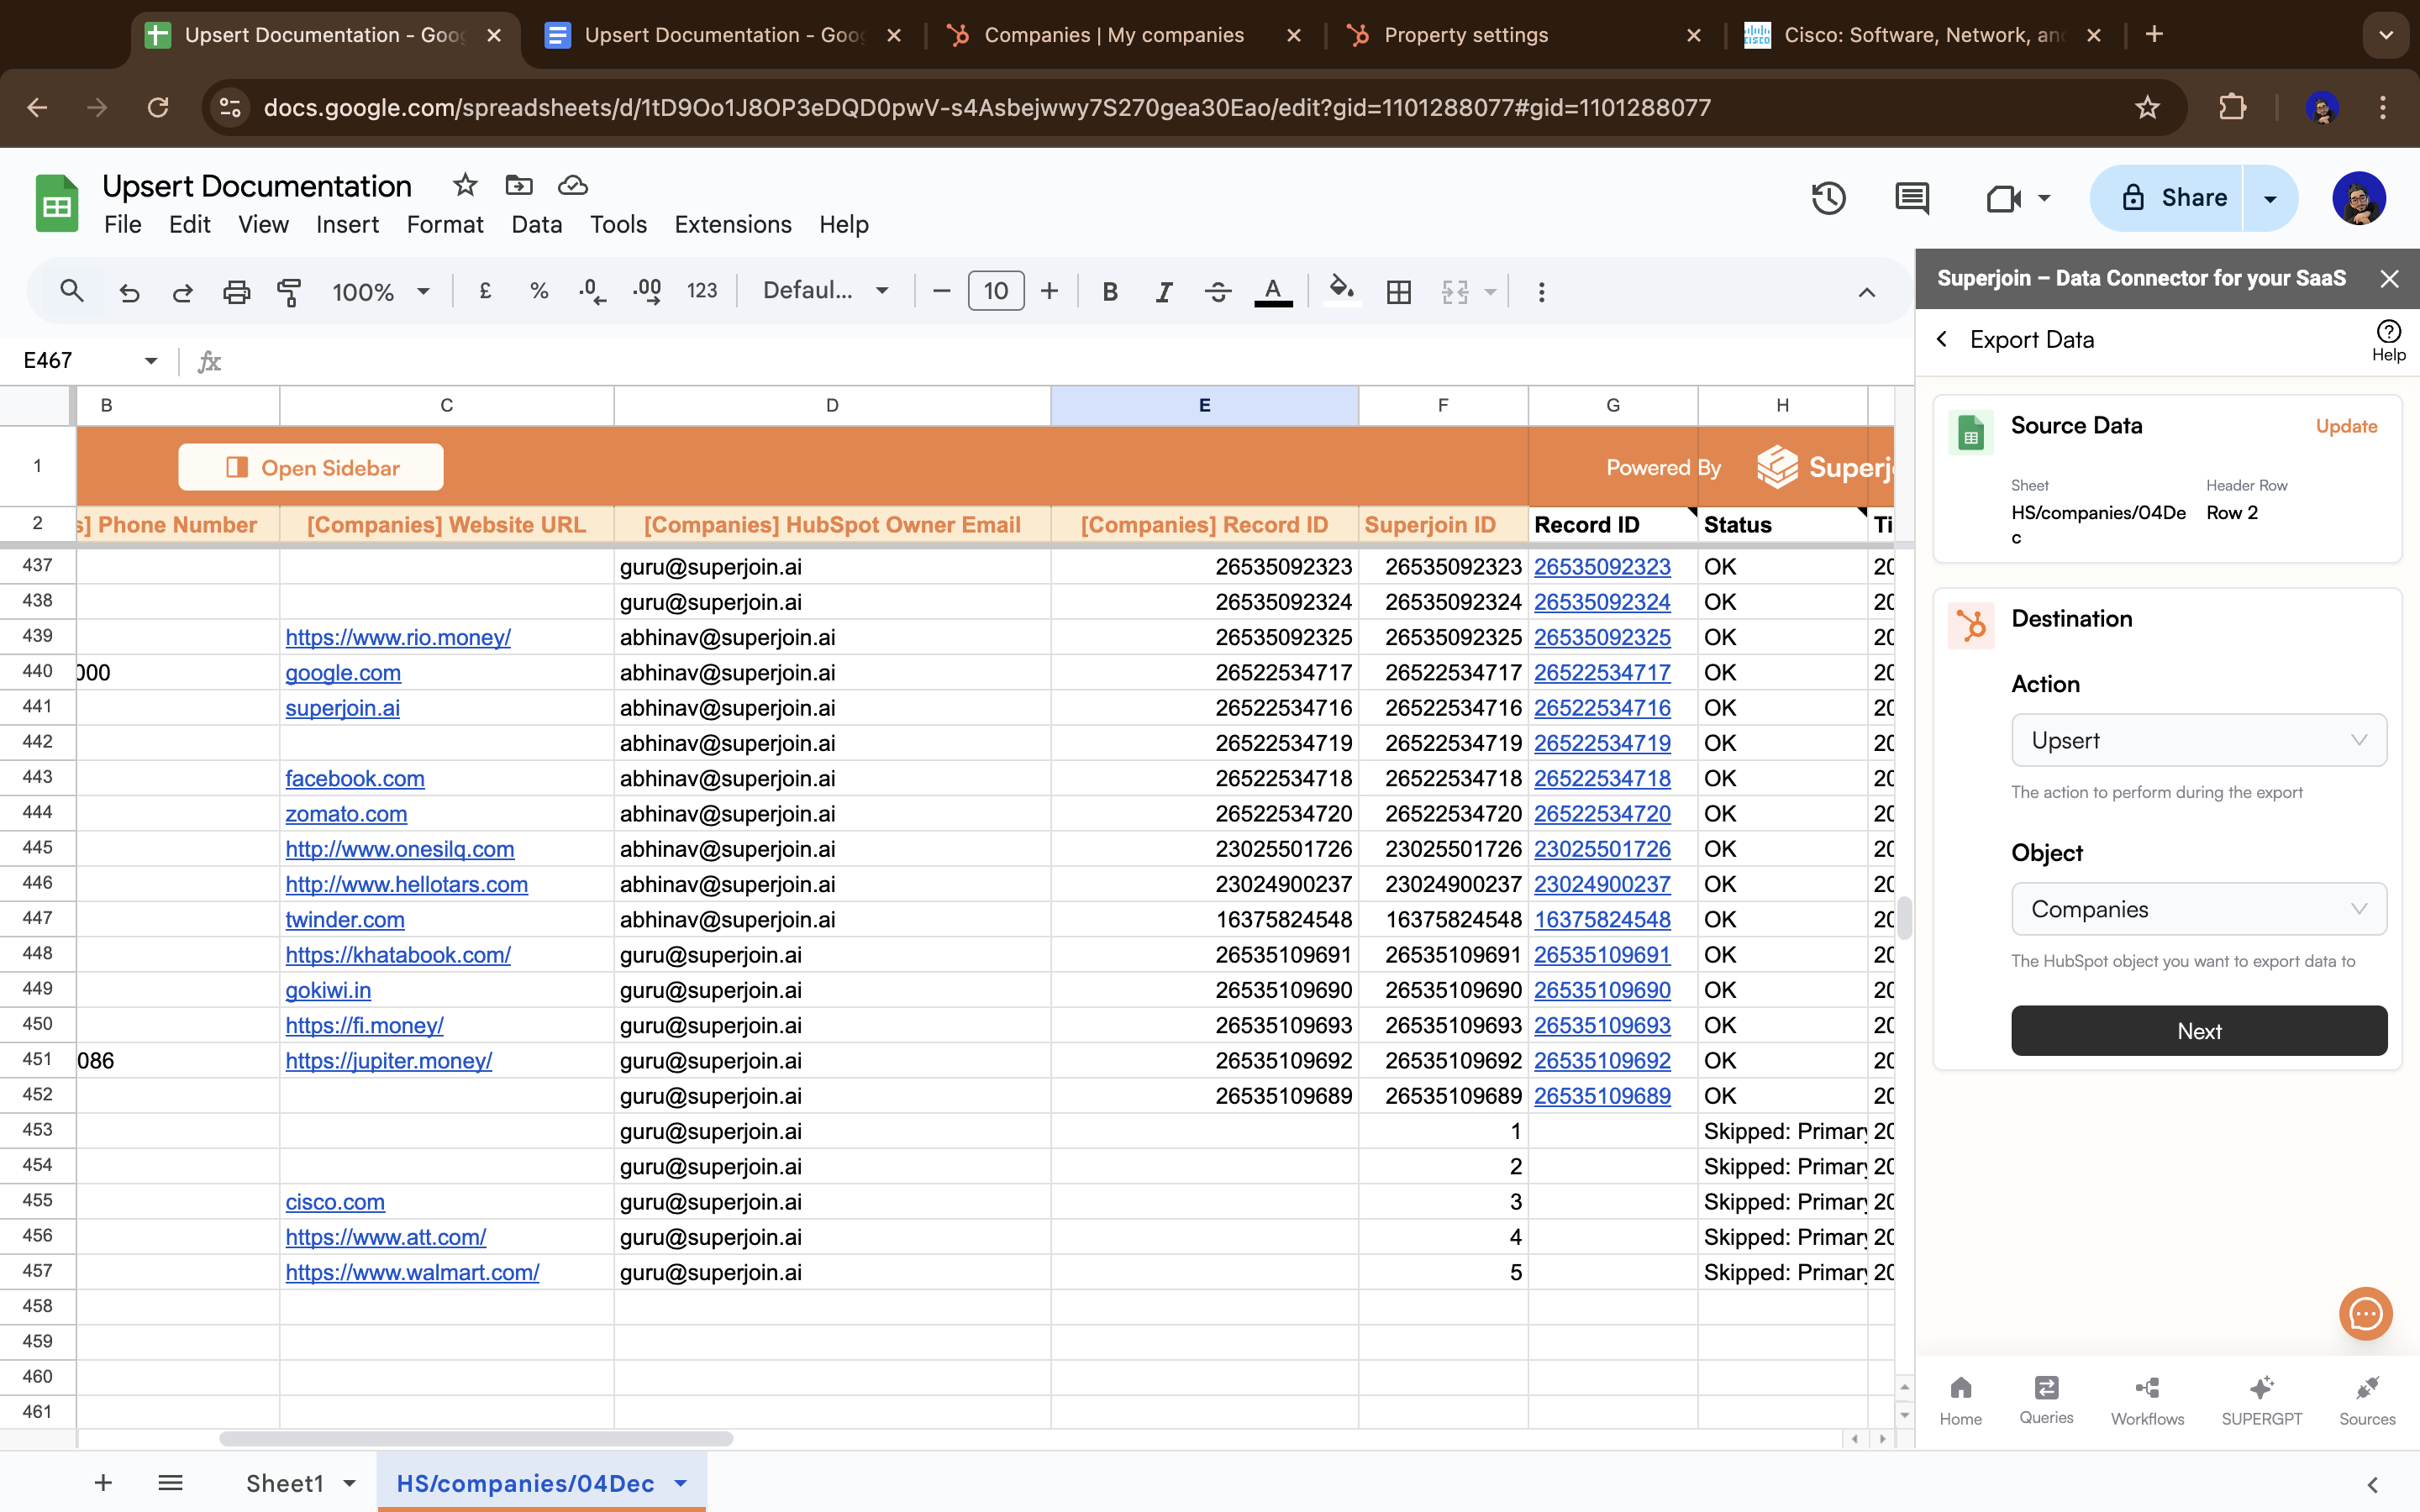
Upsert action and click Next.8
Map fields for upsert
Map your fields carefully: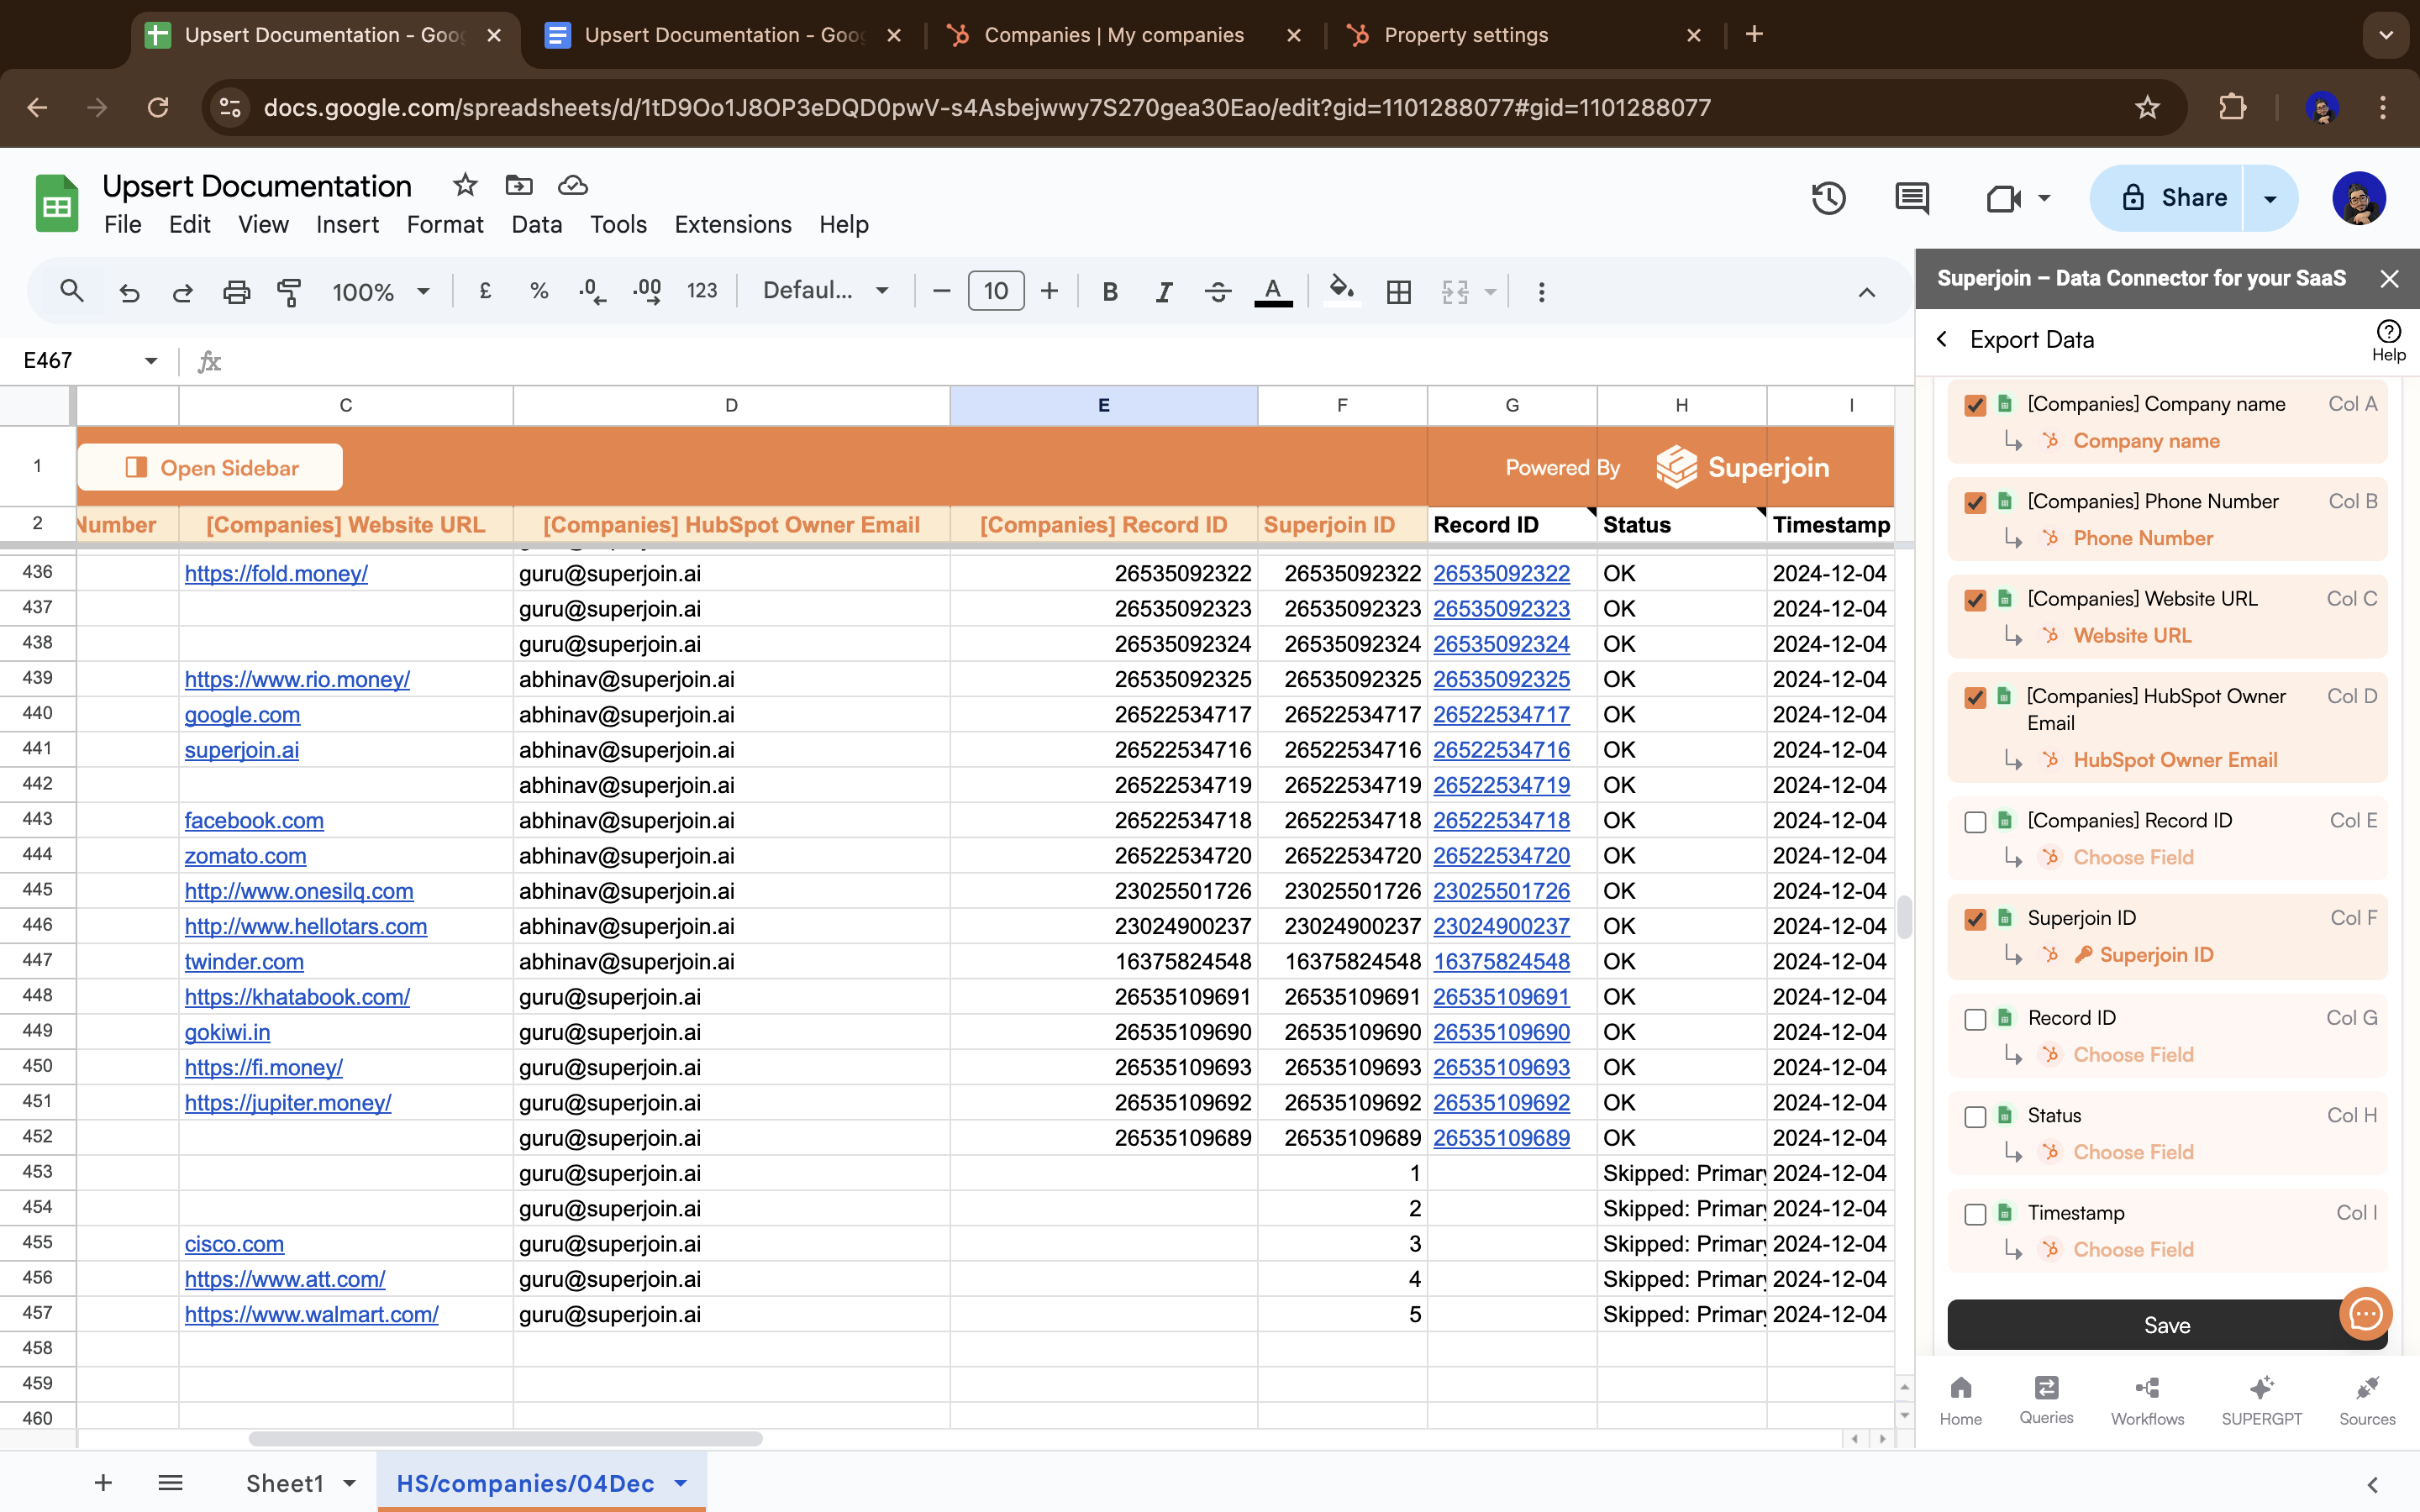
- ✅ Do include: Your custom unique identifier field and all data fields you want to sync
- ❌ Don’t include: HubSpot
Record IDfield or any Superjoin-generated metadata fields (like sync timestamps)
Save and then click Export.9
Select rows to upsert
Select the entire sheet or specific rows you want to upsert, then click 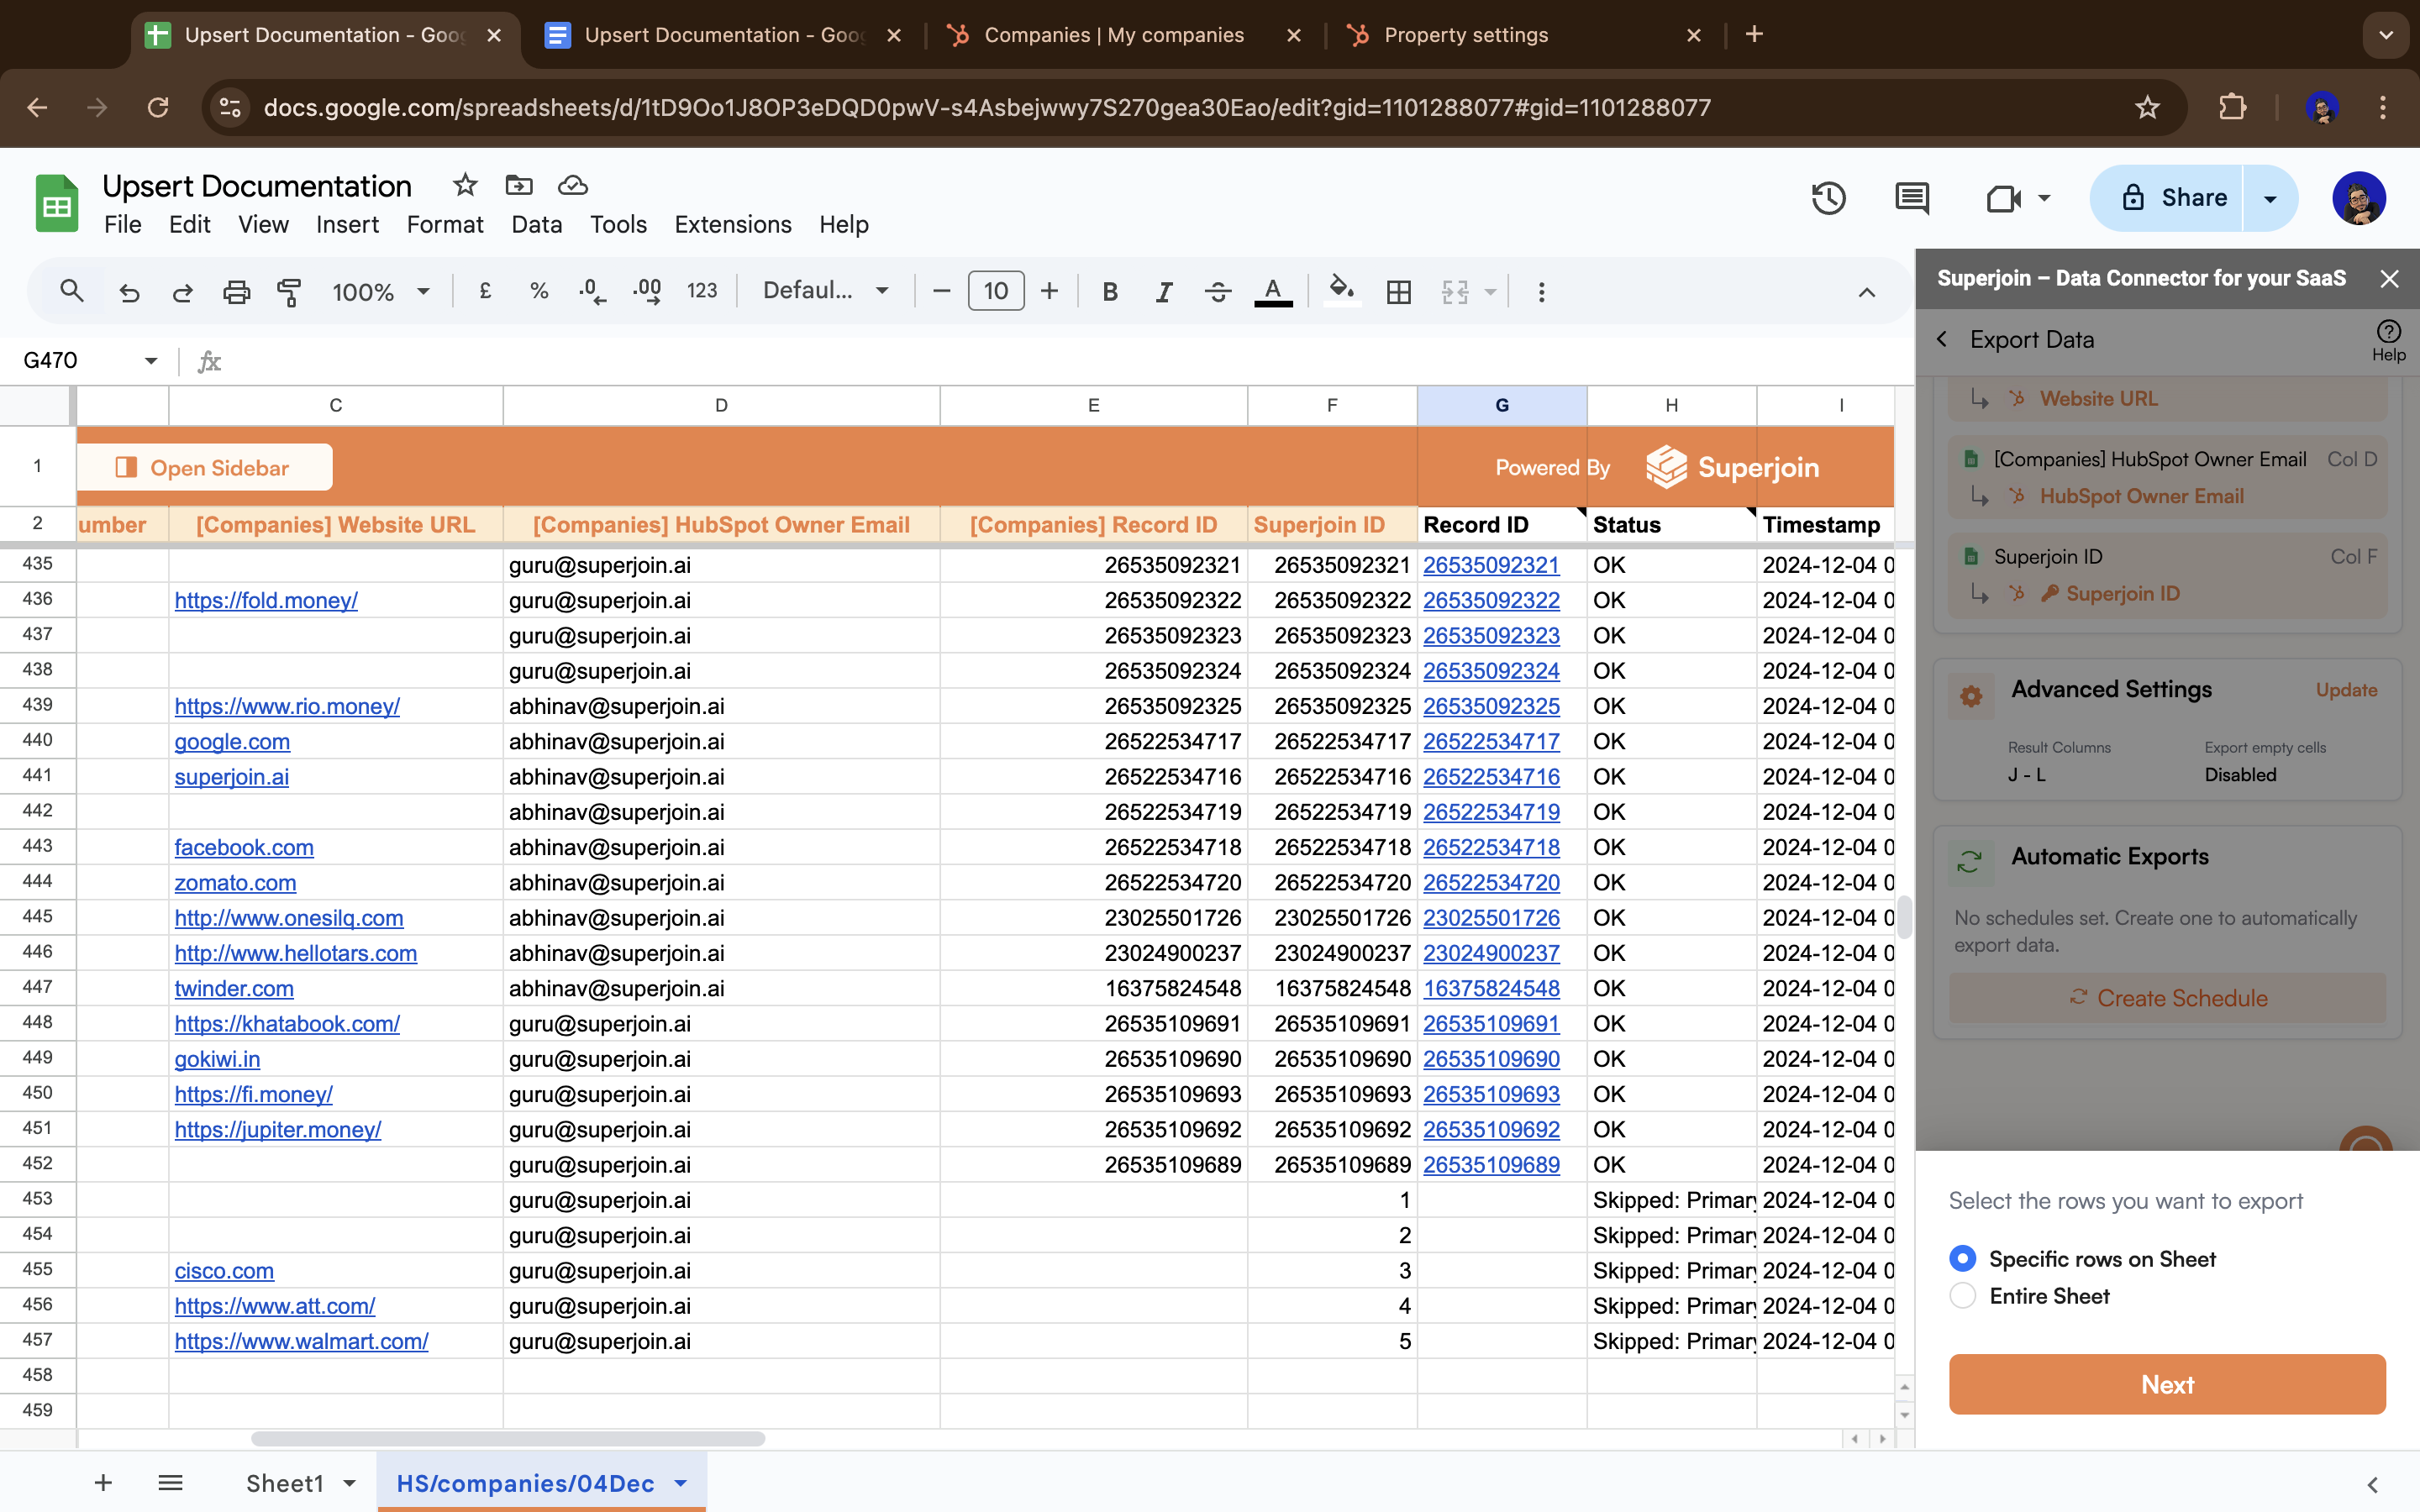
Next and run the upsert.10
Upsert complete!
🎉 Success! Your data has been upserted to HubSpot.What just happened: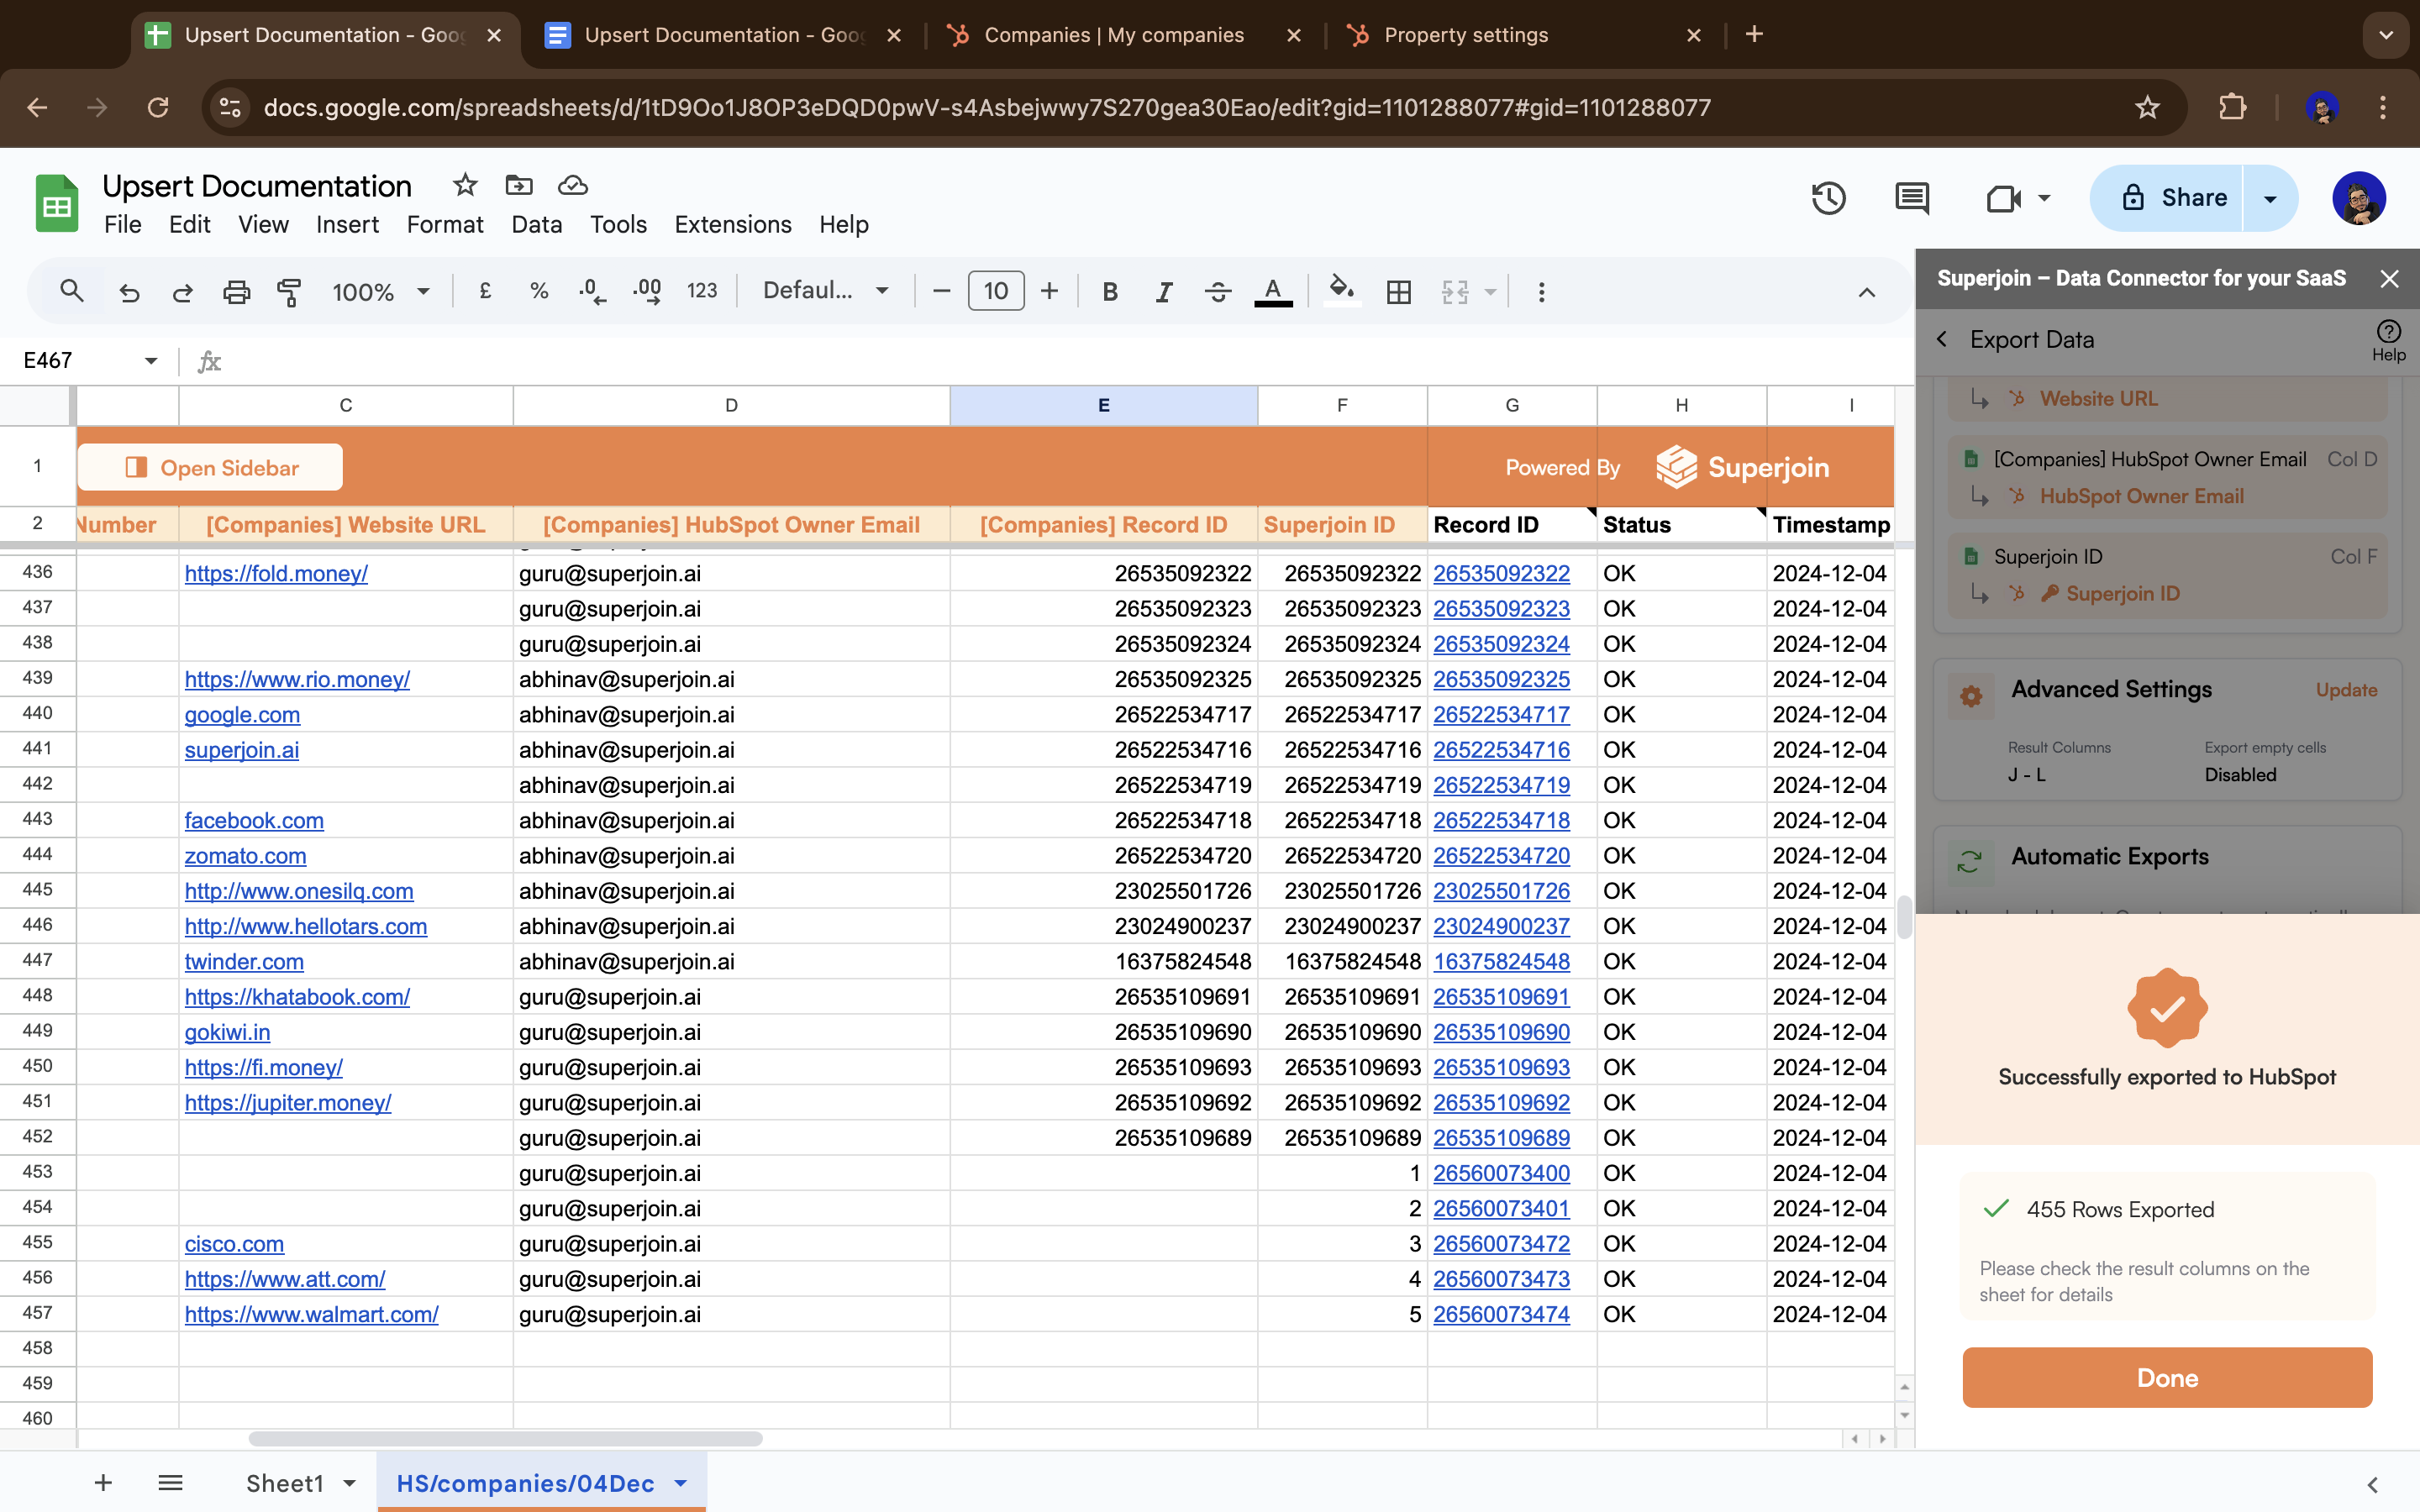
Below are the steps to automate this process.
- Existing records (matched by your custom unique ID) were updated
- New records were inserted into HubSpot
- All in one seamless operation!
Below are the steps to automate this process.
11
Automate the process
Now you’ll see a card called 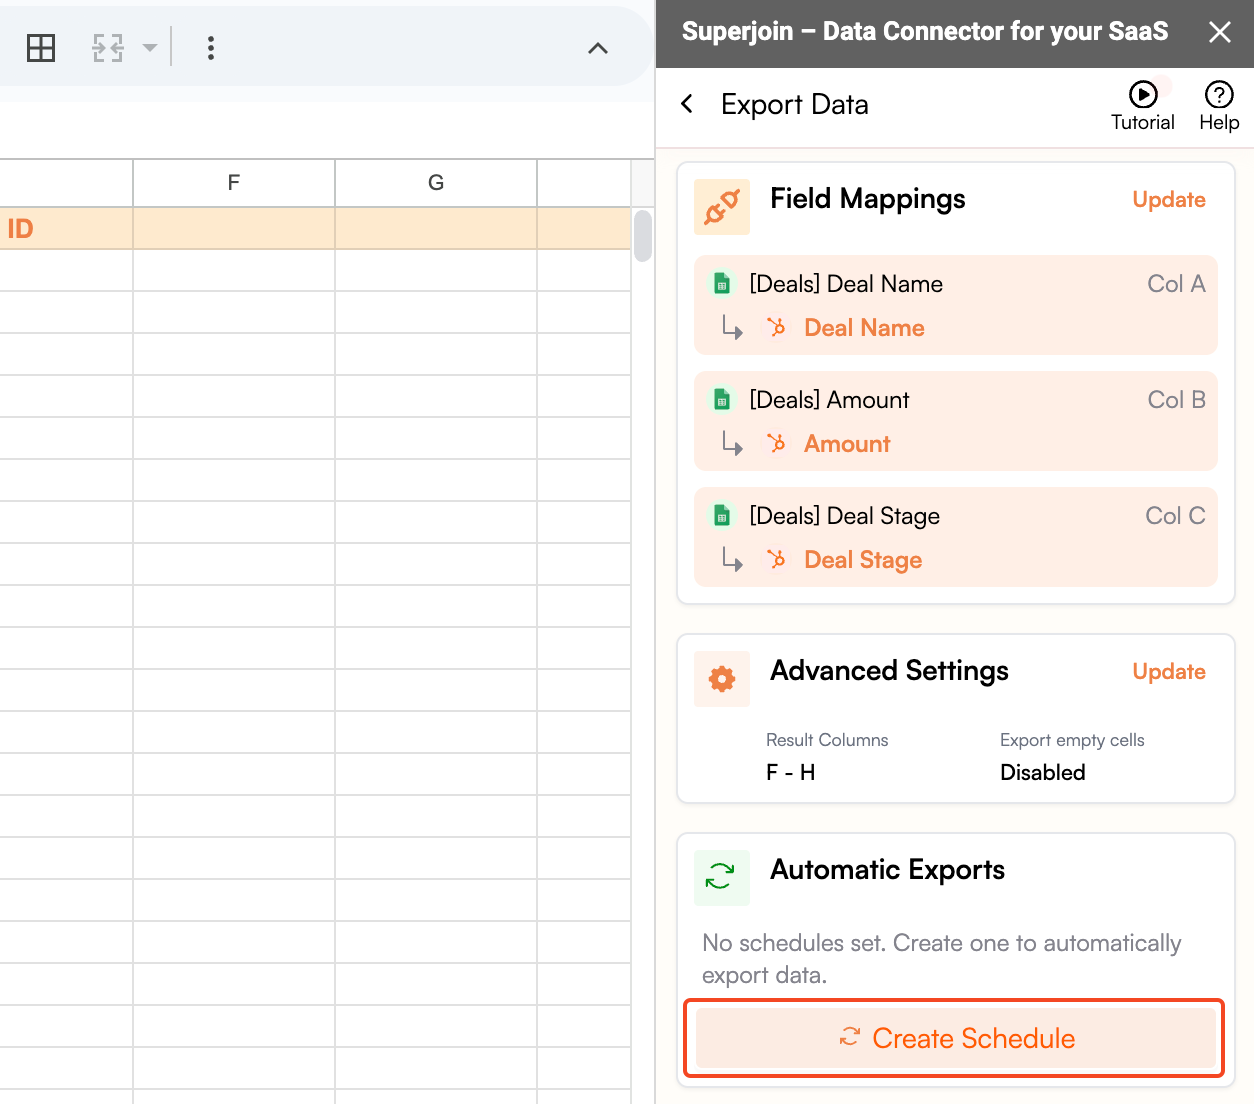
Automatic Exports. Click on the Create Schedule button.12
Create a schedule
Configure the frequency in which you want this upsert process to repeat.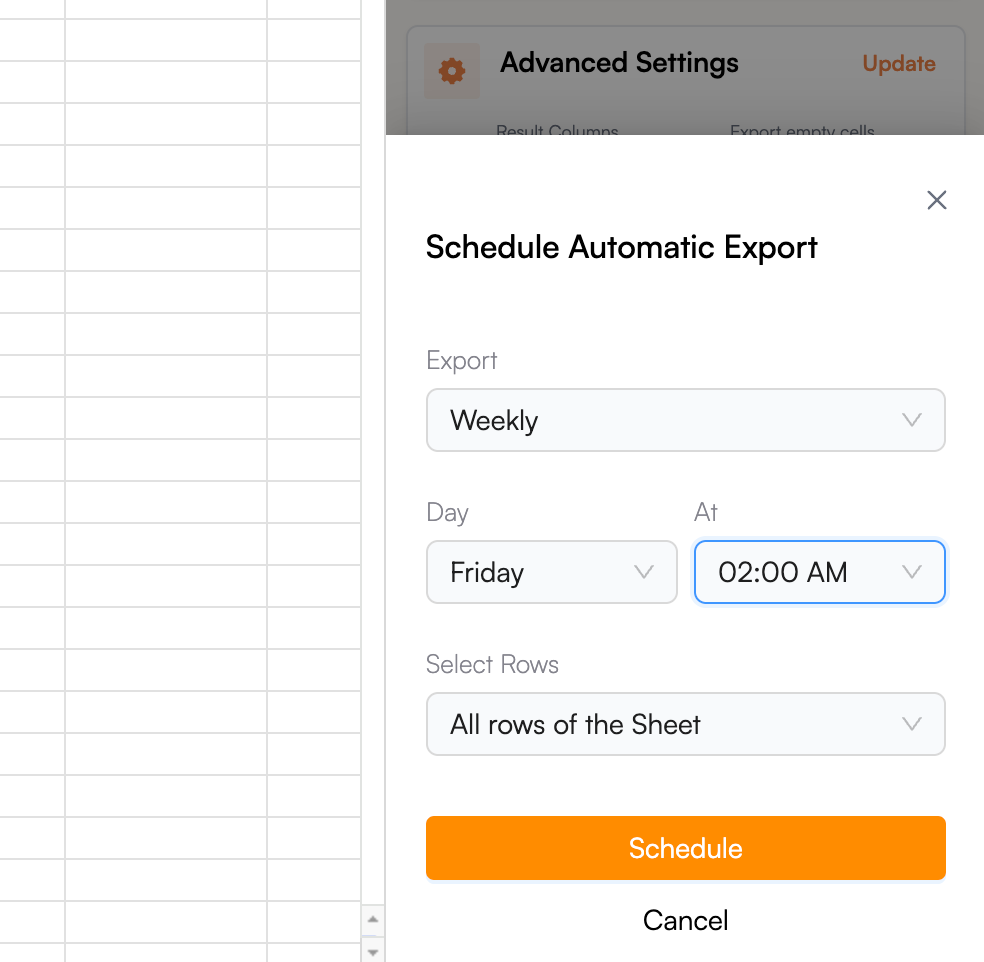
Summary
You’ve successfully set up upserts from Google Sheets to HubSpot! Here’s what you accomplished:- ✅ Created a custom unique identifier field in HubSpot (since Record IDs are read-only)
- ✅ Populated your Google Sheets with unique values
- ✅ Validated the field with an initial update
- ✅ Enabled seamless upserts that can insert new records and update existing ones
Frequently Asked Questions
Can I use multiple primary keys for upserts (e.g., Record ID and my custom unique ID)?
Can I use multiple primary keys for upserts (e.g., Record ID and my custom unique ID)?
No, you cannot use multiple primary keys for upsert operations.HubSpot requires a single unique identifier to match and upsert records. Here’s why:
- How upserts work: When you perform an upsert, HubSpot looks at the unique identifier field to determine if a record already exists. If it finds a match, it updates that record; if not, it creates a new one.
- Why only one: Having multiple primary keys would create ambiguity. For example, if Record ID matches but your custom ID doesn’t, HubSpot wouldn’t know whether to update the existing record or create a new one.
- Record ID limitation: Remember that HubSpot Record IDs cannot be used as the primary key for upserts because they are read-only and don’t exist for new records yet.
I get an error "Requires Unique ID to upsert" - how do I fix this?
I get an error "Requires Unique ID to upsert" - how do I fix this?
This error means HubSpot doesn’t have a validated unique identifier field to use for matching records during upsert operations.Quick fix - follow these steps:
-
Create a custom unique field in HubSpot:
- Go to Settings → Properties in HubSpot
- Create a new Number field with the “Unique value” option enabled
-
Add the field to Google Sheets:
- Create a column with the same name as your HubSpot field
- Fill it with unique values (use Record IDs for existing records, unique numbers for new records)
-
Validate the field:
- Run a one-time Update operation (not upsert) to push the unique values to HubSpot
- This validates the field and populates existing records with your custom IDs
-
Now try upsert again:
- Select the Upsert action
- Map your custom unique identifier field
- Your upserts will now work!
Why can't I use HubSpot's Record ID for upserts?
Why can't I use HubSpot's Record ID for upserts?
HubSpot Record IDs are read-only fields, which creates a fundamental limitation for upsert operations.Here’s the problem:For existing records:
- ✅ Record IDs work perfectly for updates
- Every existing record already has a Record ID assigned by HubSpot
- ❌ Record IDs don’t exist yet - they’re only assigned after a record is created
- You can’t provide a Record ID when inserting a new record
- This makes Record IDs incompatible with the “insert” part of “upsert”
- An upsert combines insert (create new records) + update (modify existing records) in one operation
- It needs a unique identifier that works for both scenarios
- Create a custom unique identifier field that you control
- For existing records: populate it with Record IDs or other unique values
- For new records: assign unique numbers (e.g., 10001, 10002, etc.)
- This field works for both inserts and updates, enabling true upsert functionality
What if I don't have Record IDs to fill the unique field with?
What if I don't have Record IDs to fill the unique field with?
If you don’t already have HubSpot Record IDs in your Google Sheet, you’ll need to import them first. Record IDs are required for existing records to properly identify and update them during upserts.Solution: Import data from HubSpot firstUse Superjoin to import your existing HubSpot records into Google Sheets, which will automatically pull the Record IDs along with your data:
-
Import your HubSpot data:
- Use Superjoin’s import feature to pull data from HubSpot
- Make sure to include the Record ID field in your import
- This will create a sheet with all your existing records and their HubSpot Record IDs
-
Populate your custom unique field:
- Copy the Record IDs from the imported data
- Paste them into your custom unique identifier field
- For any new records you want to add, use unique numbers (e.g., 10001, 10002, etc.)
-
Continue with the upsert process:
- Follow the validation and upsert steps from this guide
- Your existing records will be matched using the Record IDs you imported
- Existing records: Need their original HubSpot Record IDs so the system can match and update them correctly
- New records: Can use any unique numbers since they don’t exist in HubSpot yet
- Without Record IDs: You risk creating duplicate records instead of updating existing ones
Need help importing? Check out our complete guide on importing data from HubSpot to learn how to pull your existing records with their Record IDs.