- Import
- Export
Guide to quickly obtain default permissions
Guide to quickly obtain default permissions
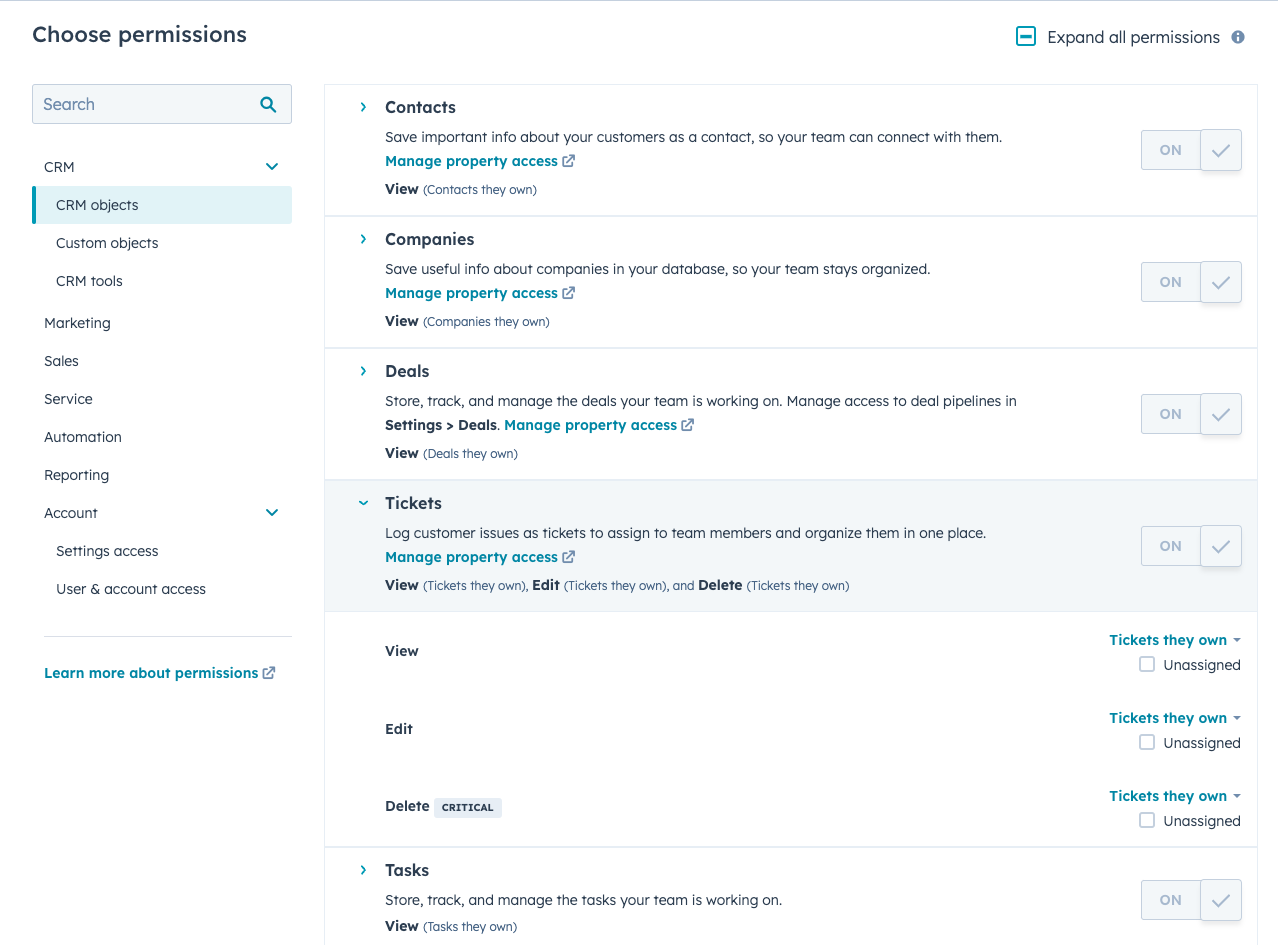
If you follow the upcoming guide, you will get access to the below objects. Do note that unless you modify the settings, you will only see items that you own. For Eg. You will only see “Contacts” that are assigned to you:Contacts,
Companies,
Deals,
Deal Splits,
Goals,
Leads,
Custom Objects,
Line Items,
Carts,
Discounts,
Fees,
Orders,
Subscriptions,
Taxes,
Calls,
Emails,
Meetings,
Notes,
Tasks,
Communications,
Postal Mail
1
Re-authenticate with HubSpot
If you believe that you have the right permissions on your user account to access these Objects, go ahead and click on Re-authenticate with HubSpot.
Follow the next steps if you encounter the same error.
Only a person with Super Admin access (on HubSpot) can give another user the right permissions.
2
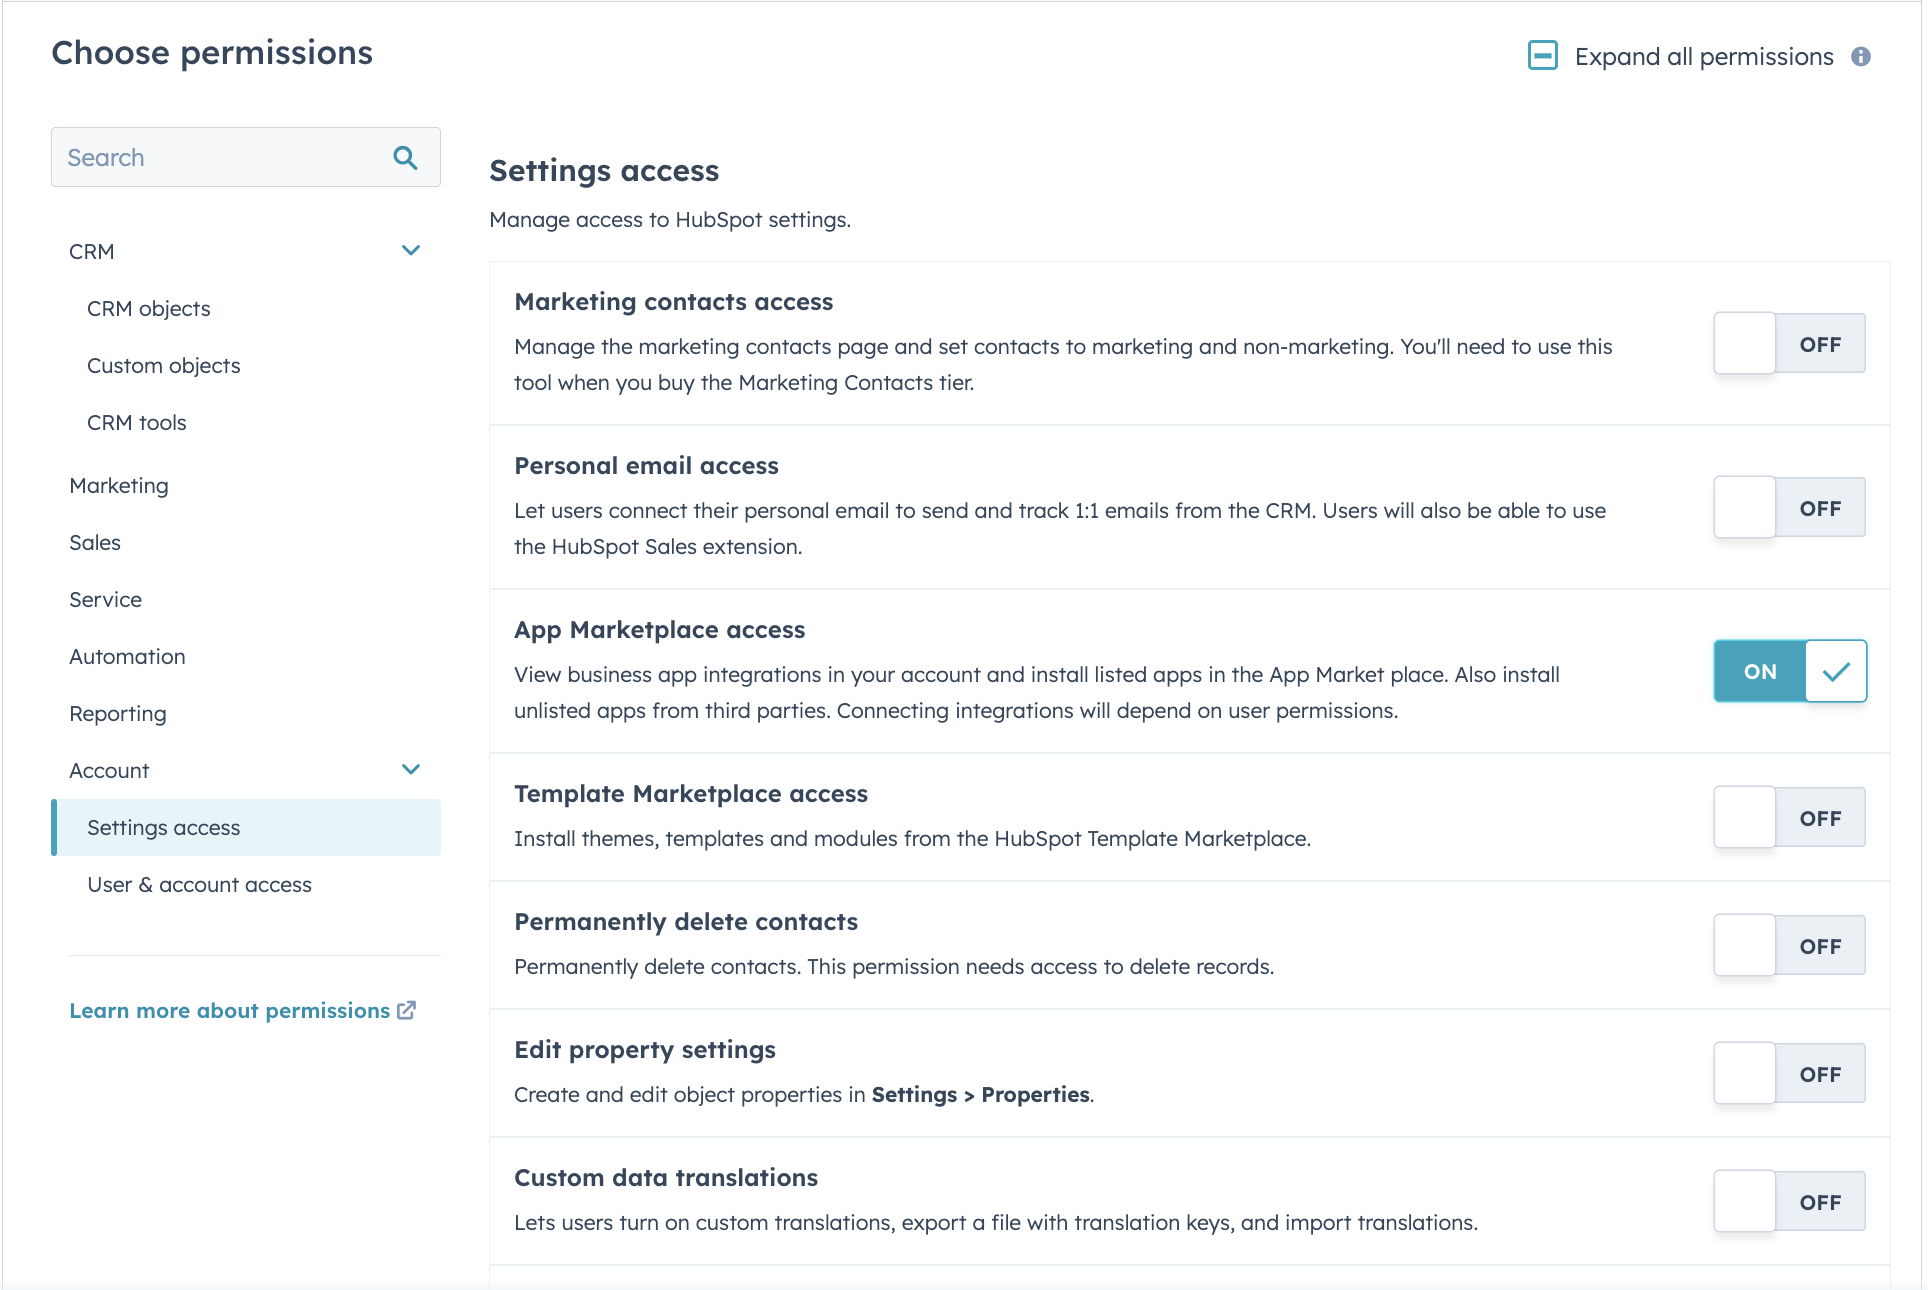
Go to HubSpot Settings.
On a new web browser tab, navigate to your HubSpot account. Make sure to select the same account that you are using in Superjoin. From the topbar (top right), navigate to Settings.
3
Edit Permissions
Under Settings (Account Management), select Users & Teams from the left section.

4
Enable Apps Marketplace settings
5
Re-authenticate your Account
Navigate to Google Sheet where Superjoin is loaded.
Perform the authentication process again and select the right HubSpot account. You will now be able to access the most basic objects.
6
Contact Support
If you are still facing the same issue, reach out to support@superjoin.ai and we will help you.
Get access to 'Invoices' object
Get access to 'Invoices' object
Under Individual User Settings, turn on the following permission.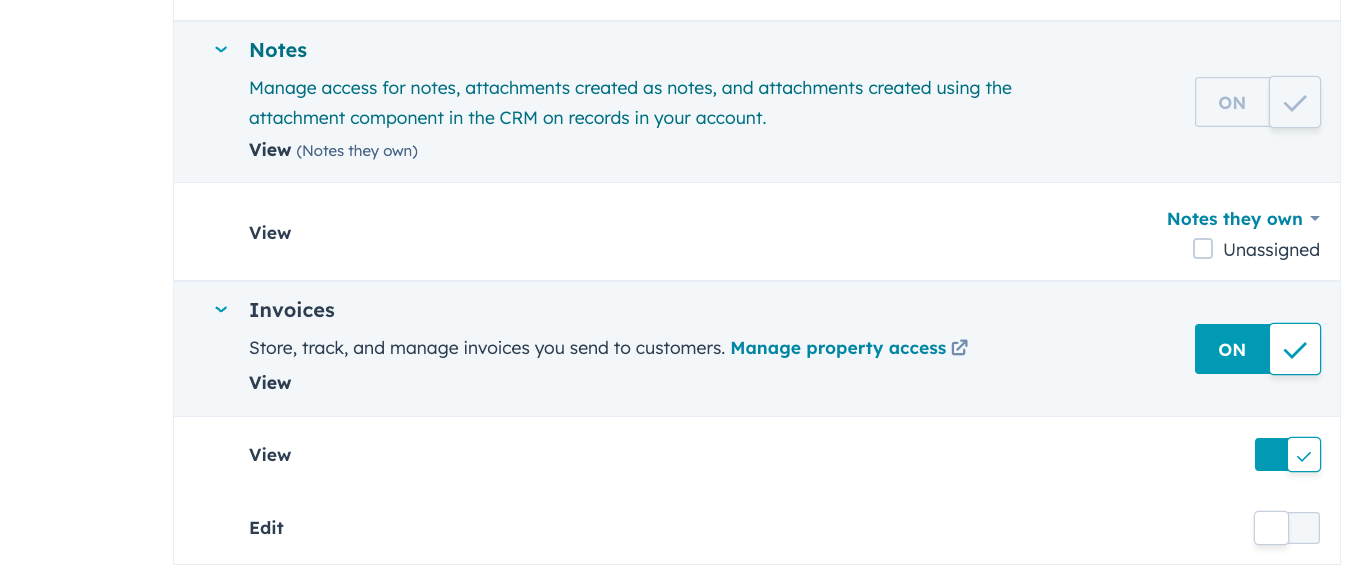
Get access to 'Lists' object
Get access to 'Lists' object
Under Individual User Settings, turn on the following permission.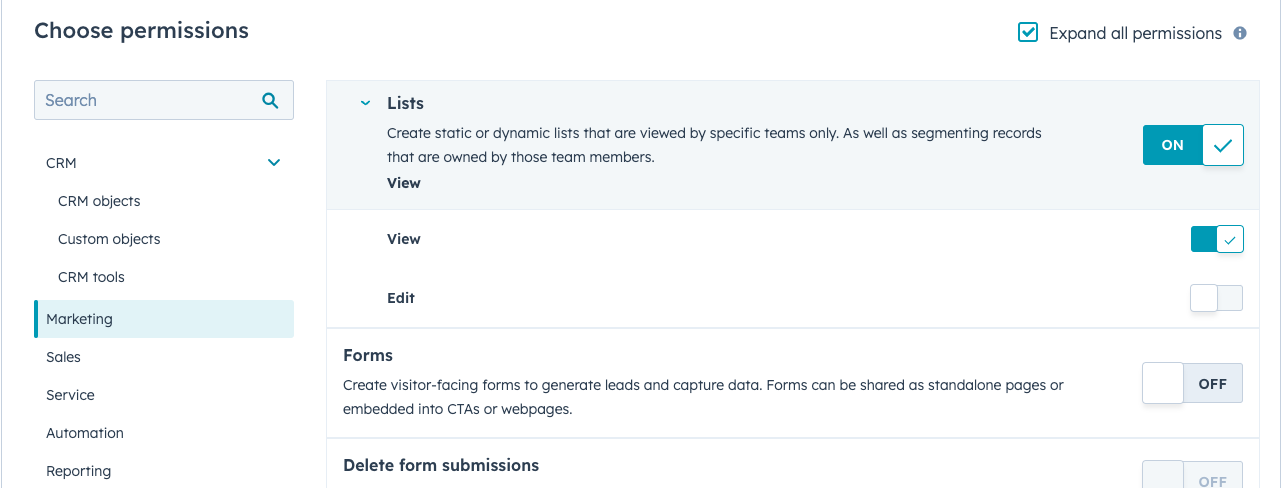
Get access to 'Payments' object
Get access to 'Payments' object
Under Individual User Settings, turn on the following permission.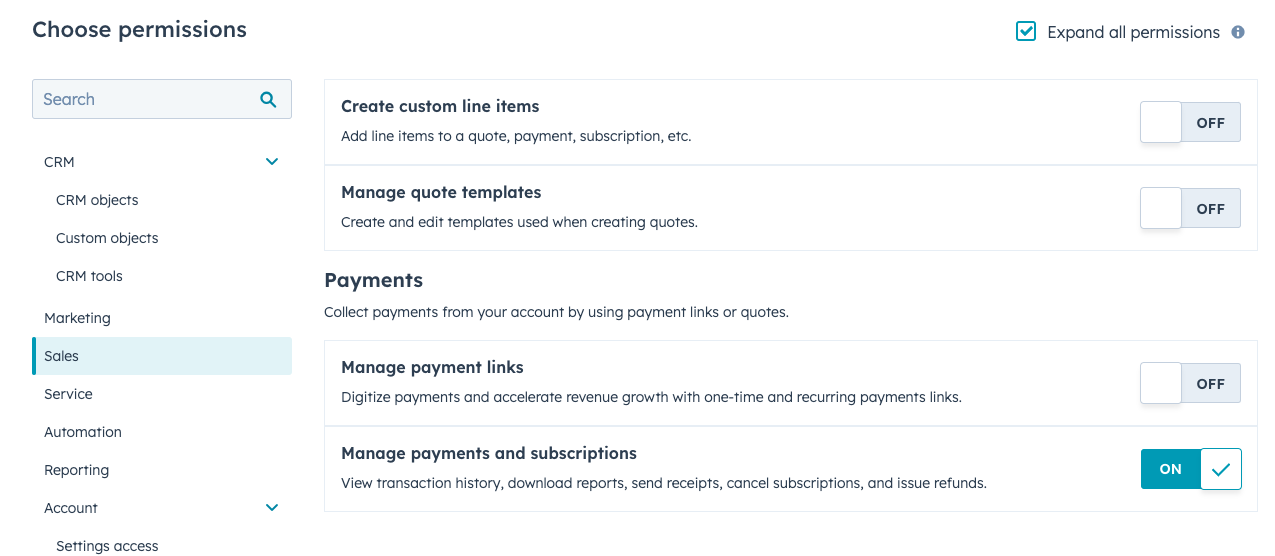
Get access to 'Quotes' object
Get access to 'Quotes' object
Under Individual User Settings, turn on the following permission.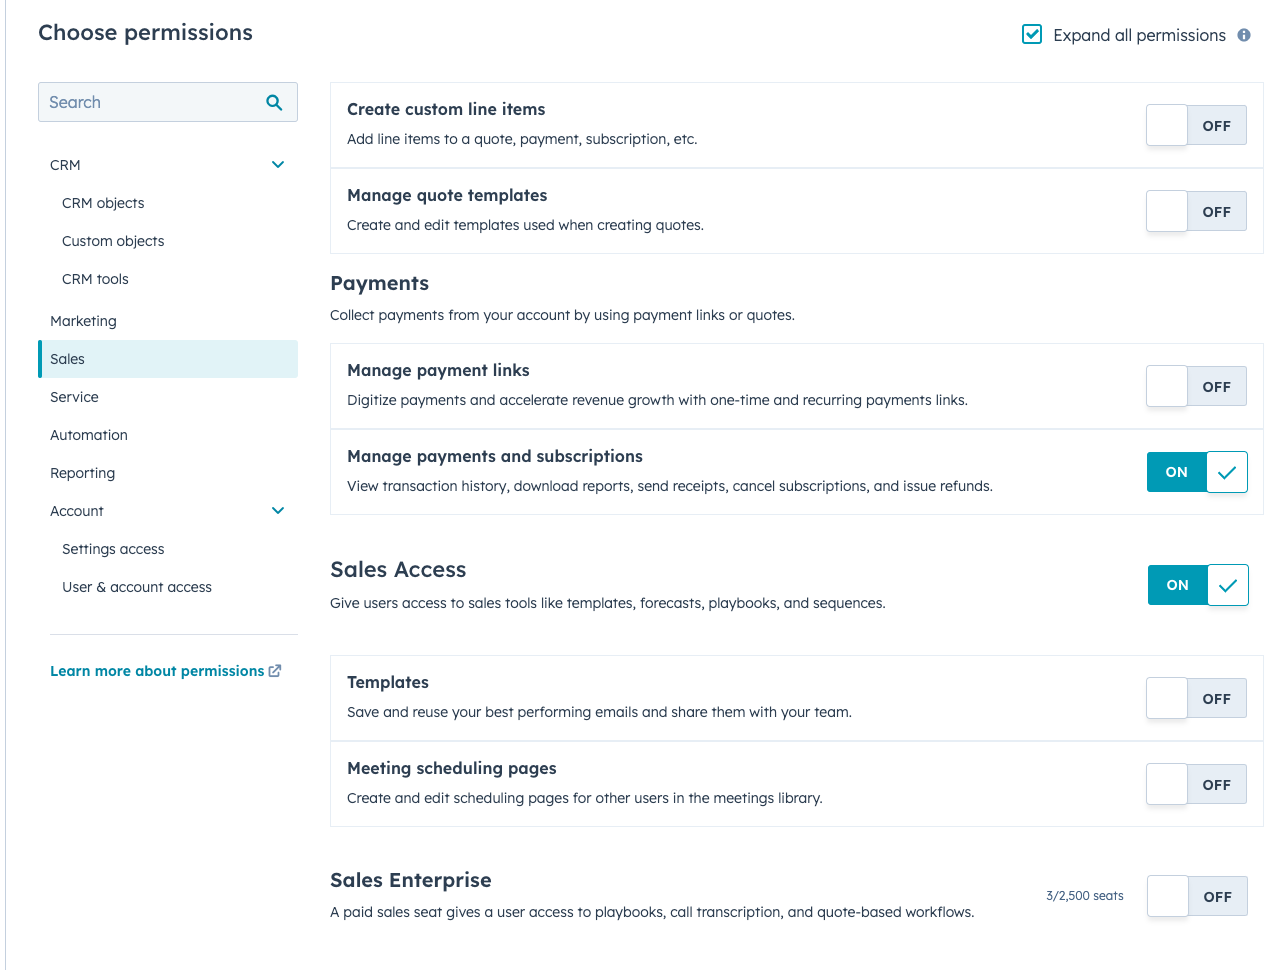
Get access to 'Products' object
Get access to 'Products' object
Under Individual User Settings, turn on the following permission – “Edit properties” & “Manage Product Library”.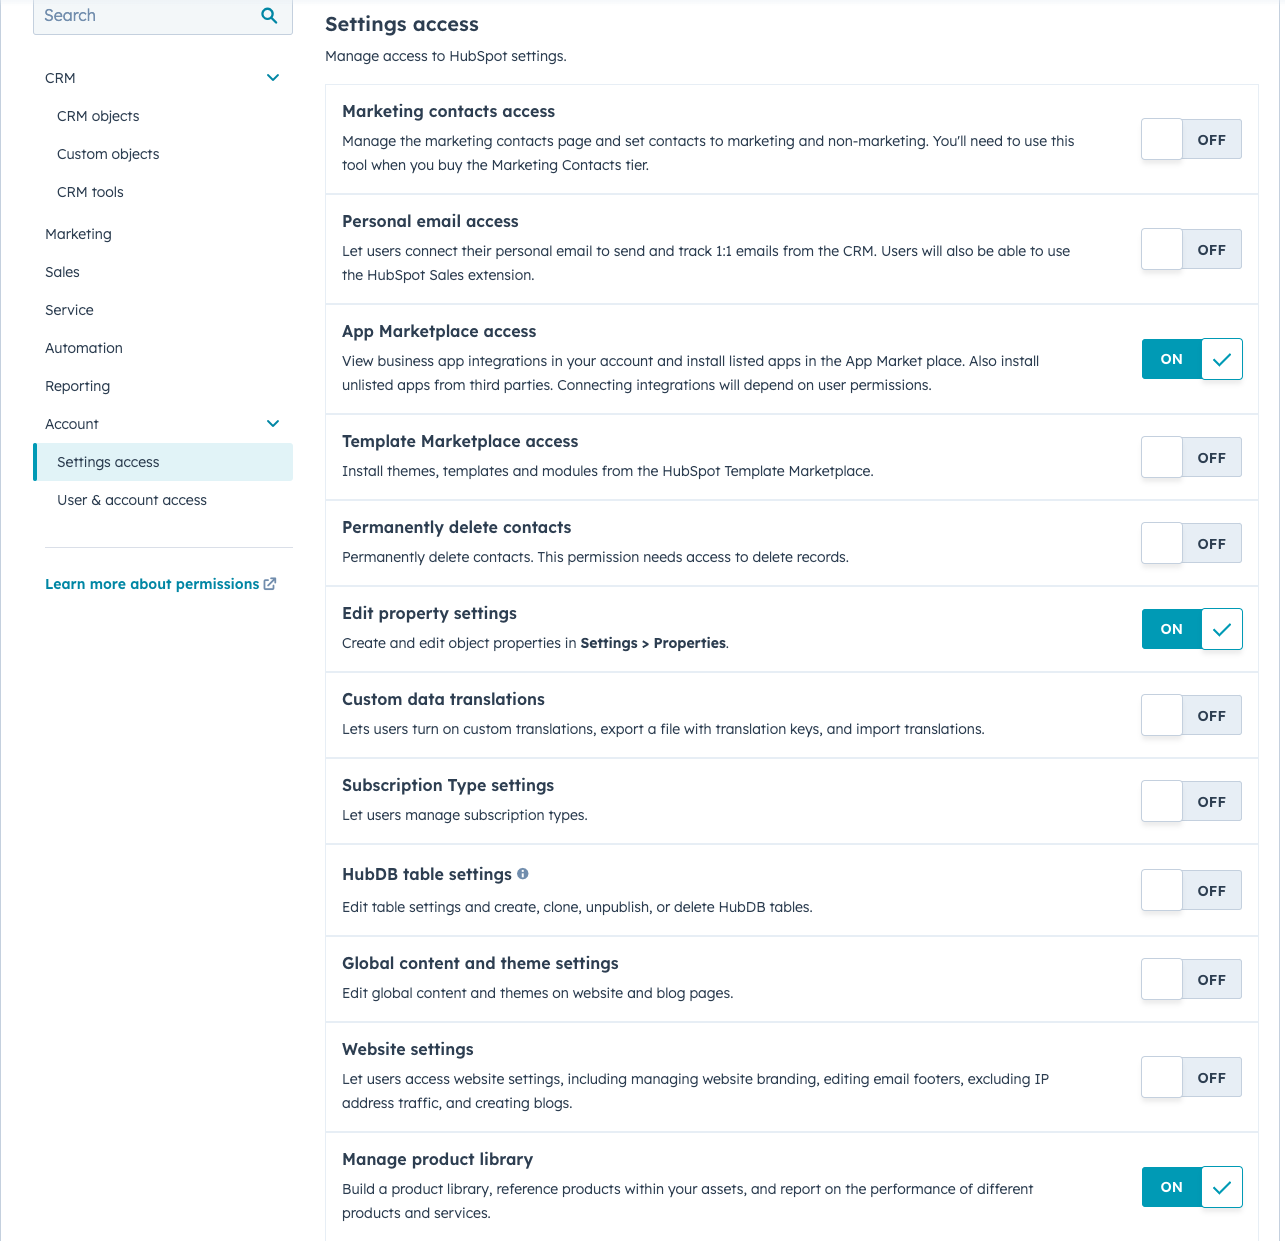
Get access to 'Tickets' object
Get access to 'Tickets' object
Under Individual User Settings, turn on the following permission.