- Google Sheets
- Microsoft Excel
1
Choose the Source
In the Superjoin side panel, click on 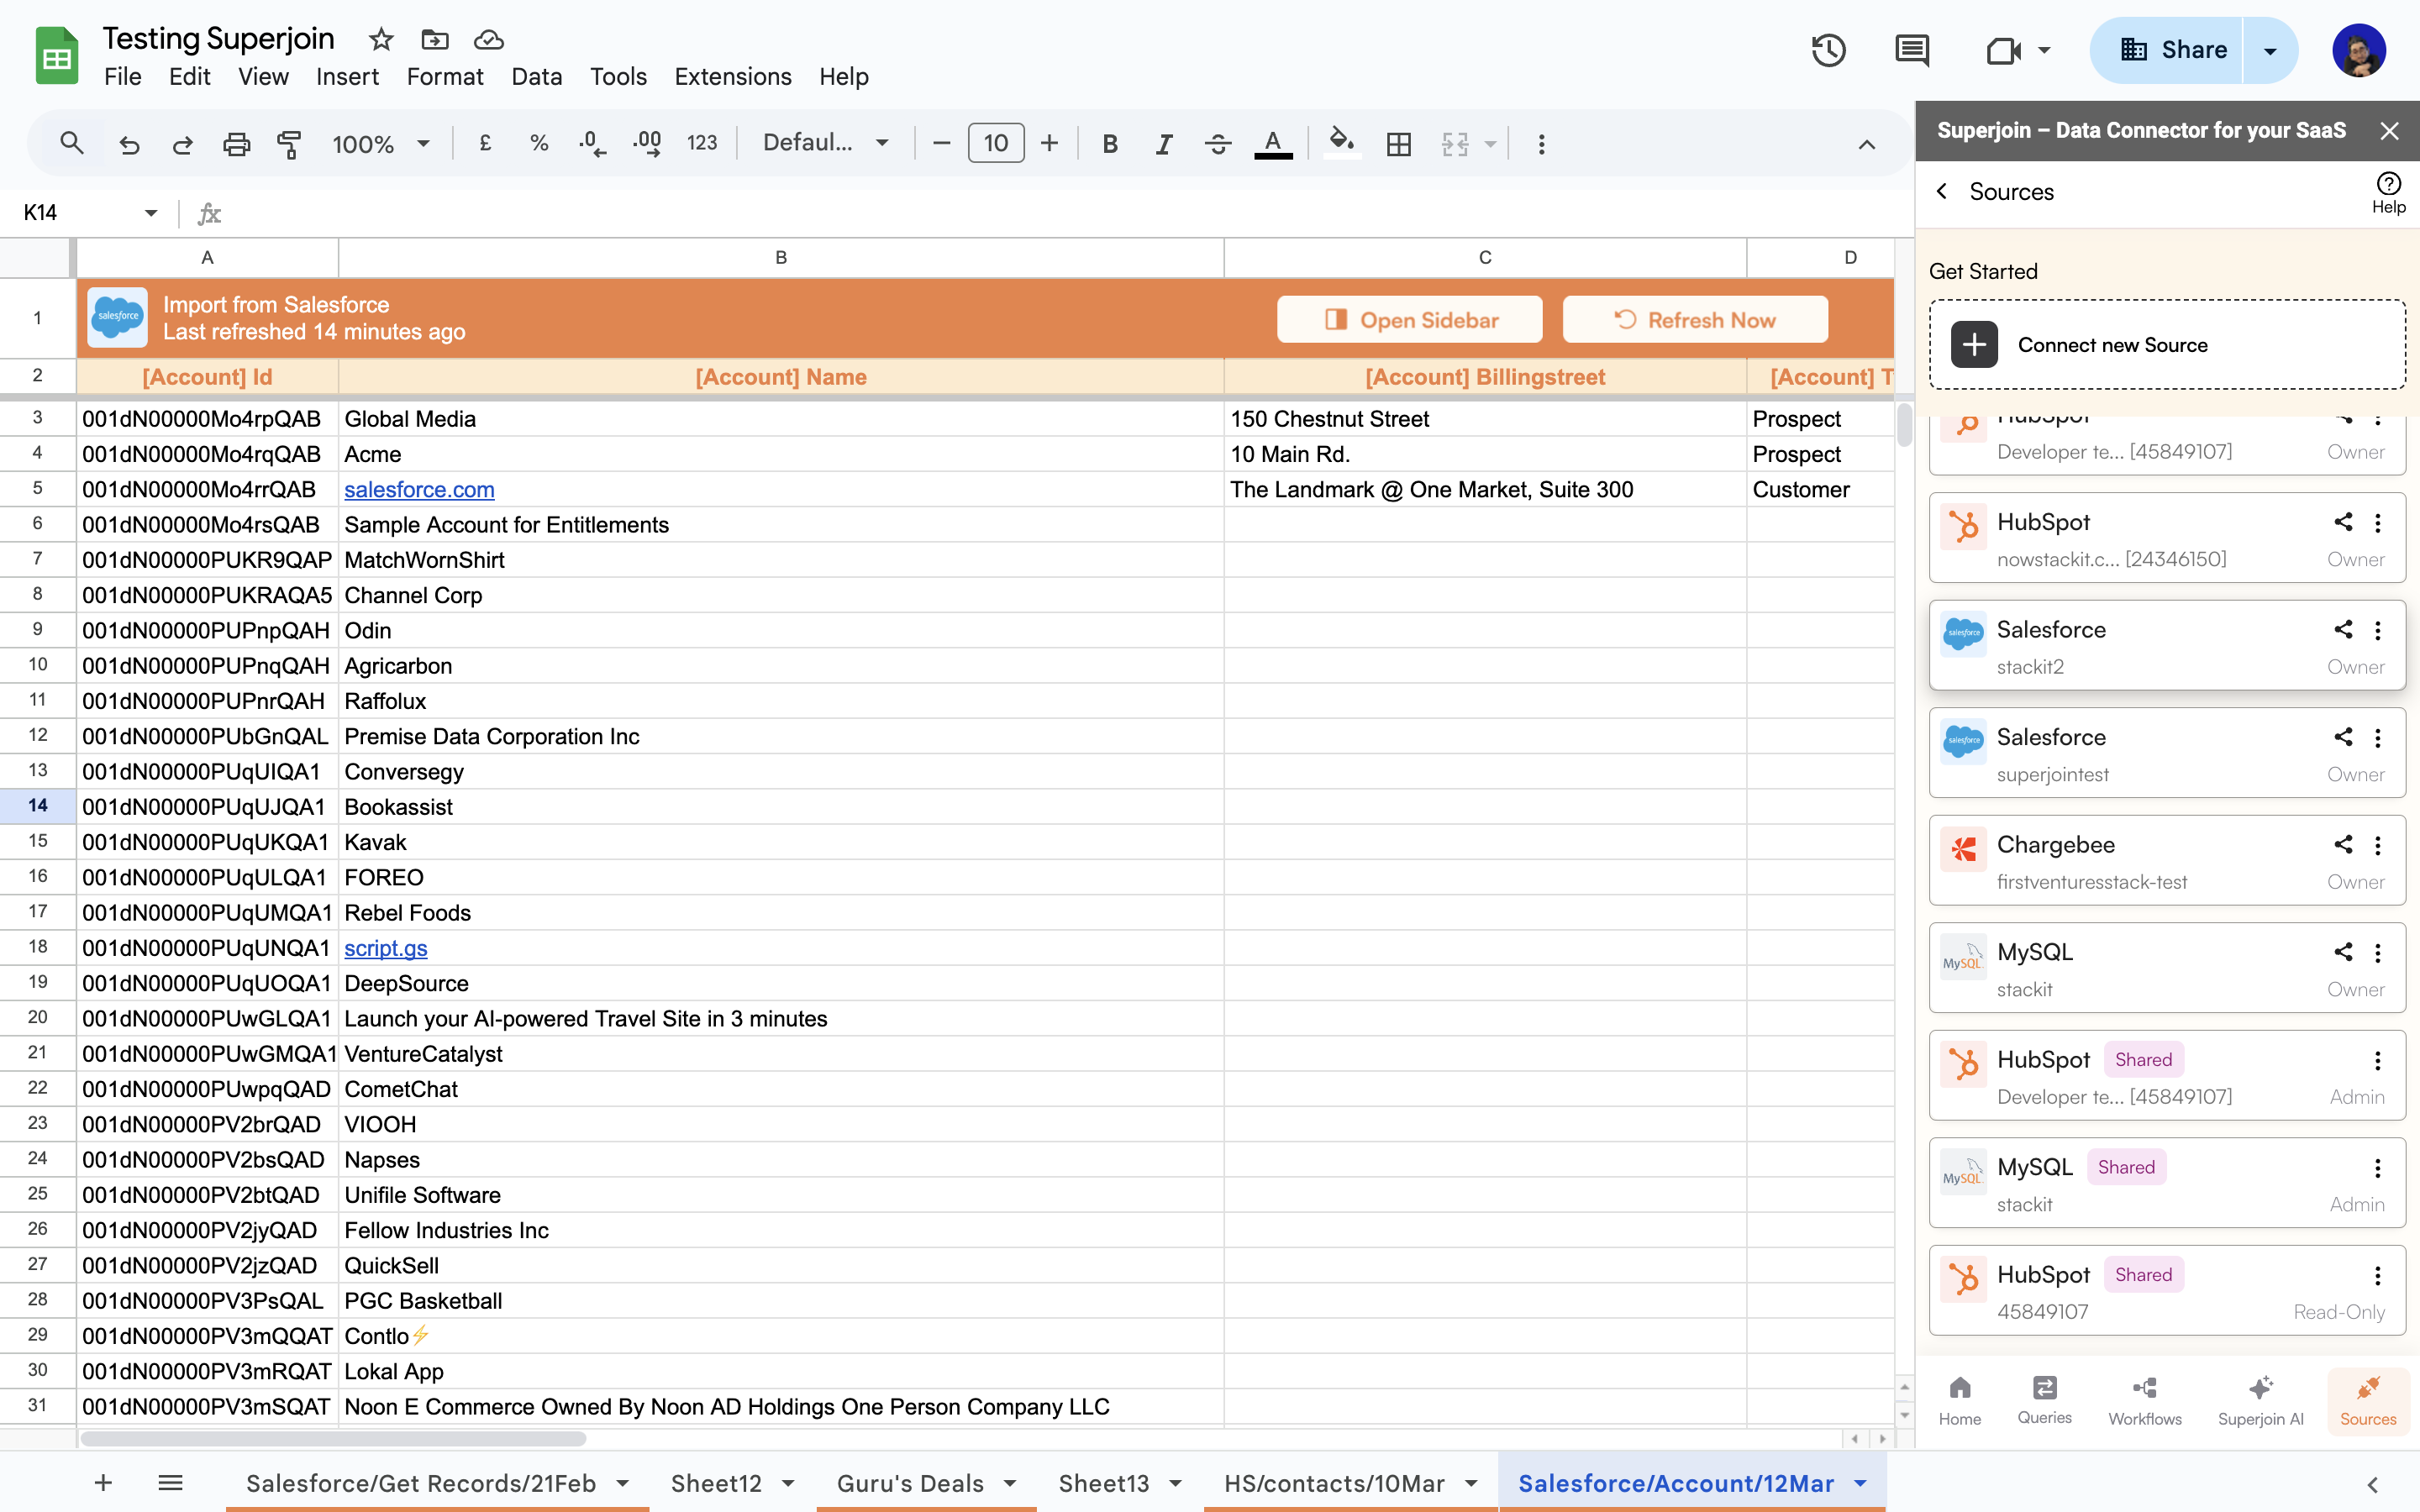
Sources, navigate through Your Sources and click on the Salesforce source you want to export the data to.2
Create new Export
A pop-up will come up at the bottom of the side panel. Click on 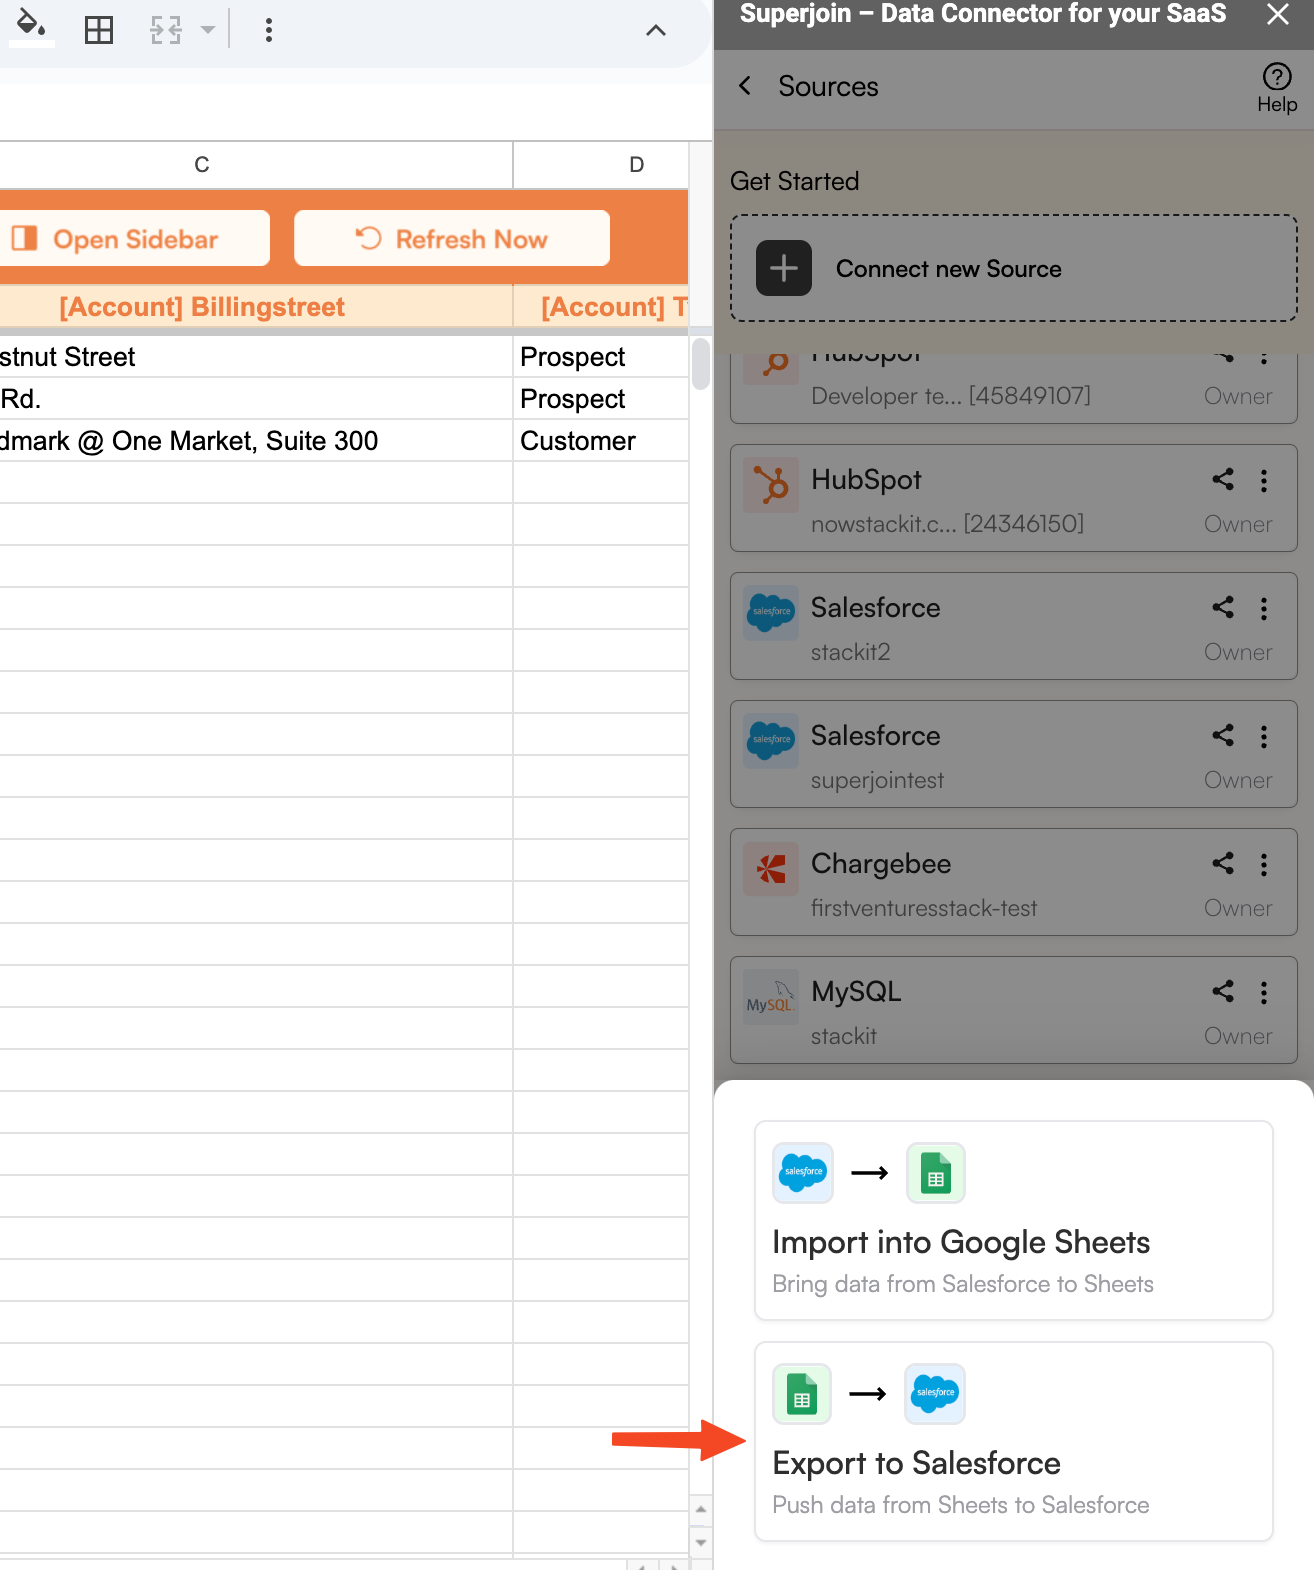
Export to Salesforce.3
Fill Source Data
Choose the sheet with the data that you want to export to Salesforce and the row with the header cells of the sheet that you want to export.
4
Select Destination
Choose the Salesforce 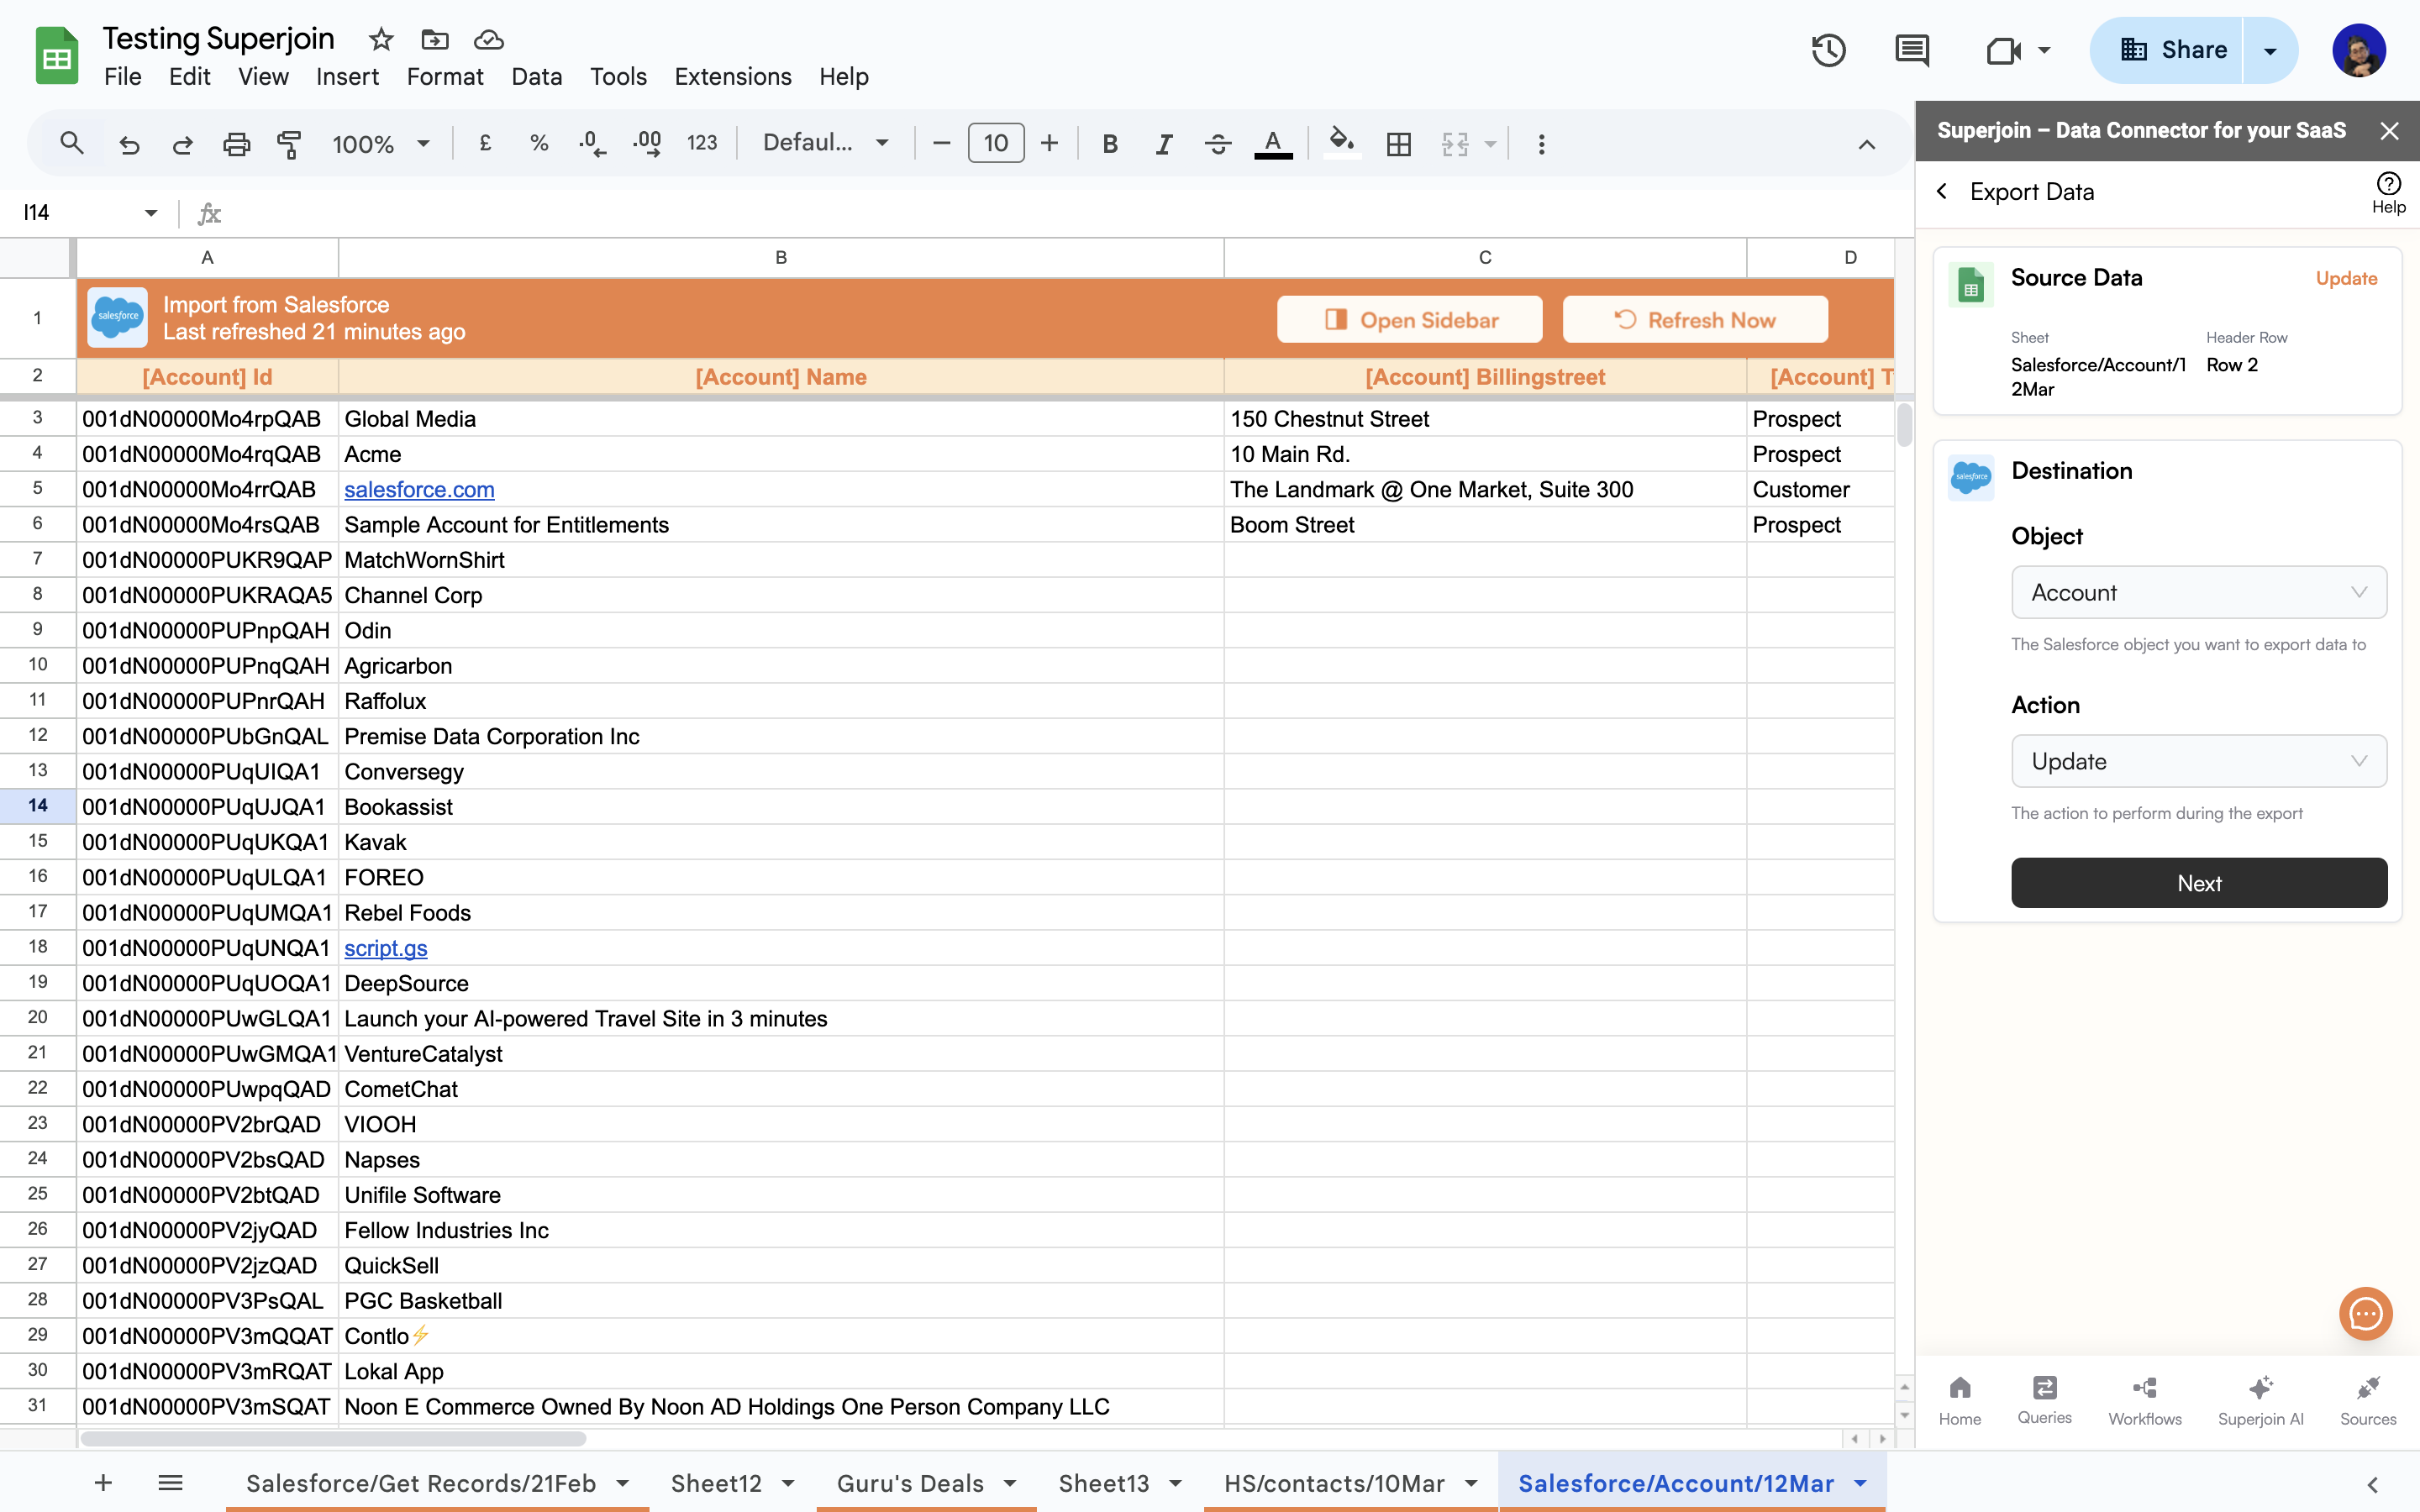
Object you want to export data to from the dropdown and the action you want to perform during the export:- if you want to insert new data click on
Insert - if you want to update existing data, click on
Update - if you want to delete records in Salesforce, click on
Delete
5
Mapping the Data
Map the Google Sheets data fields to the Salesforce Data fields to ensure accuracy. Click on 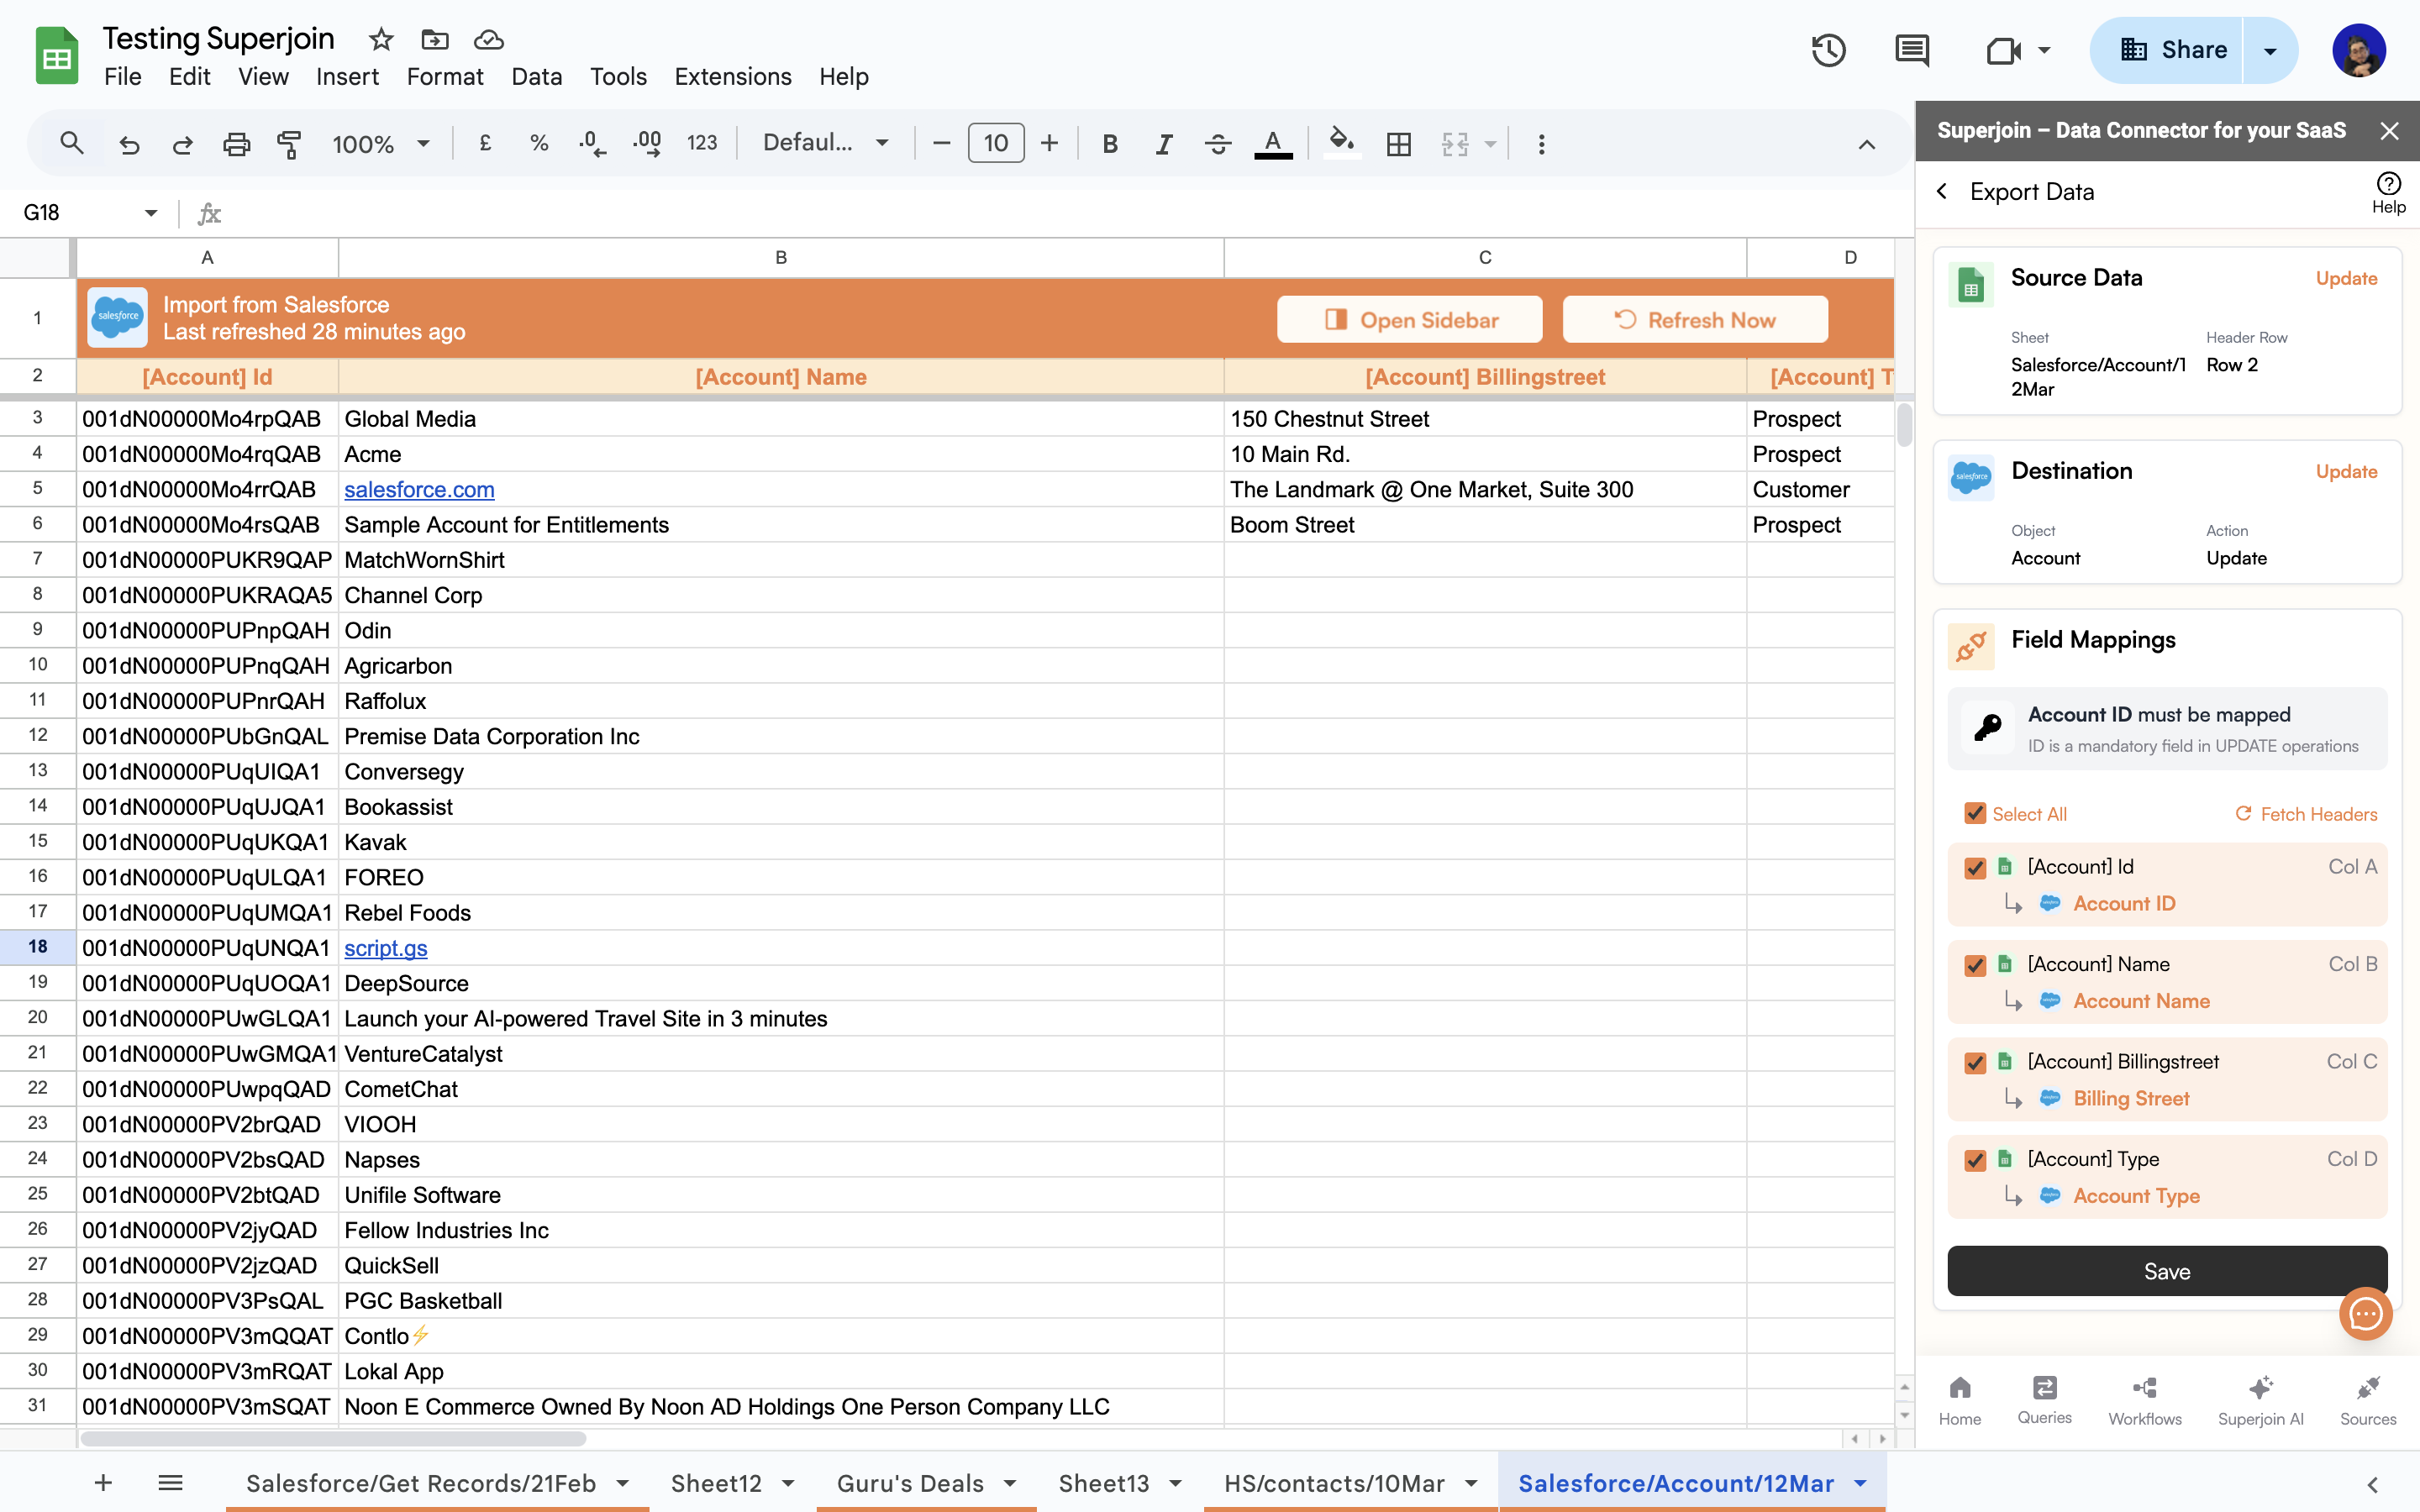
Save and the click on Export.IDs are mandatory if you want to perform the
UPDATE action.6
Select rows or sheet to export
You can choose to export specific rows or entire sheet. If you want to export specific rows, further select the rows you want to export.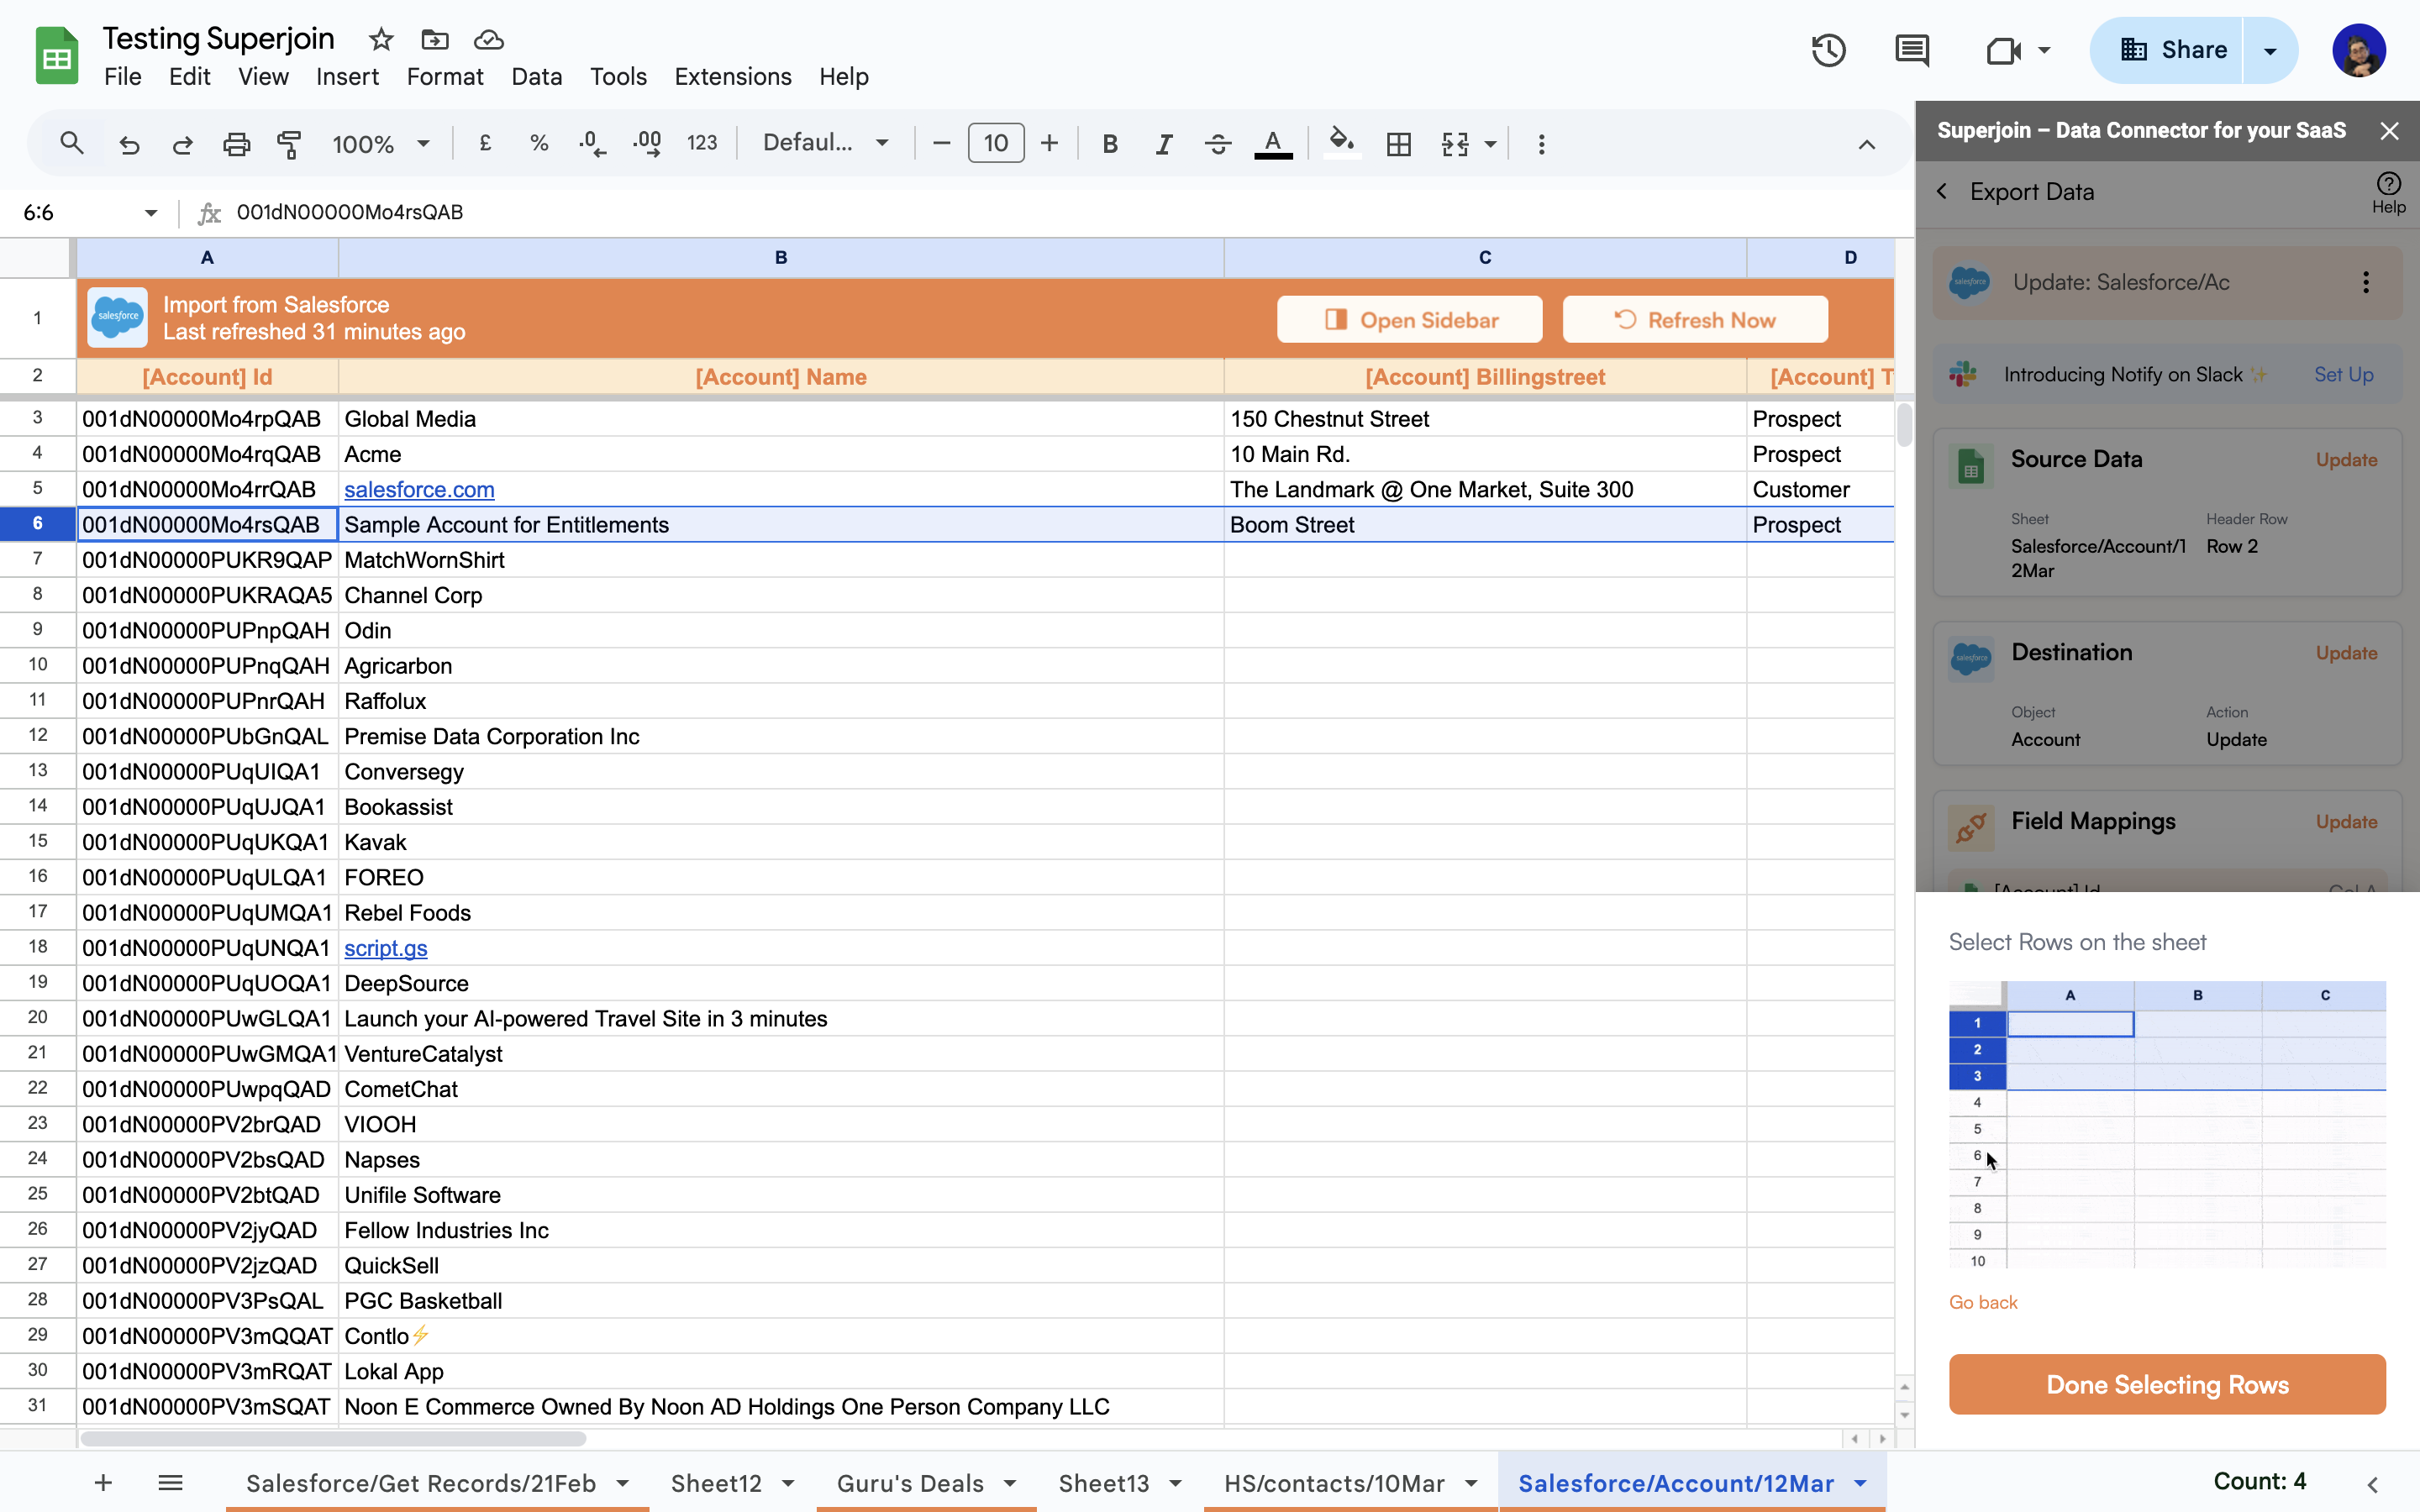
7
Export Data
Verify the data and the rows the data will be transferred to. Click on 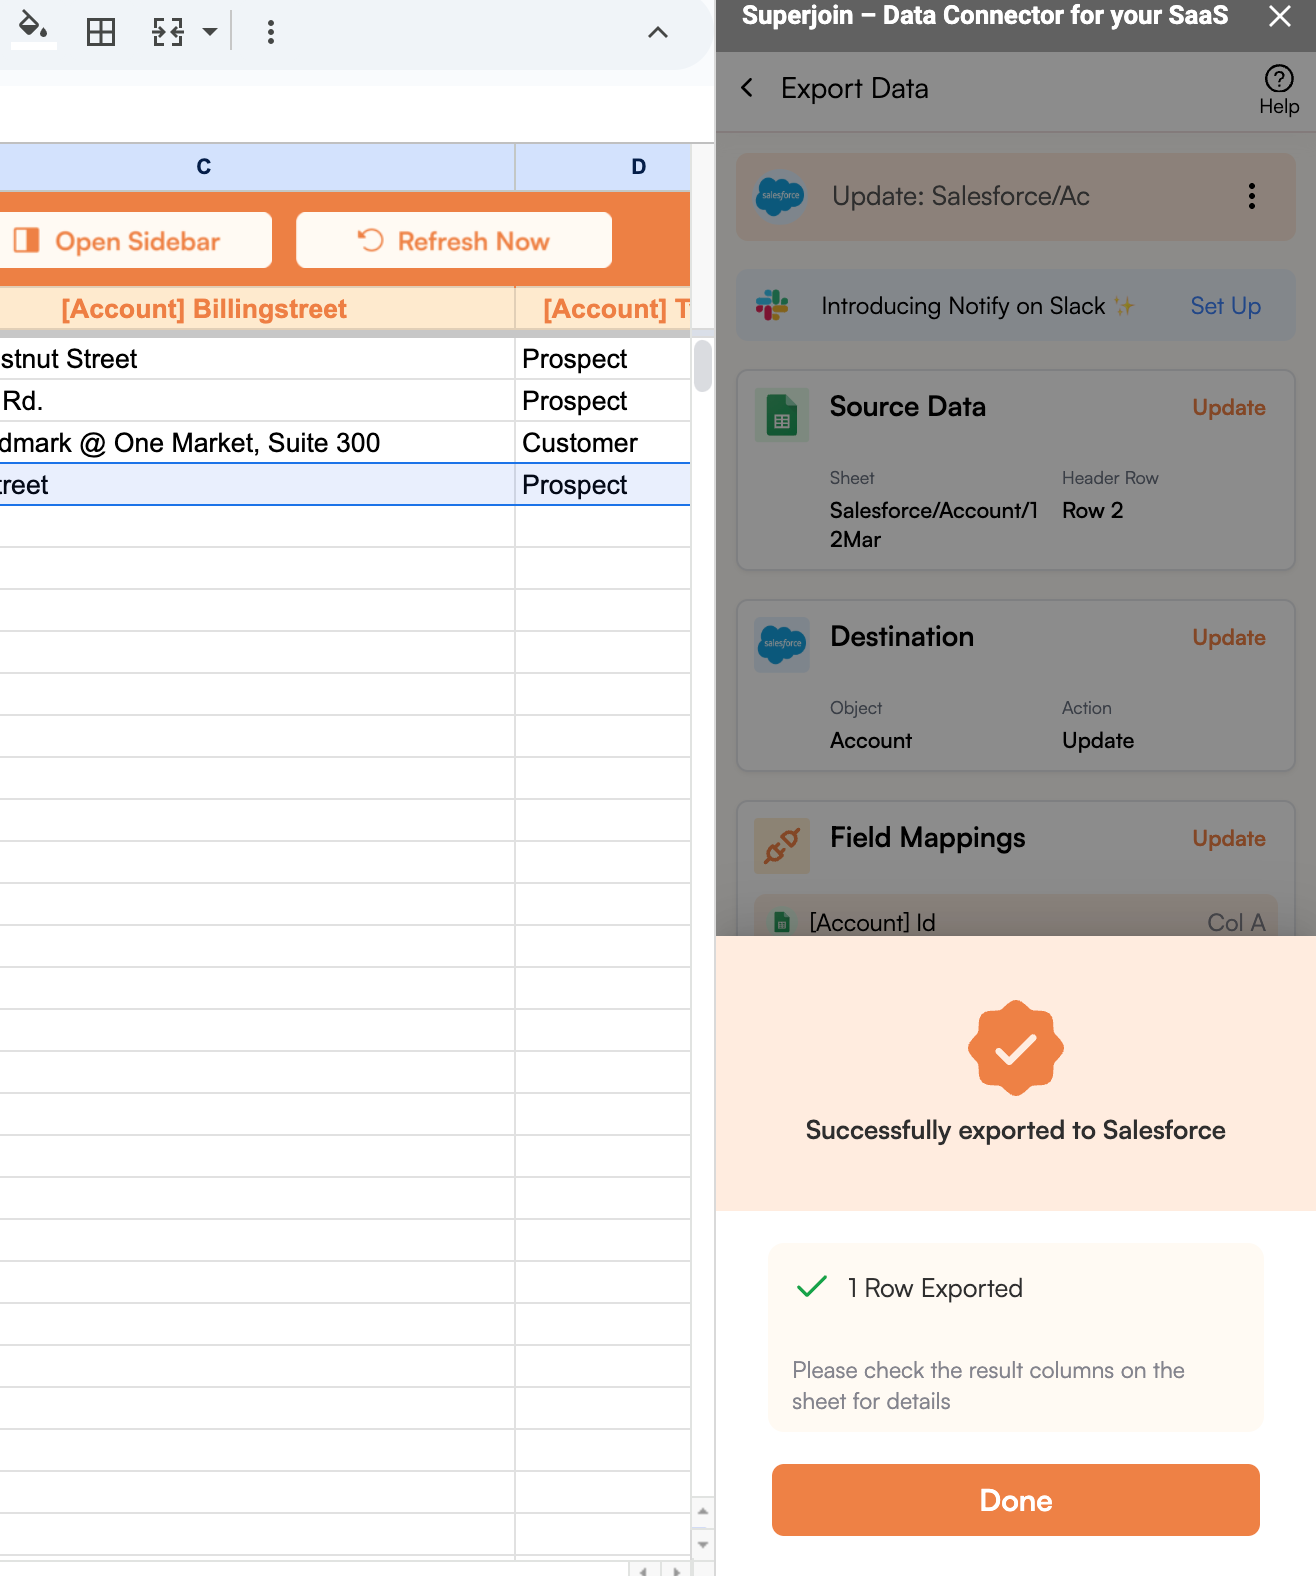
Update, this action exports all data from your Google Sheets into Salesforce account.