How to Filter Import Queries in Superjoin
Superjoin lets you filter your data imports before bringing them into Google Sheets, so you only import the data that matters. This powerful feature allows you to create sophisticated filter queries that ensure your spreadsheets remain clean, focused, and performant. Whether you’re importing contacts, deals, transactions, or any other data, filters help you eliminate unnecessary information and focus on the records that drive your business decisions.Quick tip: Use filters to import only the data you need, reducing clutter and improving spreadsheet performance. Filtered imports also refresh faster and consume less API quota.
Before You Begin
Before setting up filters, make sure you have:- Superjoin installed - Set up the Superjoin add-on in Google Sheets
- Data source connected - Connect to your data source (like HubSpot, Salesforce, Stripe, or others)
- Fields selected - Choose which fields you want to import from your data source
Important: Filters work on your primary object only. If you’ve associated secondary objects, you can only filter based on properties from your primary object. For more details about filtering limitations, see our FAQ on filter options.
Remember that the data preview shows only the first 100 rows. After applying filters, you may see an empty preview even if your filtered data exists—this just means the matching records aren’t in the first 100 rows. Always click Import to see your complete filtered results.
How to Set Up Filters
1
Access the Data Preview in Superjoin
Open Superjoin in Google Sheets and select your connected data source. The data preview screen will display a sample of your incoming data, showing you the available fields and a snapshot of your records.This preview helps you understand your data structure before you apply filters. Take a moment to review the fields available for filtering.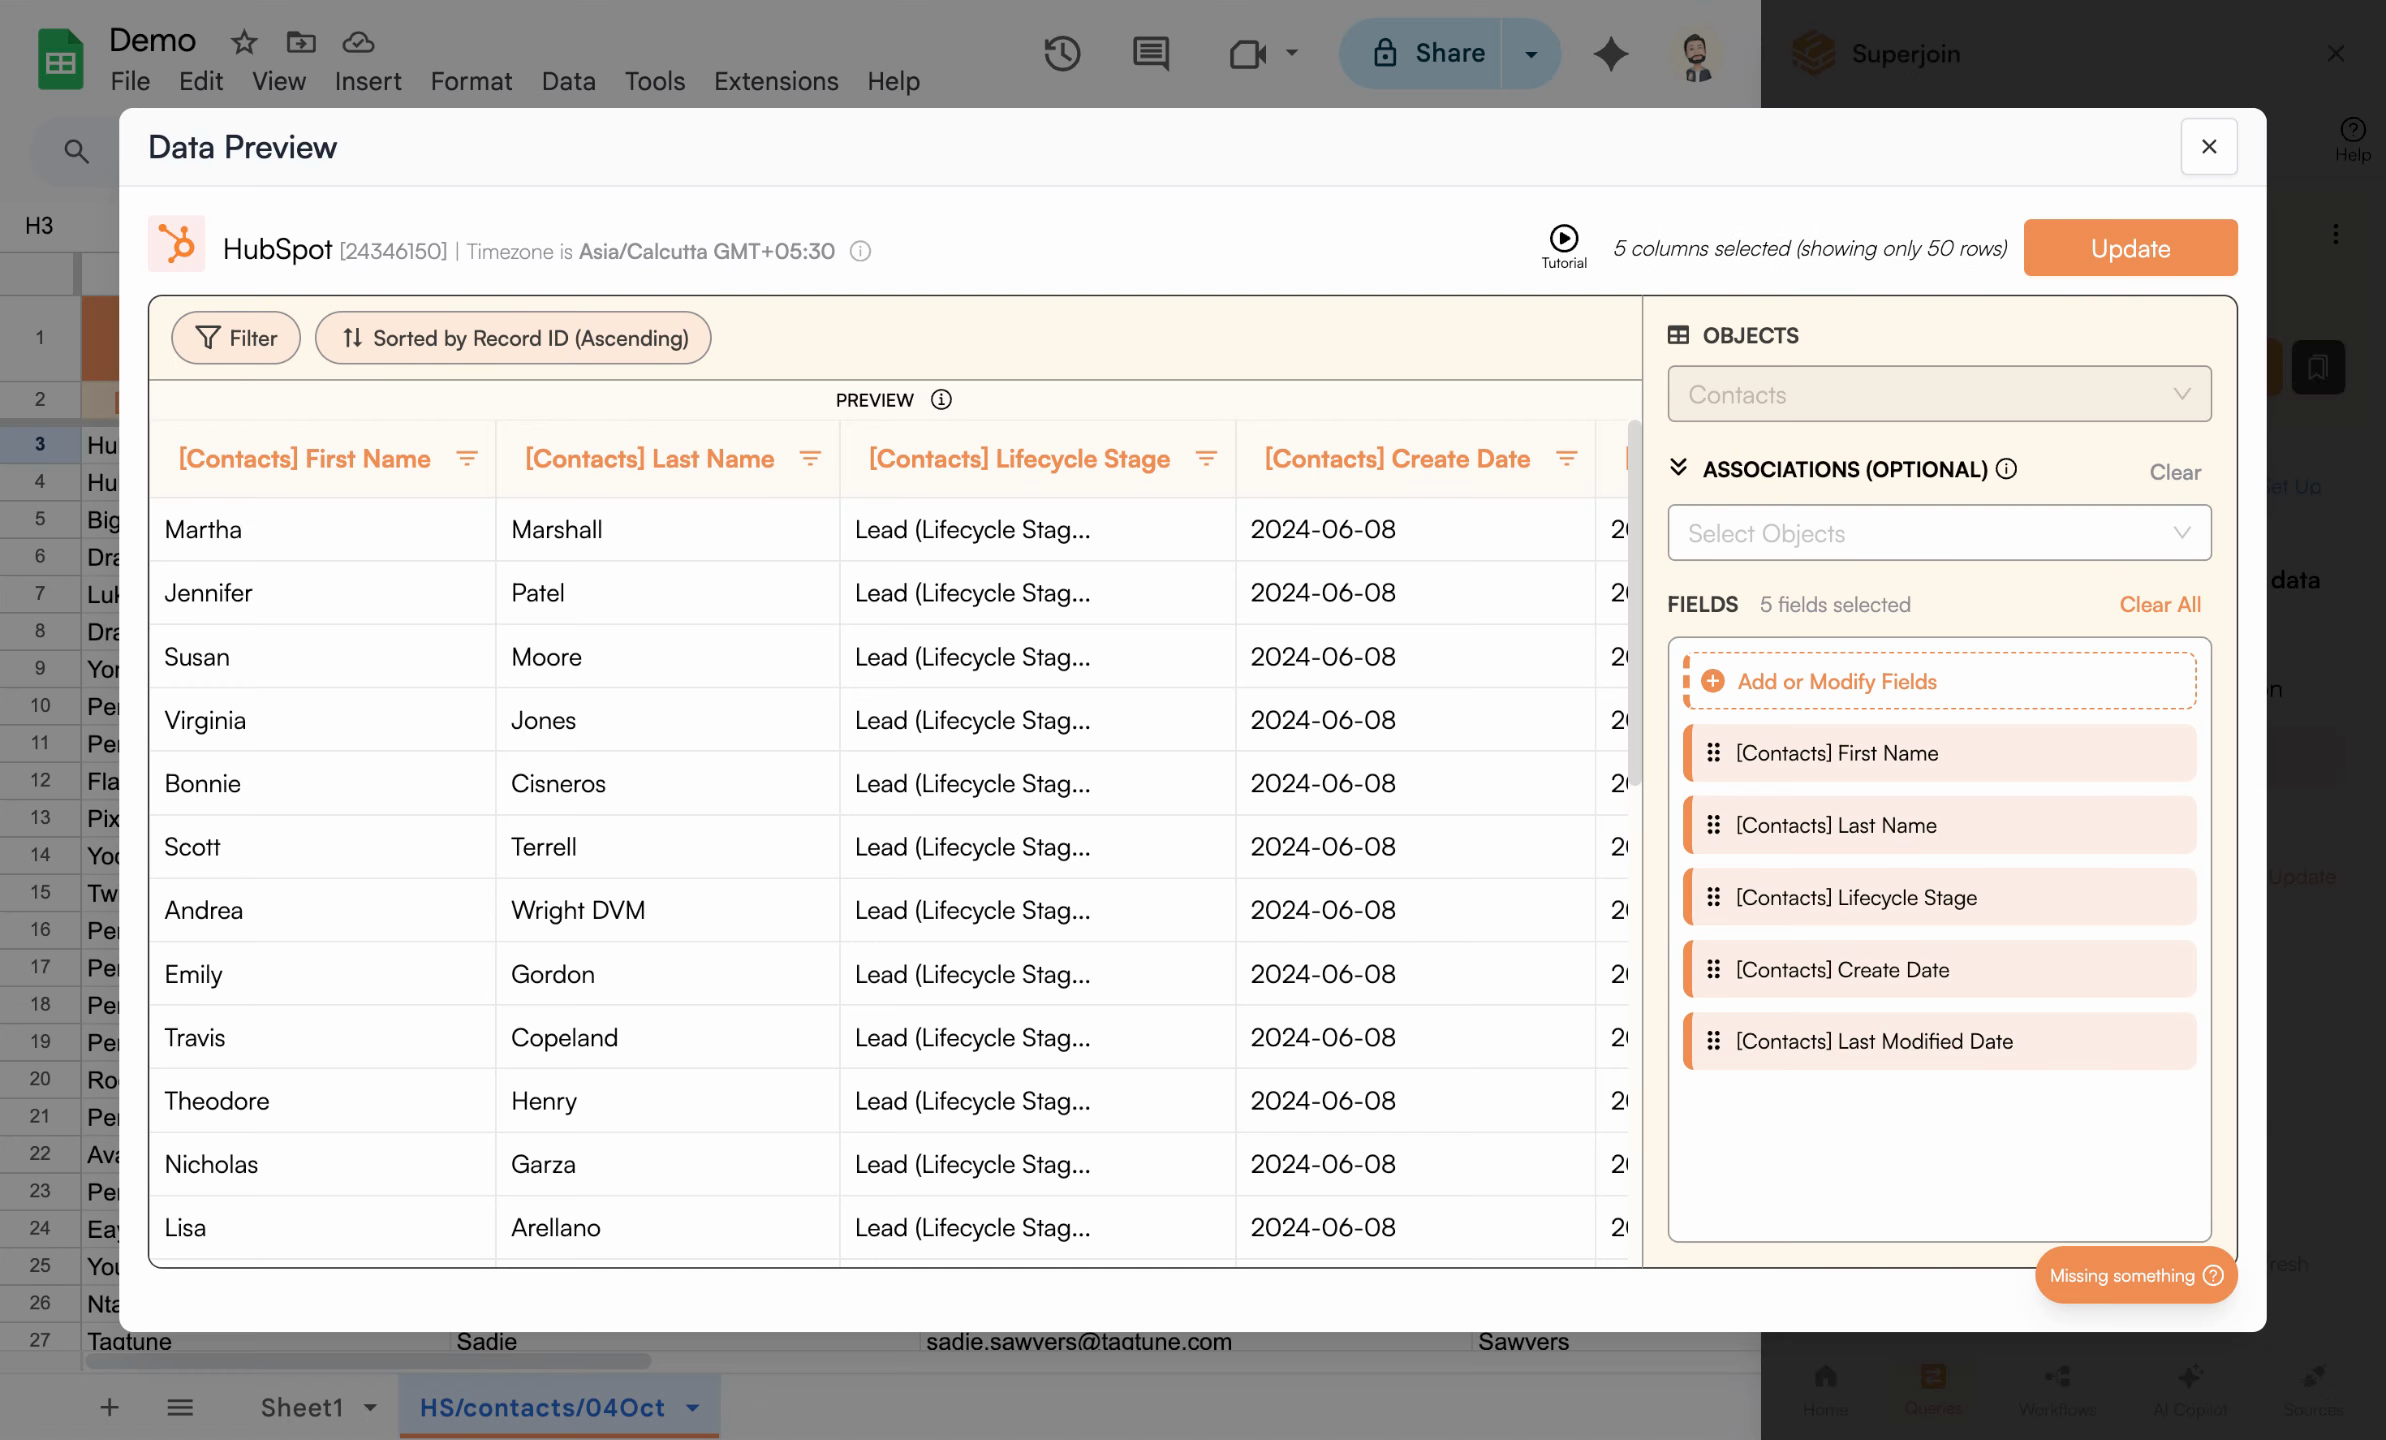
The data preview interface displaying your source data with all available fields
2
Click the Filter Button
Click the Filter button to open the filter configuration interface. This is where you’ll build your filter query using a user-friendly visual interface.The filter builder allows you to create both simple and complex filter conditions without writing any code or learning query syntax.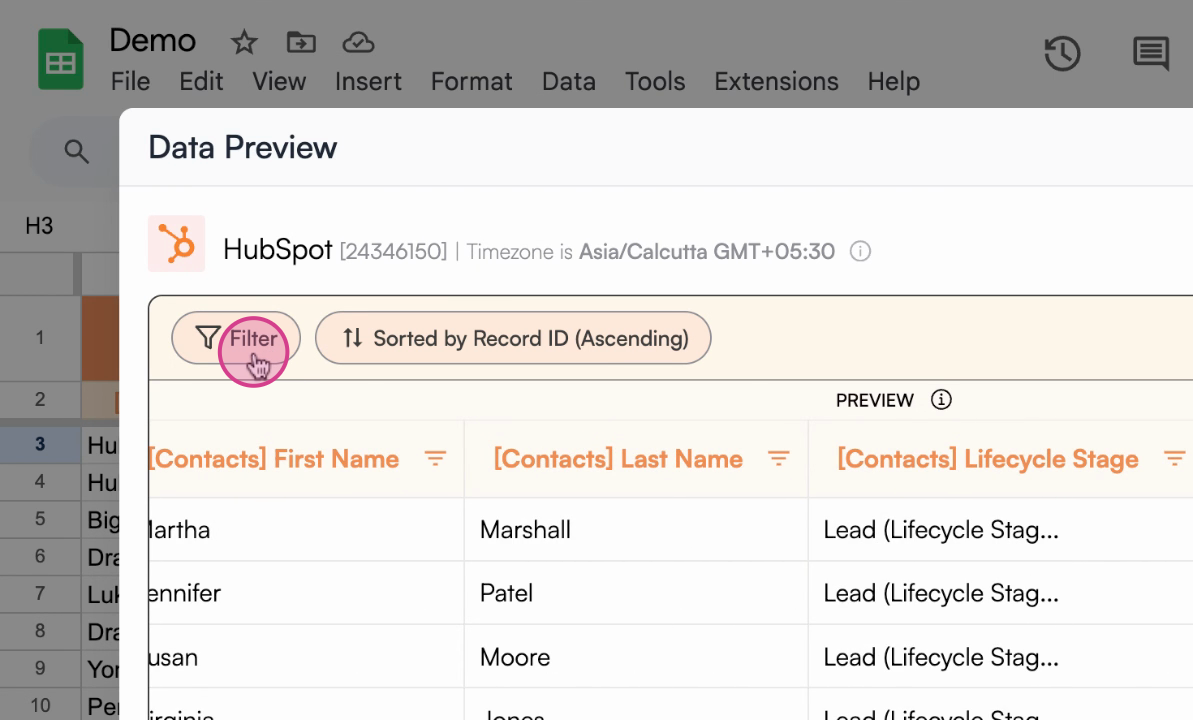
The Filter button in the Superjoin data preview interface
3
Select a Field and Set Filter Conditions
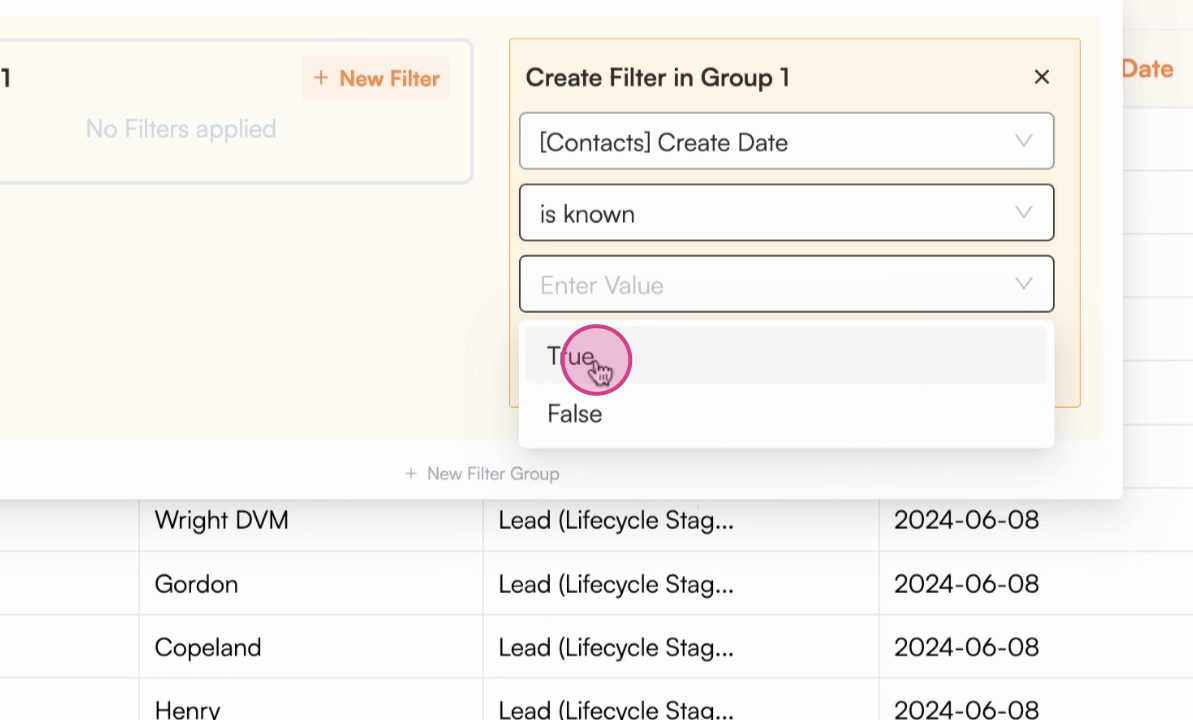
Choose a field you want to filter on (for example, Create date), then select the appropriate filter condition (such as is known, equals, contains, greater than, etc.).The available filter conditions depend on the field type you select. Date fields offer date-specific operators, text fields provide string matching options, and numeric fields include comparison operators.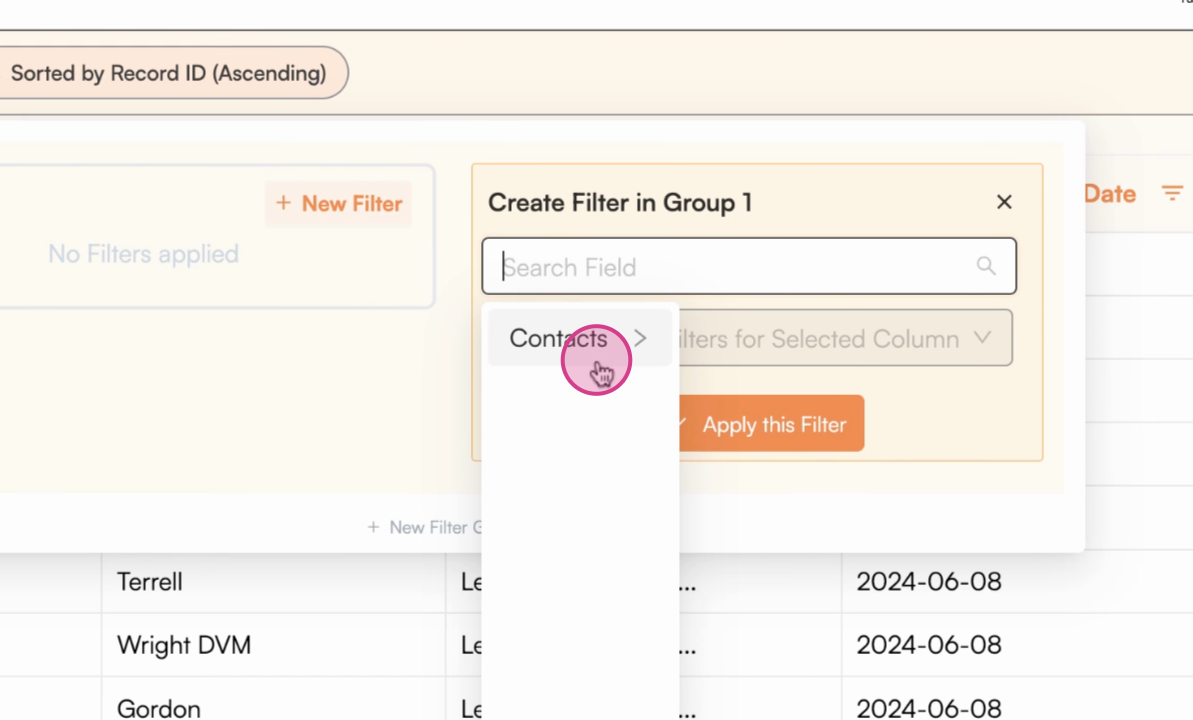
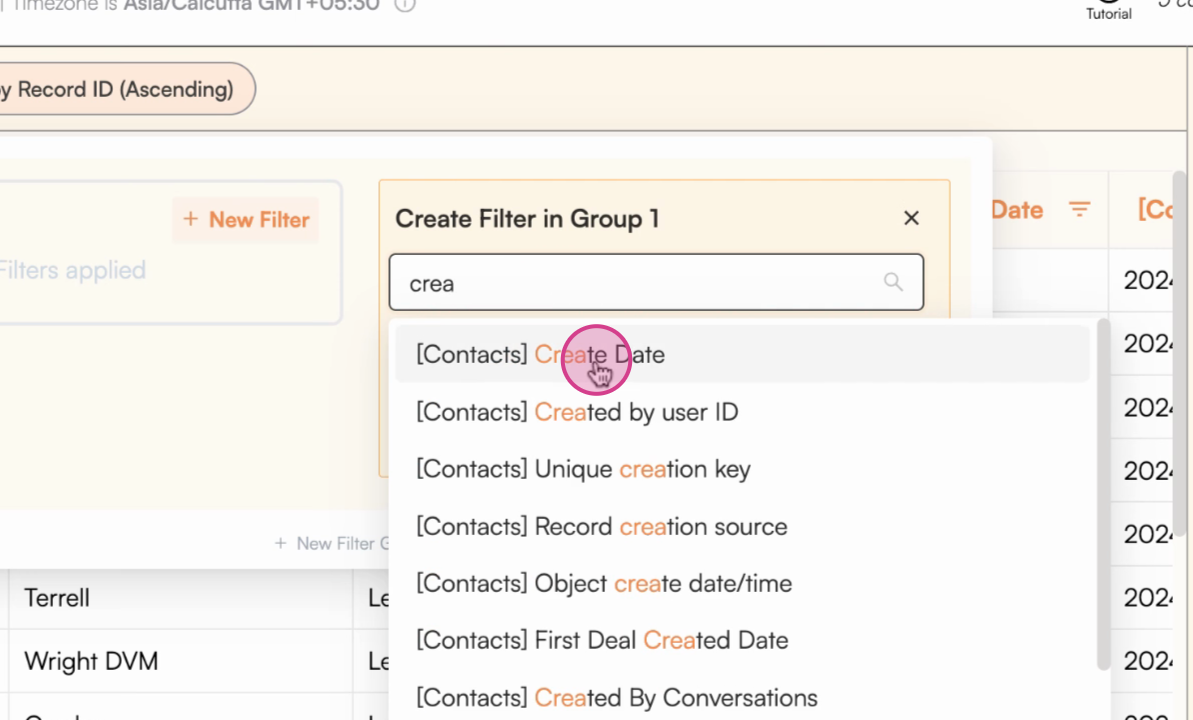
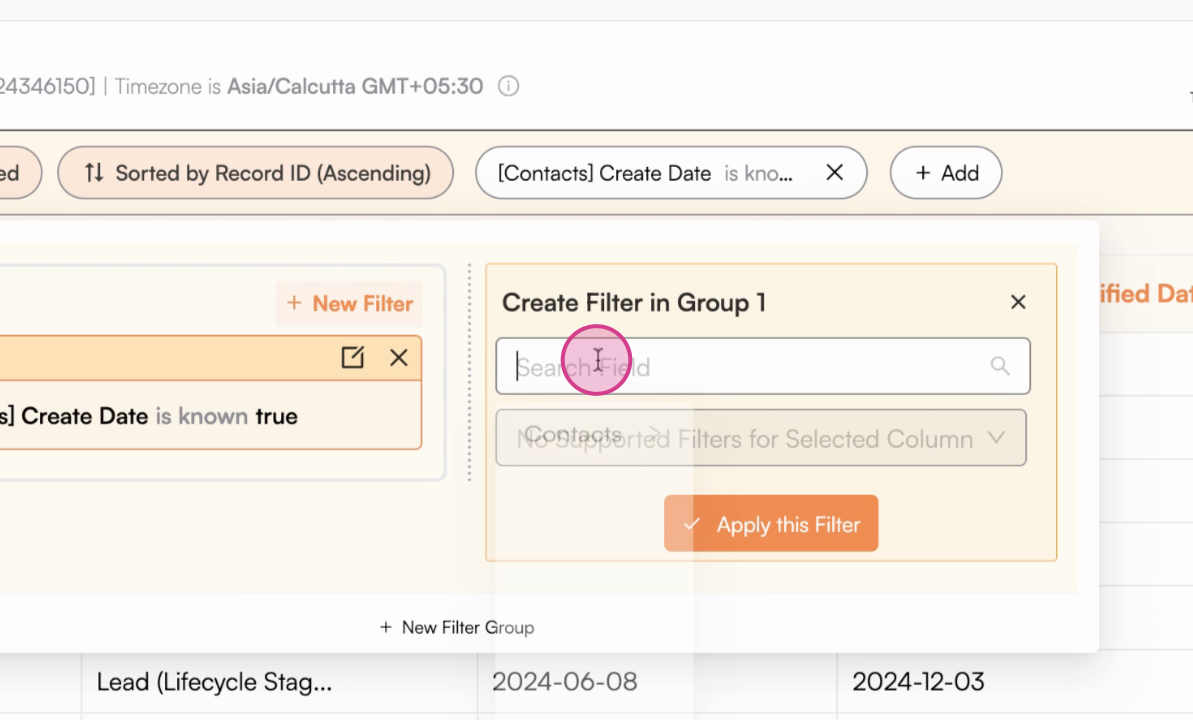
Opening the field selector to choose which property to filter
Selecting the Create date field from the available field list
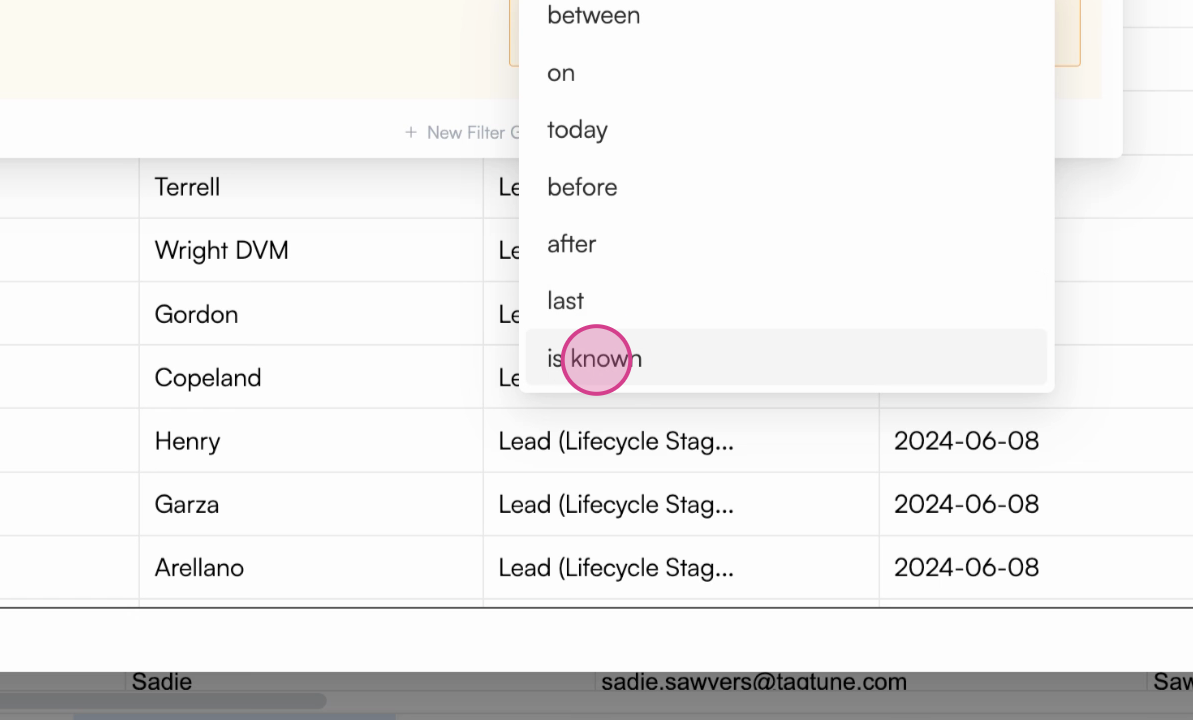
Choosing the filter operator - in this example, is known (which filters for records that have a value in this field)
Confirming the selected filter condition before applying
Common filter operators:
- is known/unknown - Check if a field has a value or is empty
- equals/not equals - Exact match for specific values
- contains/doesn’t contain - Search within text fields
- greater than/less than - Compare numbers or dates
4
Apply the Filter
Click the Apply button to see how your filter affects the data preview. The preview will update to show only records matching your filter criteria.This lets you verify that your filter is working as expected before importing the full dataset.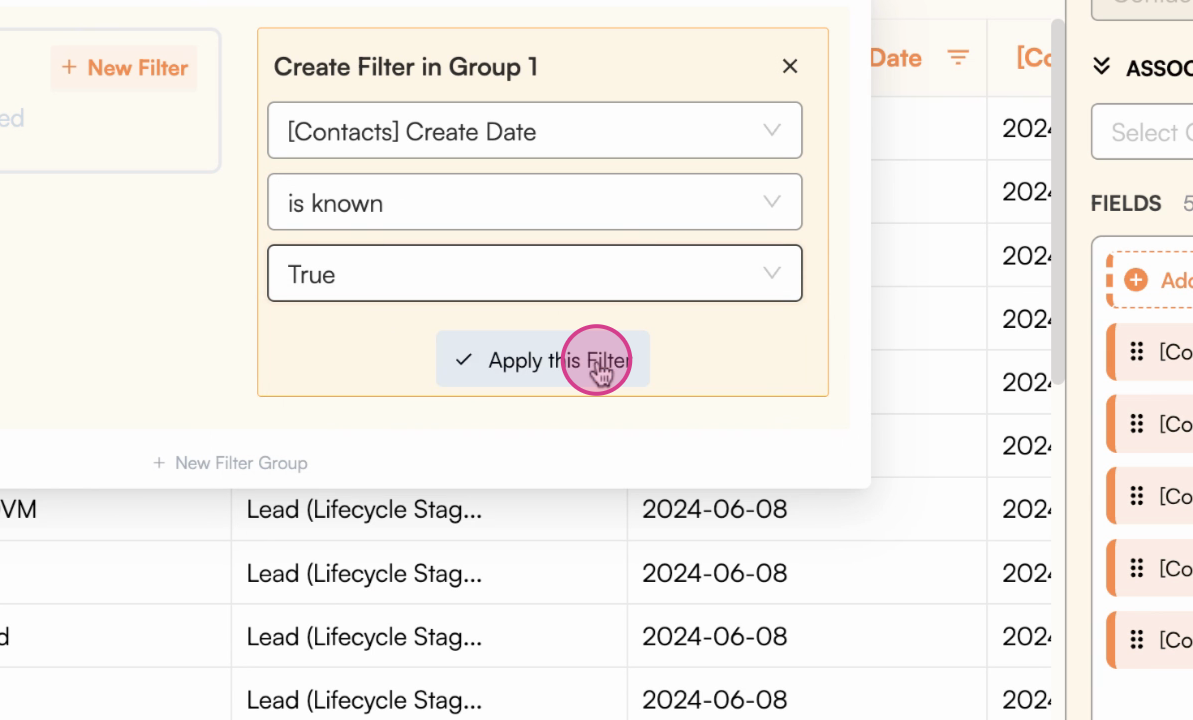
Click the Apply button to preview your filtered results
If the preview appears empty after applying a filter, don’t worry! The preview only shows the first 100 rows from your source. Your filtered data may exist beyond those first 100 rows and will appear when you complete the import.
5
Add Additional Filters (AND Logic)
To further narrow your data and make your filter more specific, click Add Filter to include more criteria in the same filter group. When multiple filters are in the same group, all conditions must be met for a record to be included (AND logic).This is perfect for scenarios like “Import all contacts created this year AND with lead status” where both conditions must be true.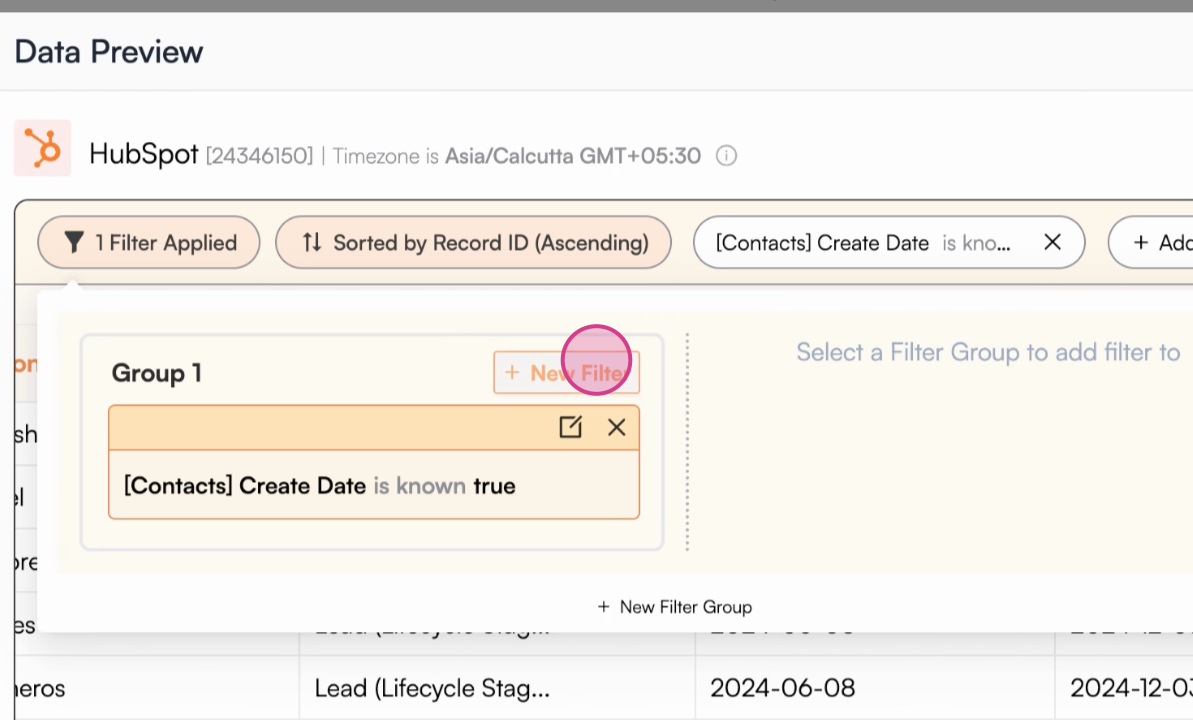
 Set the new filter condition (for example, Life cycle stage equals lead) to create a more specific filter combination.
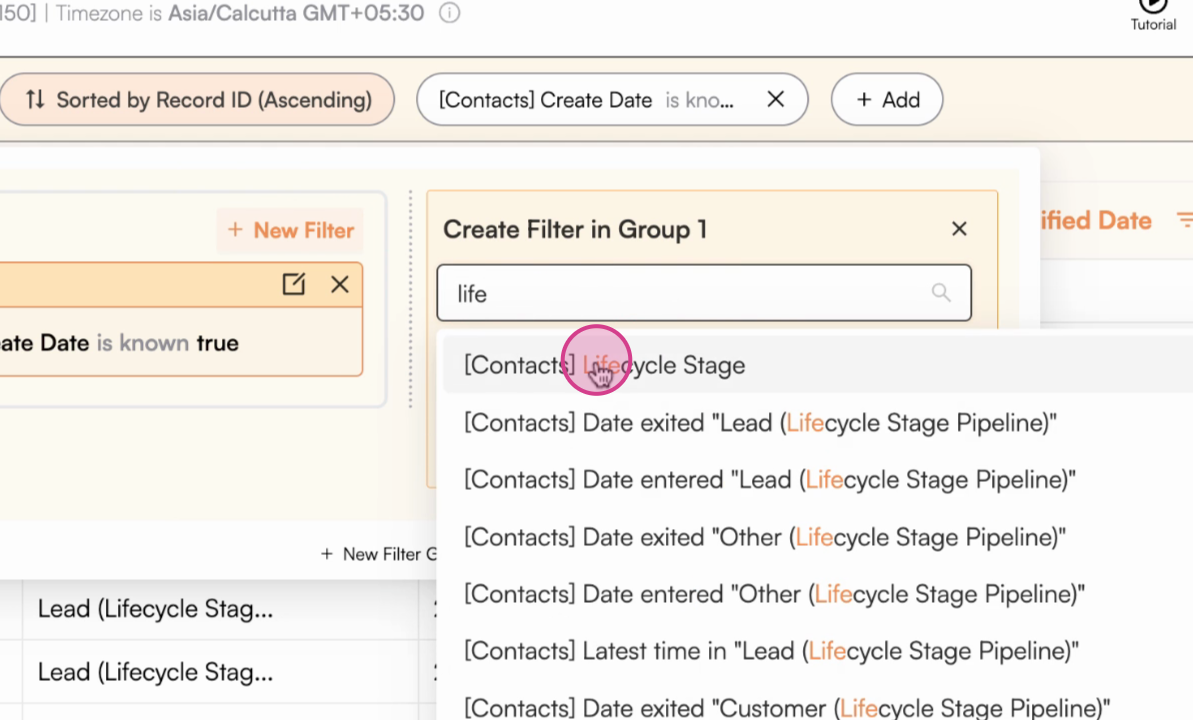
 Click Apply to preview all filters working together with AND logic. Now only records that match both the create date condition AND the lifecycle stage condition will be included.
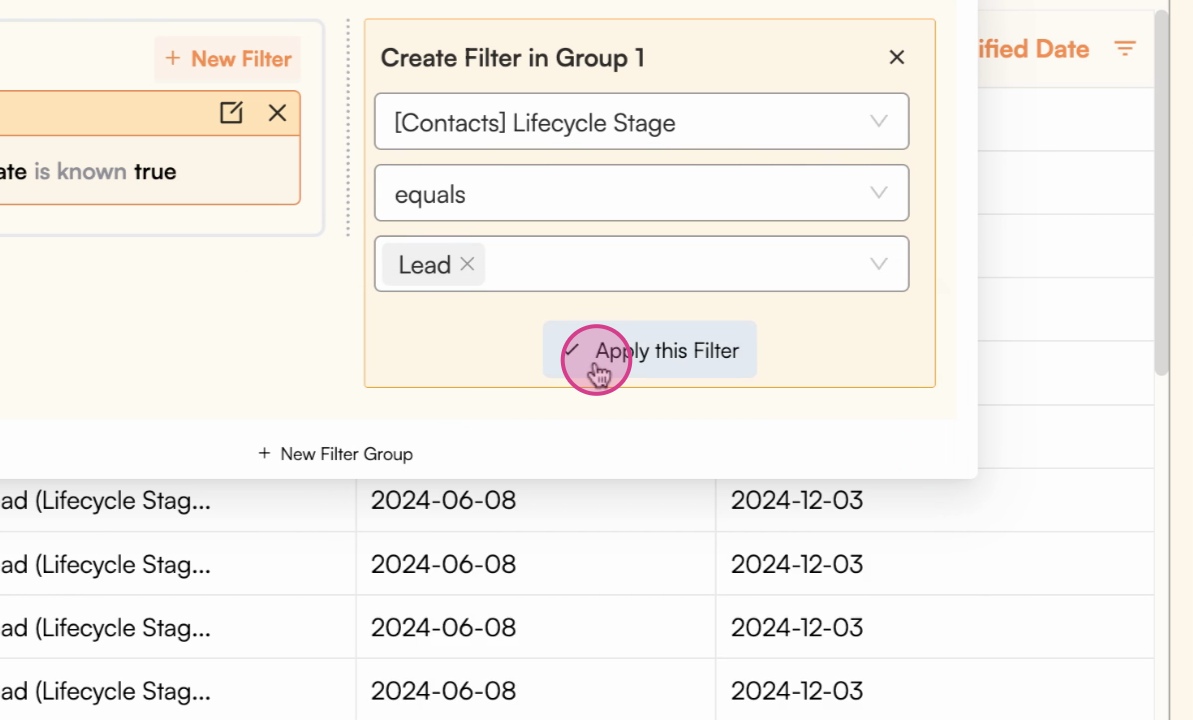
Click Add Filter to add more criteria to your current filter group
A new filter row appears in the same group
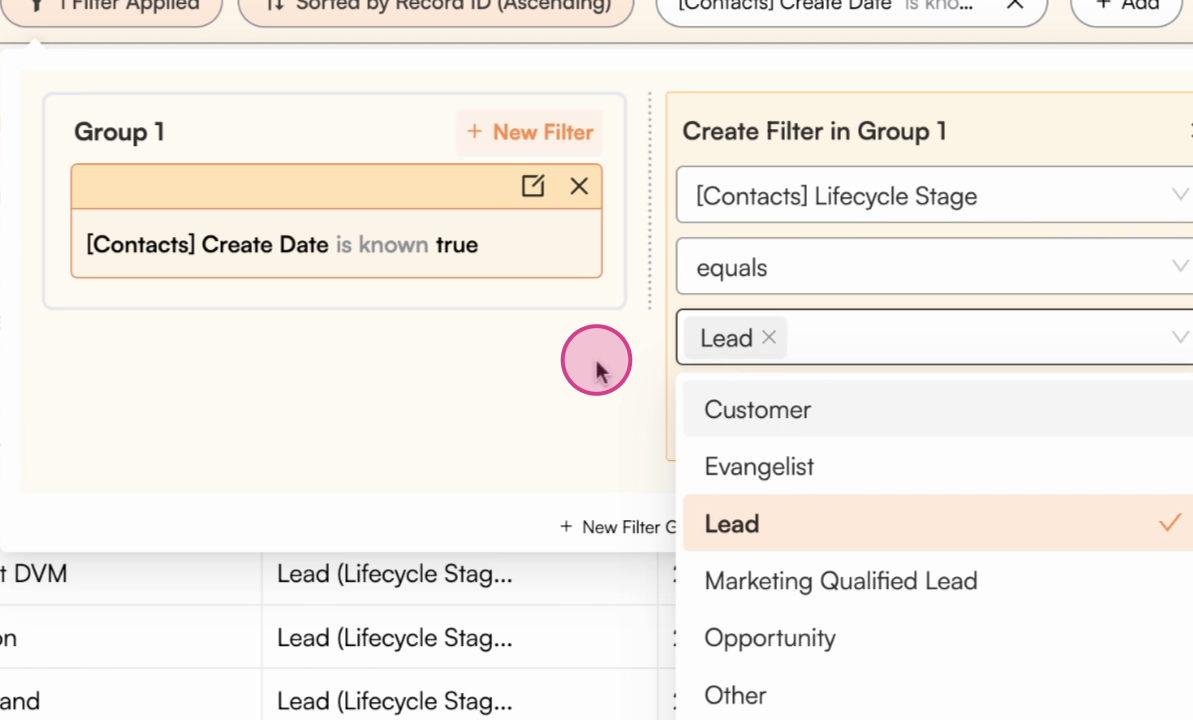
Selecting Life cycle stage field and the equals operator
Choosing the value lead from the dropdown options
The combined filter is now active - records must match ALL conditions in this group
AND Logic explained: All conditions in the same filter group must be satisfied for a record to be included. Think of it as narrowing down your results - each additional filter makes your criteria more specific.Example: Create date is known AND Lifecycle stage equals lead = Only leads with creation dates
6
Create Additional Filter Groups (OR Logic)
If you want your import to match either one set of conditions or another (OR logic), click Add Filter Group to create a separate group of conditions. Records matching any filter group will be included in your import.This is useful for scenarios like “Import contacts that are leads OR contacts created this month” where meeting either condition is sufficient.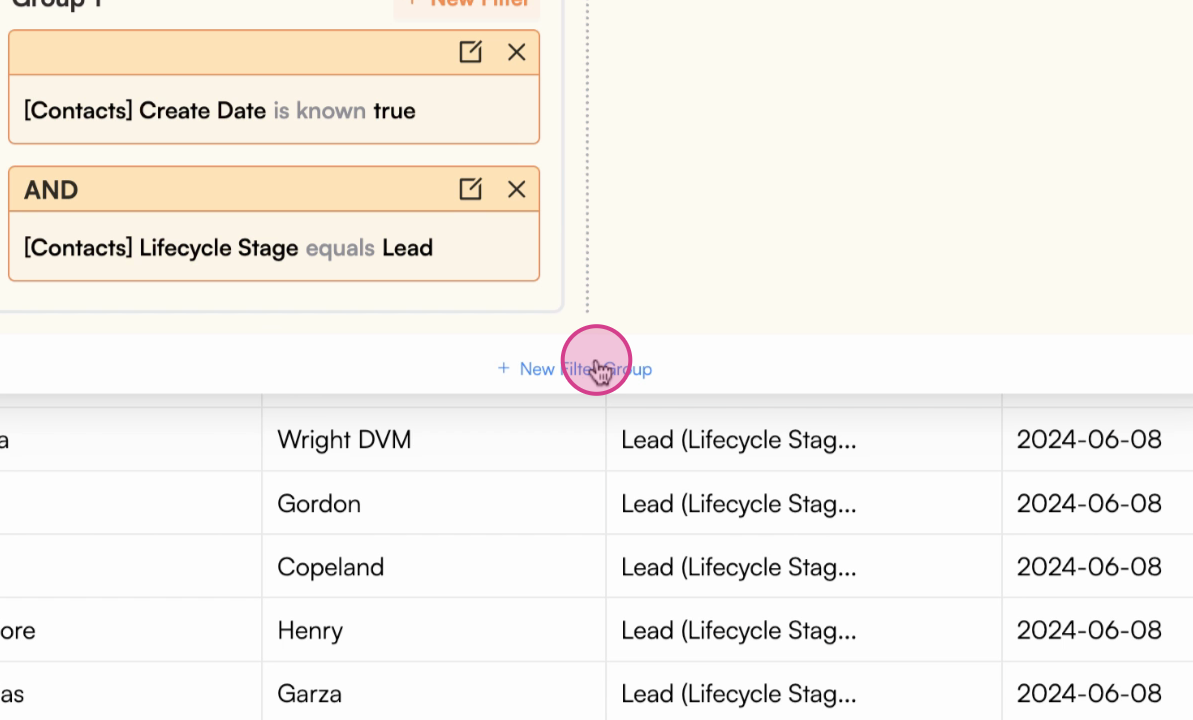
Click Add Filter Group to create an alternative set of conditions (OR logic)
OR Logic explained: Data matching any filter group will be included in your import. This broadens your results compared to AND logic.Example: (Create date > Jan 1, 2024 AND Status = Lead) OR (Last modified > March 1, 2024) = Leads created after Jan 1st OR any record modified after March 1st
You can combine AND and OR logic to create sophisticated filters: Each group uses AND logic internally, while multiple groups are joined with OR logic. This gives you maximum flexibility in defining your import criteria.
7
Import Filtered Data to Google Sheets
Once you’re satisfied with your filtered results and have verified the preview (when possible), click Update or Import to bring only the filtered data into your Google Sheets.Your import will now respect all the filter conditions you’ve configured, ensuring only relevant data is imported and kept up-to-date on future refreshes.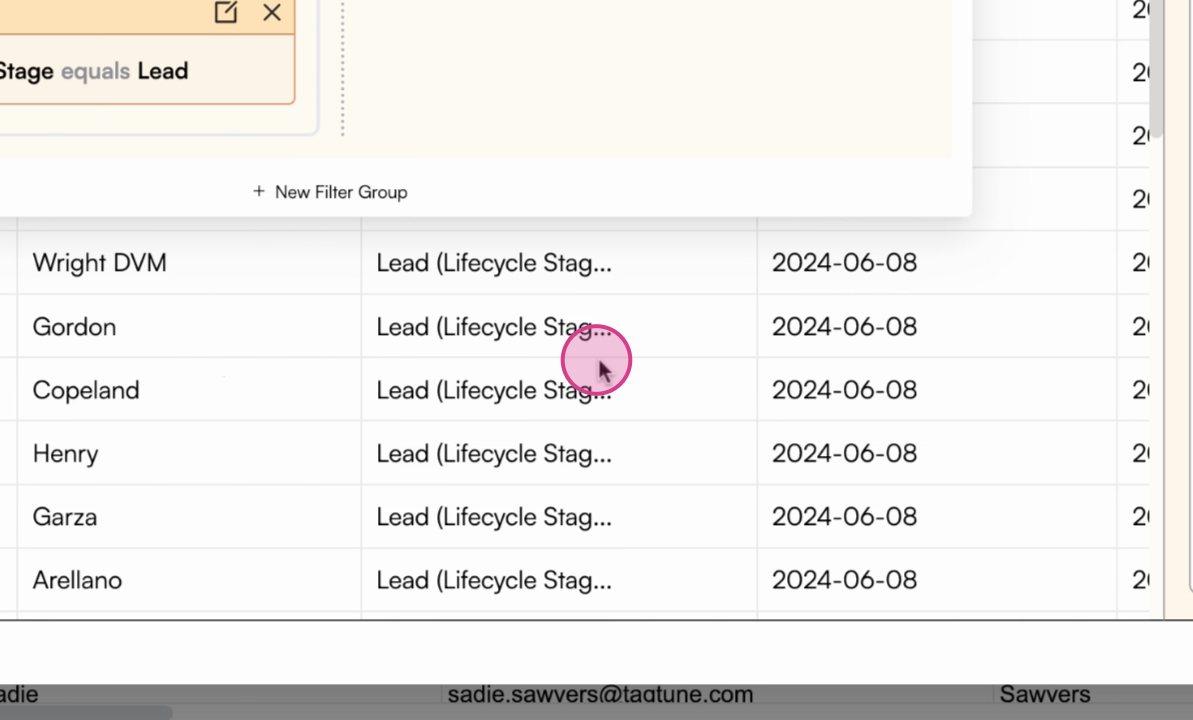
Click the Update button to import your filtered dataset into Google Sheets
Your filter configuration is saved with your import. Every time you refresh this import, the same filters will be automatically applied, ensuring you always get the most current data matching your criteria.
Understanding Filter Logic
Mastering filter logic helps you create precisely targeted imports that include exactly the data you need.AND Logic
Use Add Filter within the same group when all conditions must be met simultaneously.When to use: Narrowing down results with multiple requirementsExample scenarios:
- Contacts created after Jan 1, 2024 AND with email addresses
- Deals with amount > $10,000 AND stage = “Qualified”
- Orders from Q1 AND with status = “Completed”
OR Logic
Use Add Filter Group when you want to match any of multiple condition sets.When to use: Broadening results to include records matching different criteriaExample scenarios:
- Contacts that are leads OR customers
- Tickets created this week OR with high priority
- Deals closing this quarter OR already closed-won
Complex Filter Examples
Example 1: Recent High-Value Leads
Example 1: Recent High-Value Leads
Goal: Import leads created in the last 30 days with estimated value over $5,000Filter setup:
- Group 1:
- Create date > [30 days ago]
- AND Lifecycle stage = “Lead”
- AND Amount > 5000
Example 2: Active Contacts in Key Regions
Example 2: Active Contacts in Key Regions
Goal: Import active contacts from either New York or CaliforniaFilter setup:
- Group 1: City = “New York” AND Status = “Active”
- OR Group 2: State = “California” AND Status = “Active”
Example 3: Deals Requiring Follow-up
Example 3: Deals Requiring Follow-up
Goal: Import deals that are either in negotiation OR closing this monthFilter setup:
- Group 1: Stage = “Negotiation”
- OR Group 2: Close date > [First of this month] AND Close date < [Last of this month]
Common Filter Conditions Explained
is known
Includes records where the field has any value (not empty or null)
is unknown
Includes records where the field is empty or null
equals
Exact match - field must exactly equal the specified value
not equals
Excludes records where field exactly equals the specified value
contains
Text fields - includes records where field contains the specified text
greater than / less than
Numeric and date comparisons - includes records above or below a threshold
Best Practices & Tips
Start Broad, Then Narrow
Begin with a simple filter to ensure you’re getting results, then add more conditions to refine. This helps you avoid creating overly restrictive filters that exclude important data.
Test Before Importing
Always click Apply to preview your filter results before importing. While the preview is limited, it helps you verify your filter logic is working correctly.
Use Known/Unknown Wisely
The “is known” and “is unknown” operators are powerful for data quality. Use “is known” to import only complete records, or “is unknown” to identify records that need updating.
Document Complex Filters
For sophisticated filters with multiple groups, document your filter logic in your spreadsheet or team wiki so others understand what data is included and why.
Performance Tips
Optimize your filters for speed:
- Use date ranges to limit historical data imports
- Filter out inactive or archived records
- Exclude fields you don’t need from the import
- Consider separate imports for different time periods rather than one massive import
Troubleshooting Common Issues
Empty Preview After Filtering
Don’t panic if your preview appears empty! The preview only shows the first 100 rows from your source. If your filtered results aren’t in those first 100 rows, the preview will be blank, but your data will still import correctly.
Filter Not Working as Expected
If your filter doesn’t seem to work correctly:- Check your filter logic - Verify you’re using AND vs OR correctly
- Review field types - Ensure you’re using appropriate operators for each field type
- Test individual conditions - Remove all but one filter to test each condition separately
- Check data source - Verify the data exists in your source system
Too Much or Too Little Data
If you’re getting more or fewer records than expected:- Too much data: Add more specific filters with AND logic to narrow results
- Too few records: Check if filters are too restrictive; try OR logic or remove some conditions
- Verify in source system: Check your data source directly to confirm the data exists
Summary & Next Steps
By filtering your import queries in Superjoin, you keep your spreadsheets focused and relevant—importing only the data you need, organized and ready for analysis or automation. Key benefits of filtered imports:- ✅ Faster refresh times and better spreadsheet performance
- ✅ Reduced API usage and lower rate limit concerns
- ✅ Cleaner, more focused datasets for analysis
- ✅ Automatic filtering on every refresh keeps data current
Pro tip: Combine AND and OR logic to create complex filters that precisely match your data requirements. Start simple and add complexity as needed. Remember that you can always modify your filters later by editing the import configuration.
What to Do Next
Now that you’ve mastered filtering:- Set up auto-refresh - Configure your filtered imports to refresh automatically
- Explore derived columns - Add calculations and transformations to your imported data
- Share with your team - Use Superjoin’s sharing features to distribute filtered data to colleagues
- Create multiple views - Set up different imports with different filters for various use cases
Need help with filters? Contact Superjoin support with details about your filtering requirements and they can assist you with the best setup approach. Include screenshots of your filter configuration for faster assistance.