- Google Sheets
- Microsoft Excel
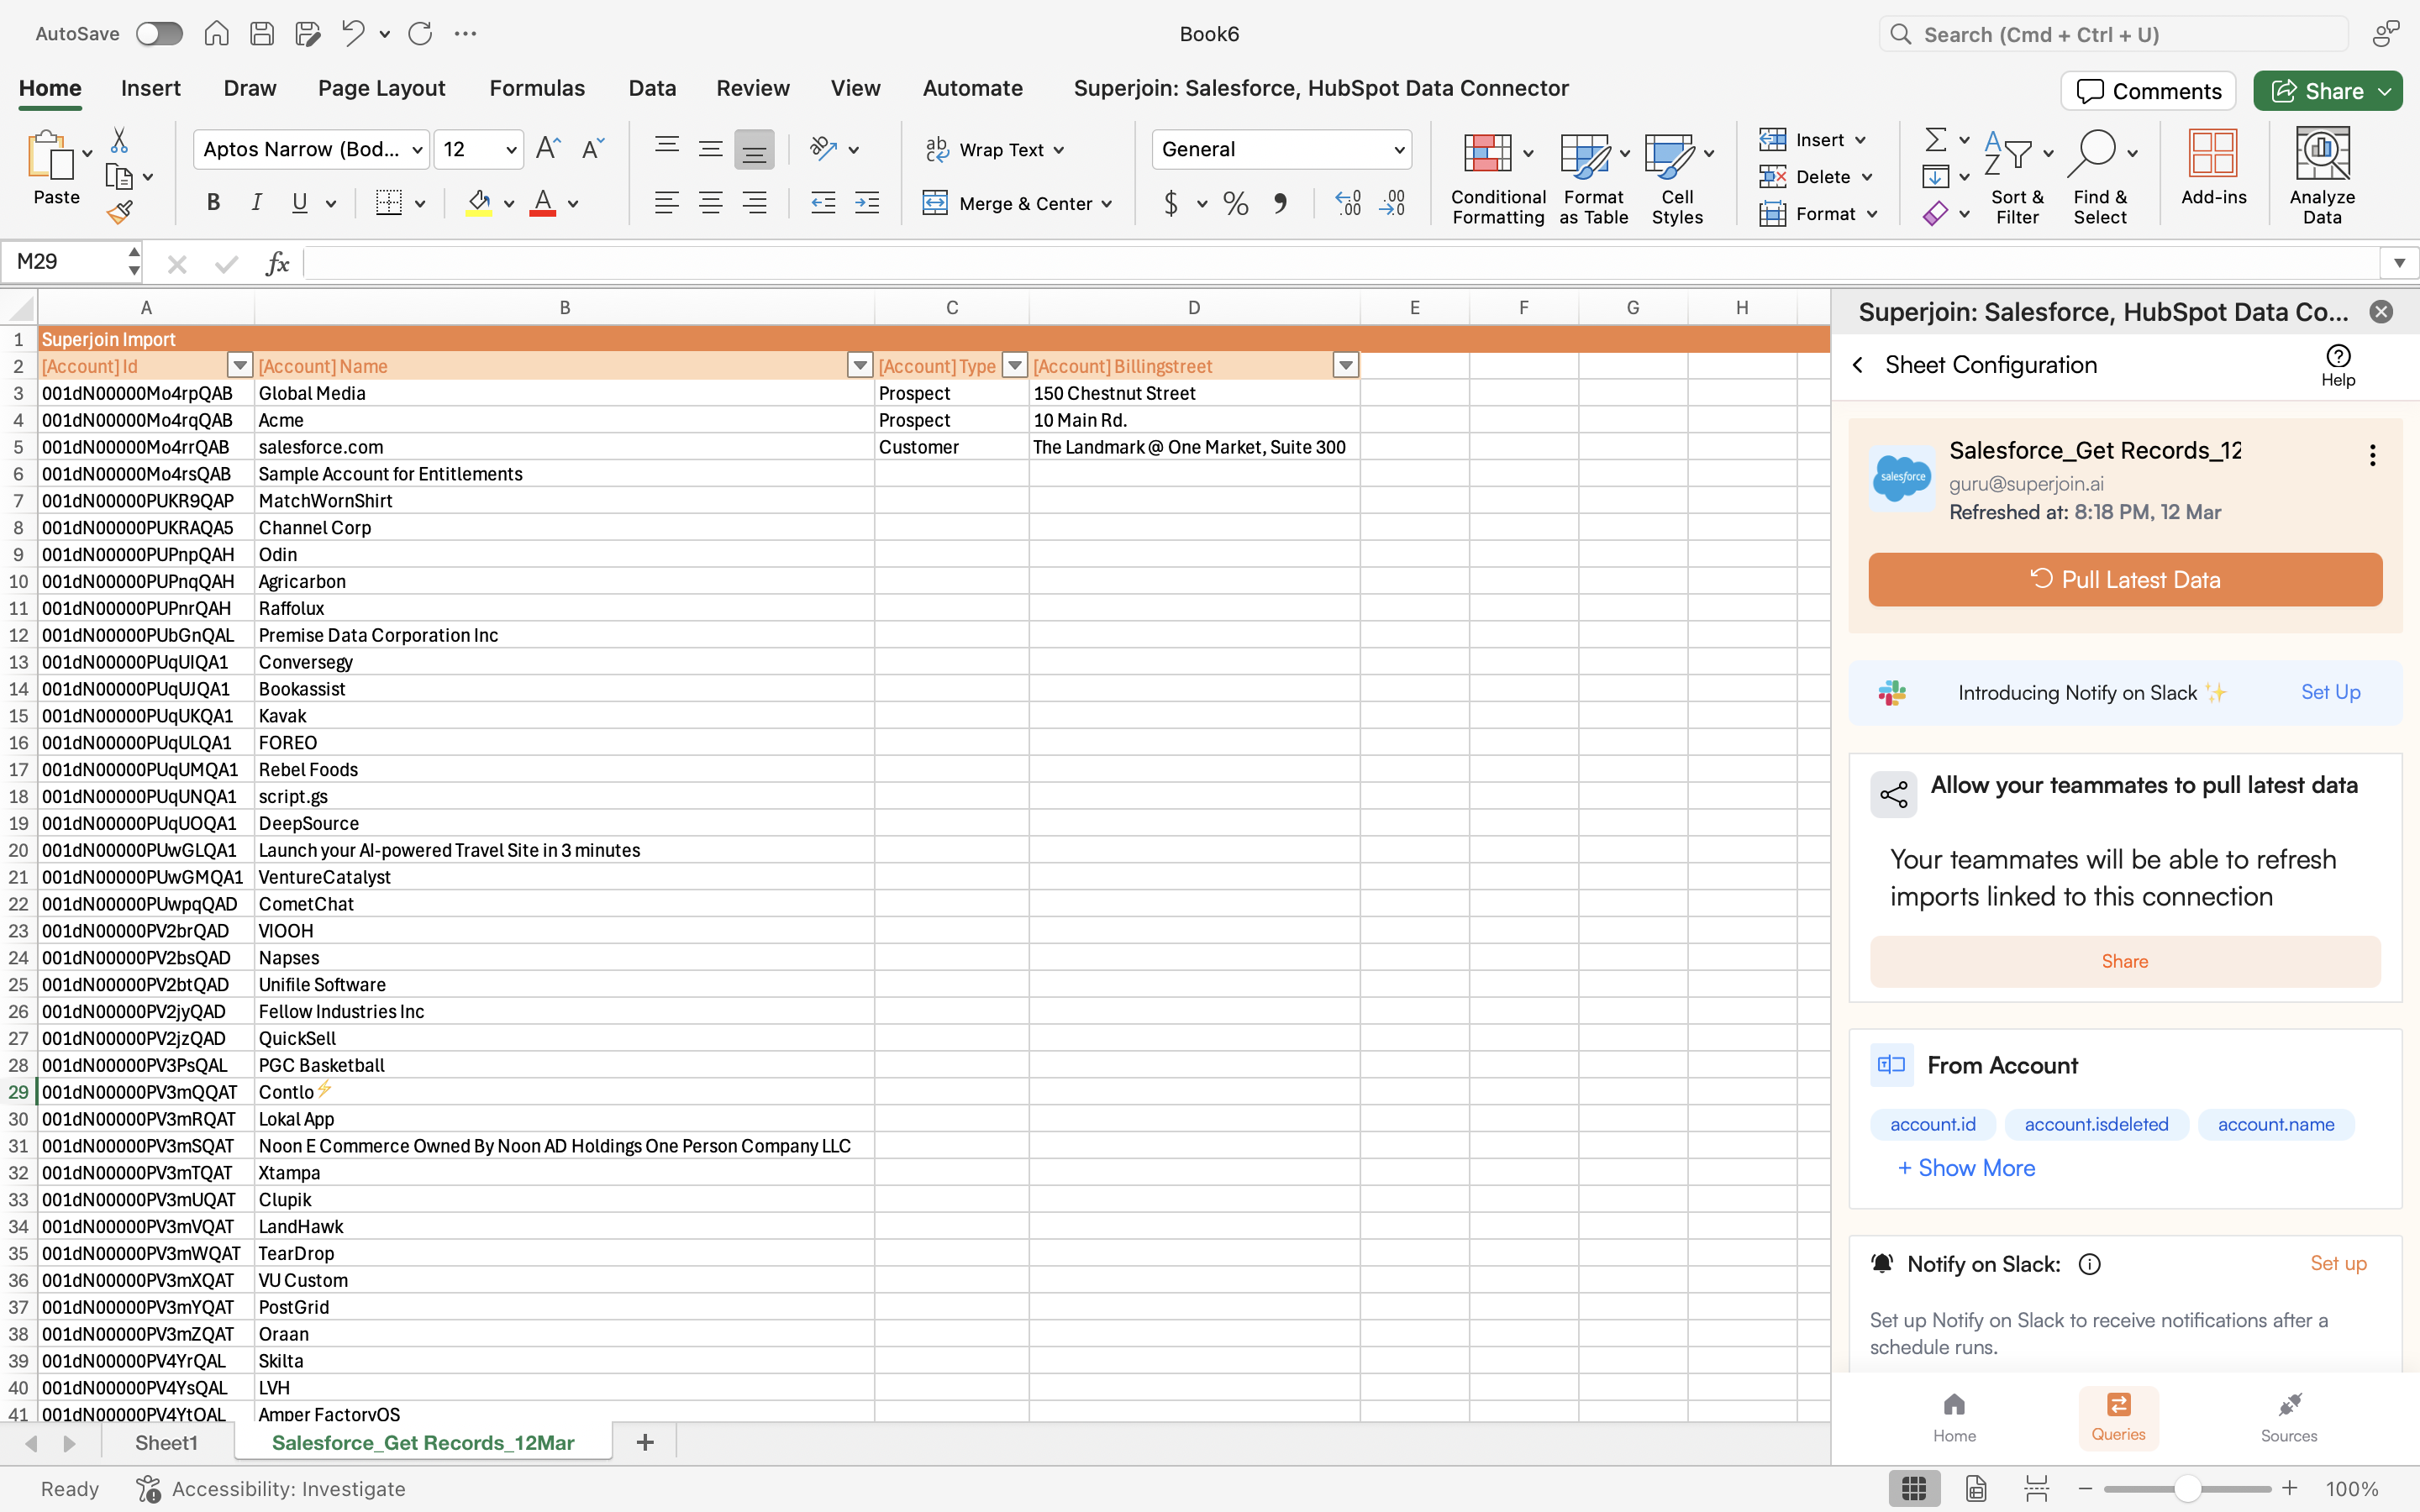
1
Preview Data
After connecting your account, a data preview window will appear, allowing you to modify and select an 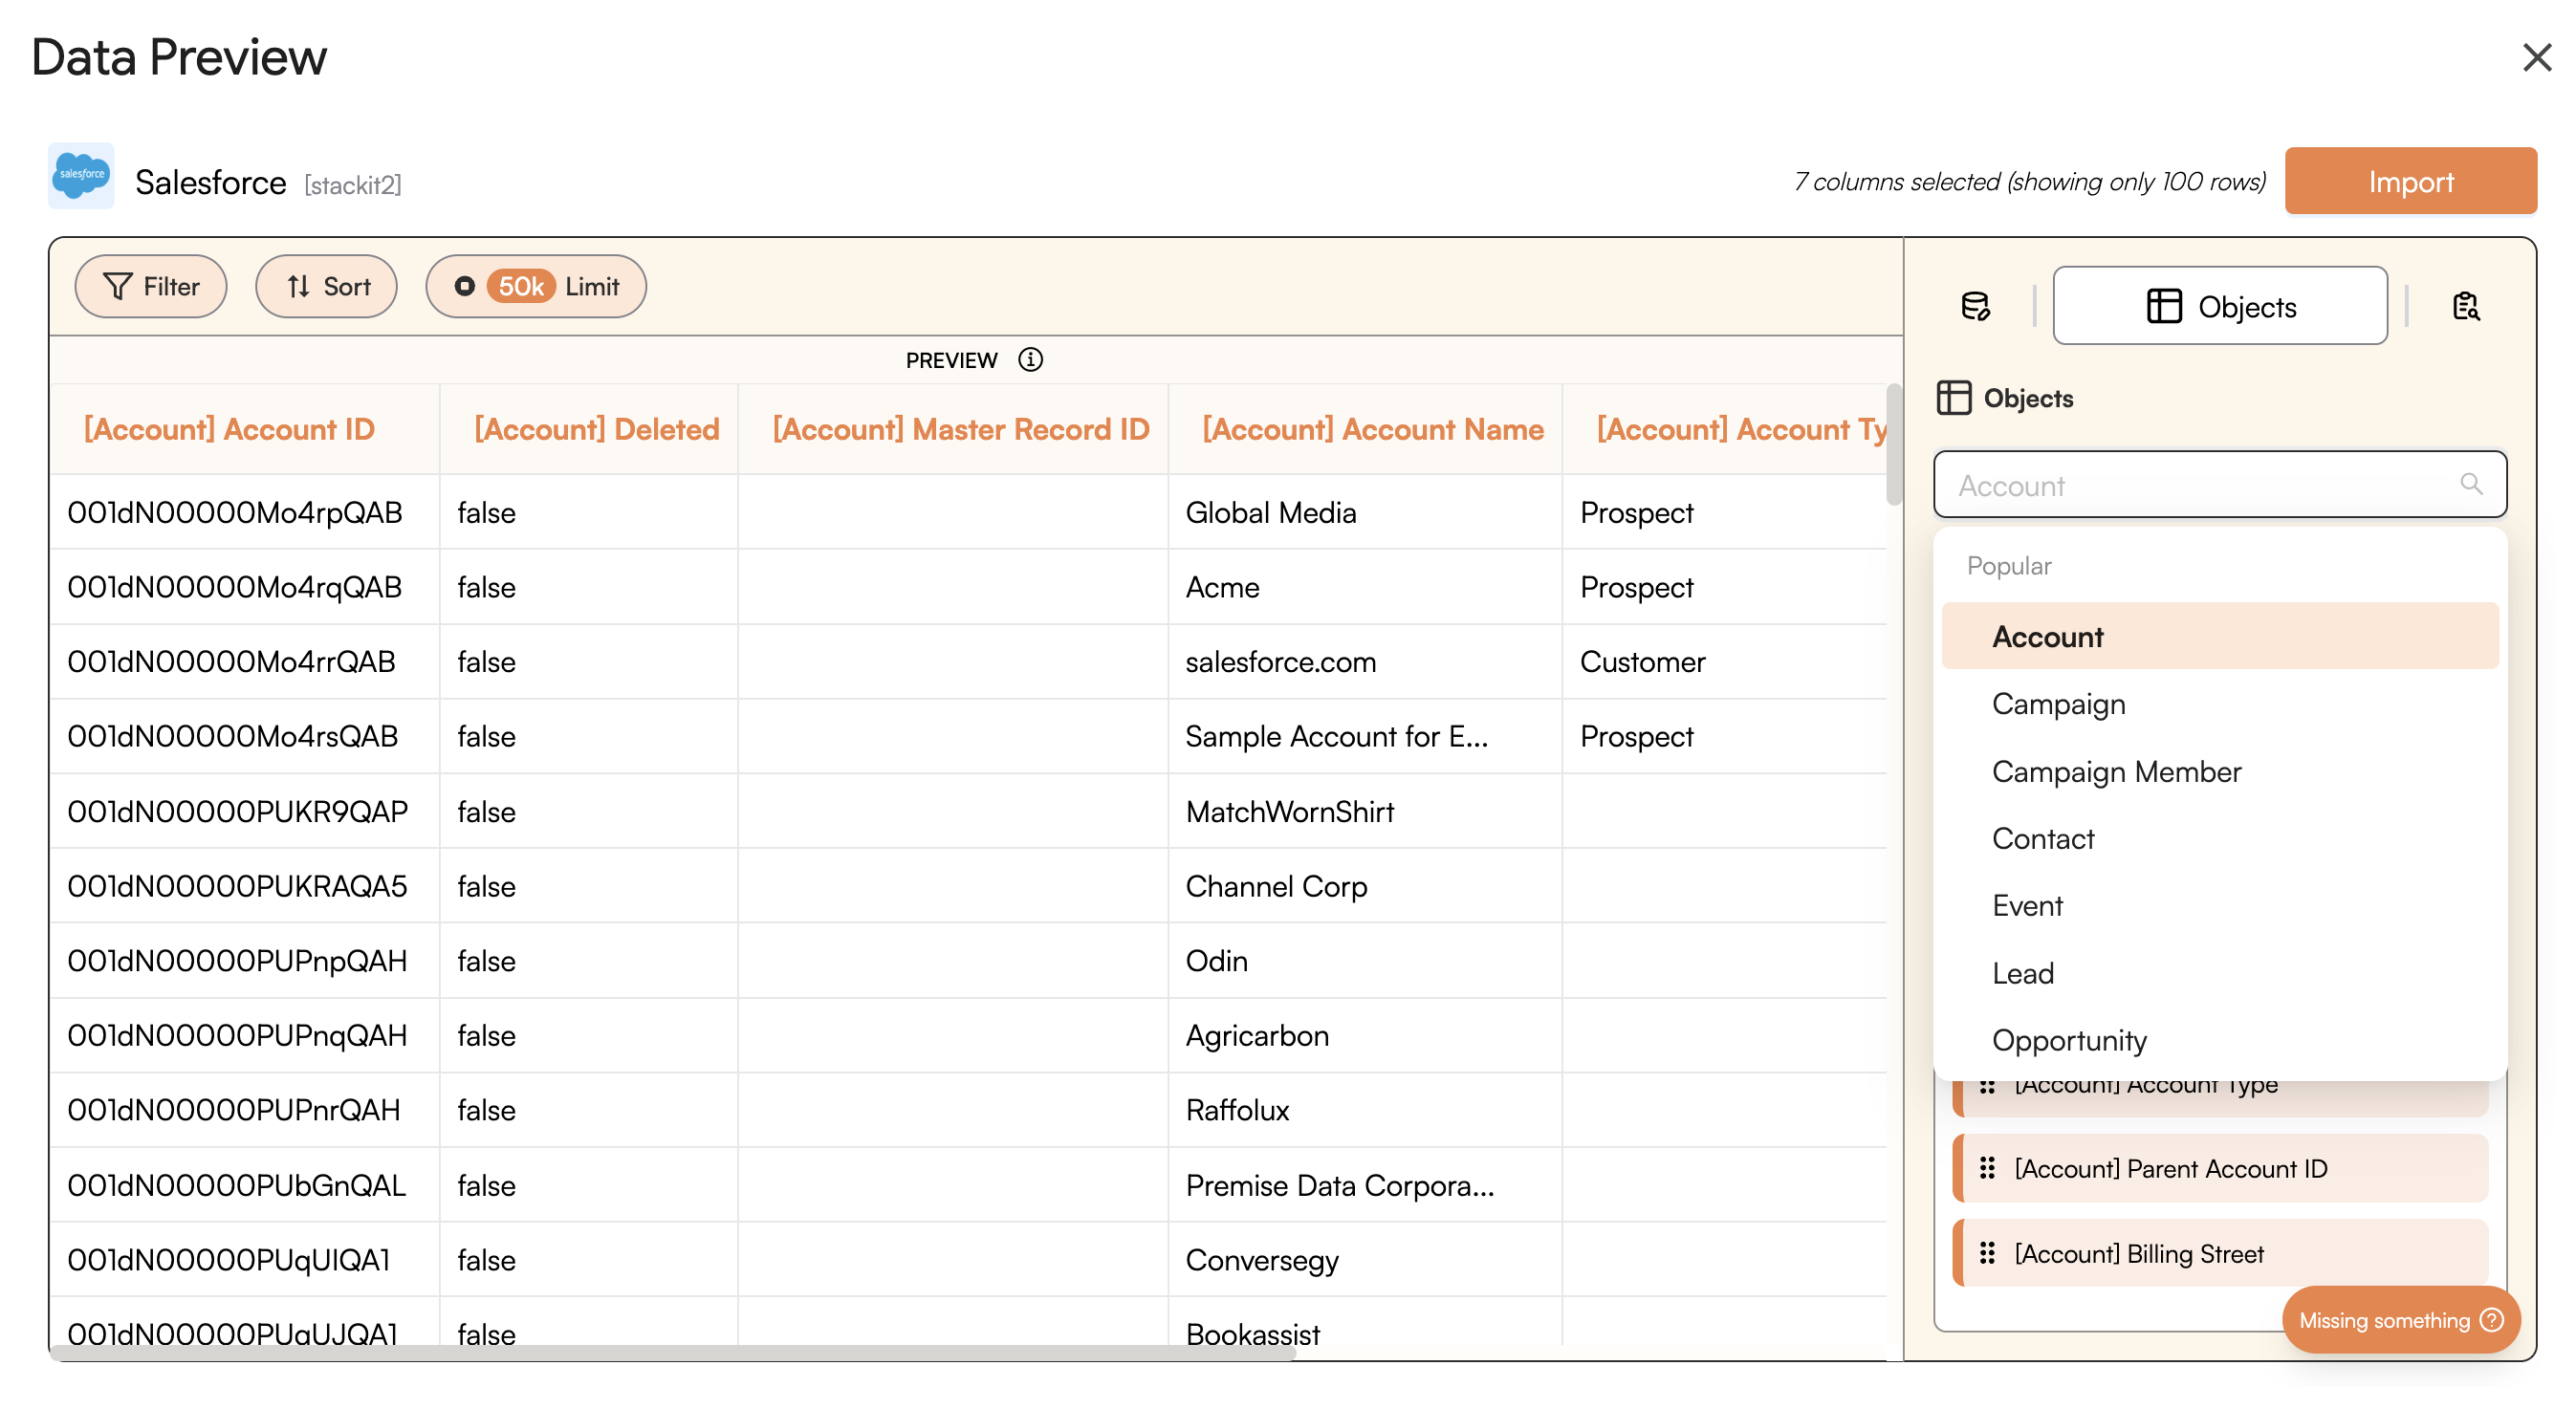
Object to import and apply various Filters to refine your data.2
Add/Modify columns
Add/modify the data fields you want to import. The 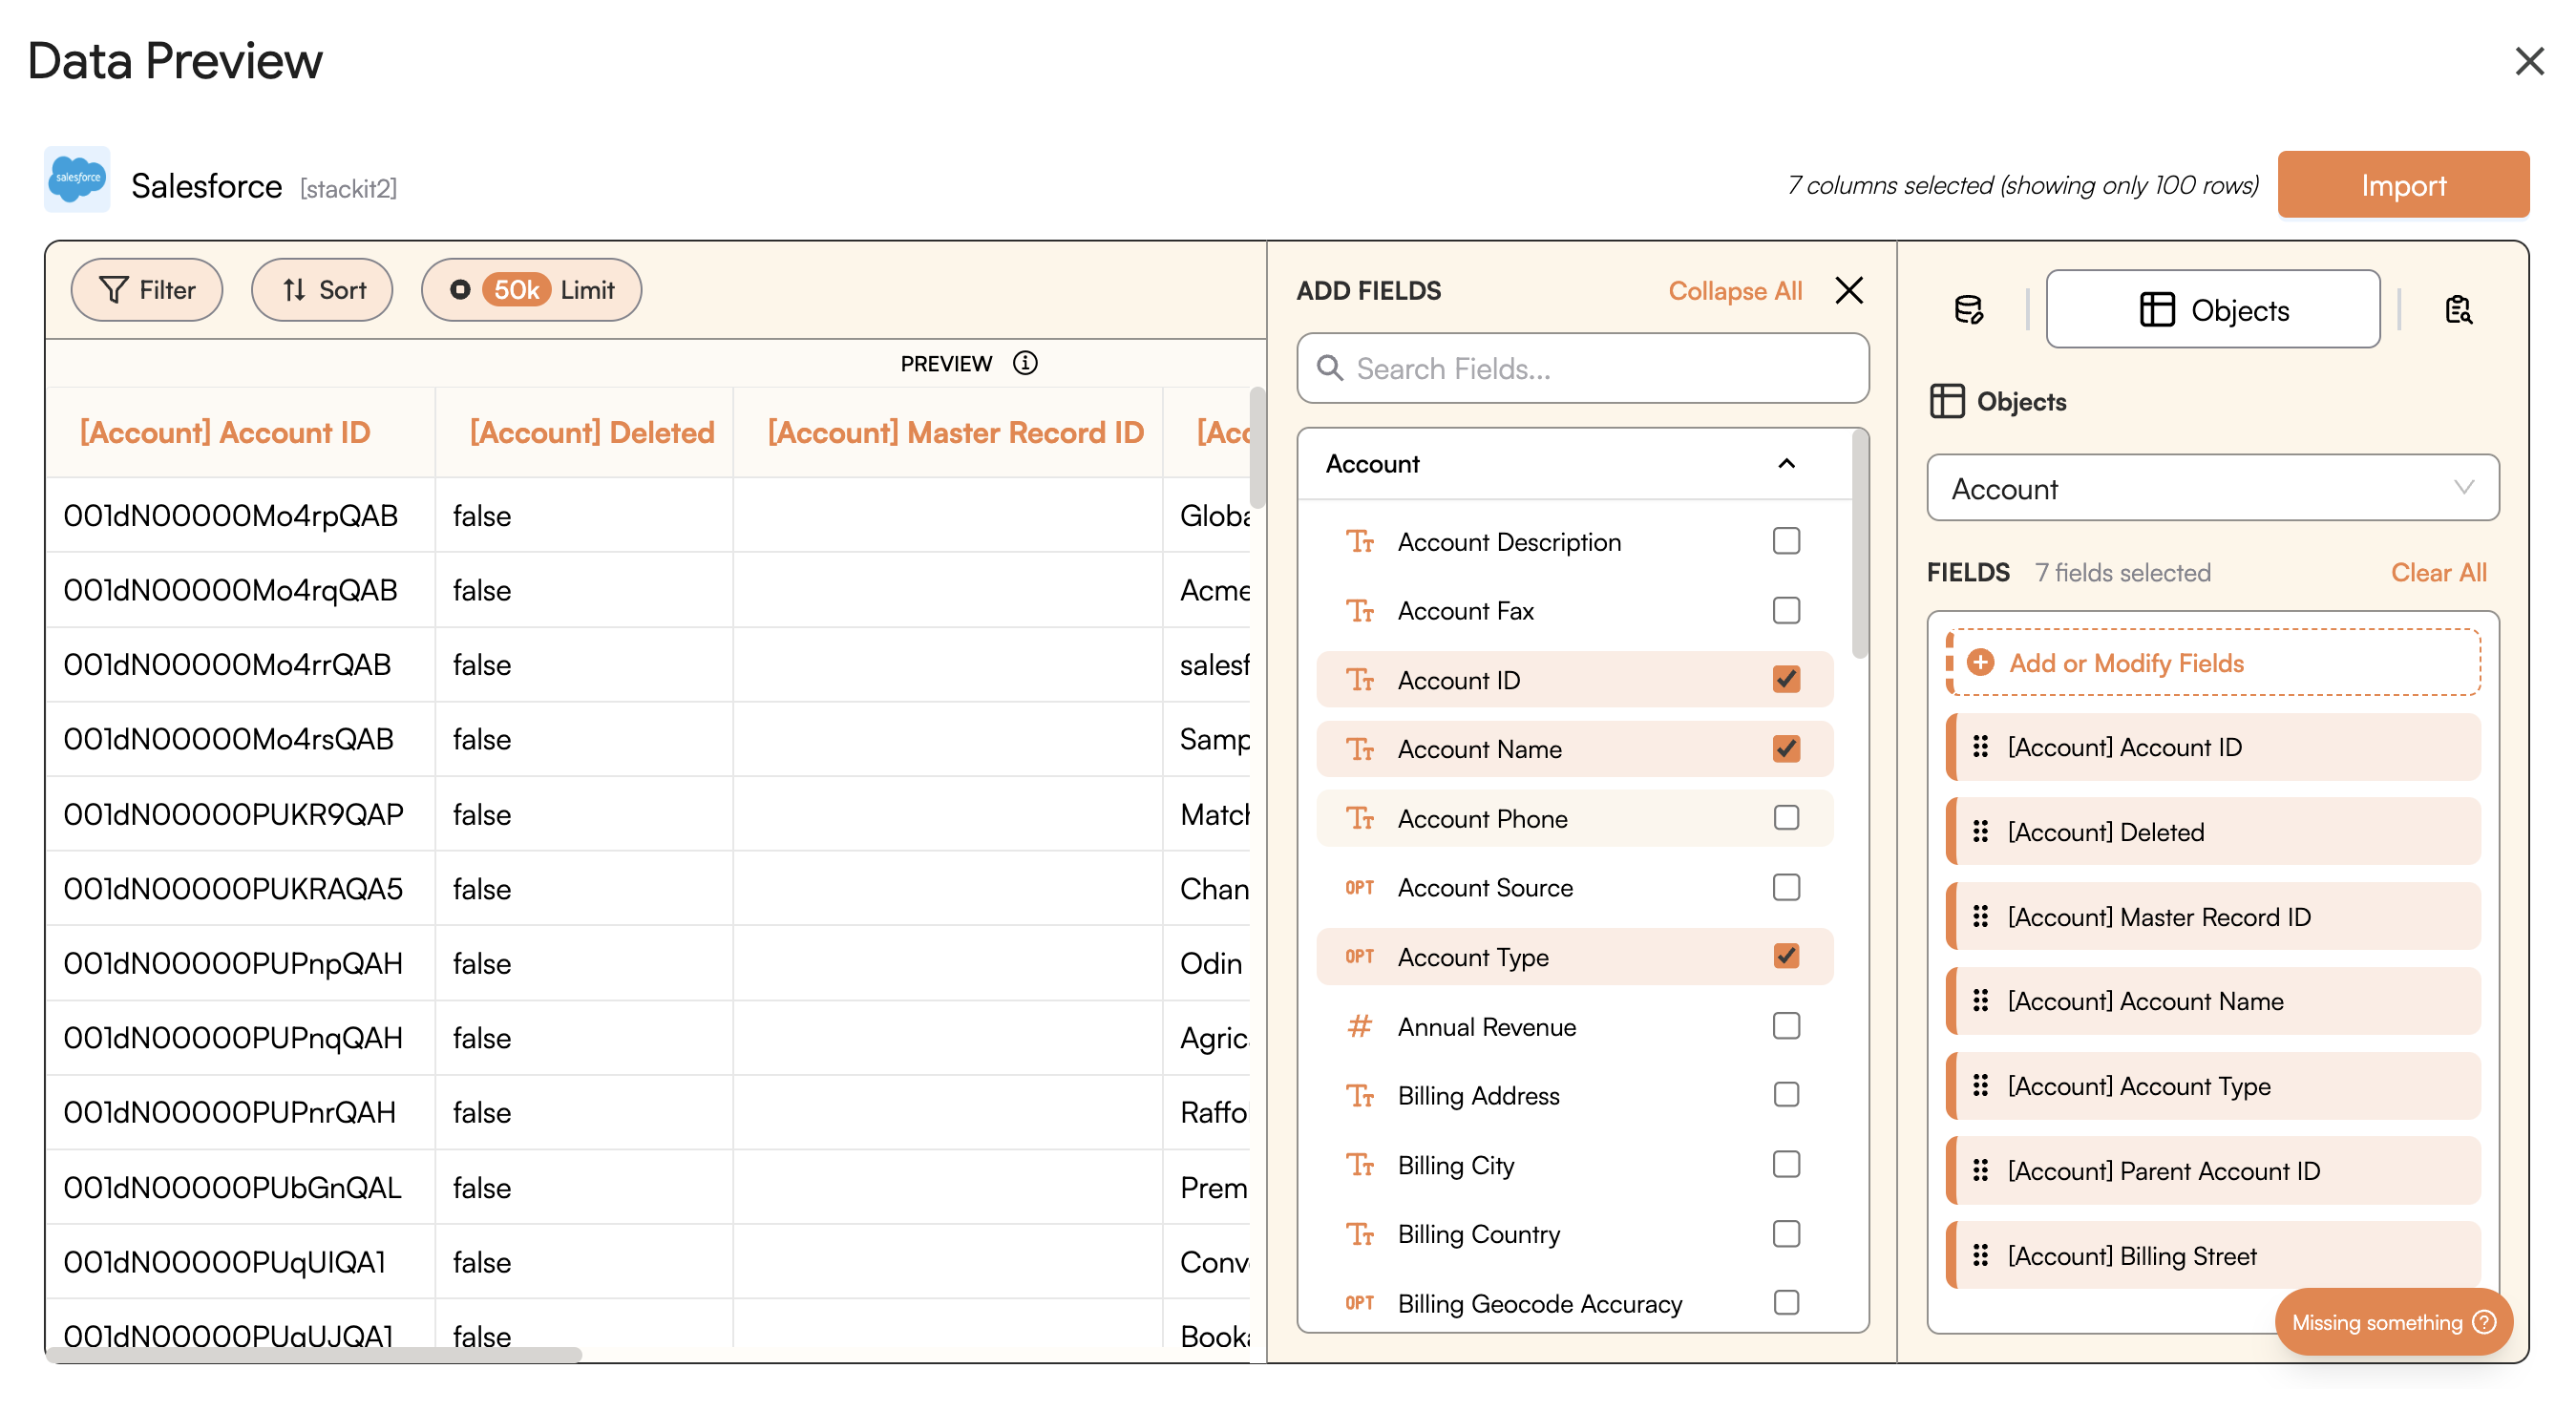
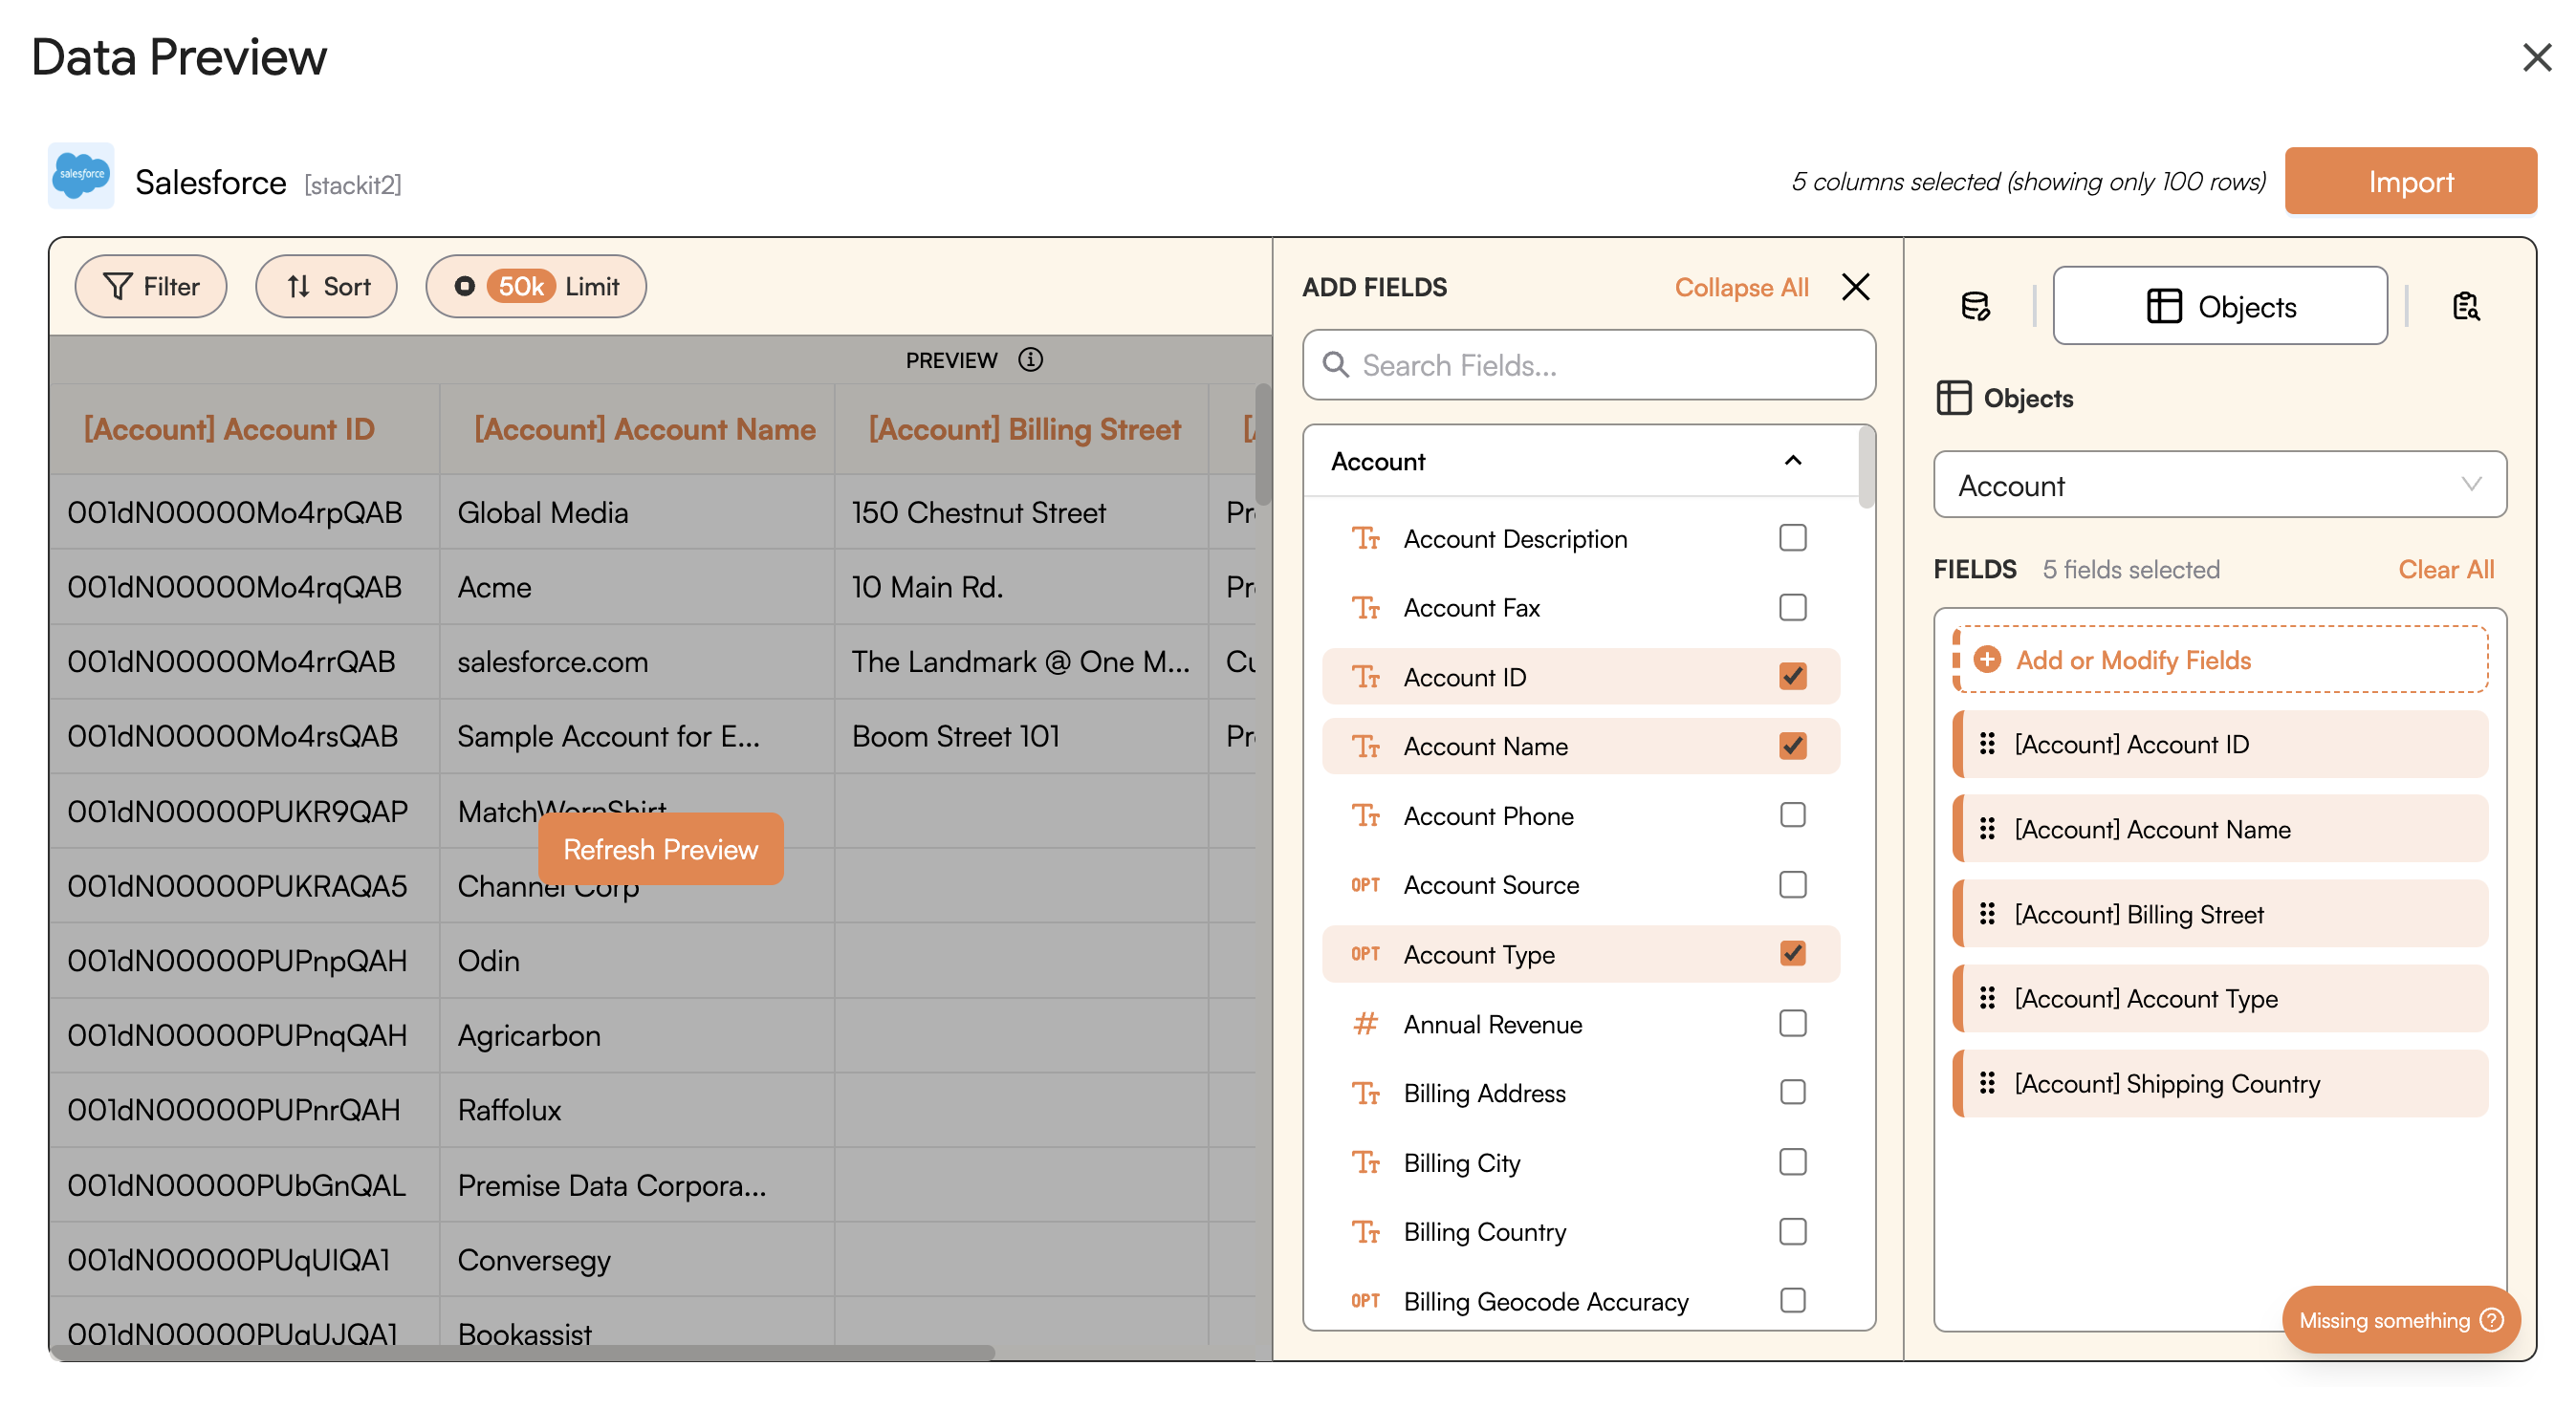
Fields you selected should start showing up in the data preview section. You may need to click Refresh Preview to see the changes.3
Import Data
After previewing the data, you are ready to start the import. Click on 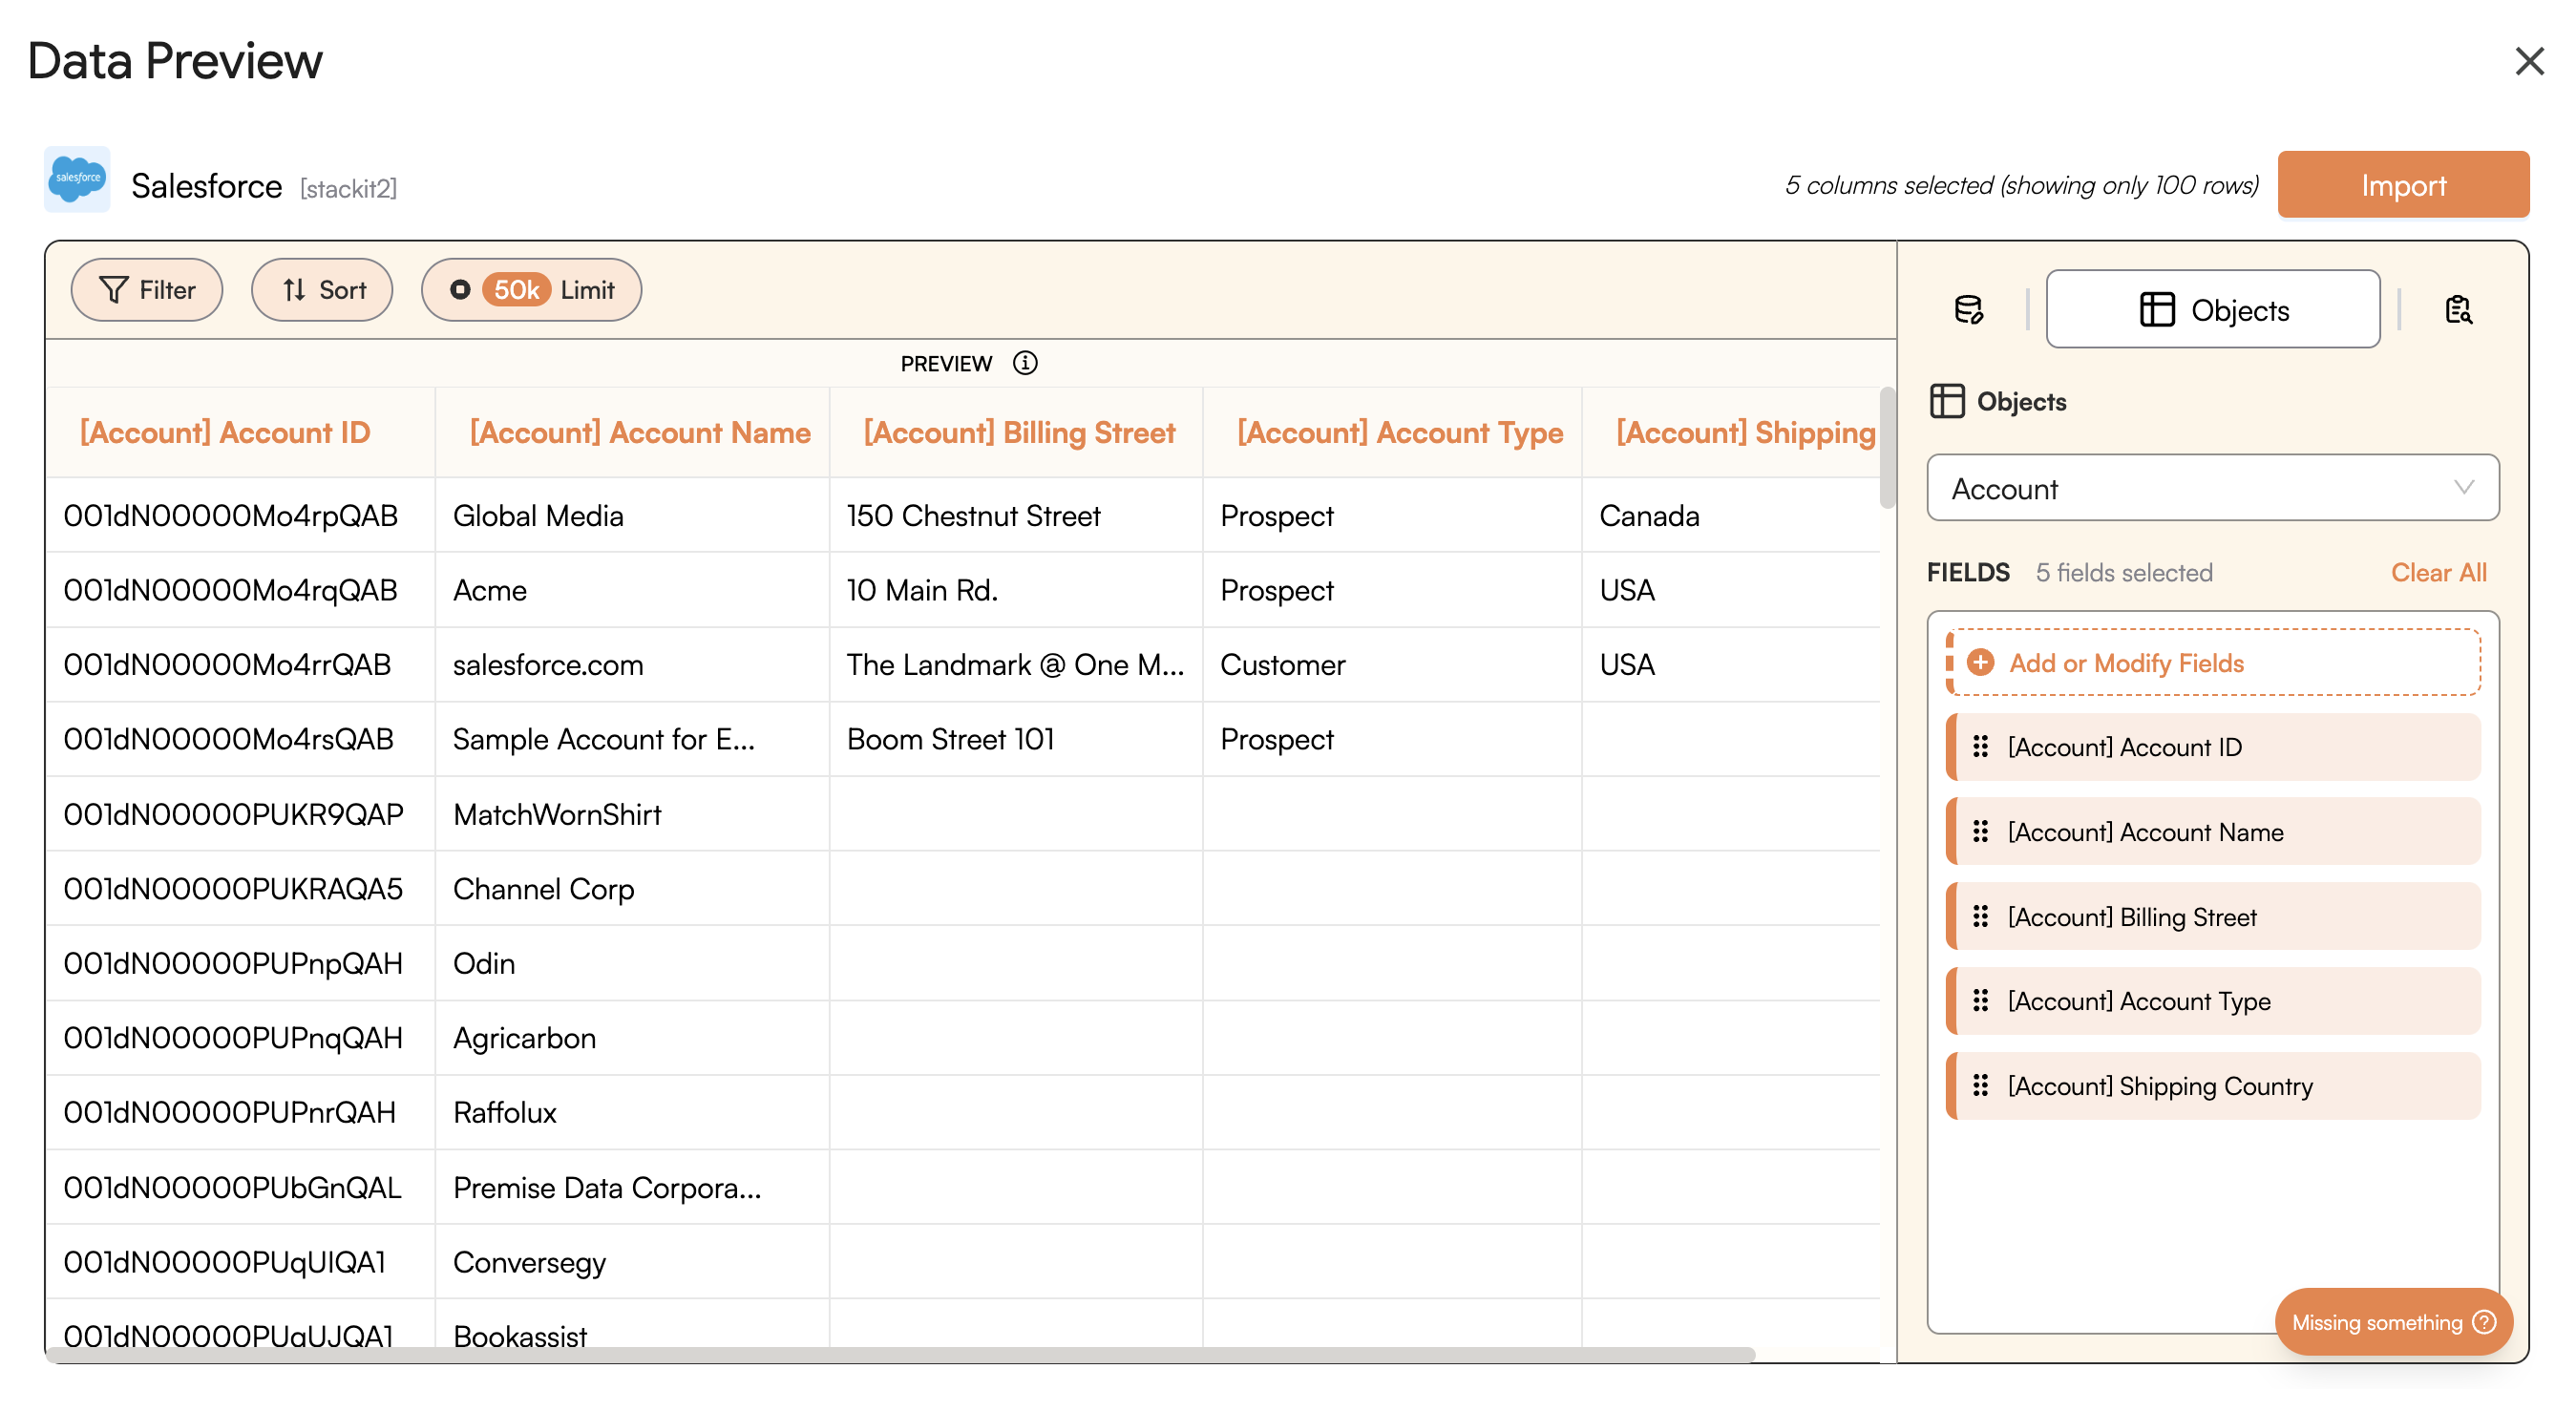
Import to start the import process. Here, you can name the new sheet where the data will be imported.4
Import Data
Once you are ready to import, click on 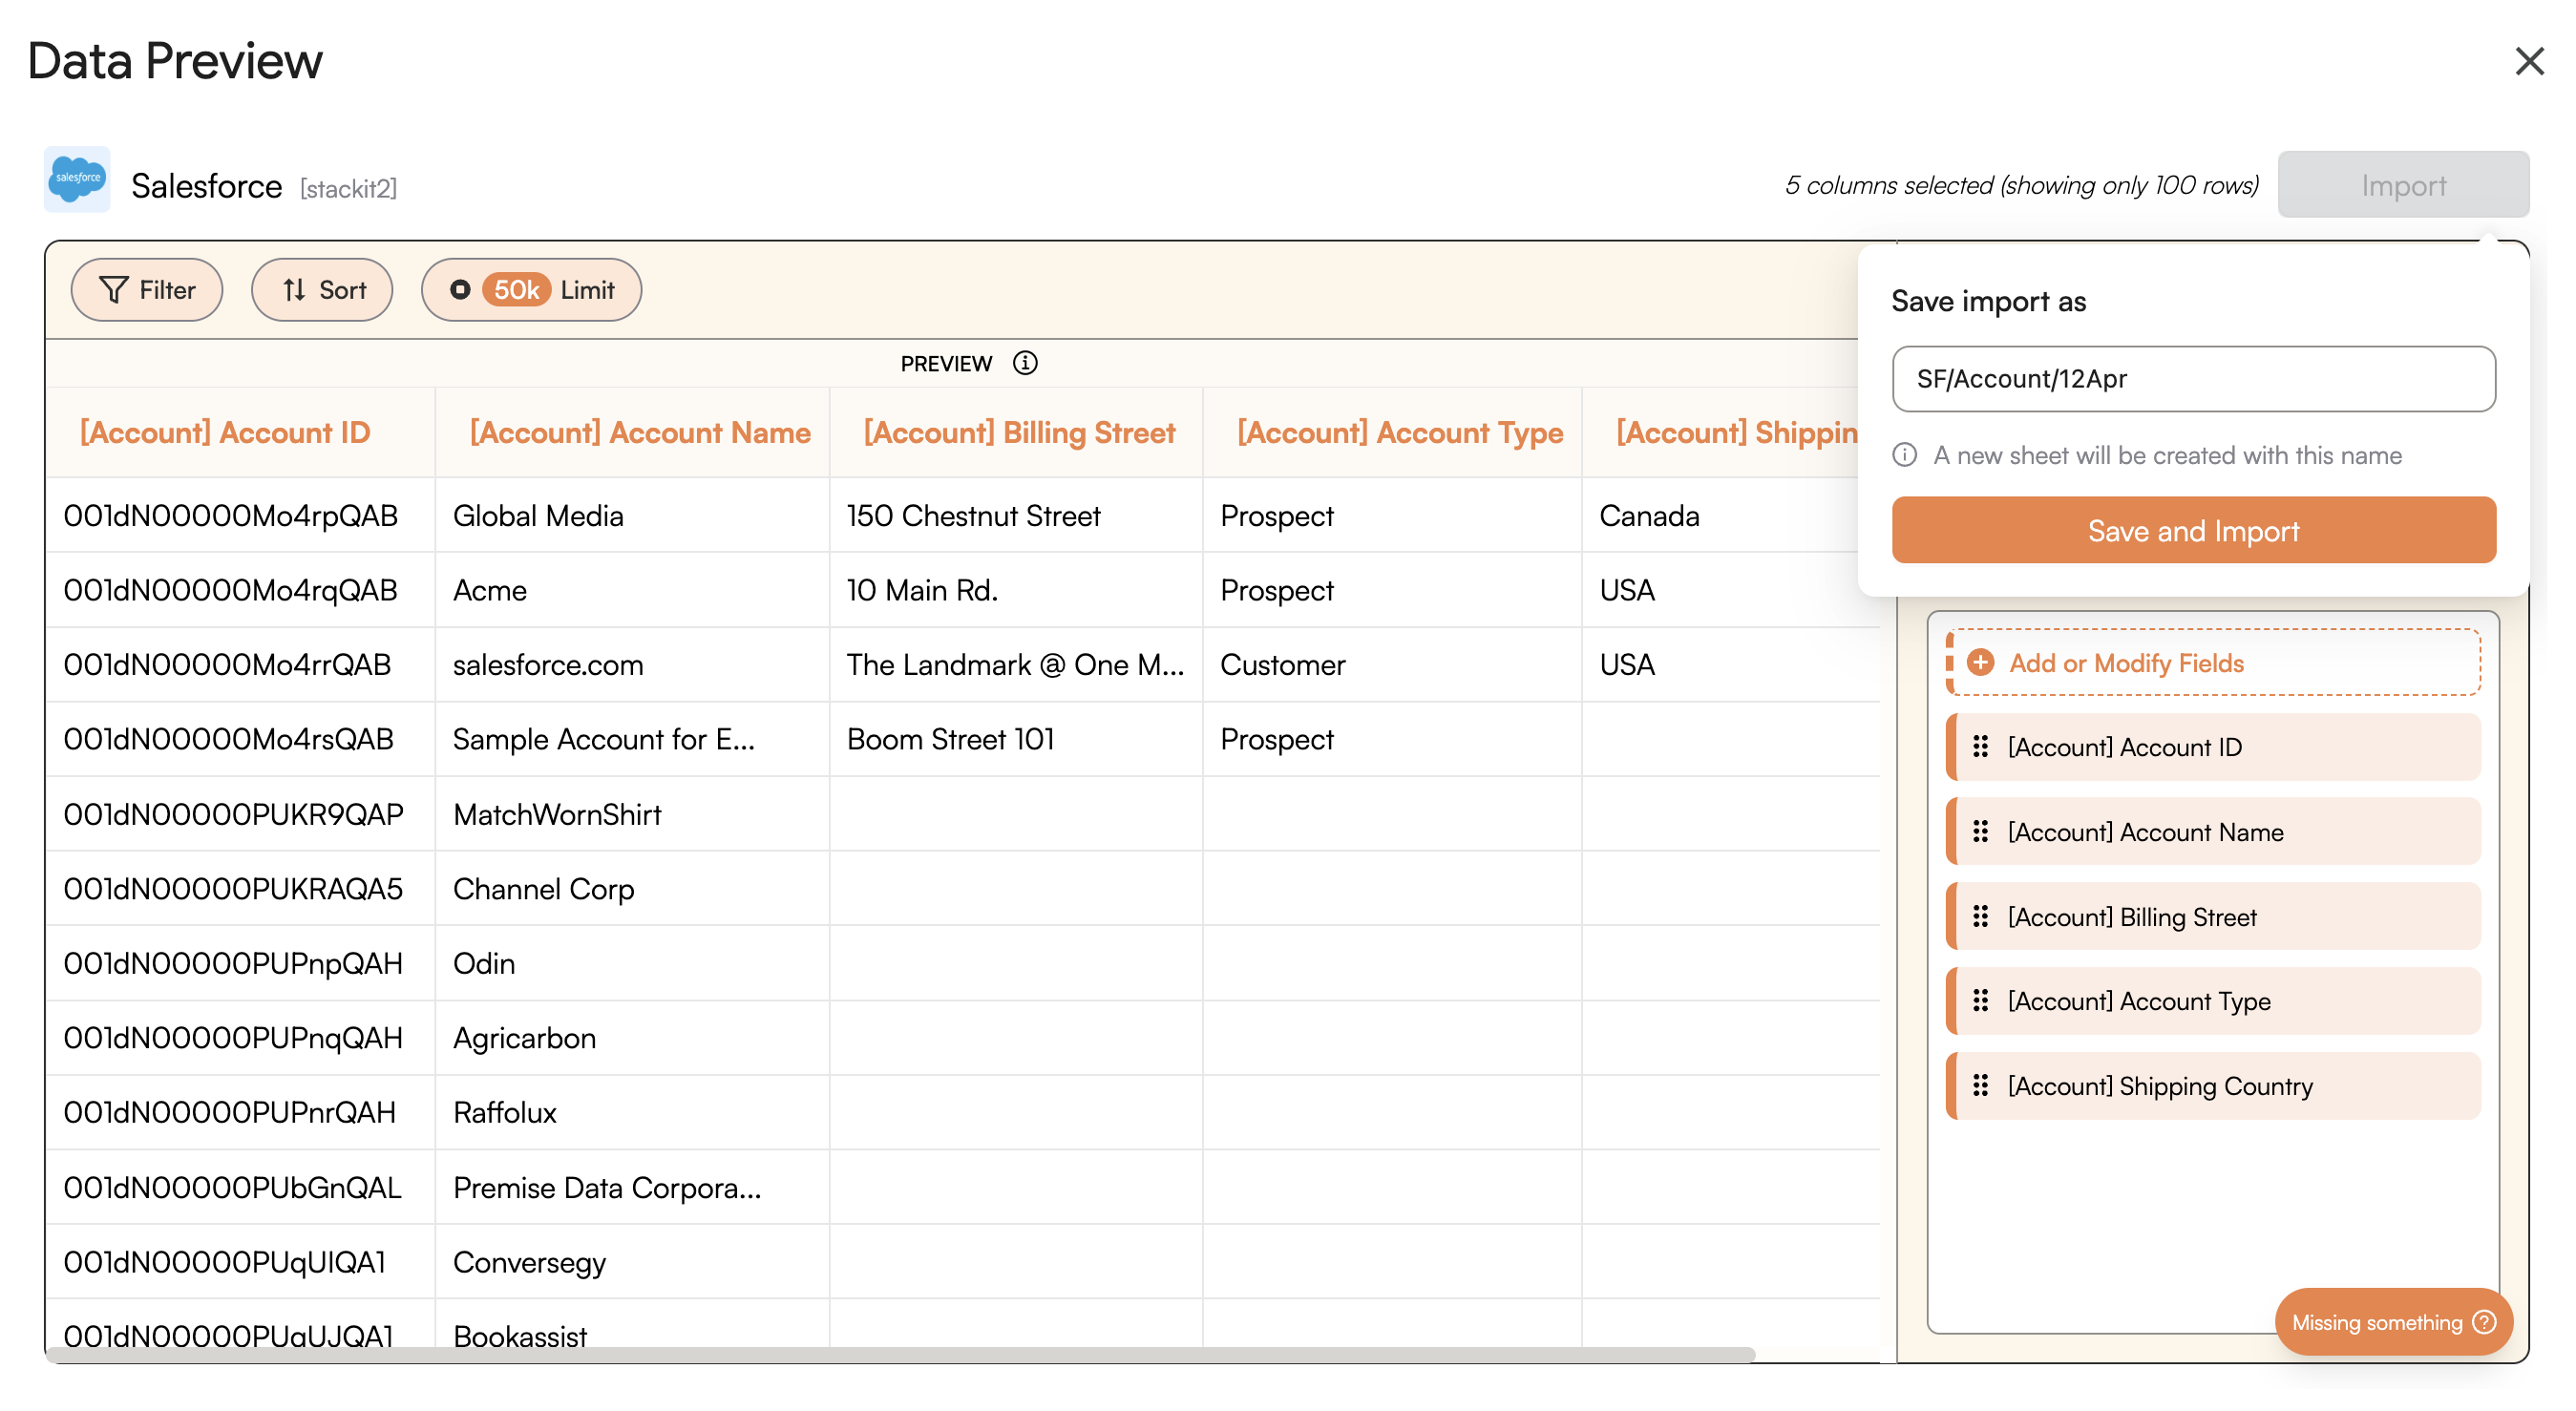
Save and Import and wait for a few seconds. This action transfers selected data from your Salesforce account into Google Sheets.5
Setup an Auto-Refresh
You can schedule a 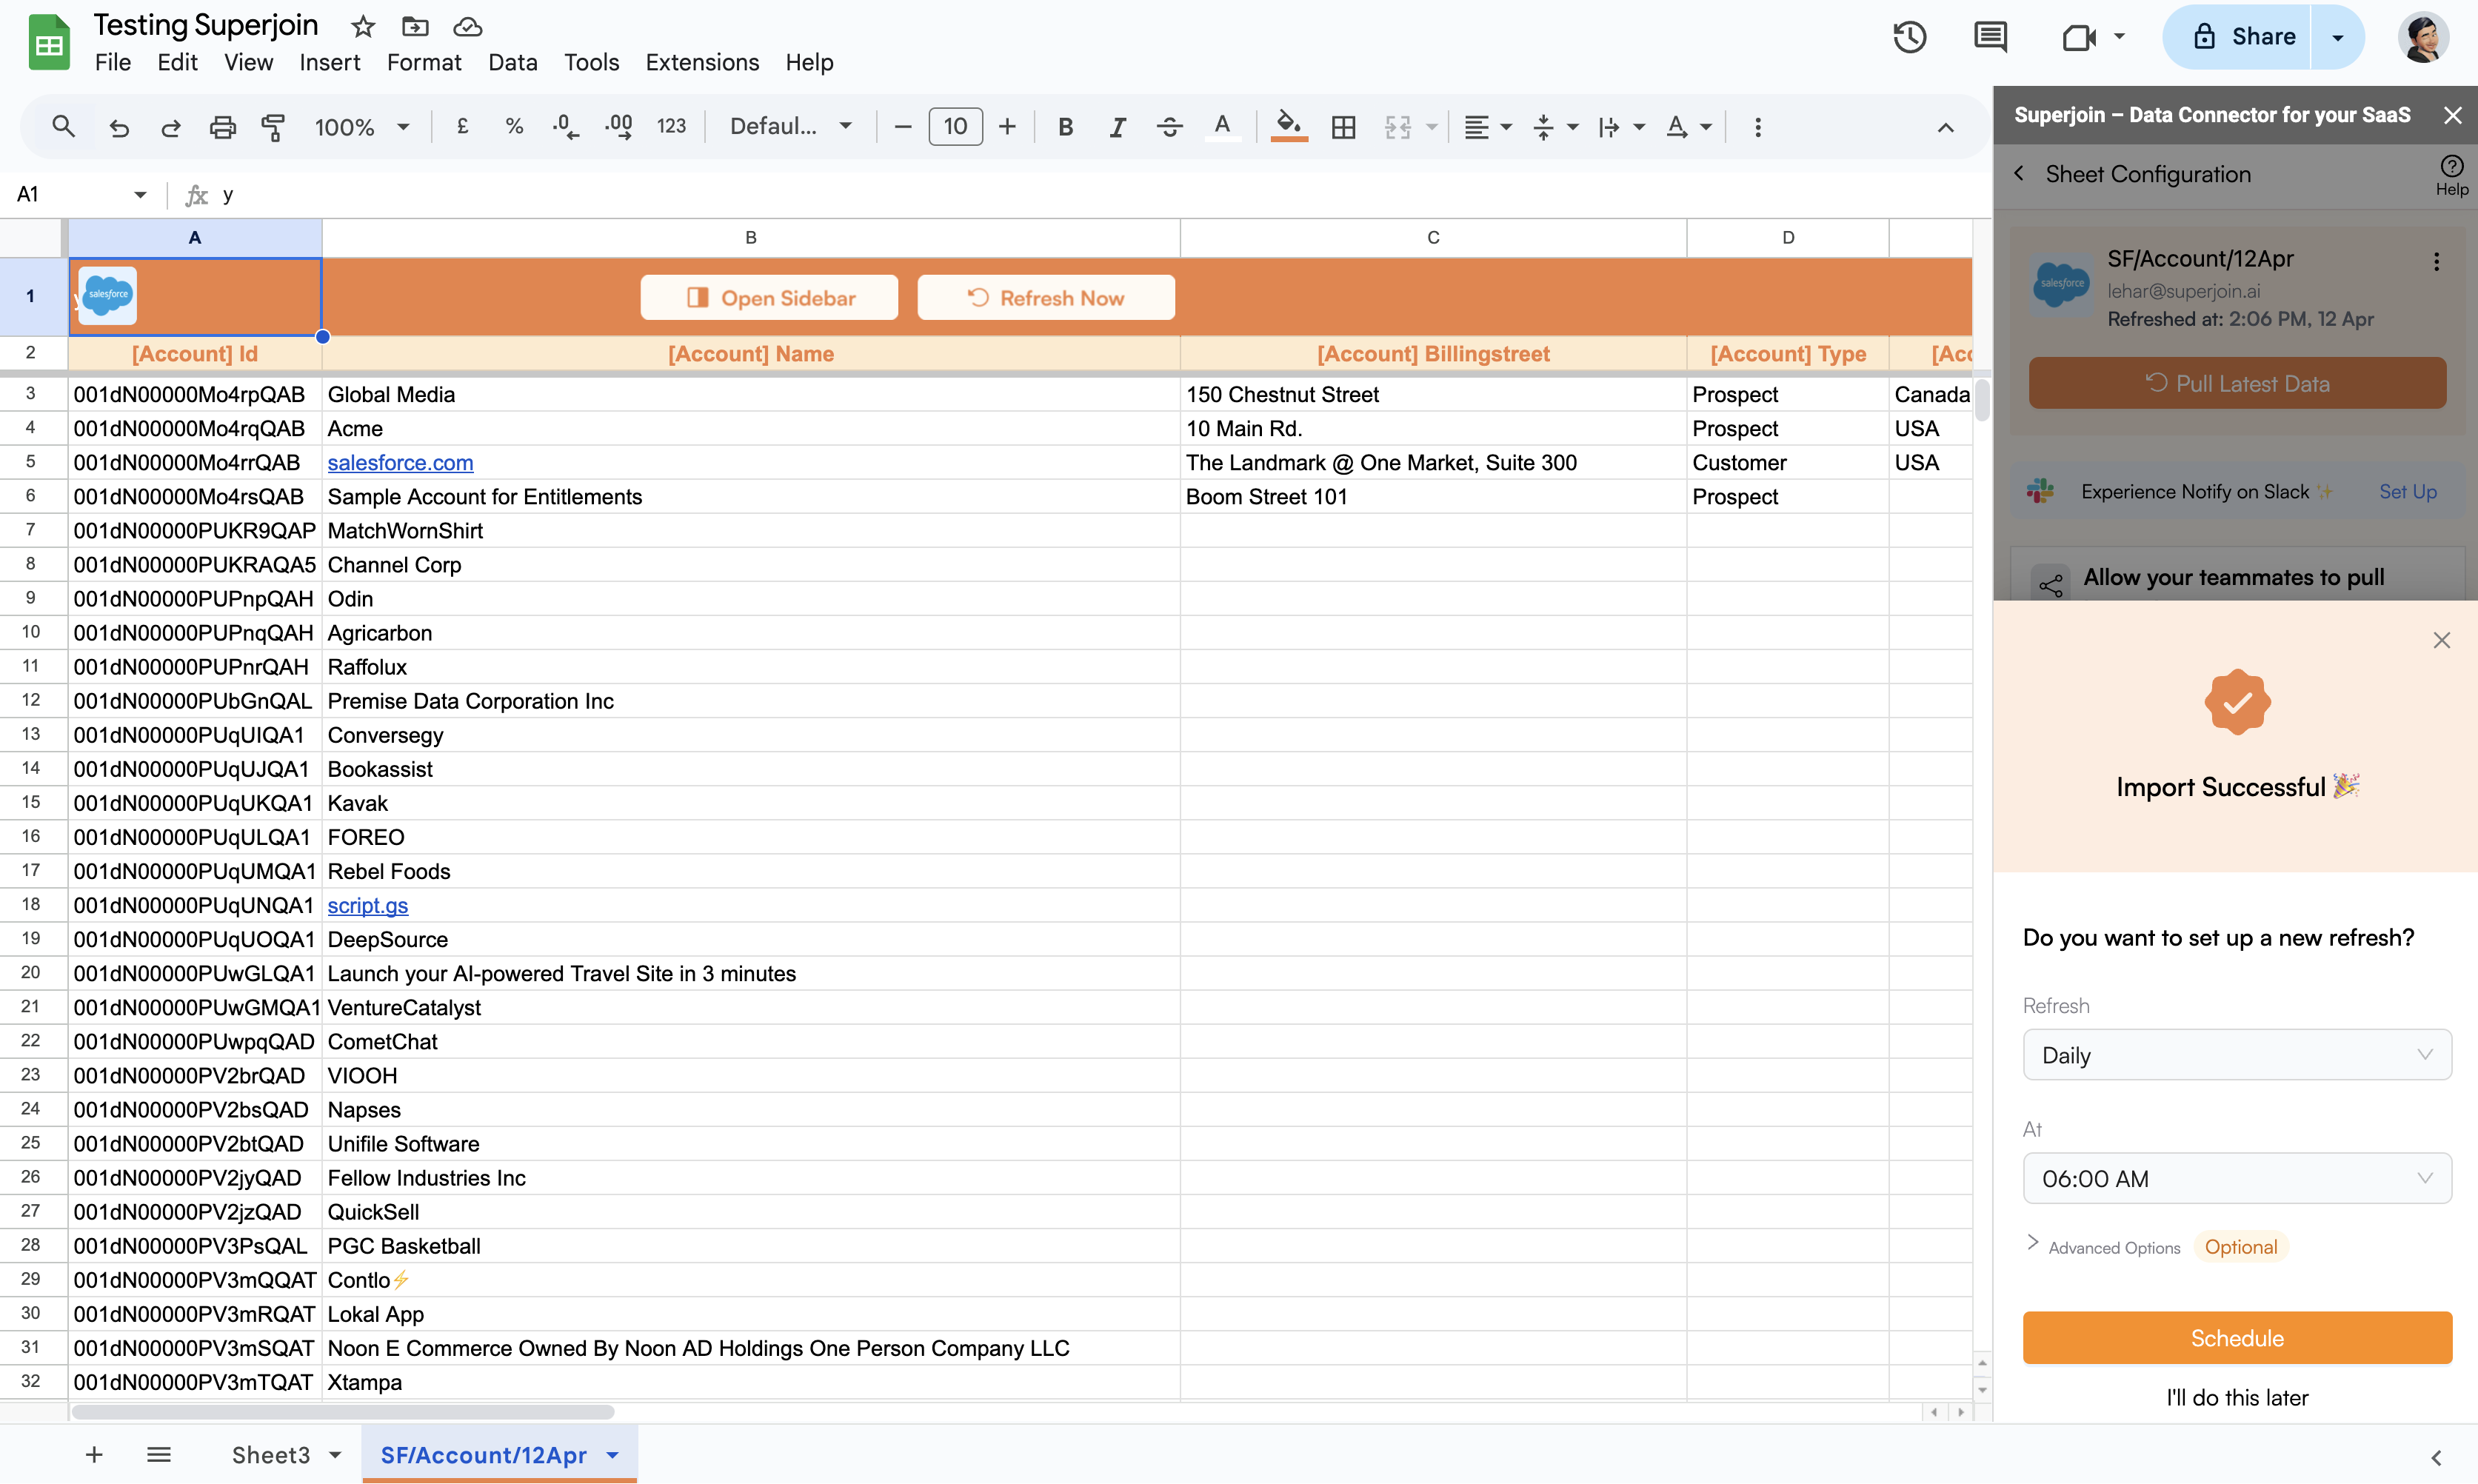
Refresh to automatically update your data hourly, daily, weekly, or monthly at a specific time.If you want to export changes you made in the imported data back into Salesforce, head over to the Export Data tab or click on the box below.
Export Data
Step-by-step guide to export data from Google Sheets to Salesforce