Only available on Google Sheets
Follow the quickstart guide to get started with Superjoin 🚀
Quickstart
Install Superjoin in under a minute and start pulling your data instantly.
Common Issues
We’ve listed down common issues that you might face & how to fix it.
Steps to create a scheduled Imports ✨
Scheduled refreshes can be created in 2 ways:
While creating a custom SQL query
While creating a custom SQL query
1
Import the data
Import the data after configuring the query.
Click on the 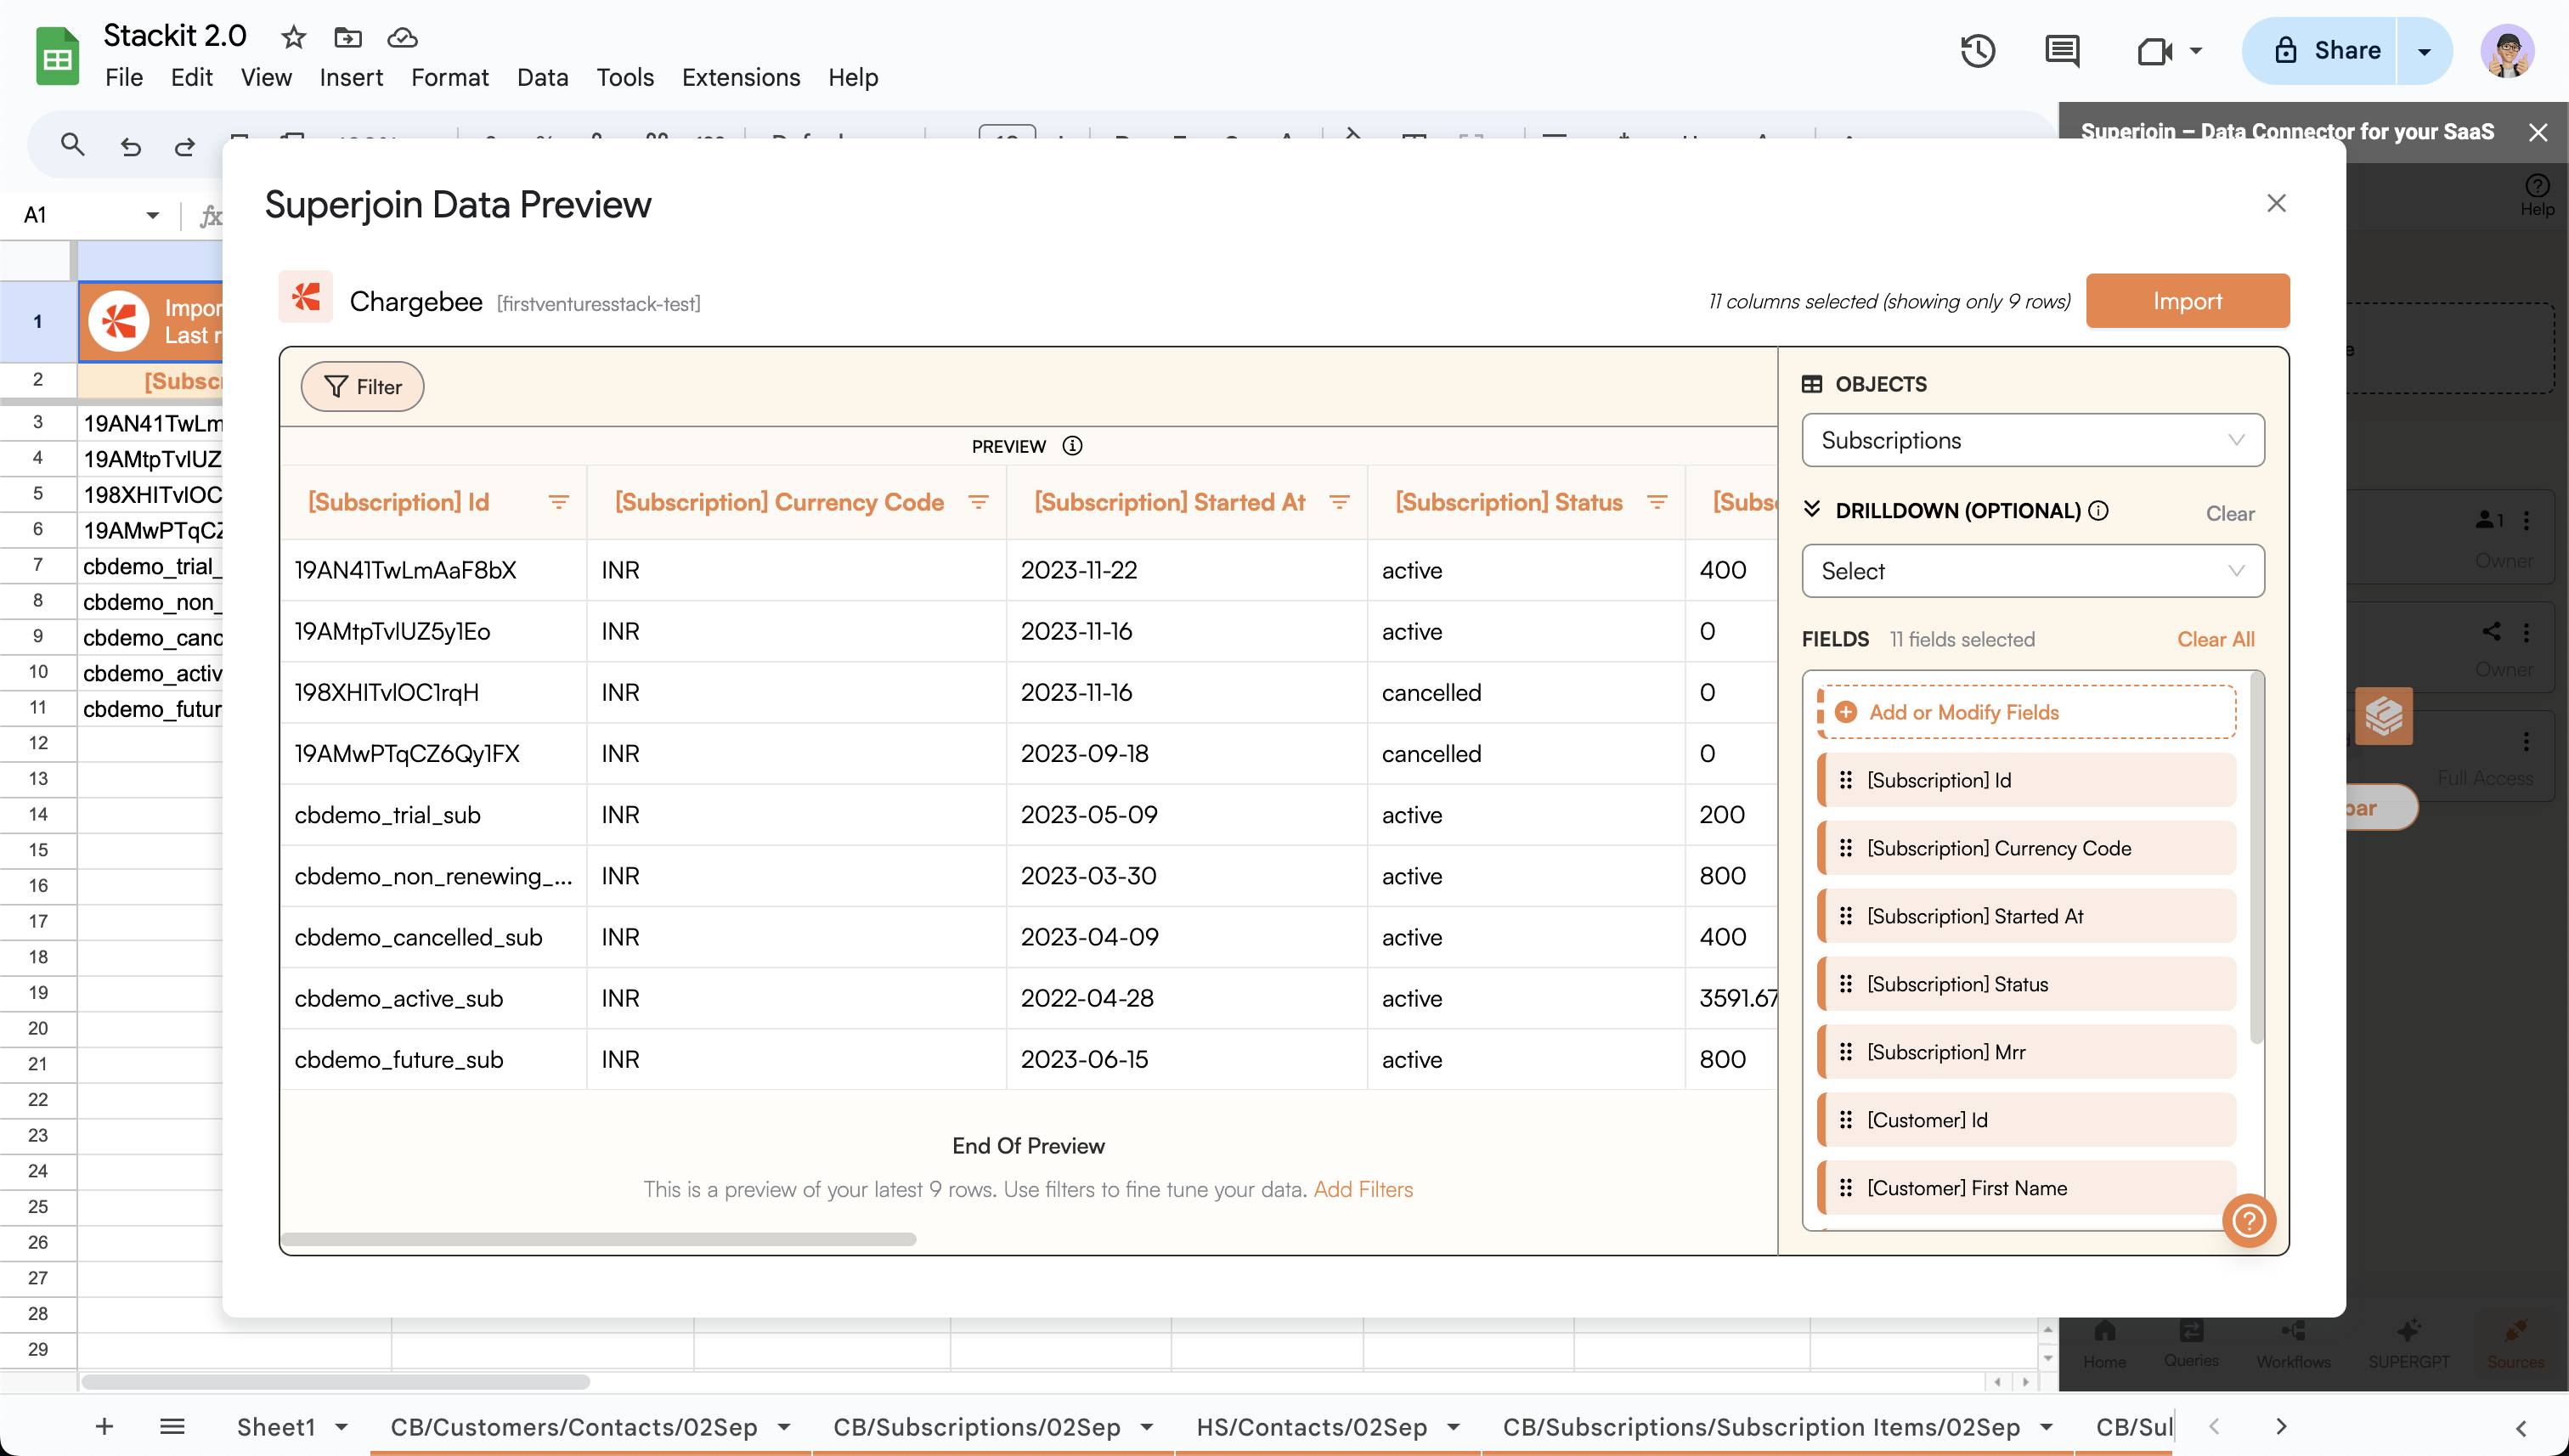
Import button to import the data.2
Set up the scheduled Imports
After a successful import, a drawer will open up with the option to create a scheduled refresh.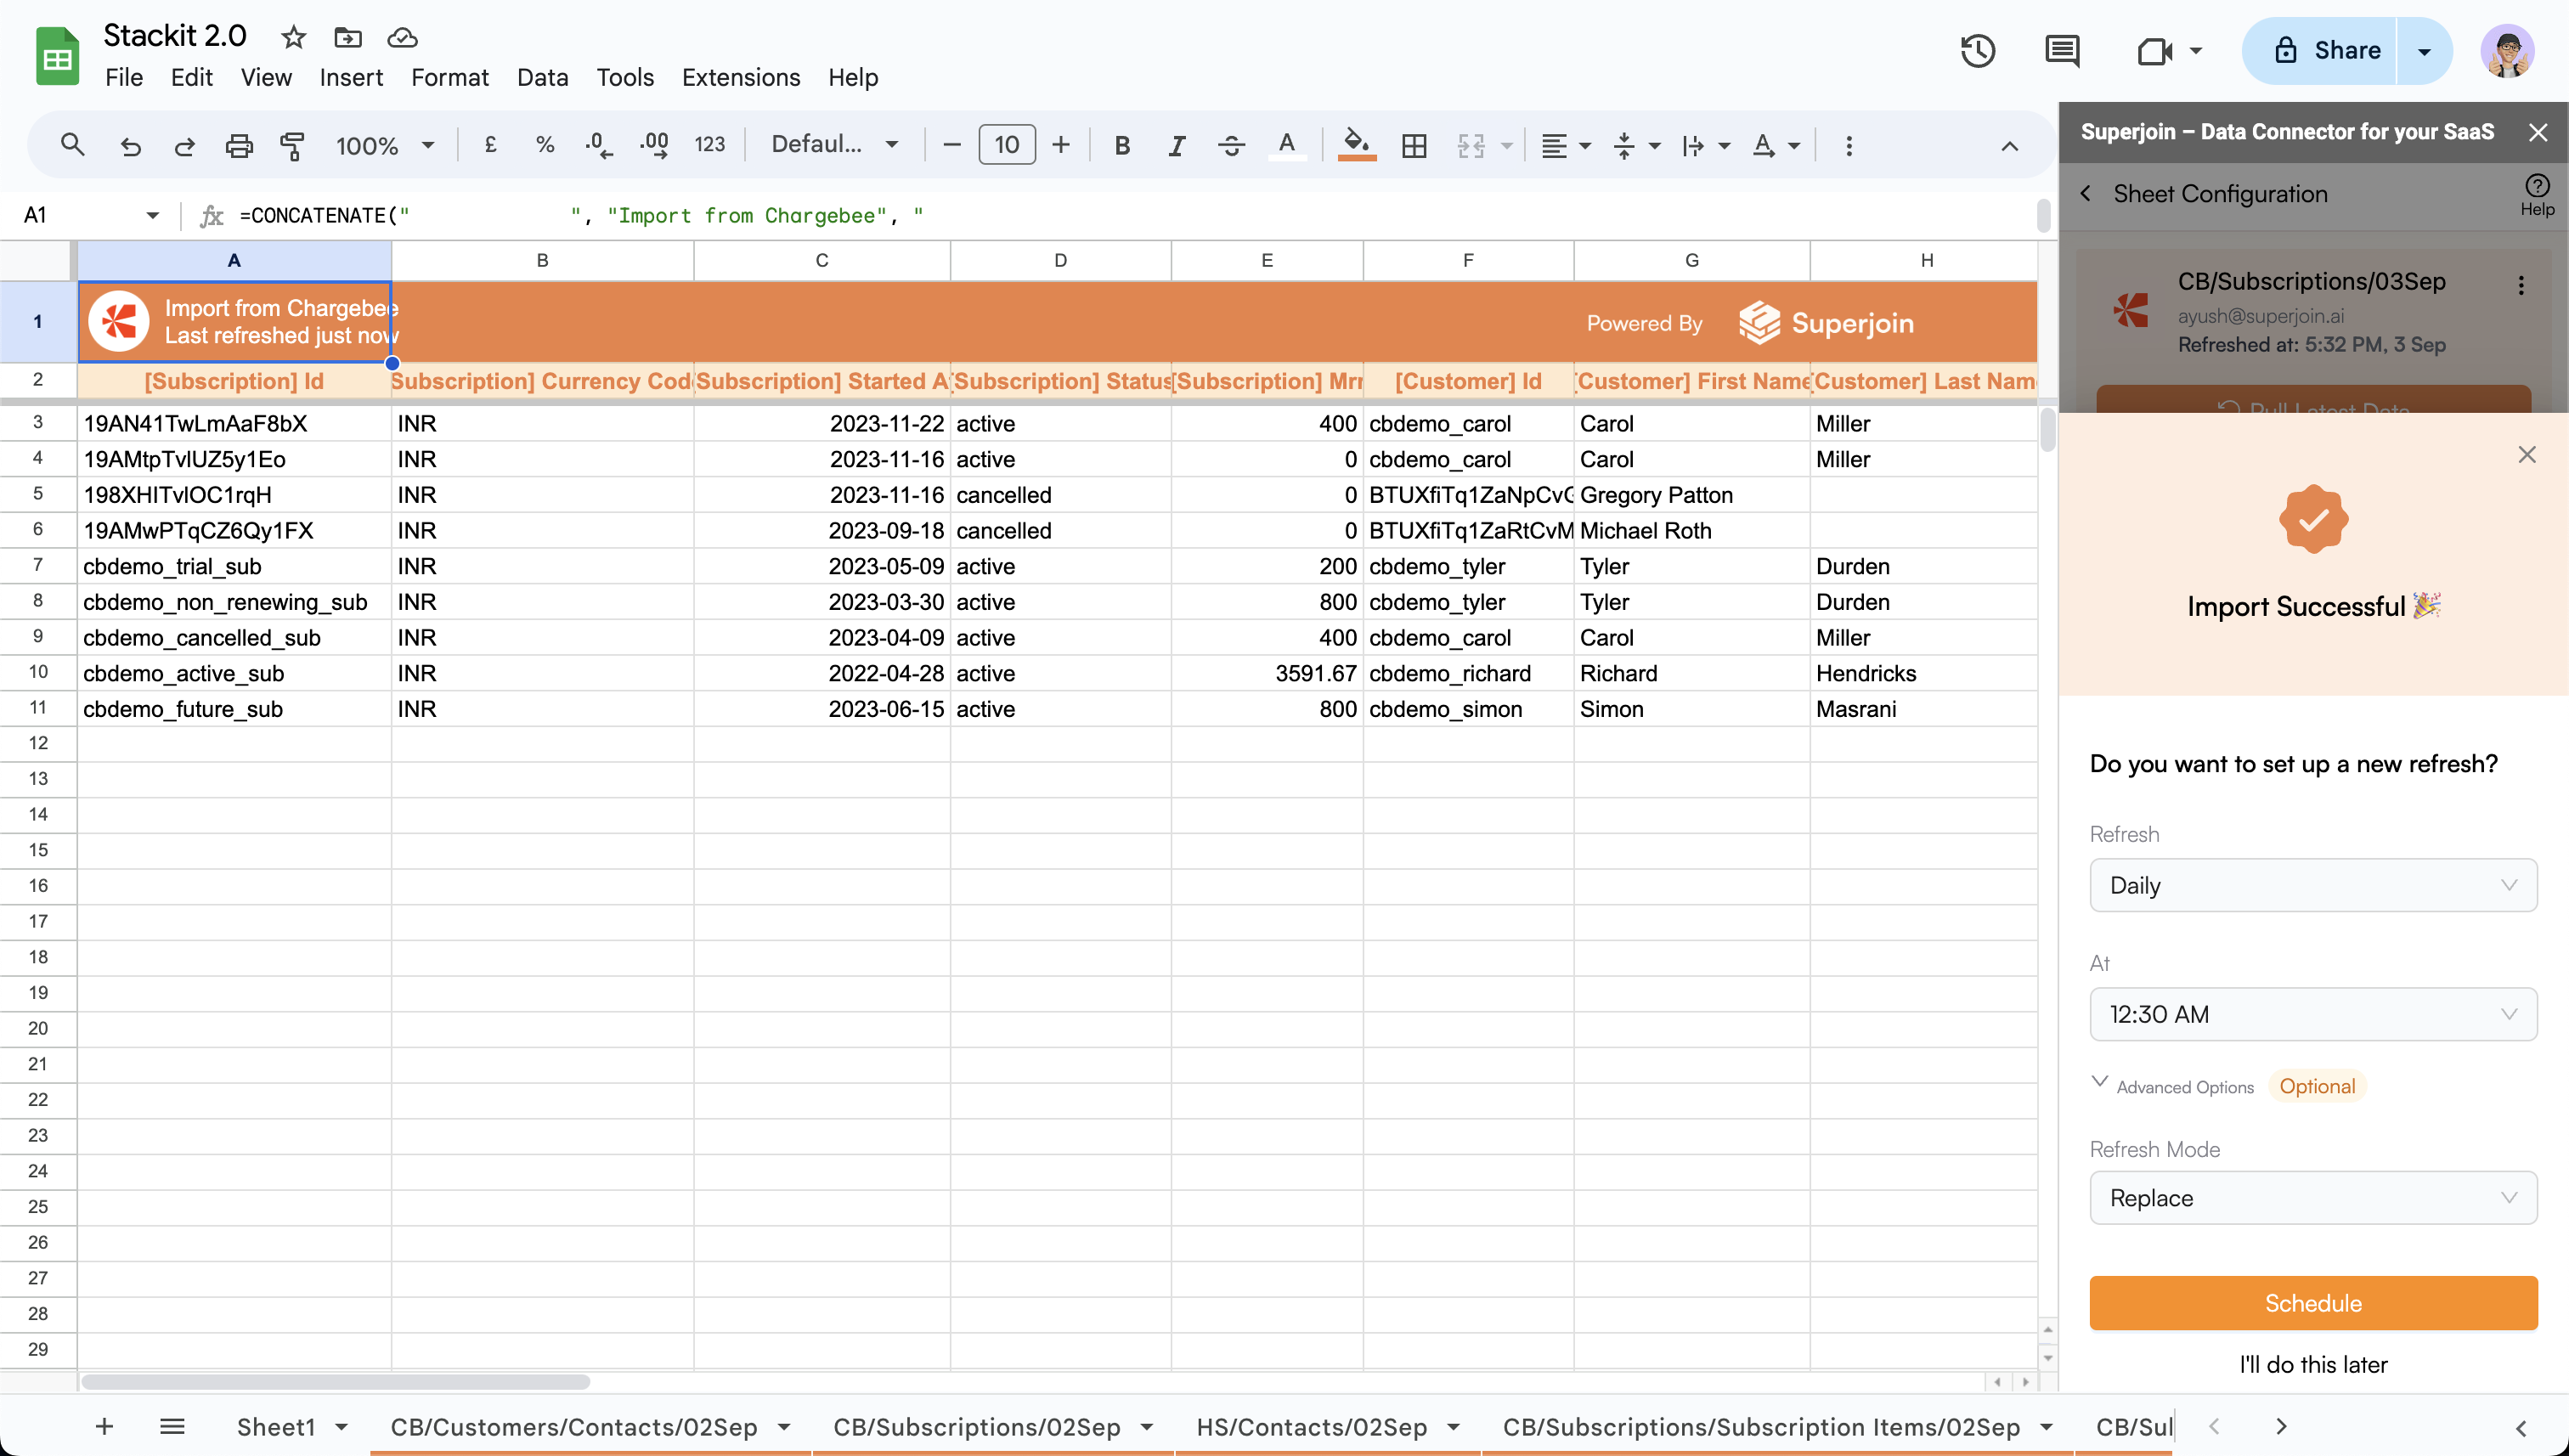
- You can choose to create a scheduled Imports right away or click
I'll do this laterto skip it. - You can choose to creata a scheduled Imports on an
hourly,daily,weeklyormonthlybasis. - If
hourly, select the desiredtime interval(Available intervals are{6, 8, 12} hours). - If
daily, select the desiredtime of the day. - If
weekly, select the desiredday of the weekandtime of the day. - If
monthly, select the desireddate of the monthandtime of the day.
- Refresh mode provides the option to
appendorreplacethe data. - Append: Appends the modified and new rows to the existing sheet.
- Replace: Replaces the modified rows and adds new rows to the existing sheet.
3
Schedule the Import
- Click on
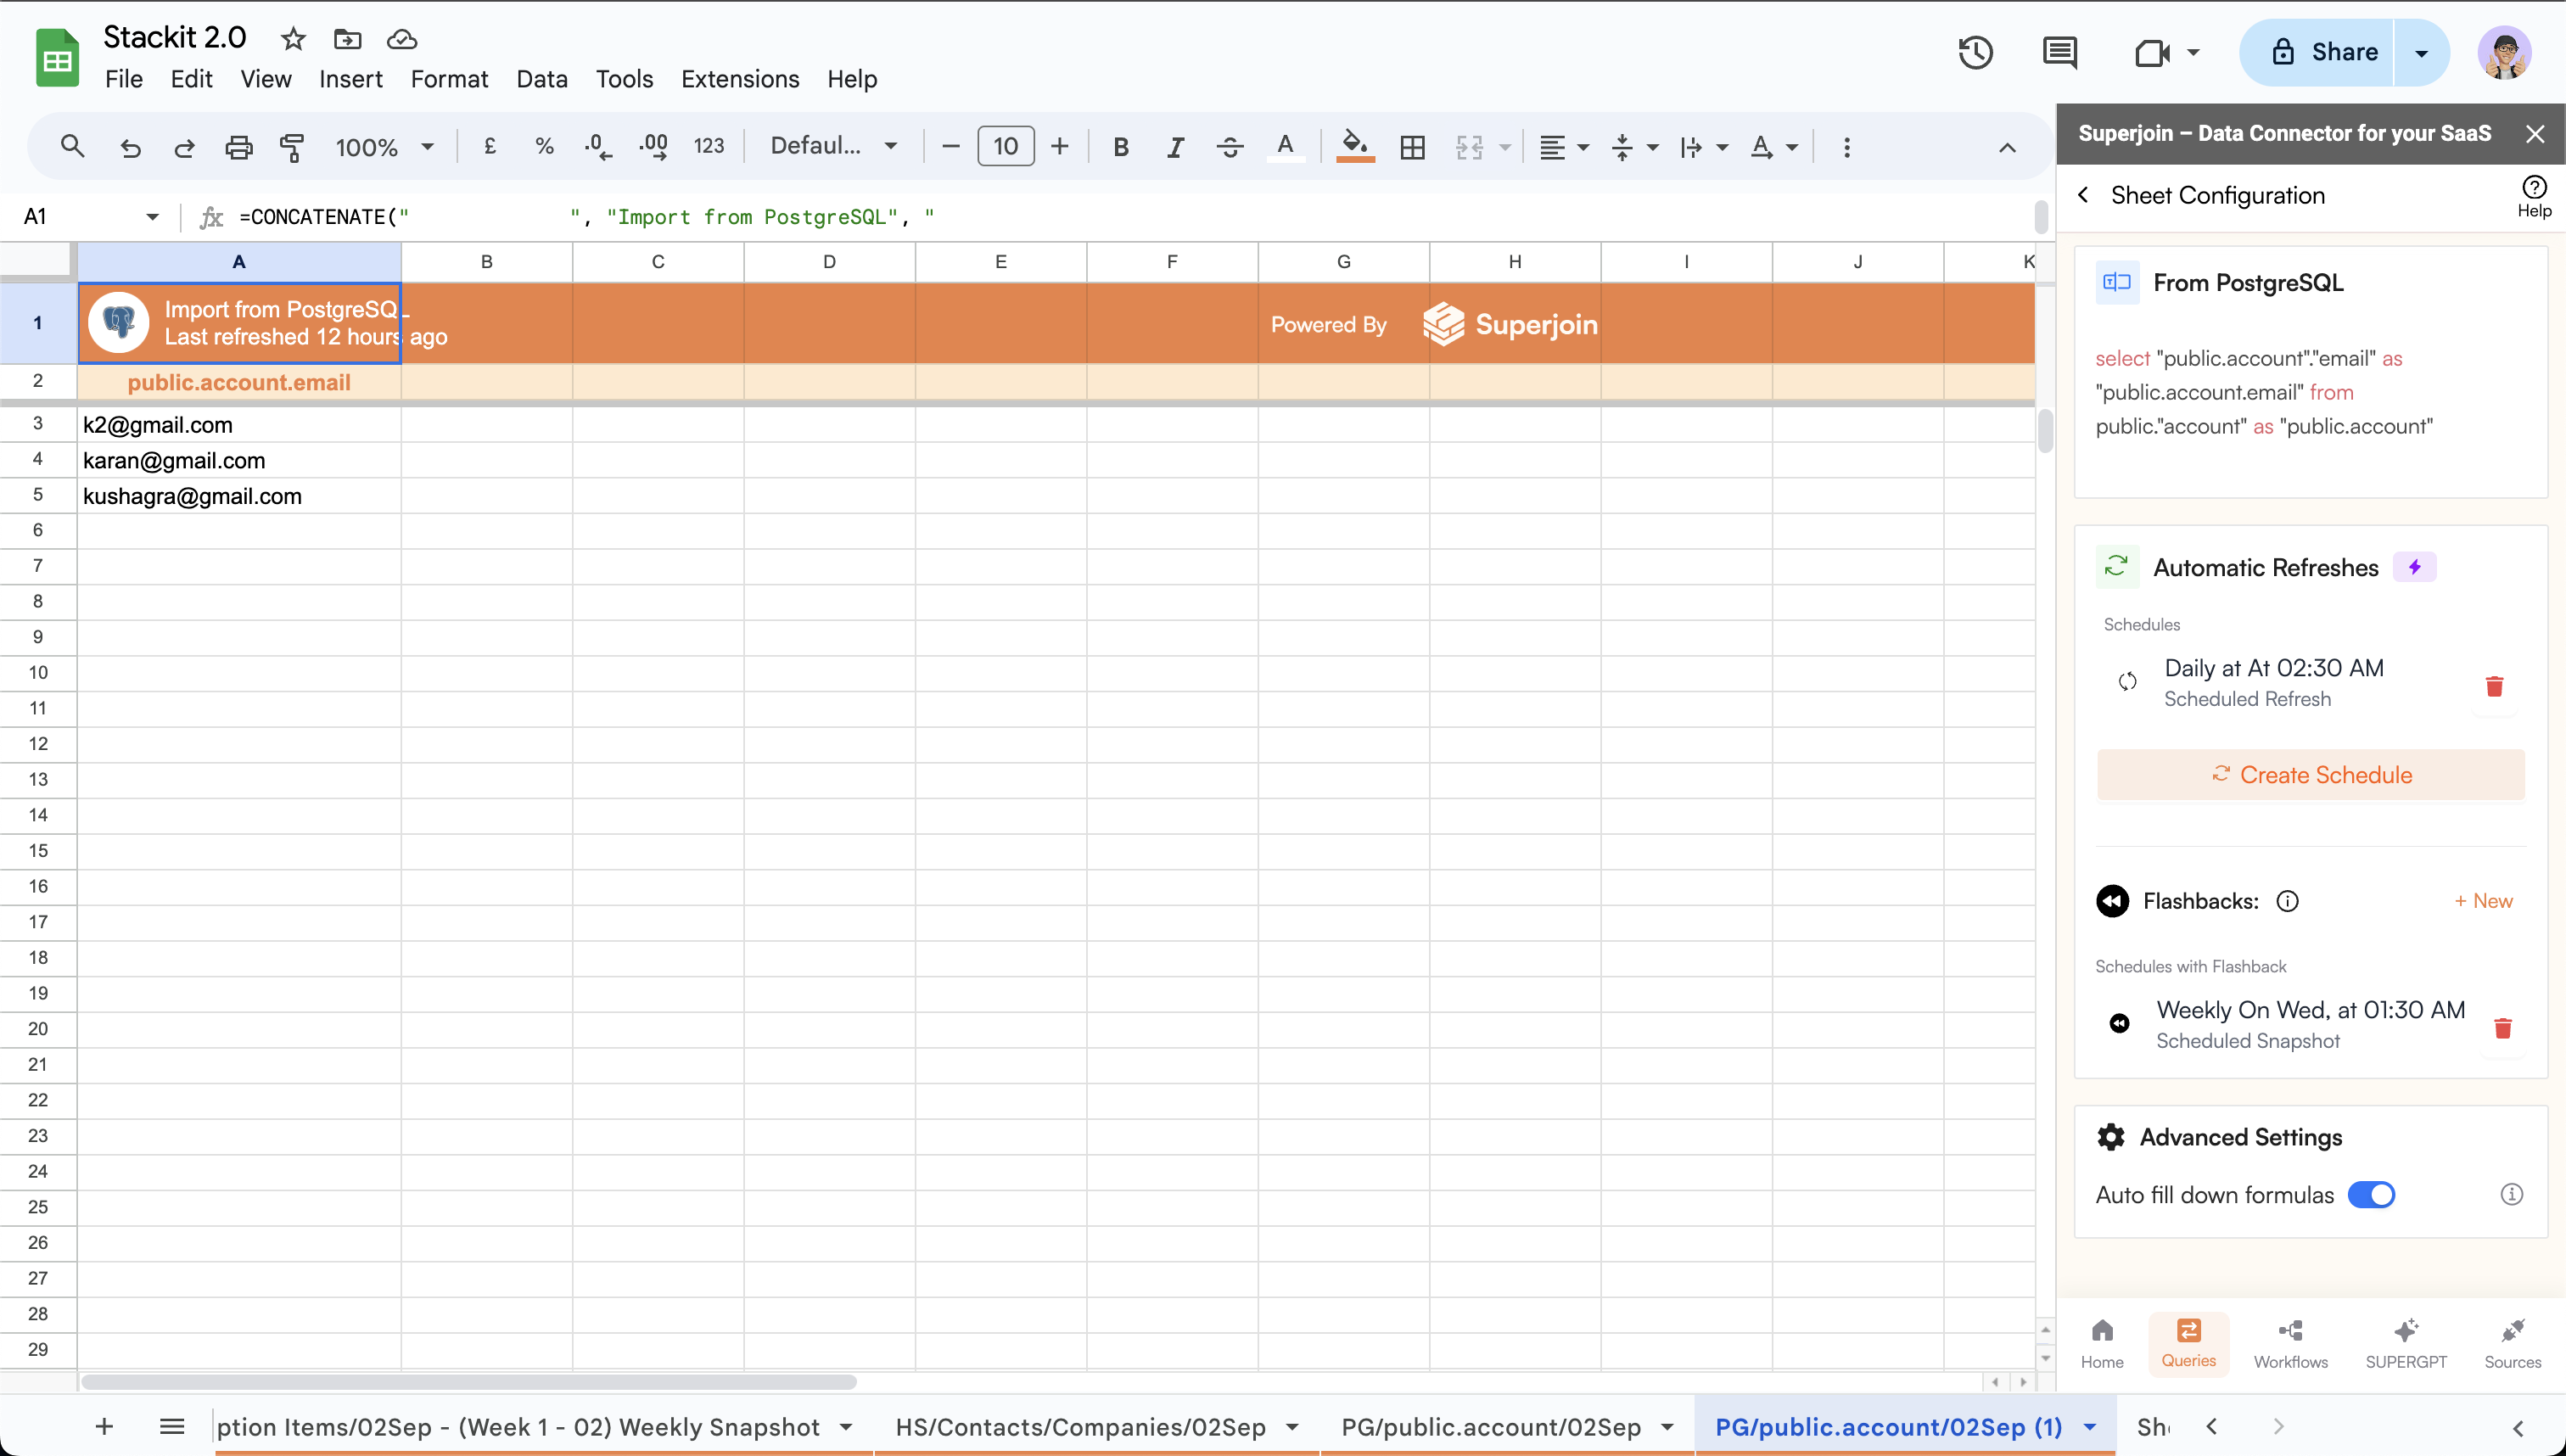
Scheduleto schedule the Imports using the desired config. - New schedule will be displayed in the
Automatic Refreshescard.
After creating a custom SQL query
After creating a custom SQL query
1
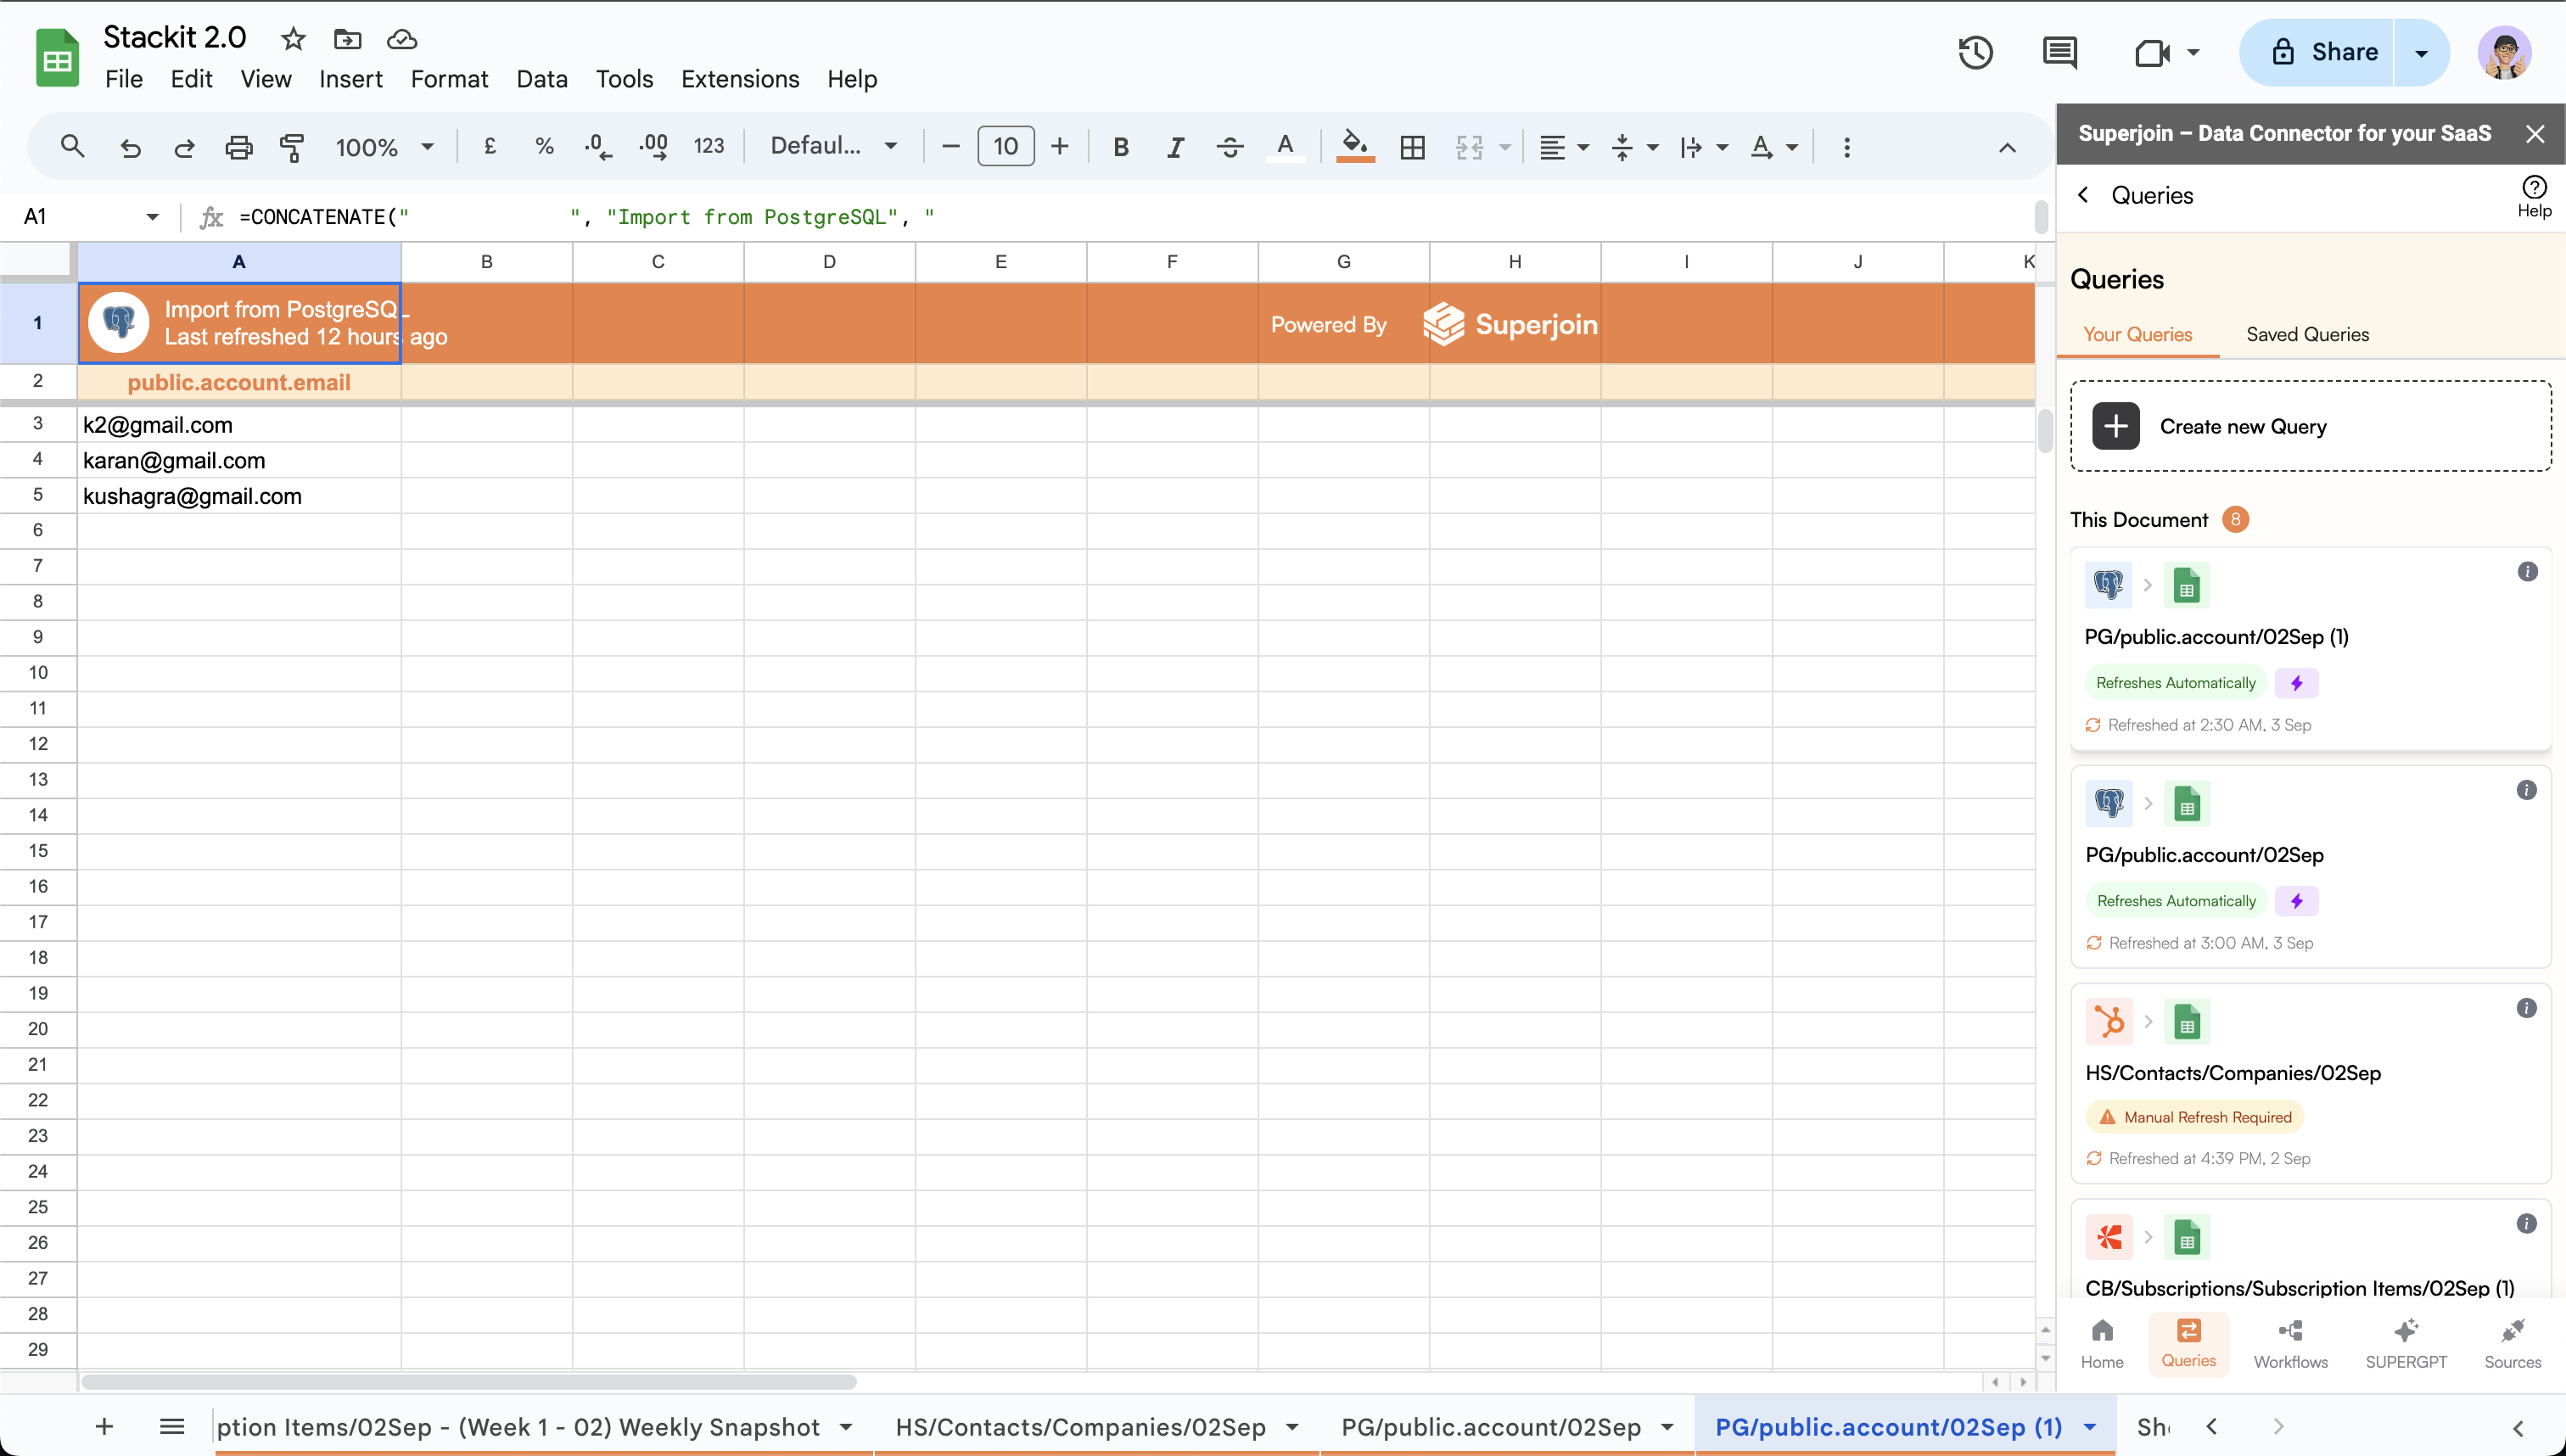
Open queries page
Click on the 
Queries tab. This will open the queries page in the sidebar.2
Select a query
Click on the desired query which you wish to create a flashback for.
3
Create a new scheduled Imports
Click on 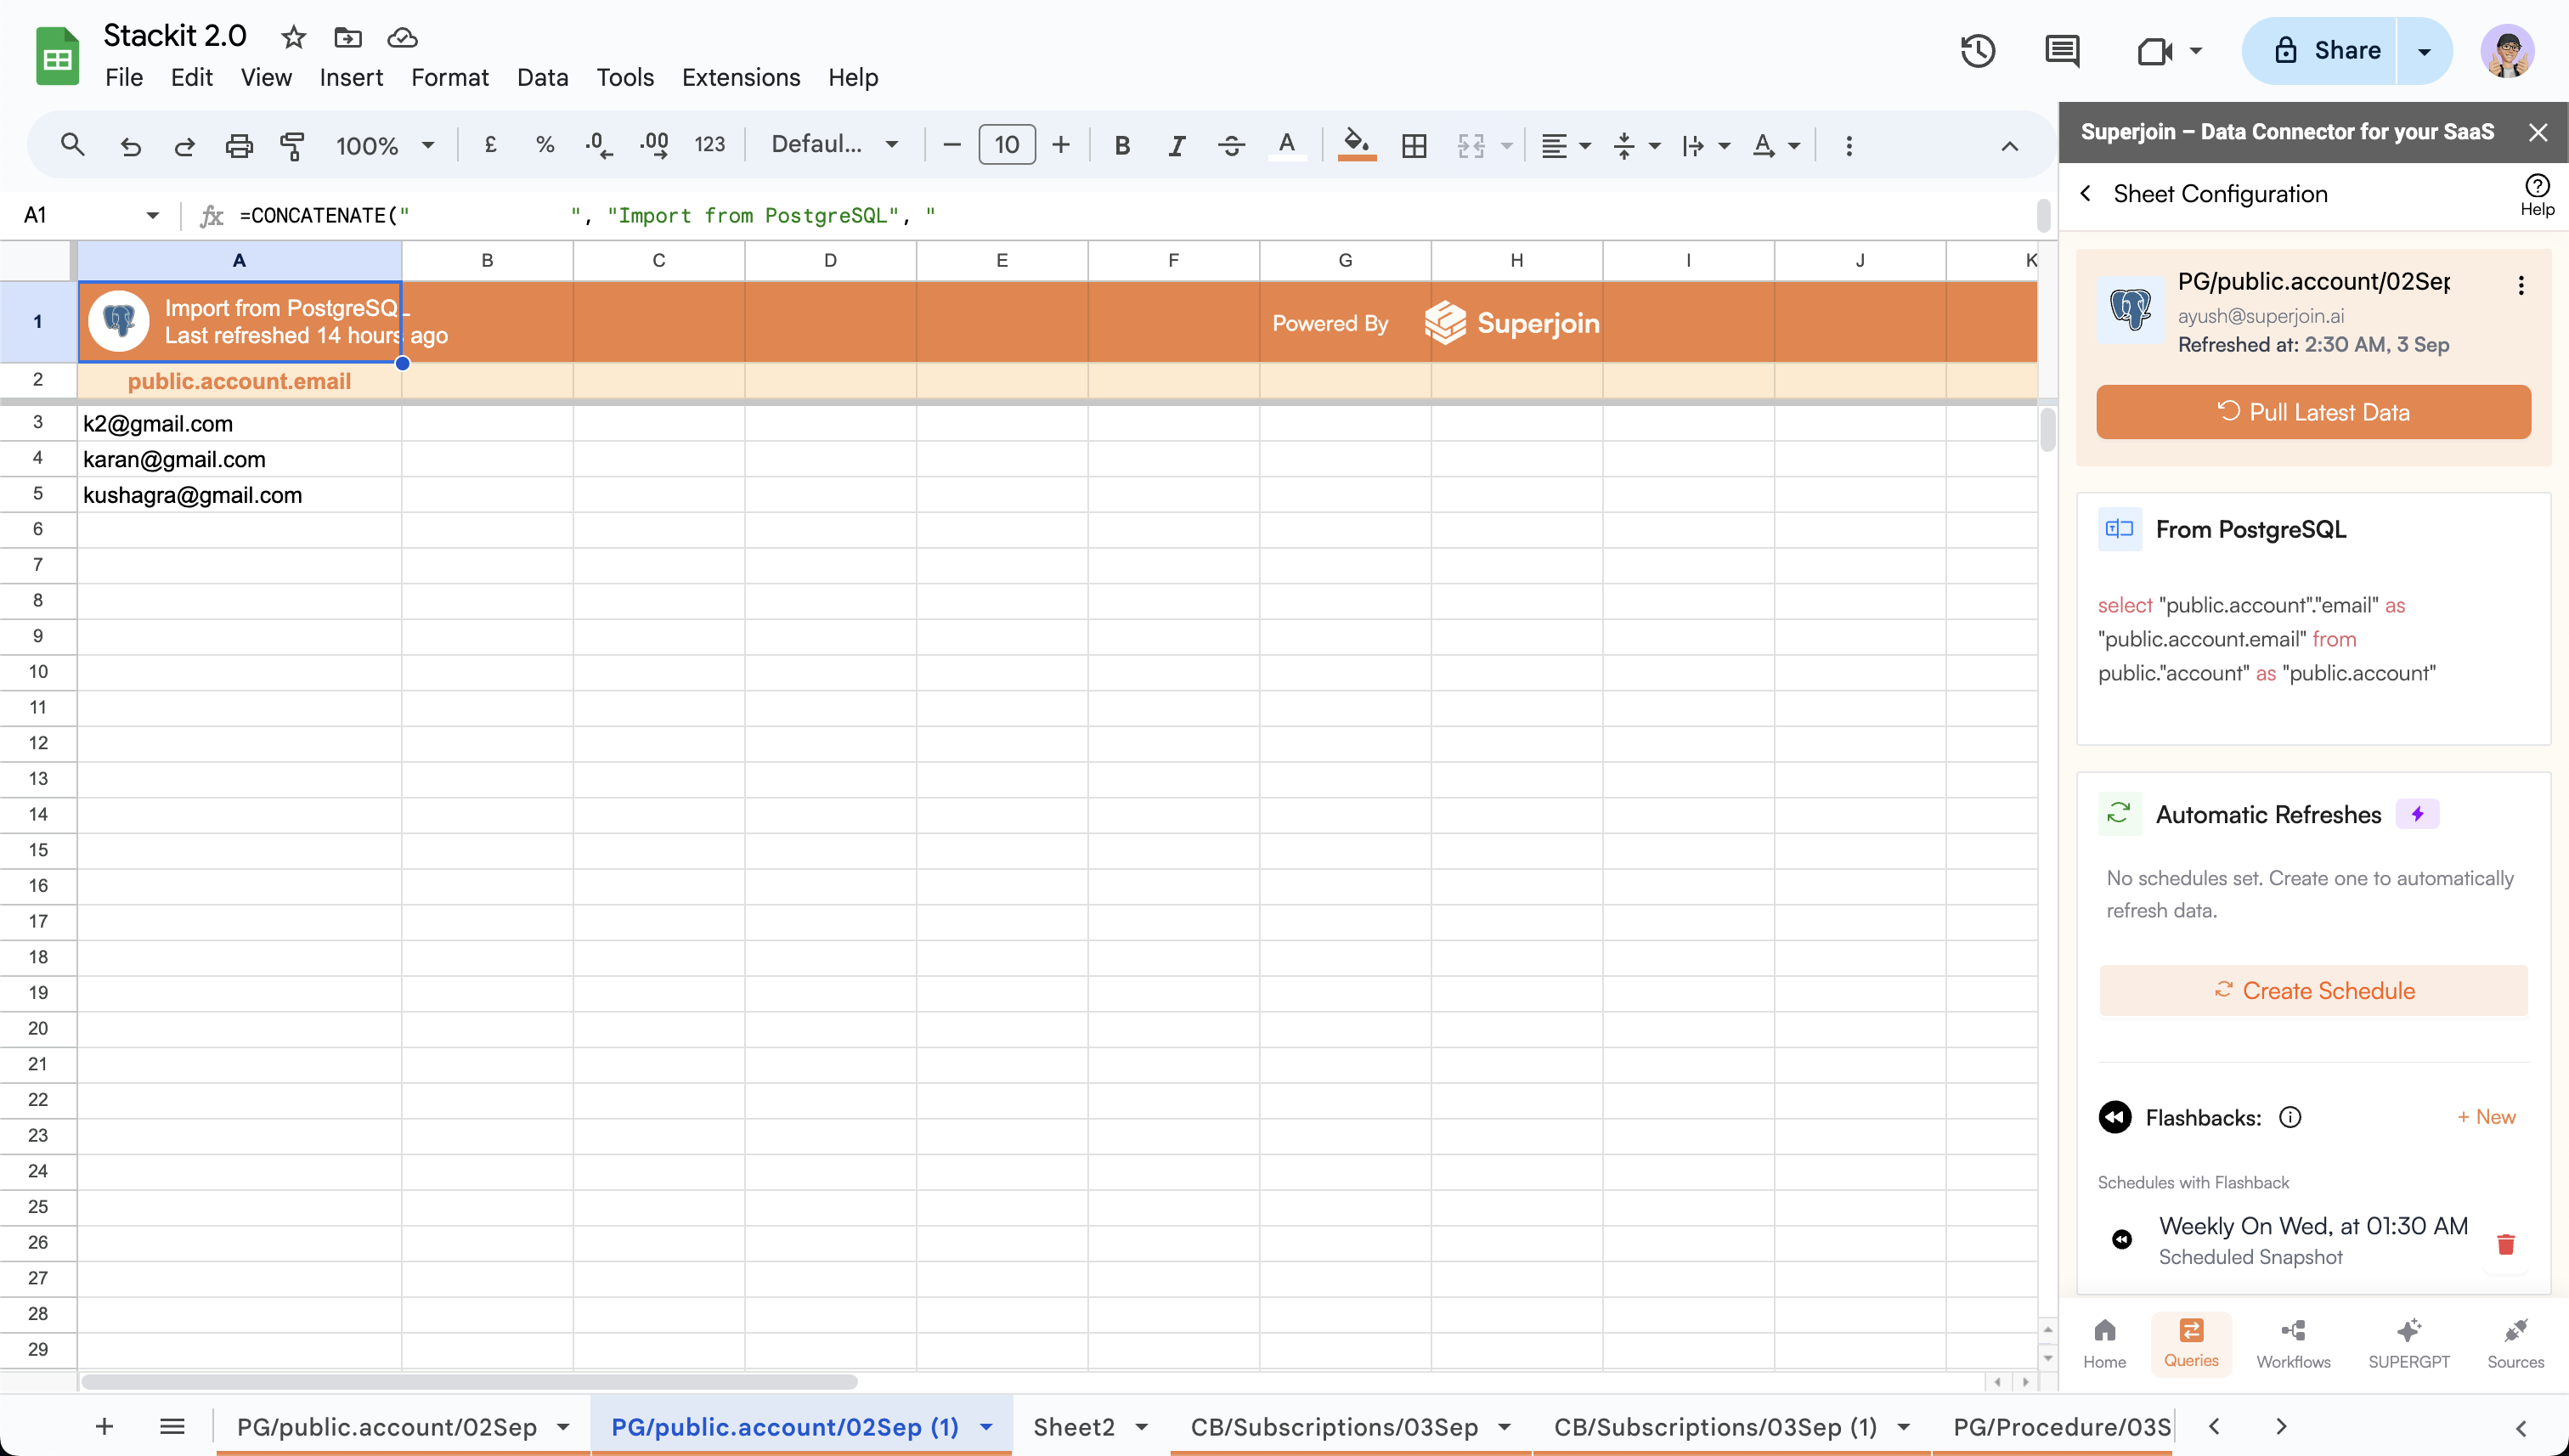
Create Schedule button in the Automatic Refreshes card.4
Configure the scheduled Imports
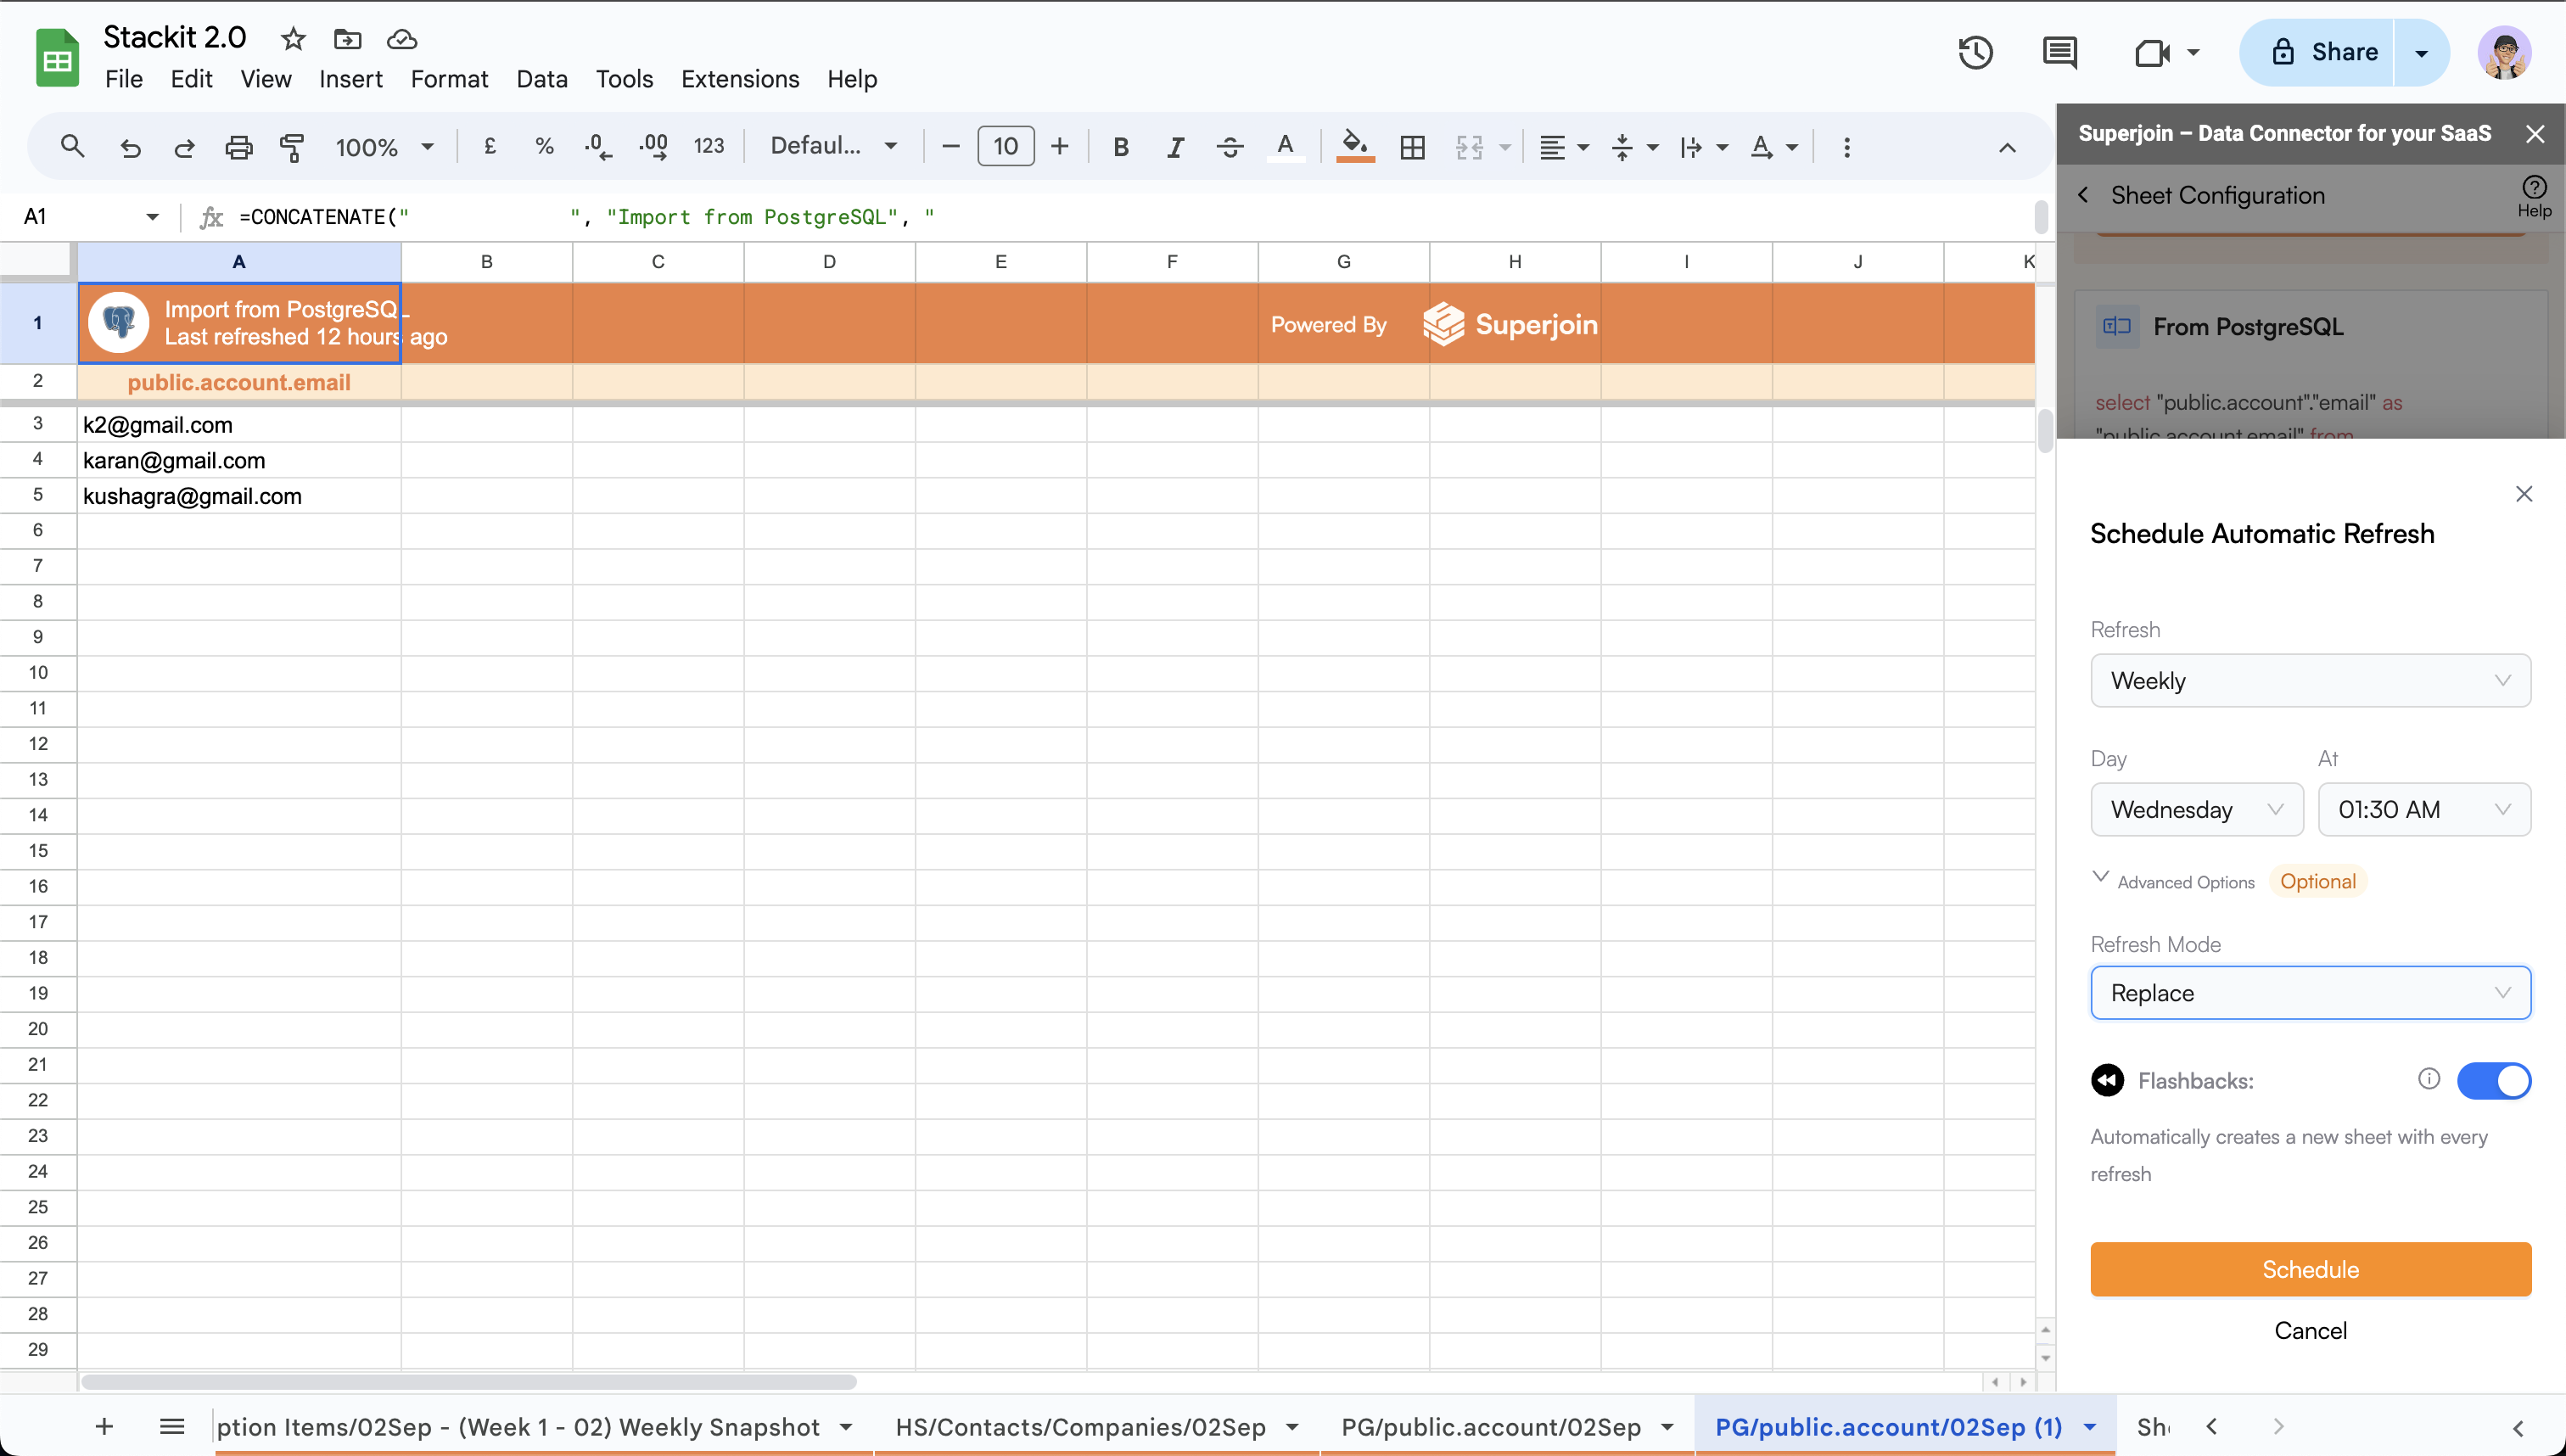
- You can choose to creata a scheduled Imports on an
hourly,daily,weeklyormonthlybasis. - If
hourly, select the desiredtime interval(Available intervals are{6, 8, 12} hours). - If
daily, select the desiredtime of the day. - If
weekly, select the desiredday of the weekandtime of the day. - If
monthly, select the desireddate of the monthandtime of the day.
- Refresh mode provides the option to
appendorreplacethe data. - Append: Appends the modified and new rows to the existing sheet.
- Replace: Replaces the modified rows and adds new rows to the existing sheet.
5
Schedule the Import
- Click on
Scheduleto schedule the refresh using the desired config. - New schedule will be displayed in the
Automatic Refreshescard.