Benefits of Derived Columns
Custom Metrics
Tailor your metrics to meet specific business needs.
Data Enrichment
Enhance your data by combining columns or applying calculations.
Real-Time Analysis
Perform calculations in real-time as your data updates.
Consistency
Ensure that everyone in your organization uses the same formulae and calculations for uniform reporting.
Steps to create calculated fields / derived columns ✨
1
Open the "Data Preview" view
If you need to setup a new integration, please follow the integration guide for the integration of your choice. You can find the guides for various integrations on the sidebar or on the integrations summary page.Now you should see the 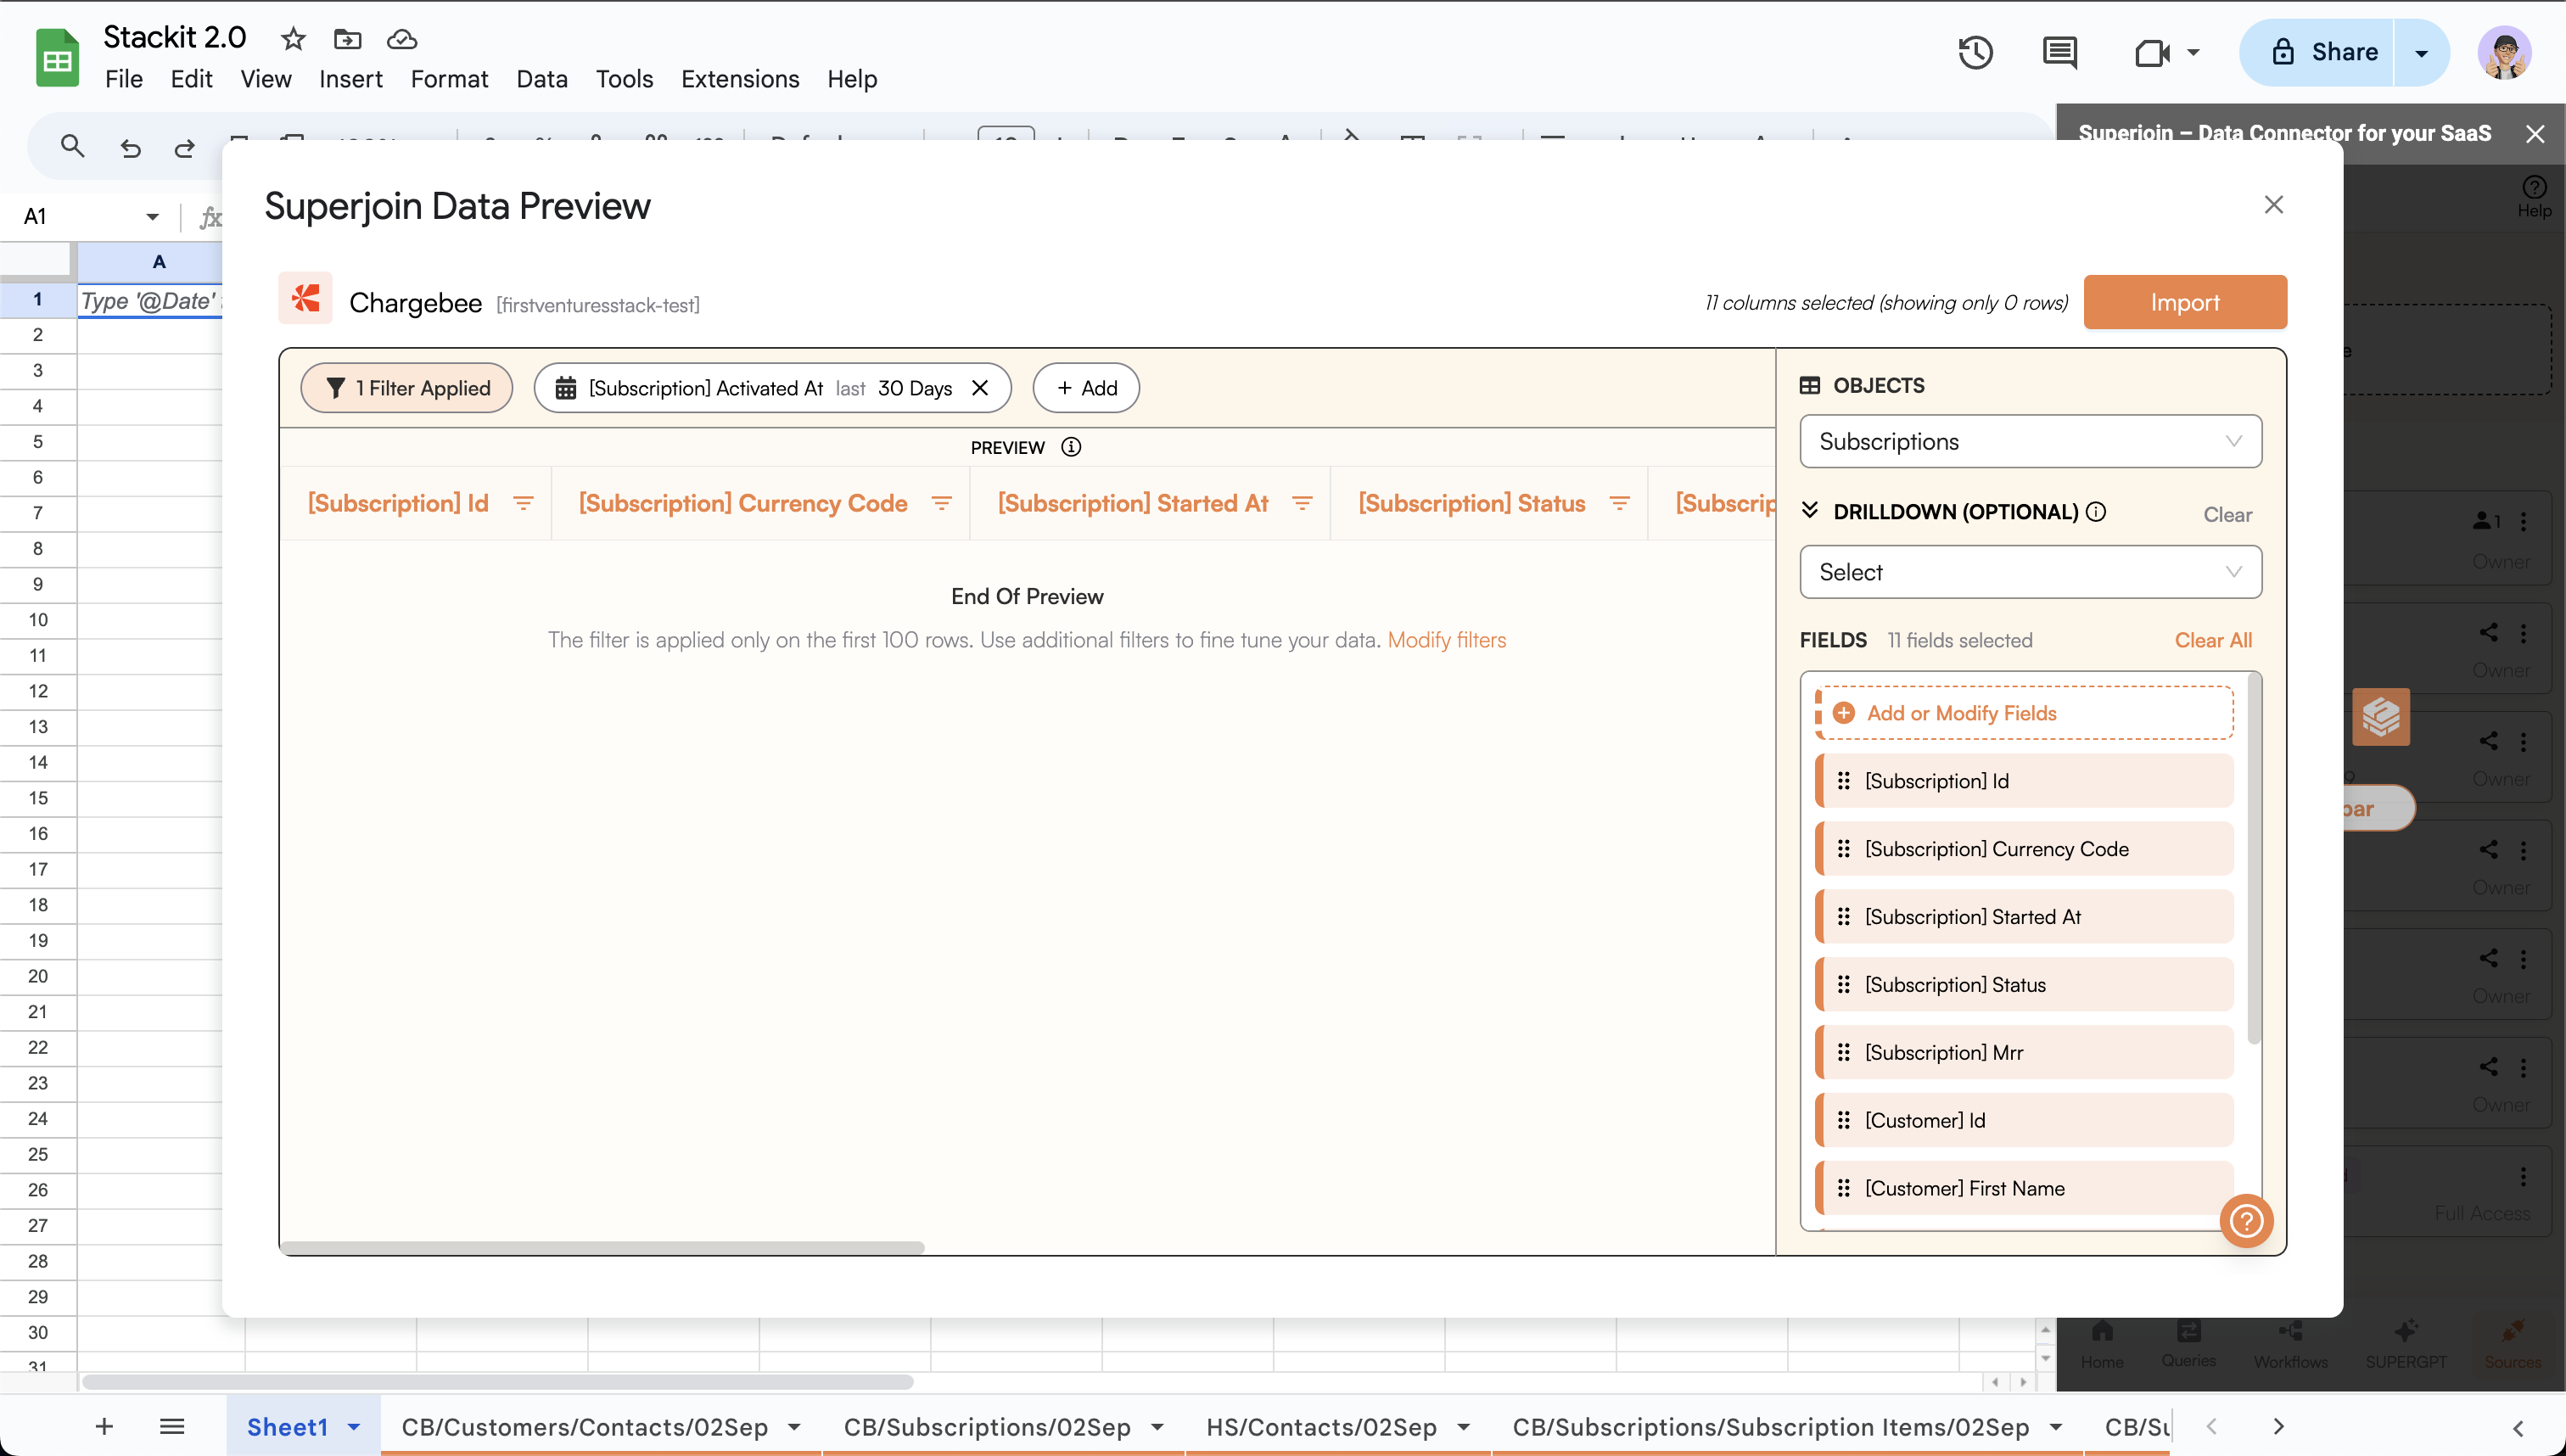
data preview screen.2
Click on "Add or Modify Fields"
Click on the 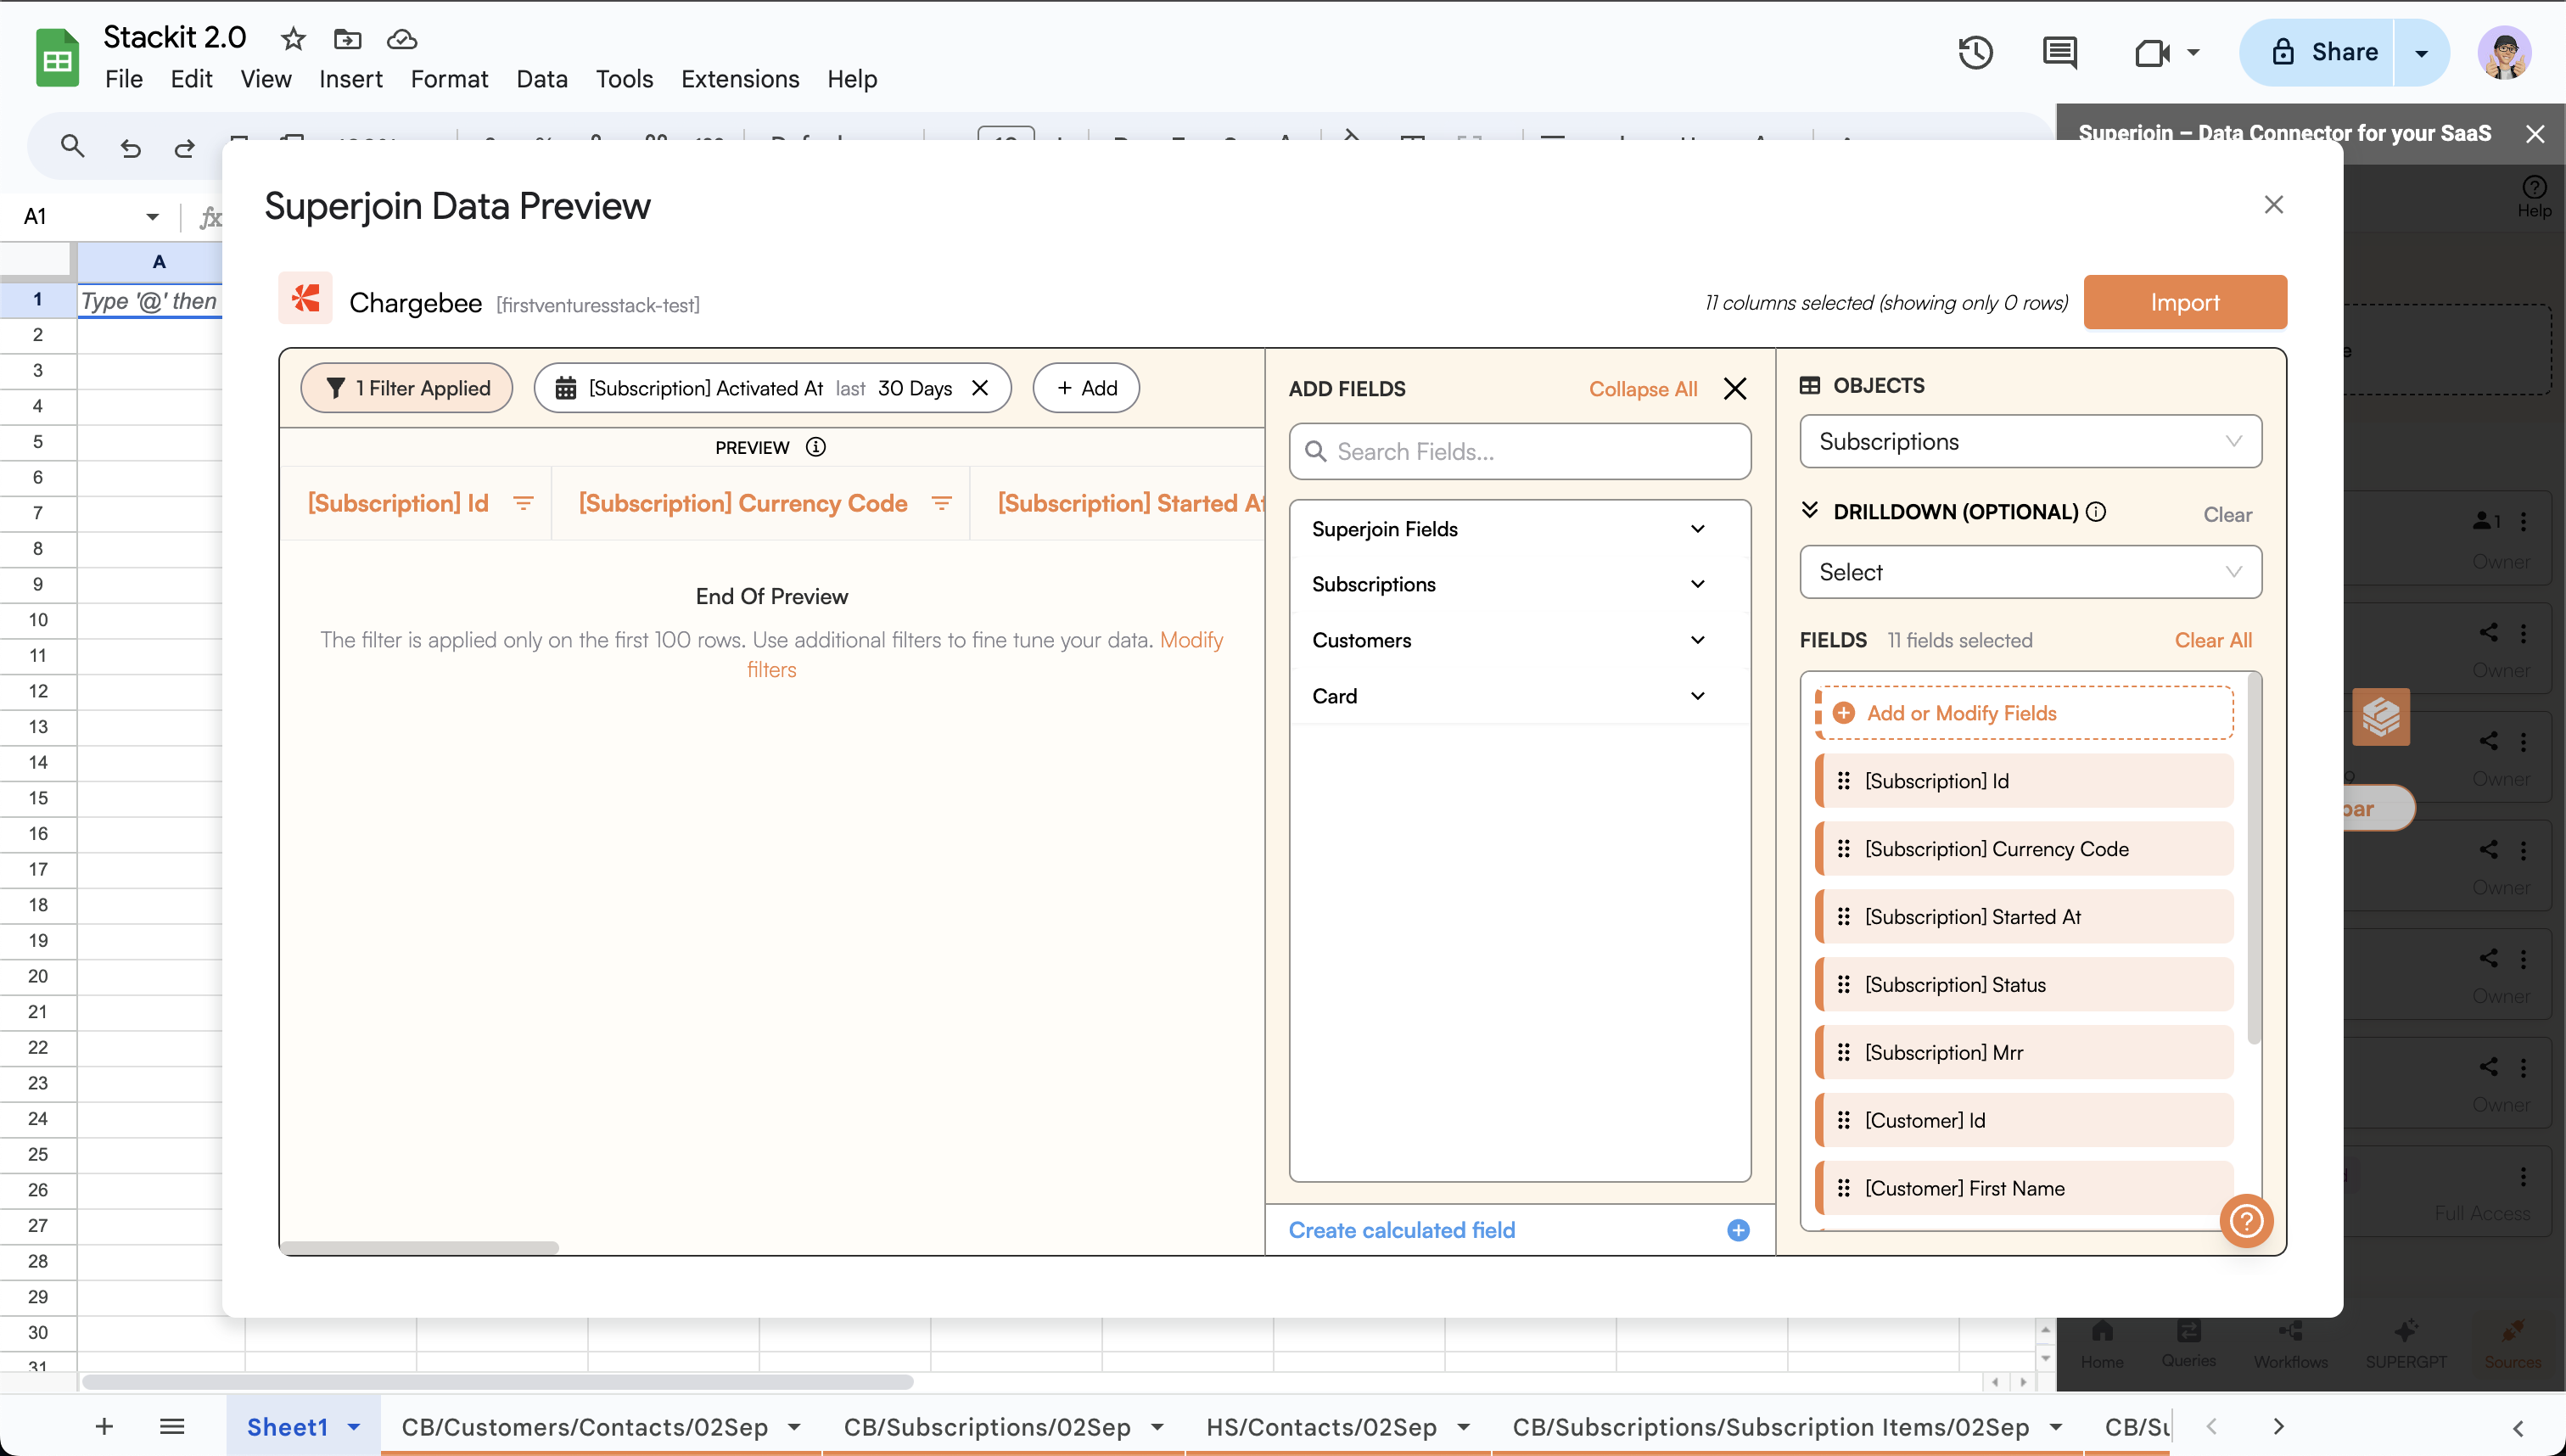
Add or Modify Fields button. This will open a sidebar where you can add / modify fields, and create calculated field(s) (derived columns).3
Create a calculated field (Derived Column)
- Click on
Create calculated fieldbutton. - Enter the
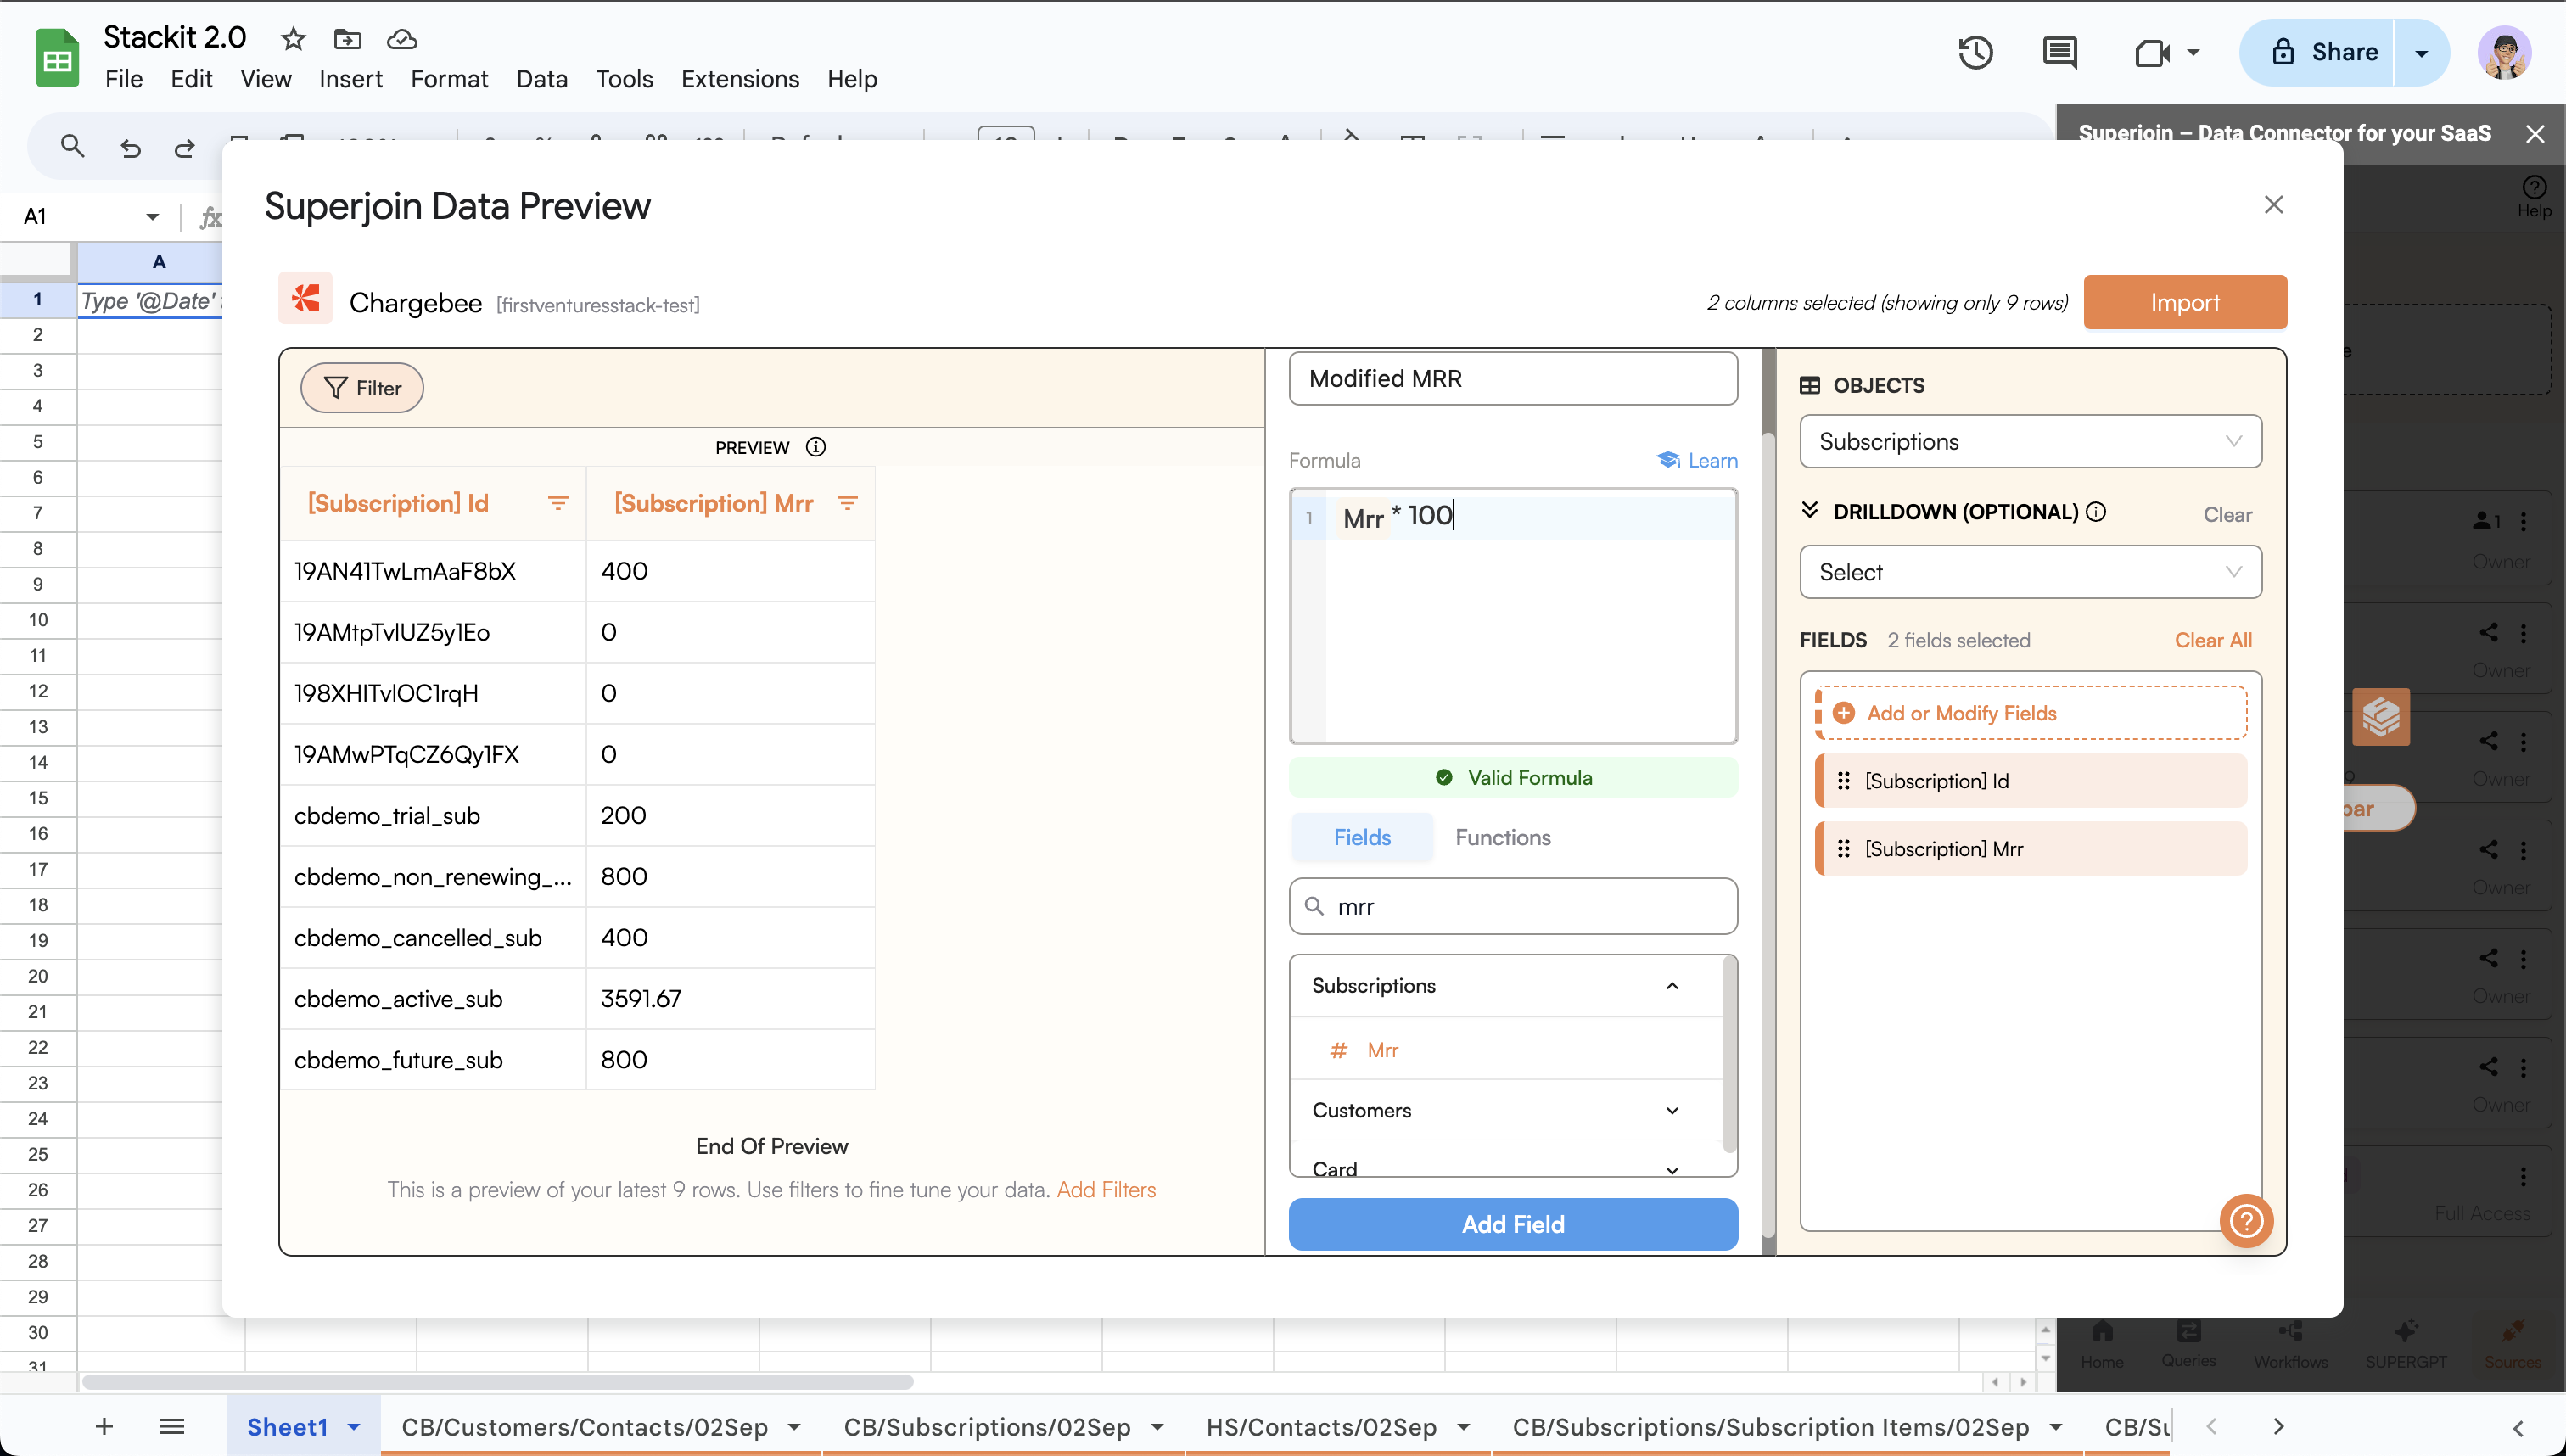
Field name, this will be the name for the newly generated column. - Write a formula in the
Formulasection. You can use theFields&Functionstab to search for and select the fields and functions, respectively. - Once ready, click on
Add Field.
4
Preview the Derived Column
After adding the field, the derived column would be visible as the last column in the preview.
You can add more derived columns.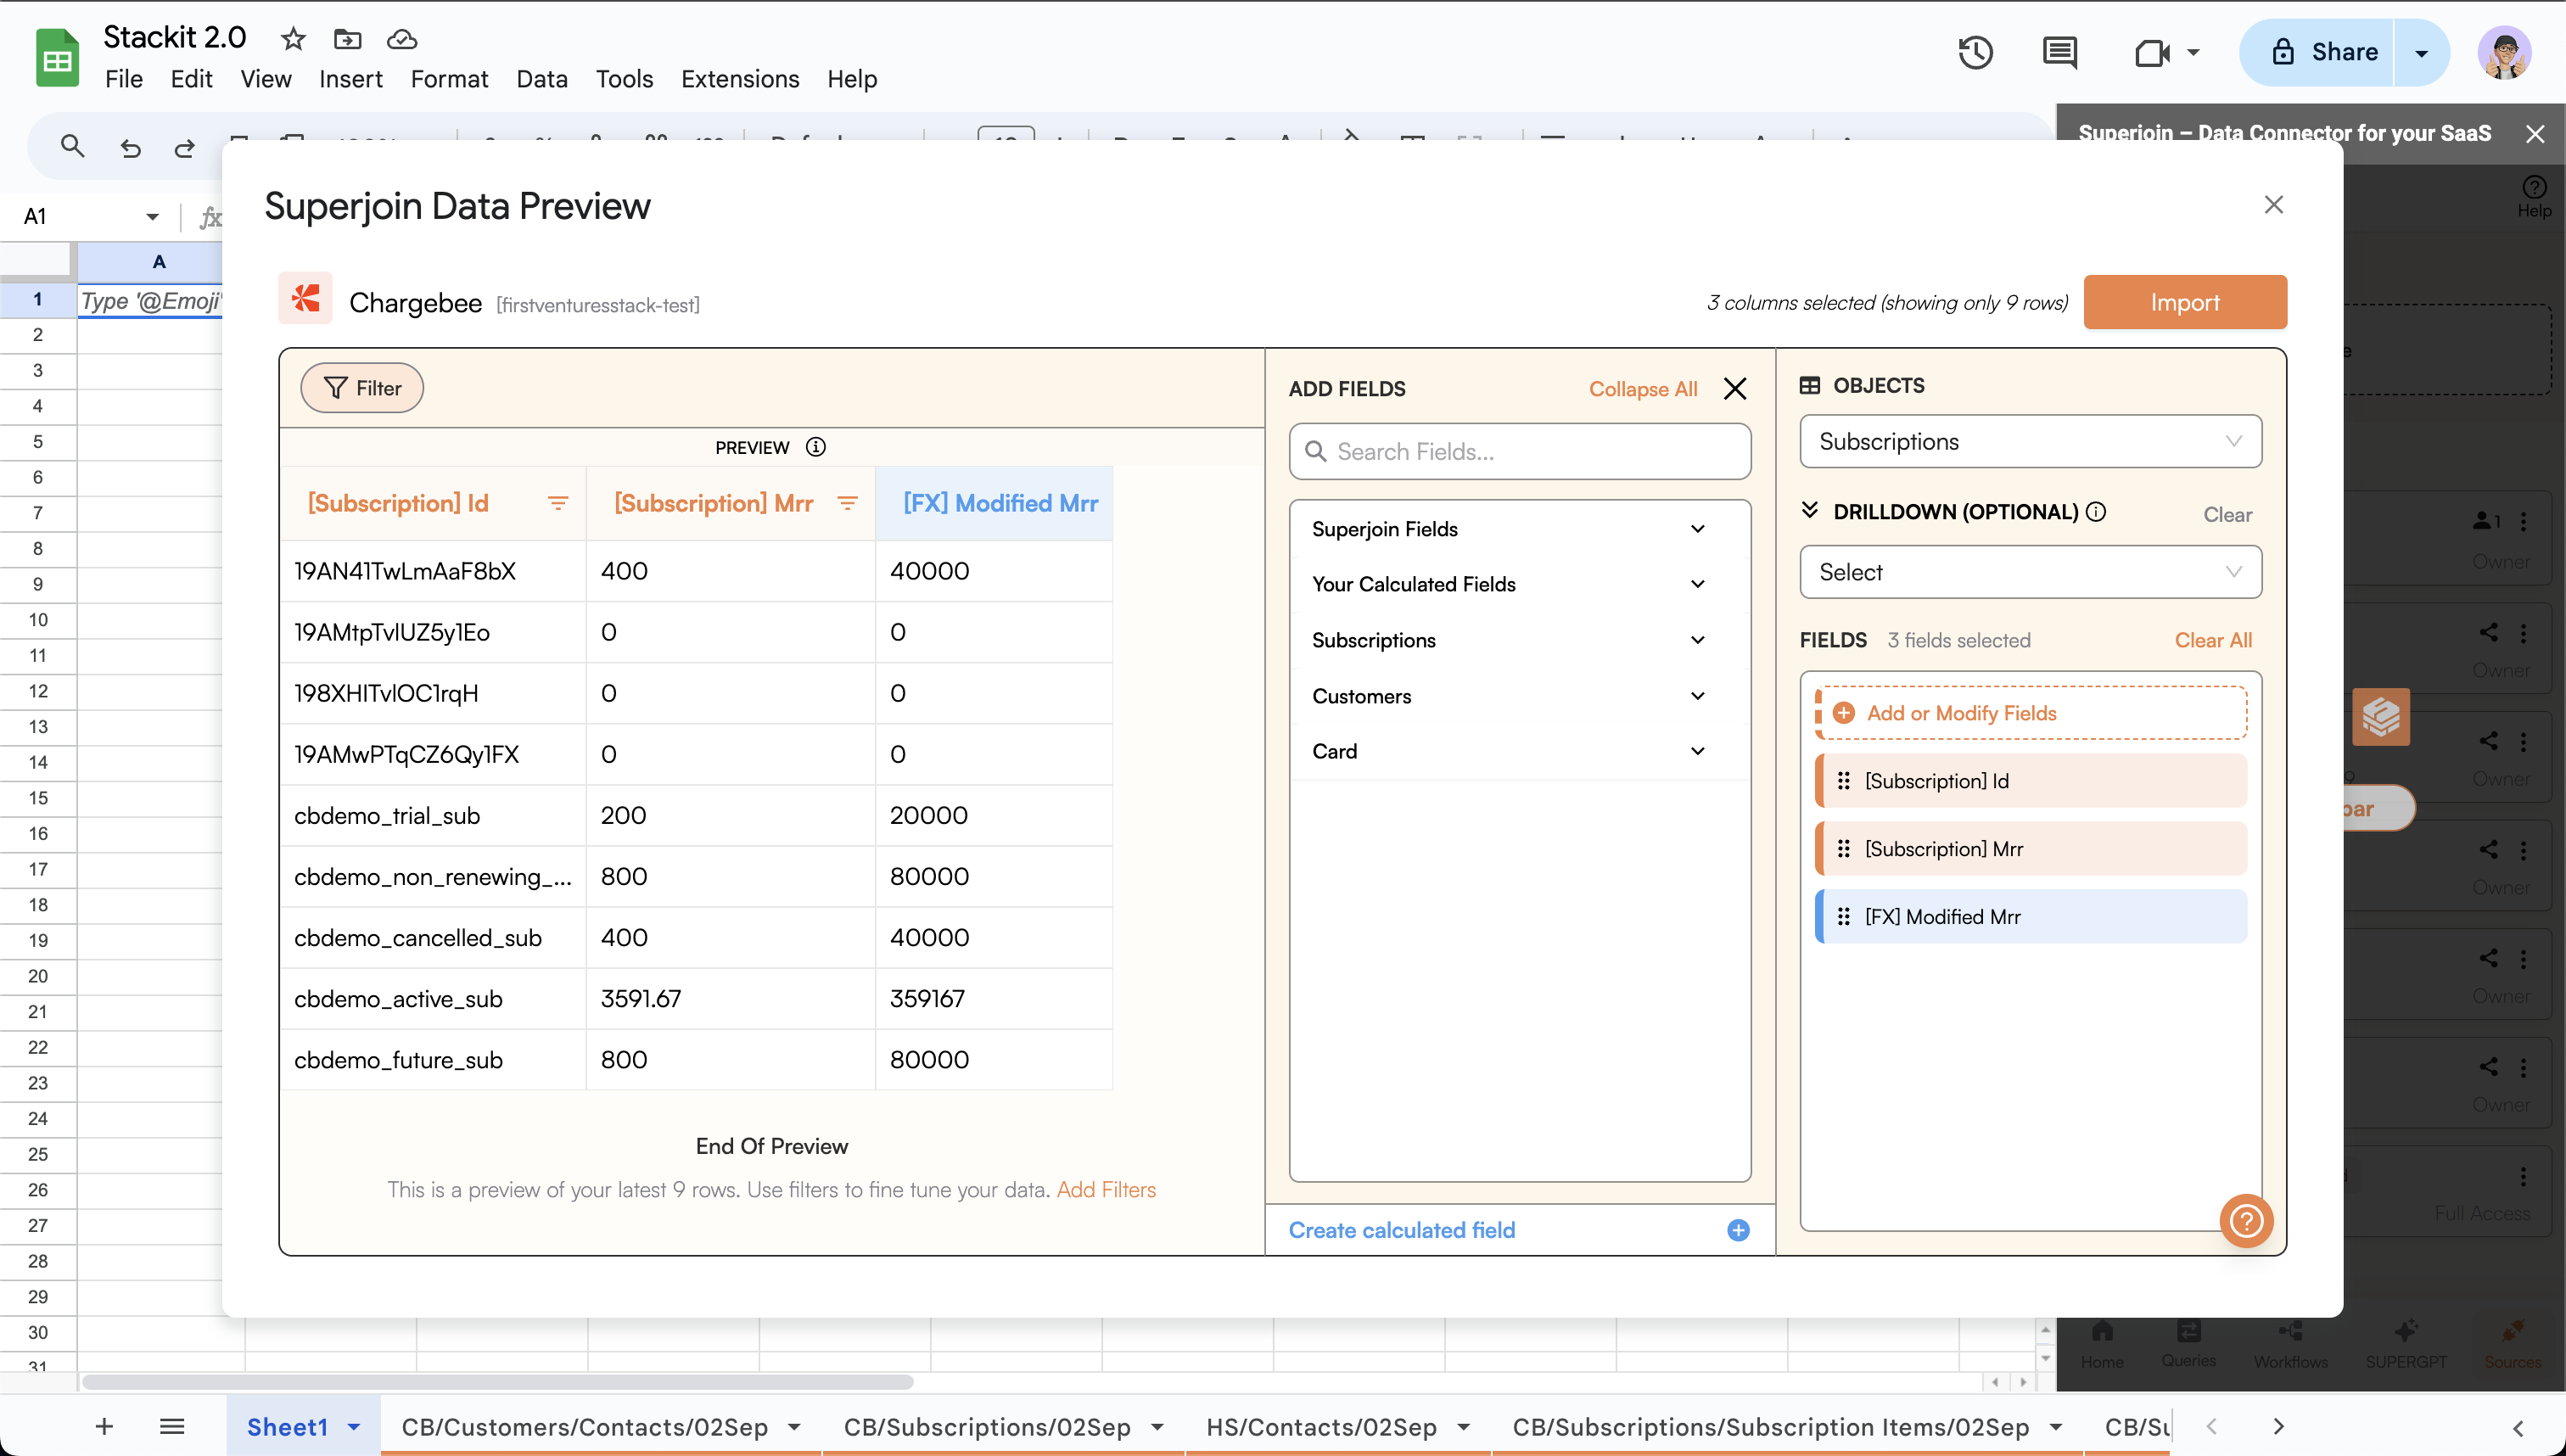
5
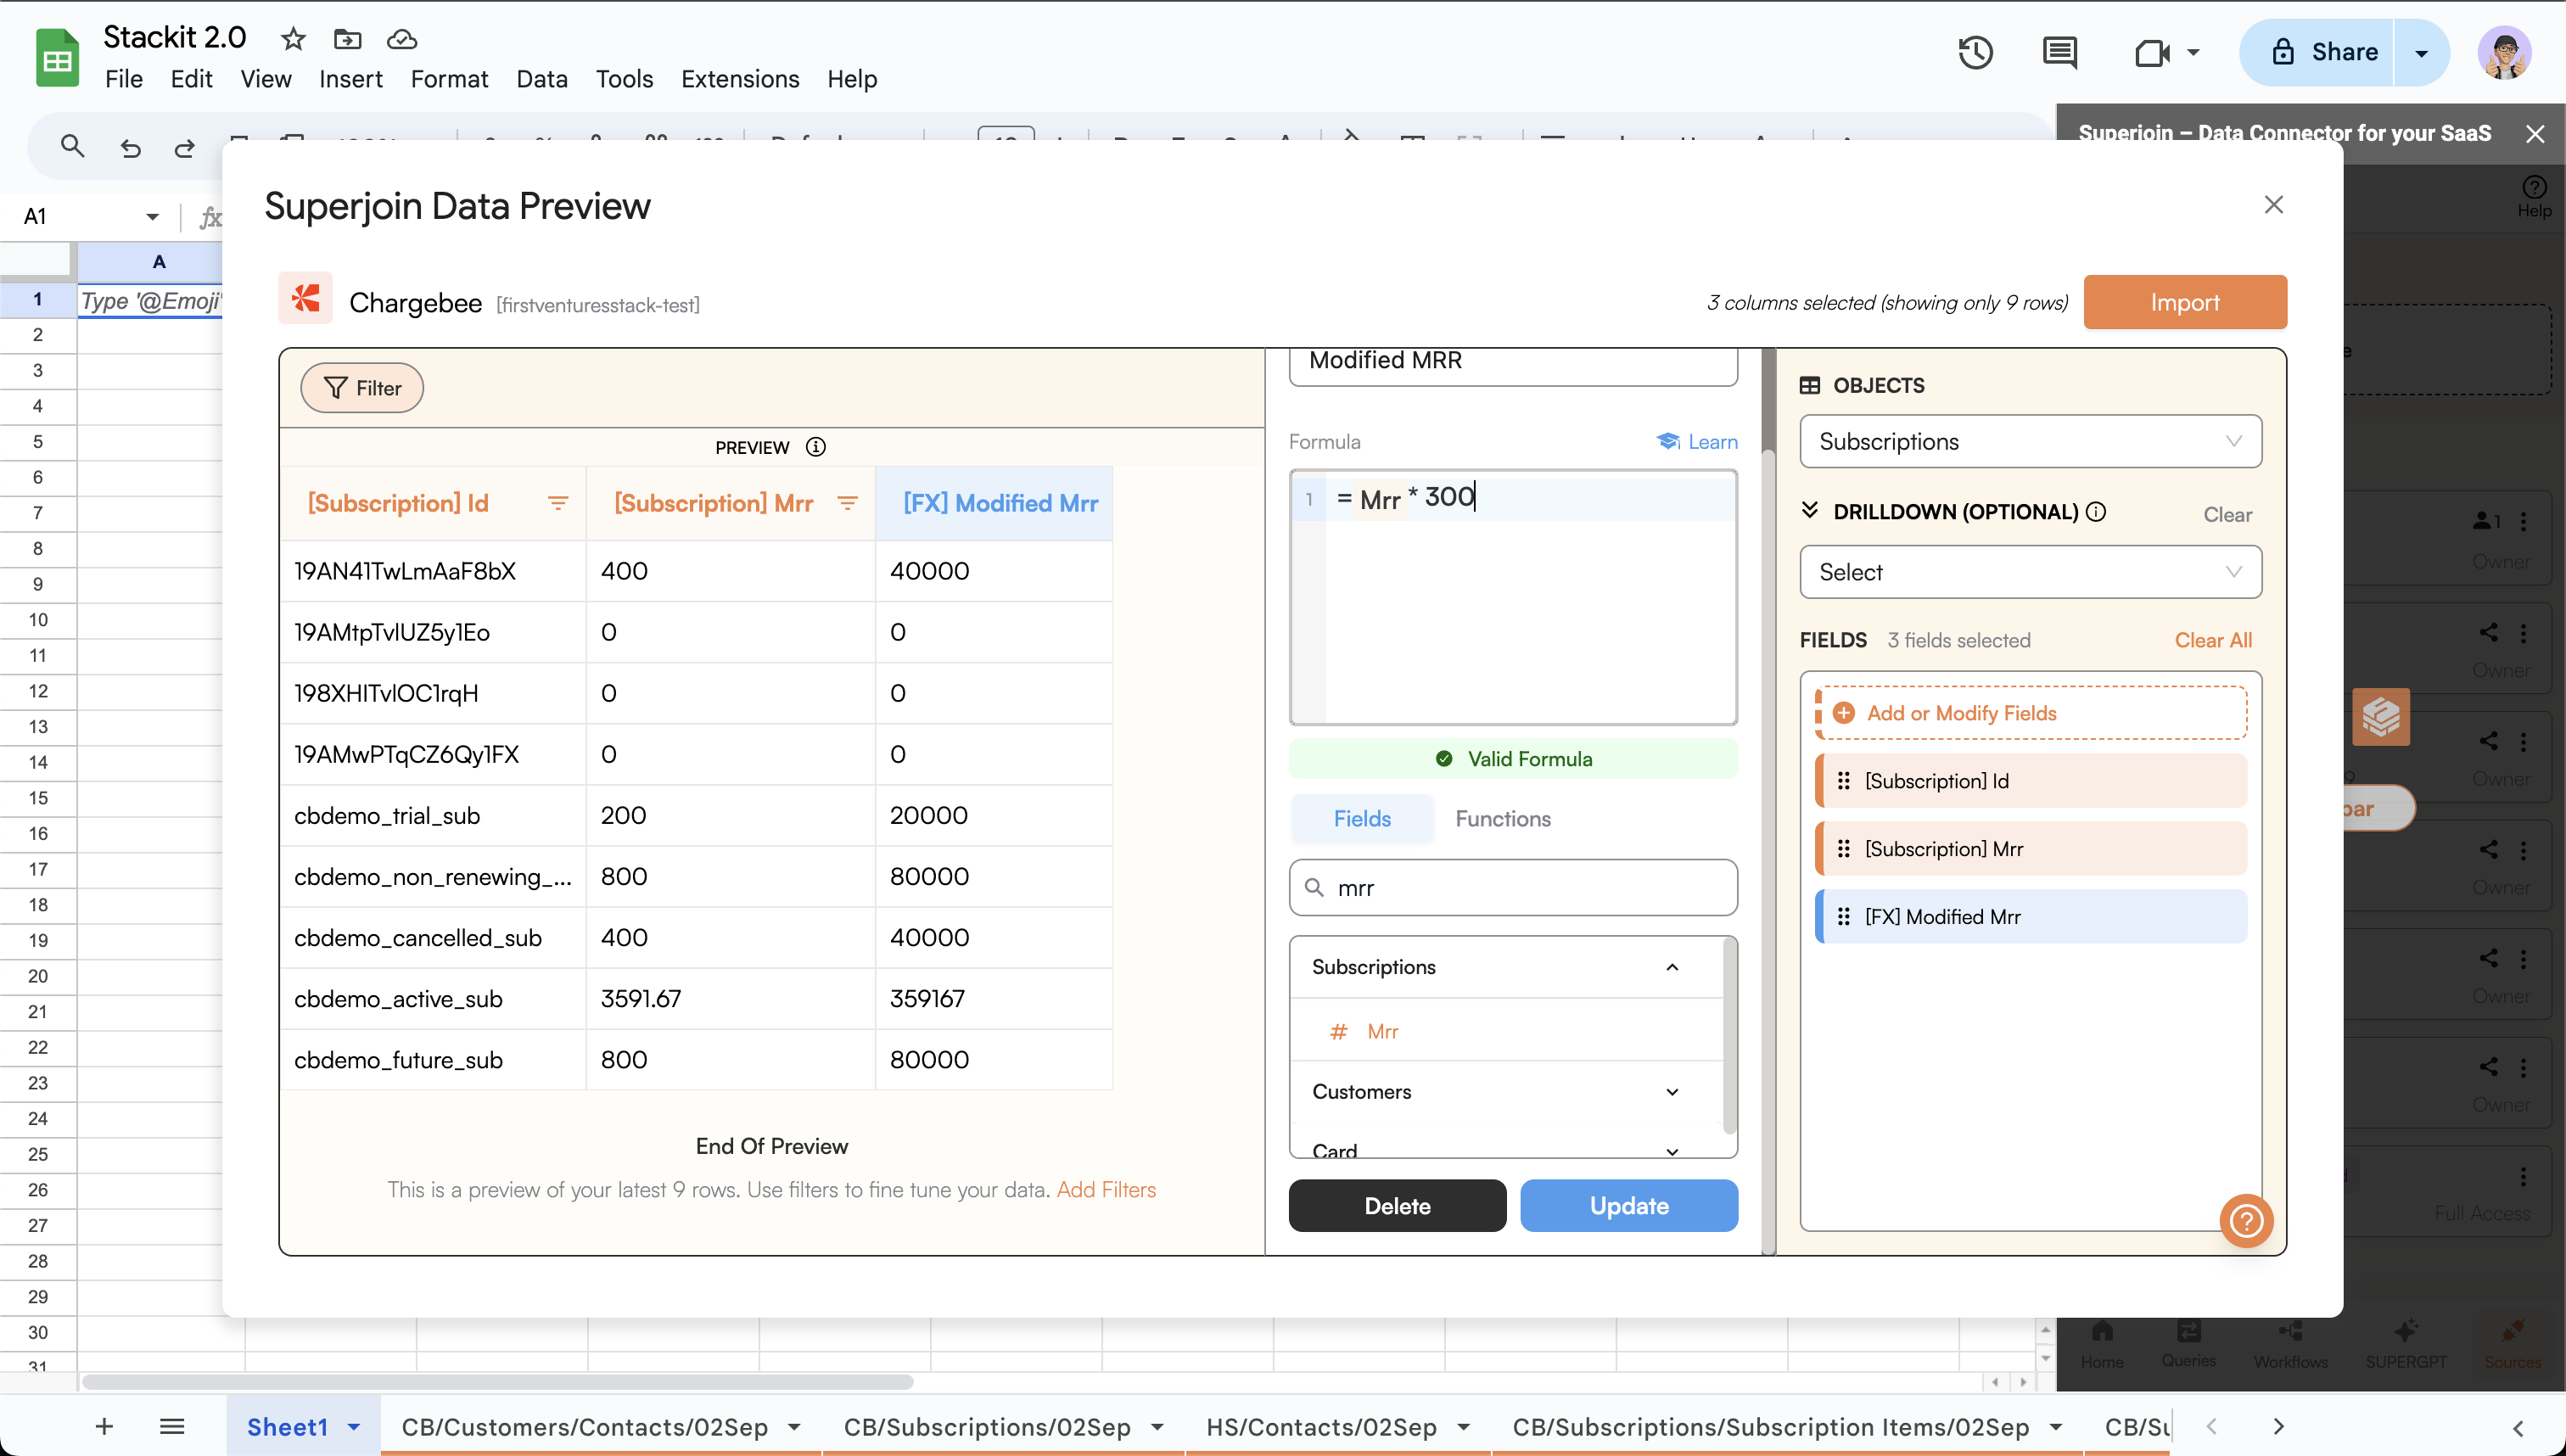
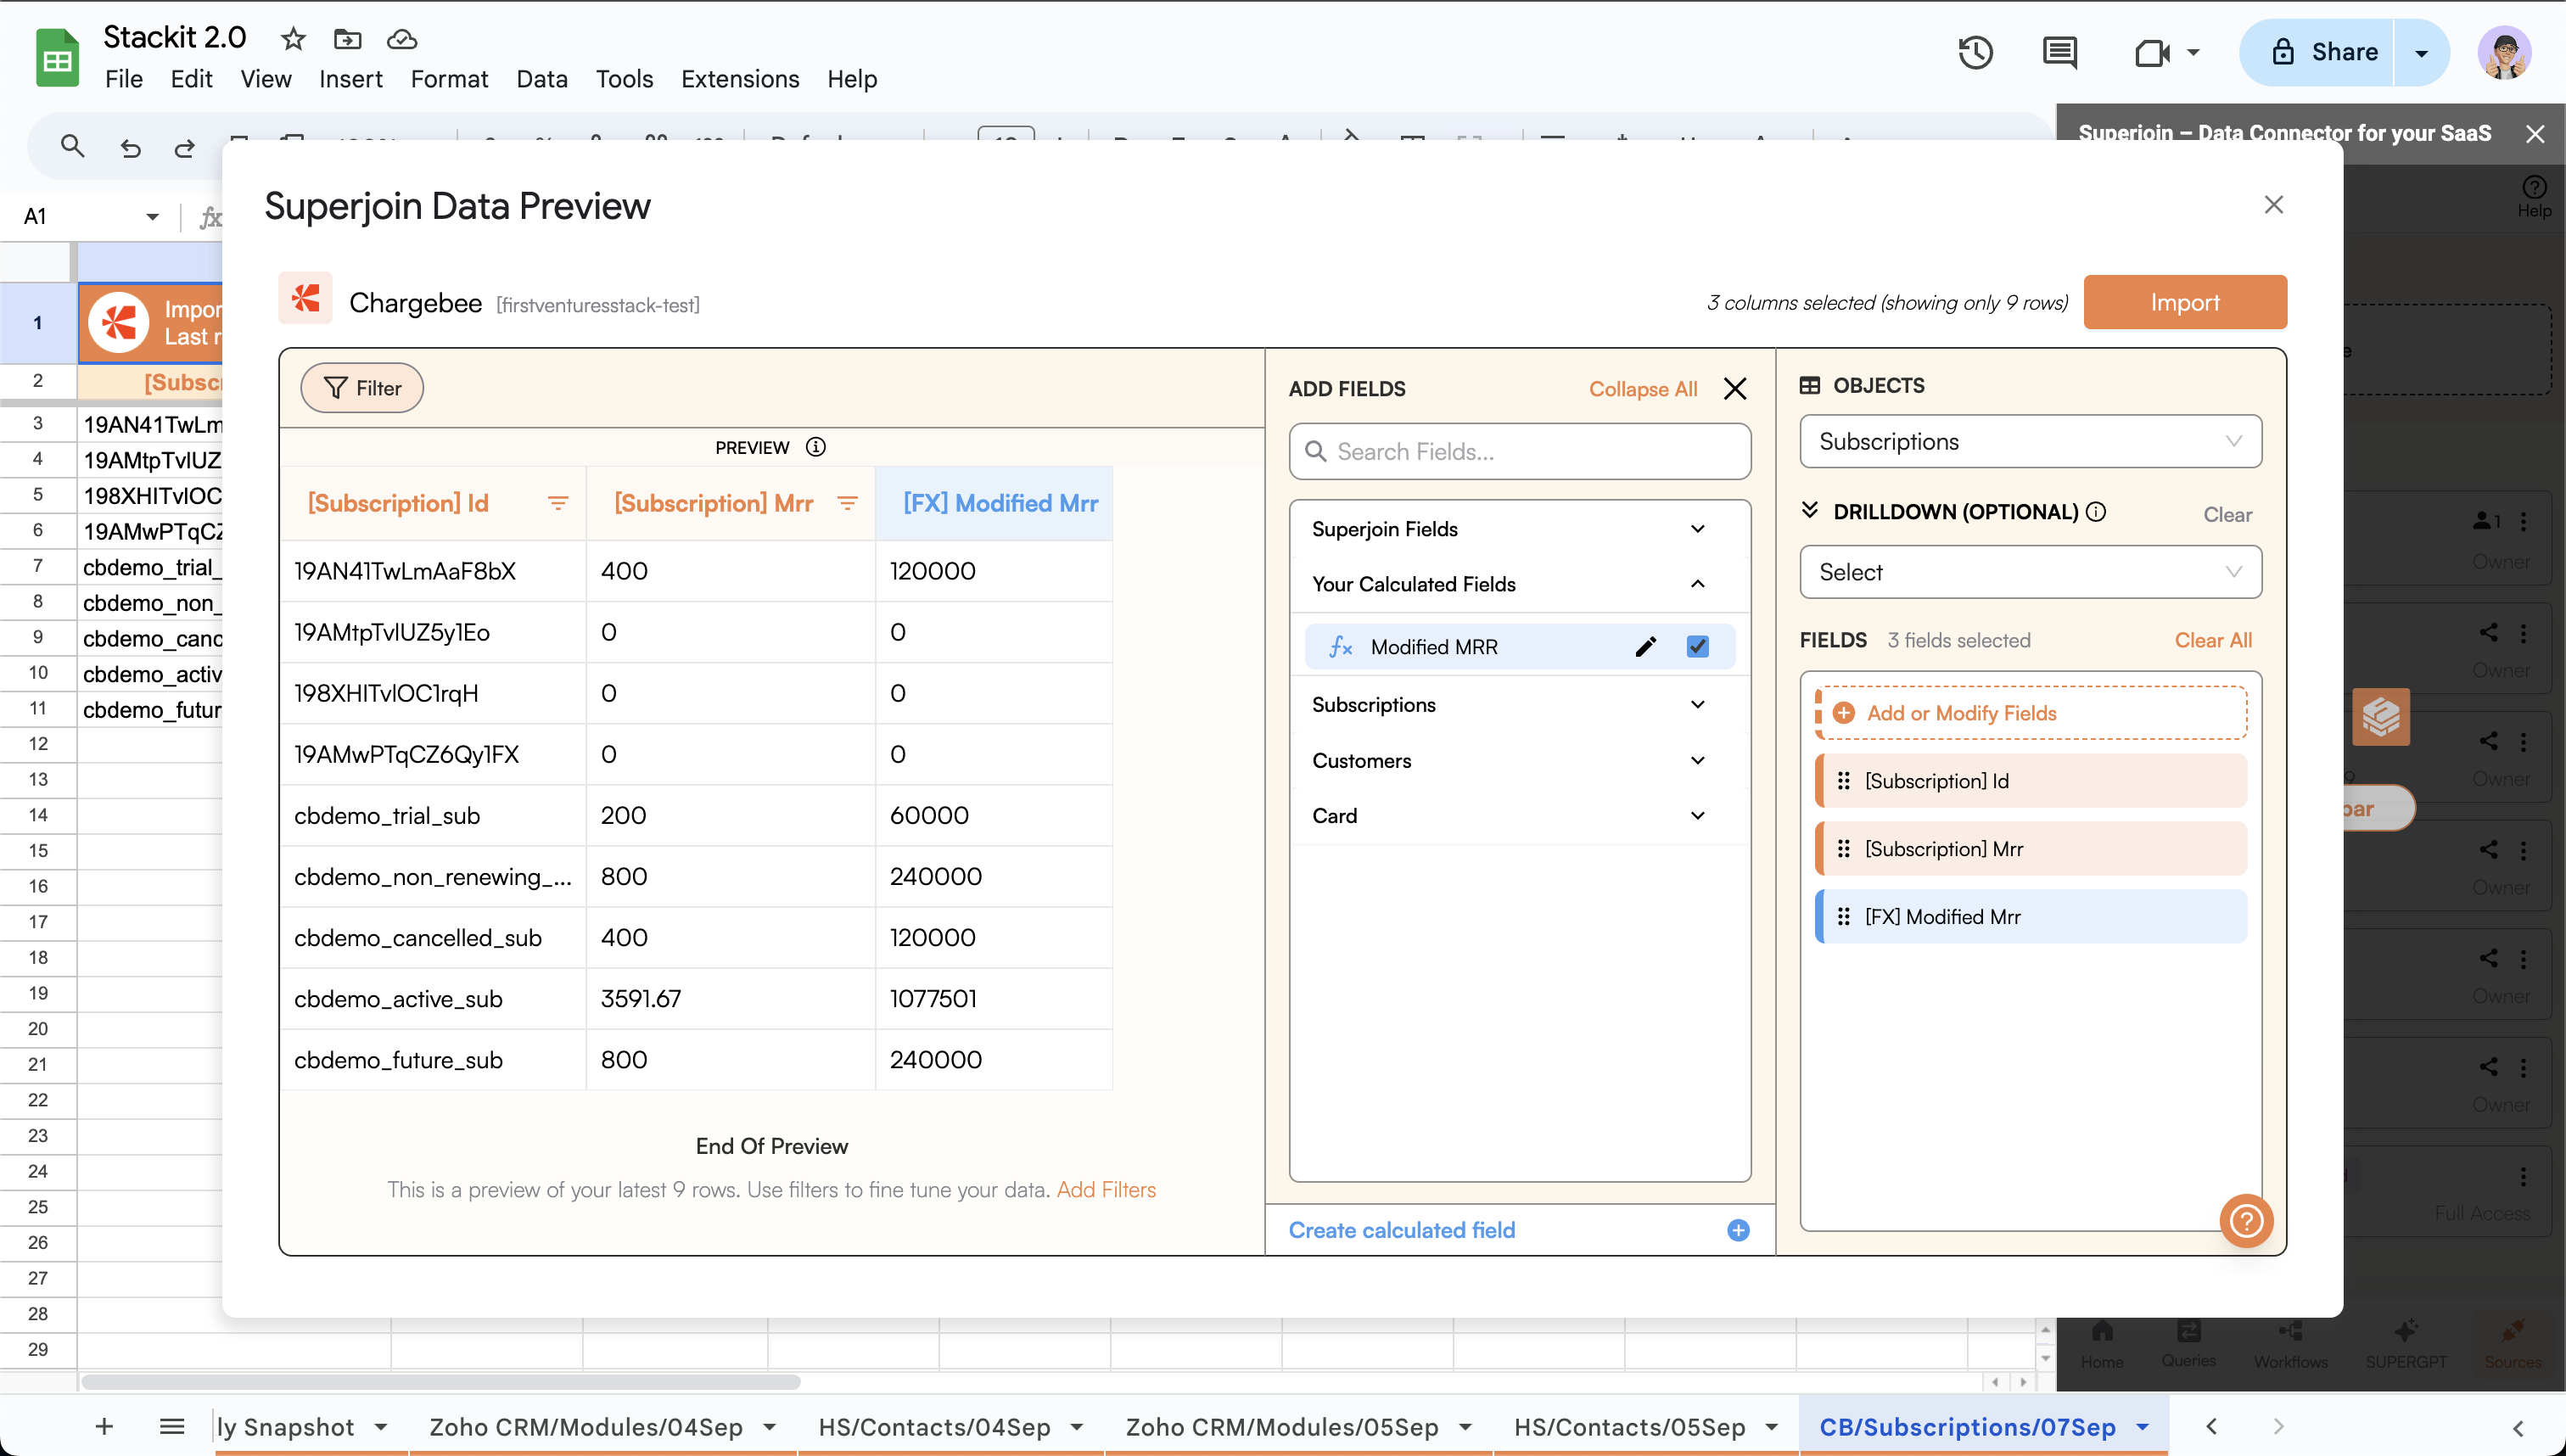
Entering the edit mode
- In the
Add Fieldssection, click onYour Calculated Fieldsto expand it if not already. - Hover over the desired derived column title under the
Your Calculated Fieldsto see an Edit option (Pencil Icon). - Click on the Edit option (Pencil icon) to edit the formula.
6
Modify or Delete the derived column
- Modify the formula as per needed.
- Click
Updateto update the derived column. - Click
Deleteto delete the derived column.
7
Preview the calculated field
The calculated field should now have updated.

8
Import the data
Click on 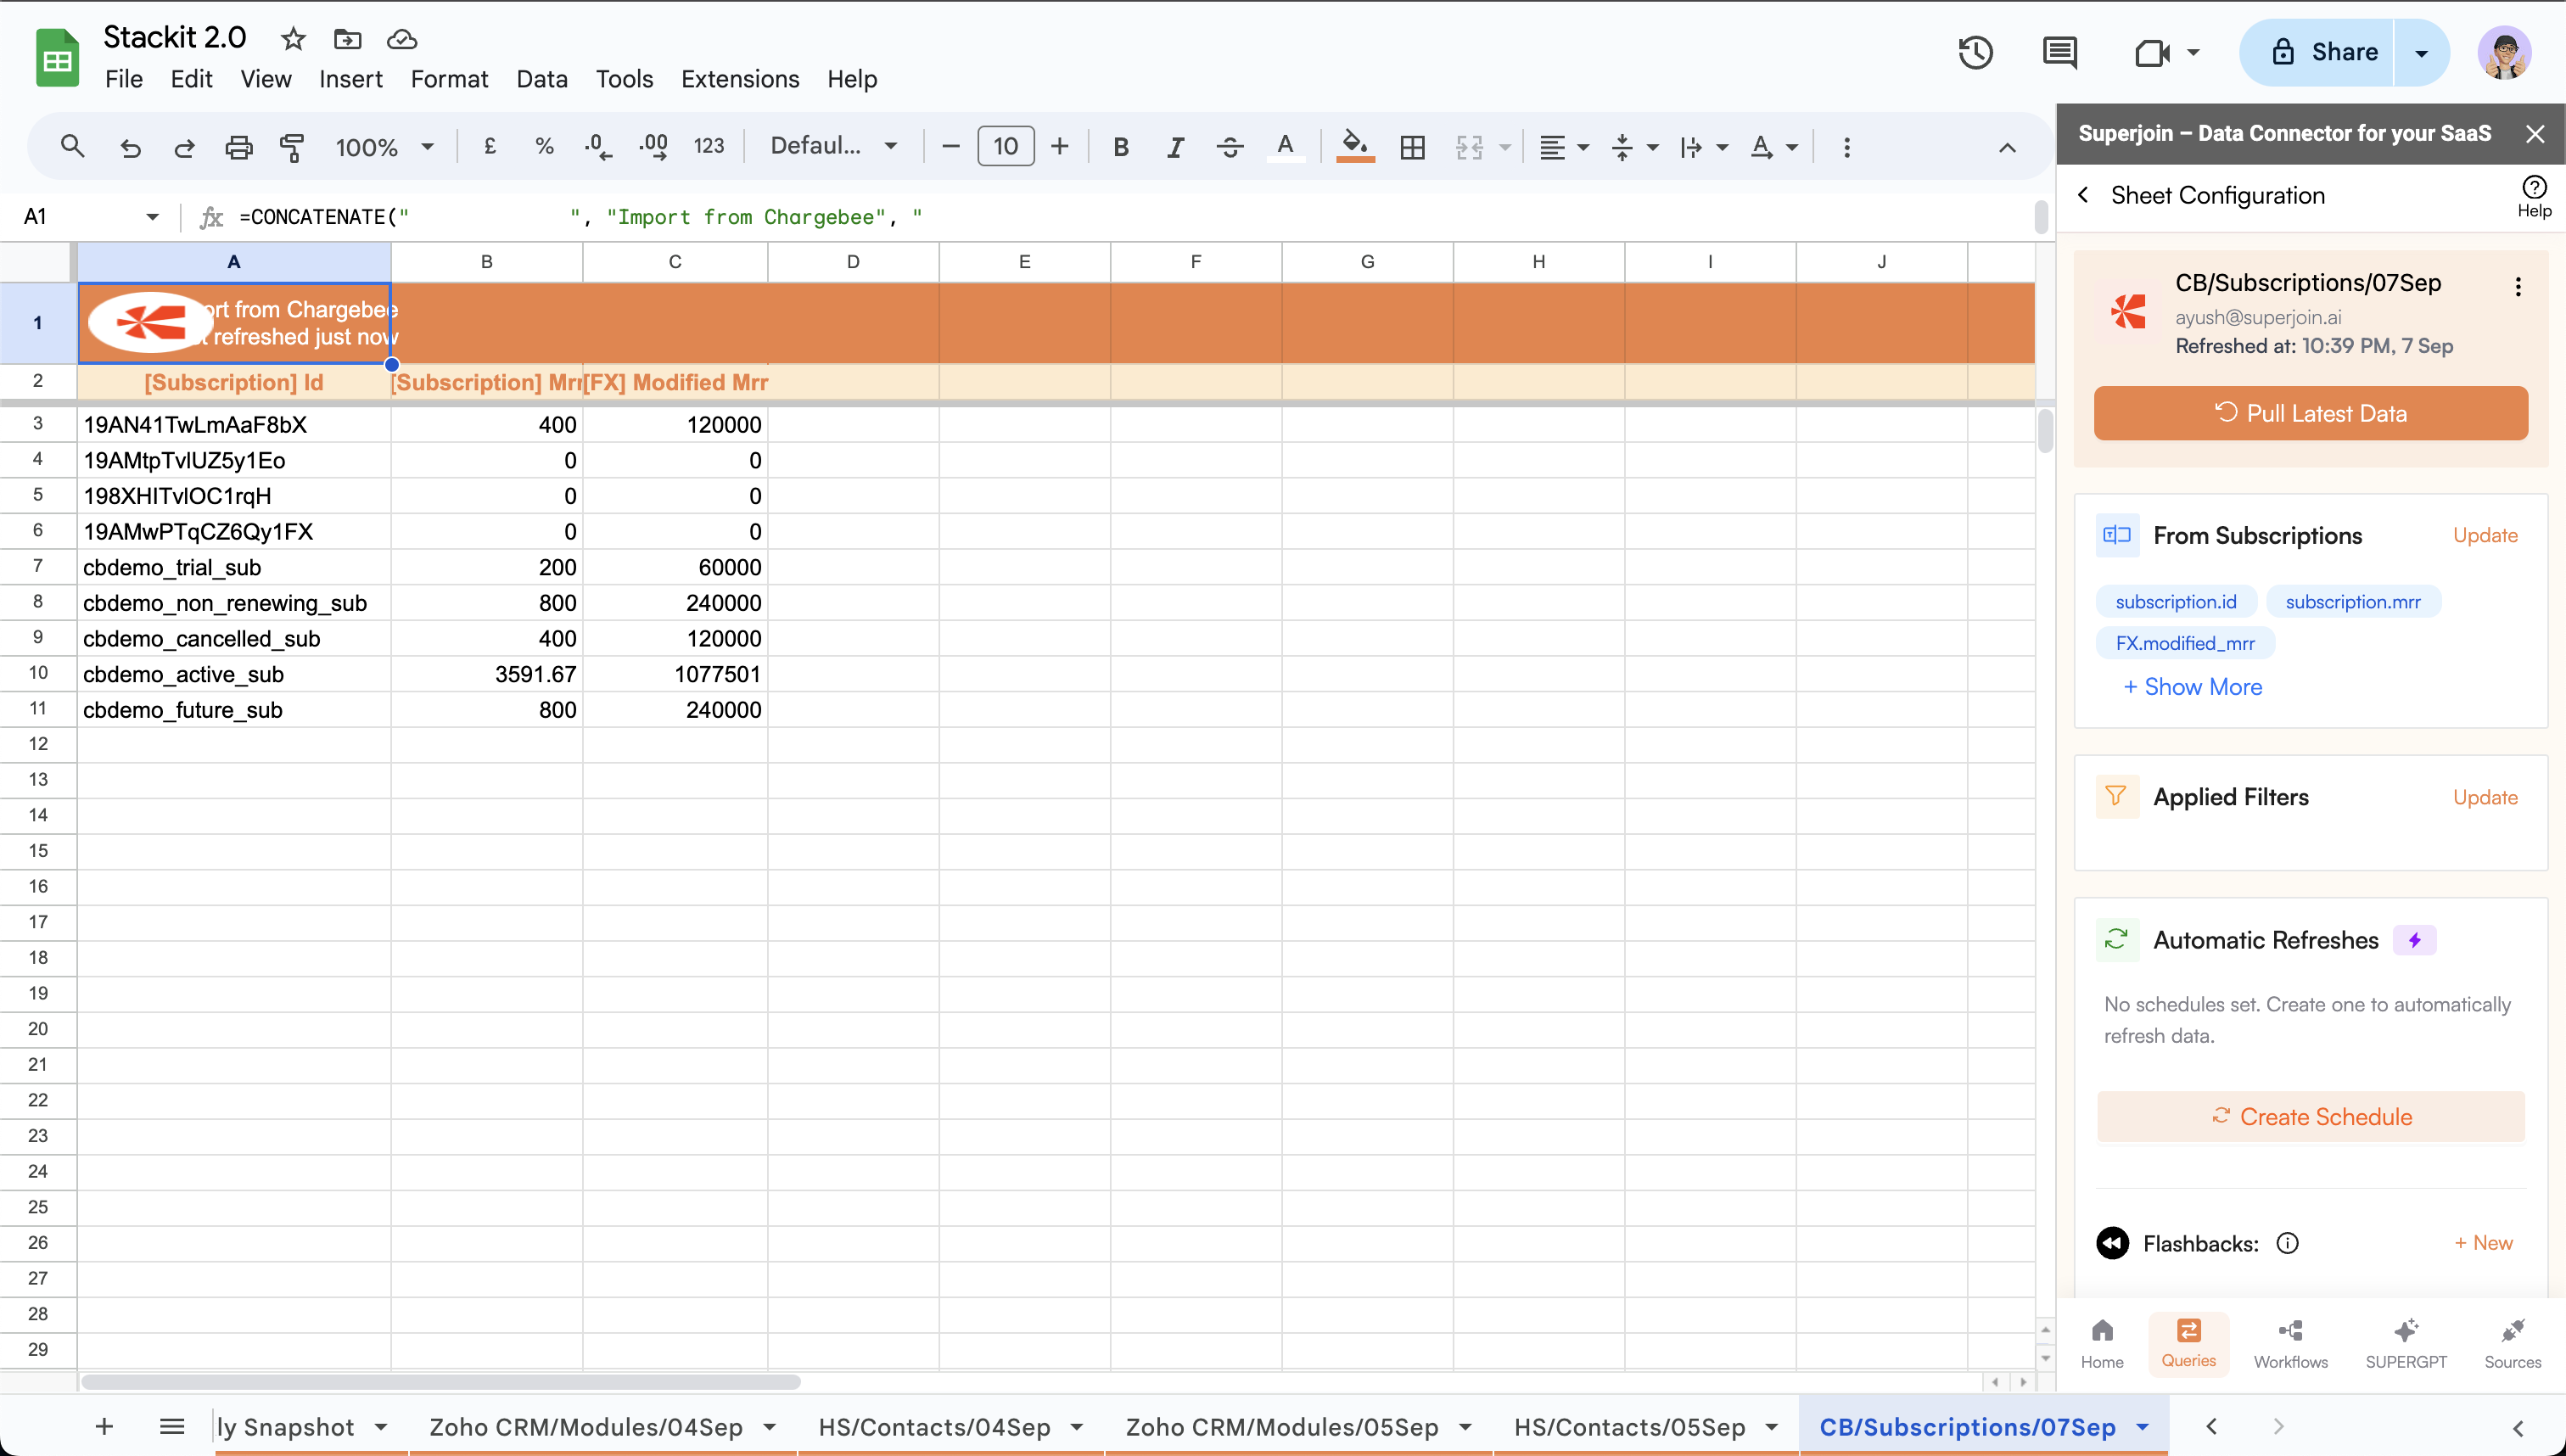
Import to import the data to a Google Sheet along with the derived column.